Output
Publish the finalised timetable: review the statistics, print the timetable views, or export to TPlus E-Campus.
12.1 Overview
This chapter covers publishing the finalised timetable. After the timetable has been checked with the reports in the previous chapter, you can proceed with the following steps:
- Room Statistics: Review how the rooms are used across the timetable
- Course Statistics: Review how the courses are distributed across the timetable
- Batch Timetable Output: View and print the timetable of each batch
- Lecturer Timetable Output: View and print the timetable of each lecturer
- Course Timetable Output: View and print the timetable of each course
- Export to E-Campus: Push the finalised timetable to TPlus E-Campus
- Student Timetable Output: View the timetable of each student in TPlus E-Campus
12.2 Room Statistics
Open the Reports tab and select the Room Statistics sub-tab. The Room Utilization Summary lists every room with its Room Code and Room Name, followed by one column per day showing how much of that day the room is occupied (O) and how much of it is still free (F).
The controls above the list change what is shown. Show switches the columns between Free (F), Occupied (O) and Both. Highlight Less marks the rooms that fall below the percentage you choose, applied with the Occupied or Free button next to it. Refresh updates the figures after a change to the timetable, and Print sends the summary to the printer.
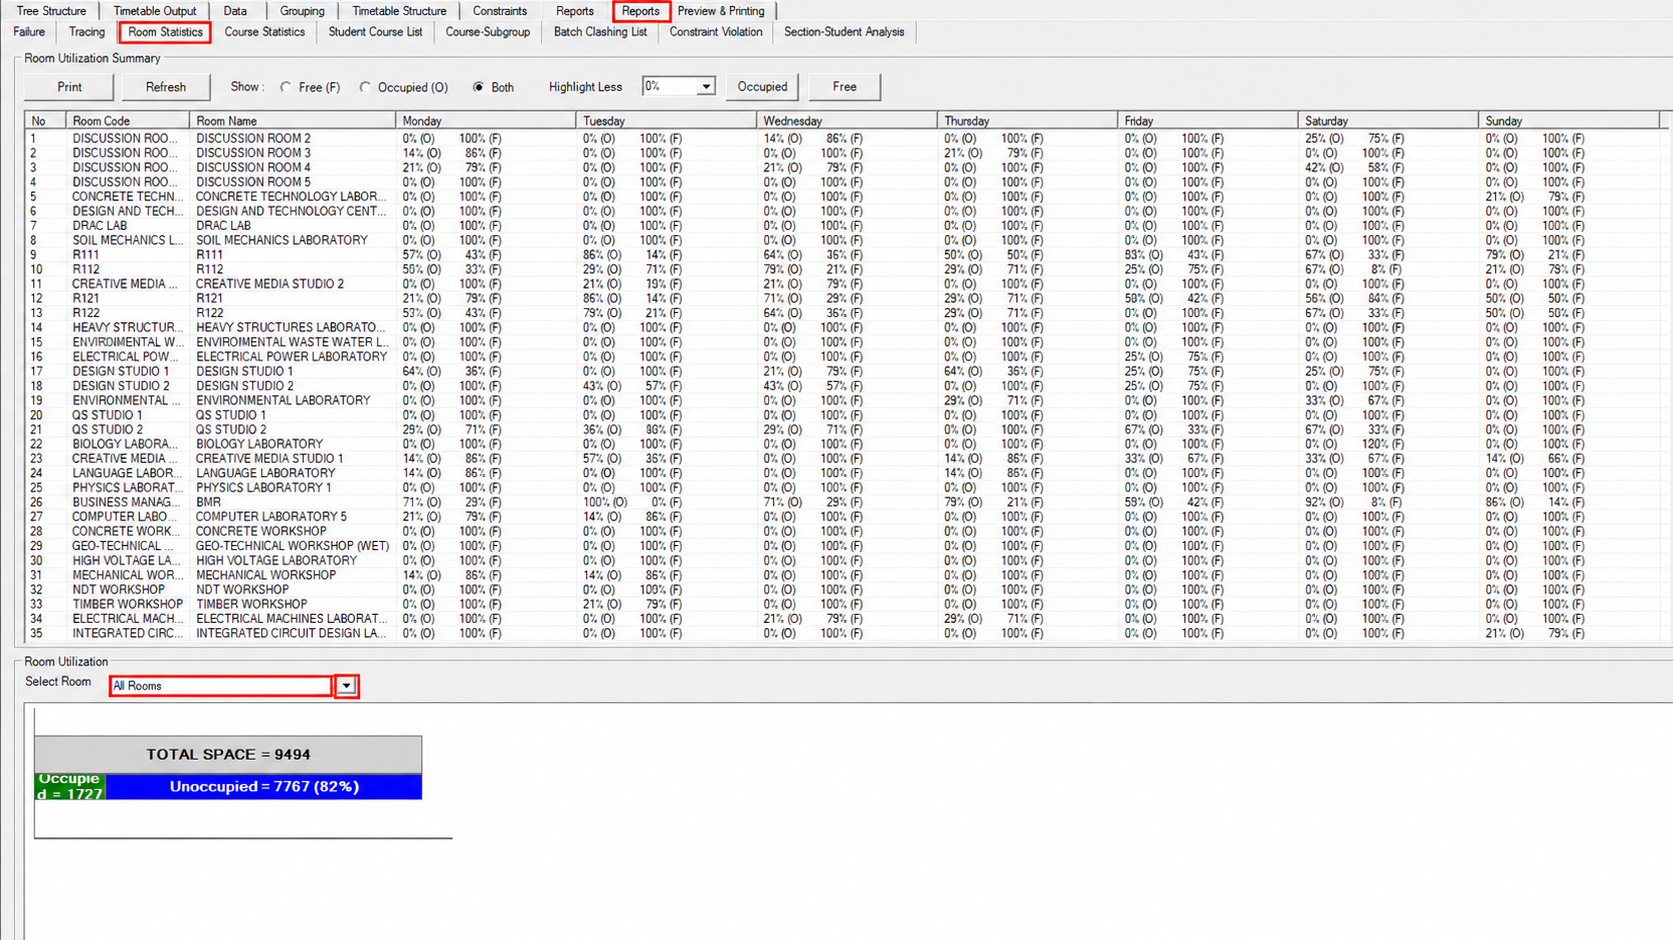
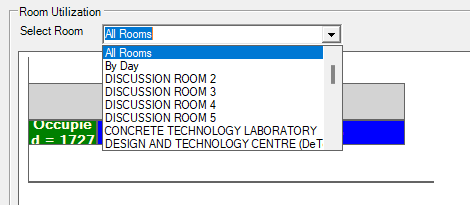
Open the Select Room drop-down to chart the utilisation a different way: All Rooms for the whole timetable, By Day for a day-by-day breakdown, or an individual room to see how heavily that one room is used.
12.3 Course Statistics
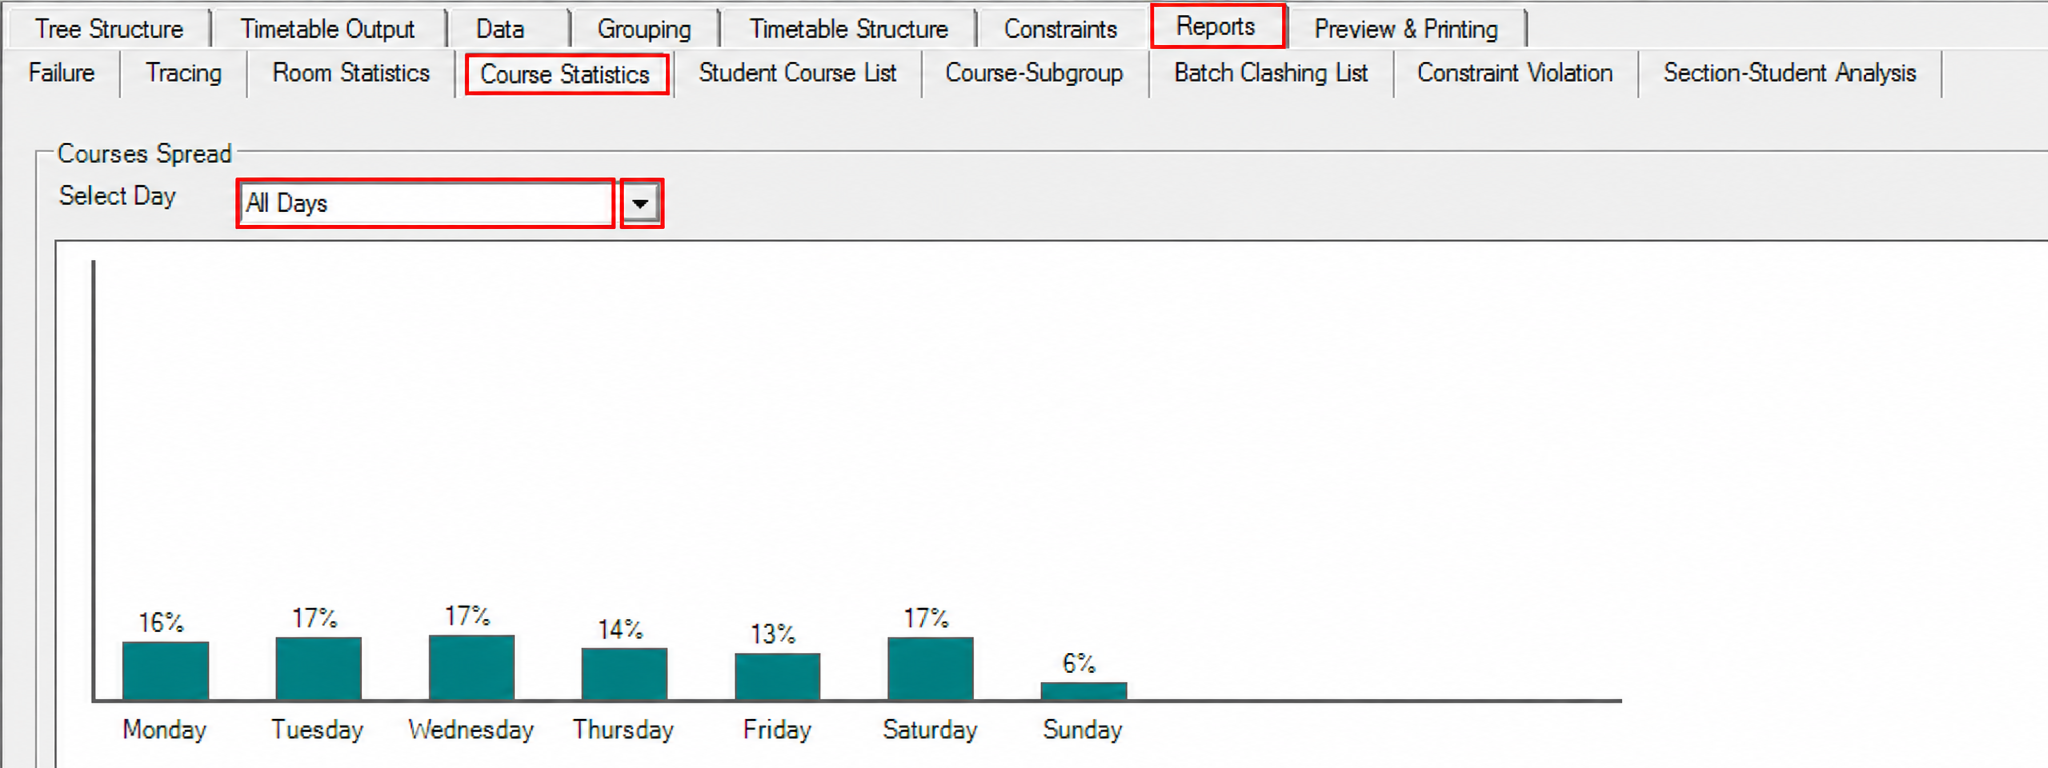
Open the Reports tab and select the Course Statistics sub-tab. The Courses Spread chart shows how the classes are distributed, and the Select Day drop-down decides what the chart is measuring.
With All Days selected, each bar is one day of the week and the percentage is the share of all classes placed on that day. In the example the load is fairly even from Monday to Saturday (16% to 17%), with Sunday the lightest at 6%.
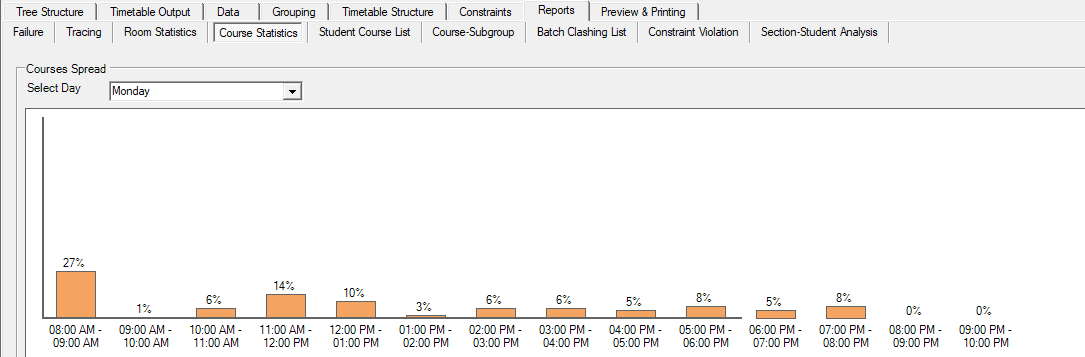
Choose a single day from Select Day to break that day down by time slot instead. The example shows Monday, where 27% of the day's classes fall in the 08:00 - 09:00 slot and the later slots are much lighter. Use this to spot the hours that are overloaded and the hours that are still empty.
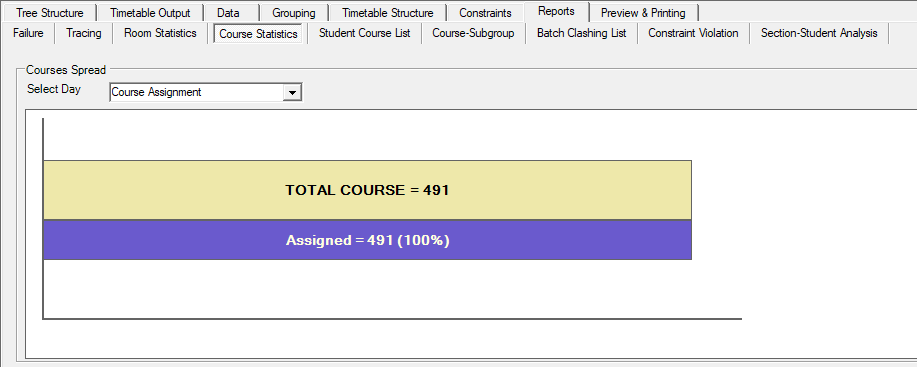
Select Course Assignment to check the timetable as a whole. The bar compares TOTAL COURSE against the number that have been assigned. In the example all 491 courses are assigned, giving 100%; anything less than 100% means some courses are still unplaced.
12.4 Batch Timetable Output
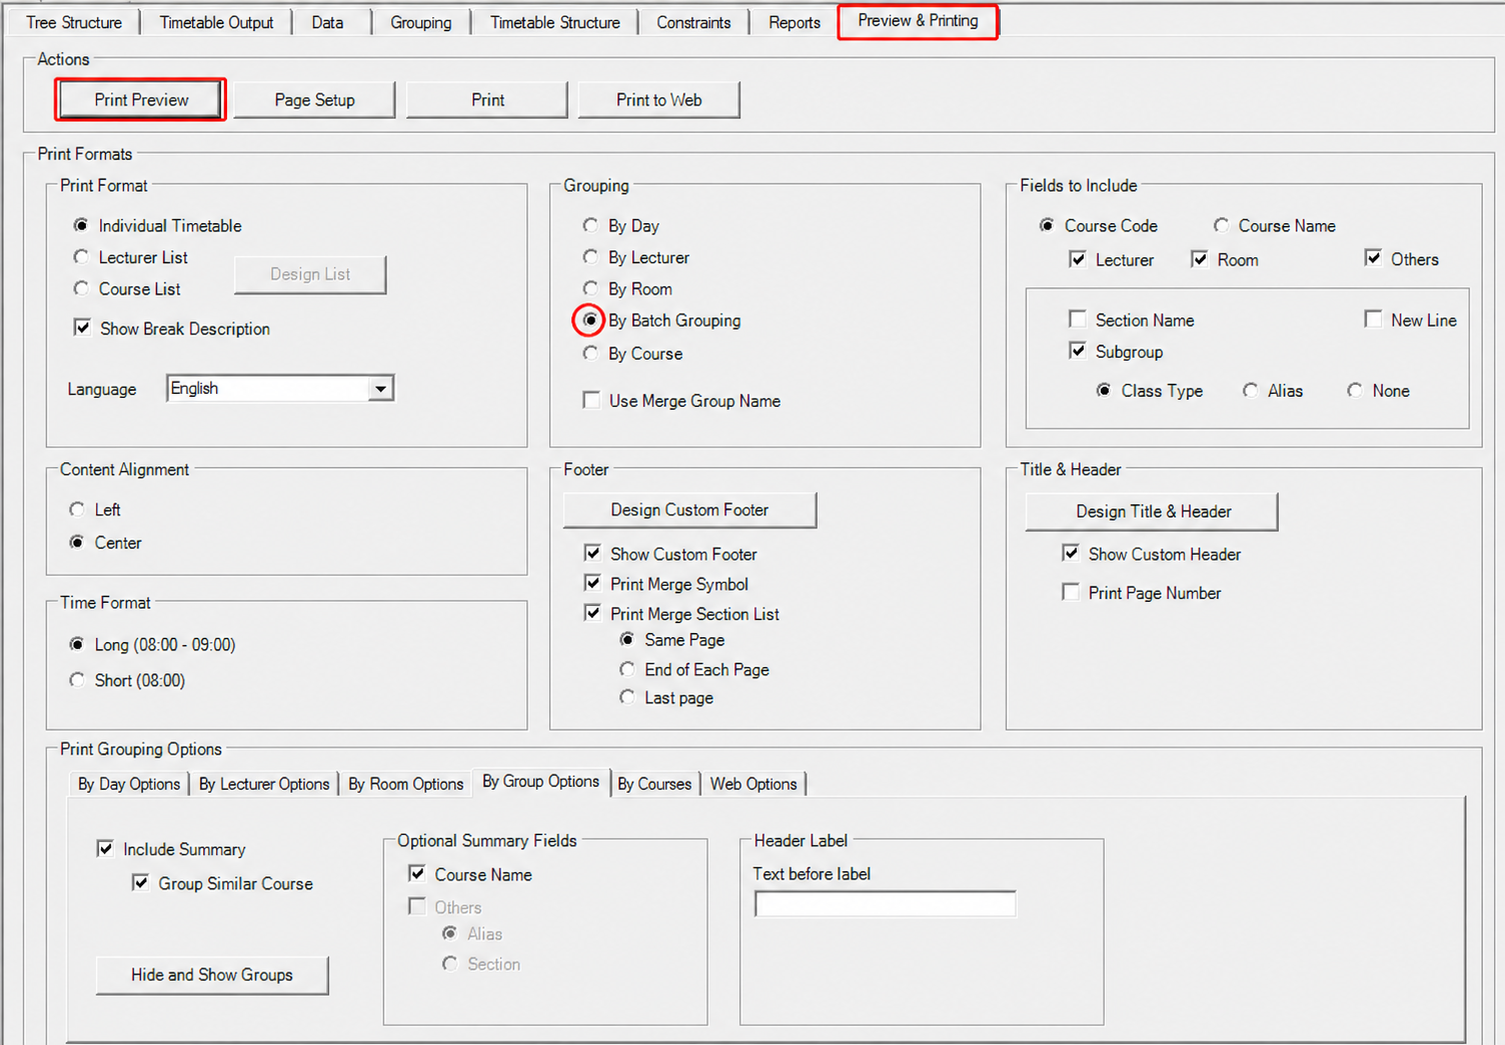
Open the Preview & Printing tab. Set Print Format to Individual Timetable and, under Grouping, select By Batch Grouping to print one timetable per batch.
The By Group Options tab at the bottom controls what is printed under each timetable. Tick Include Summary to print the course summary, and Group Similar Course to combine repeated sessions of the same course into one line. Use Hide and Show Groups to choose which batches are printed.
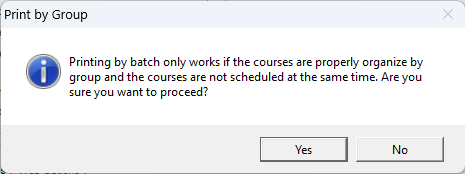
Click Print Preview. A confirmation appears first, because printing by batch only produces a correct result when the courses are properly organised by group and no two of them are scheduled at the same time. Click Yes to continue.
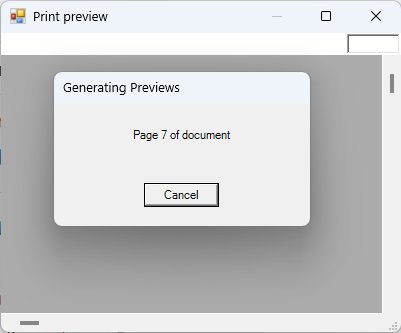
The system then builds the preview one page at a time, showing its progress. Click Cancel if you need to stop it.
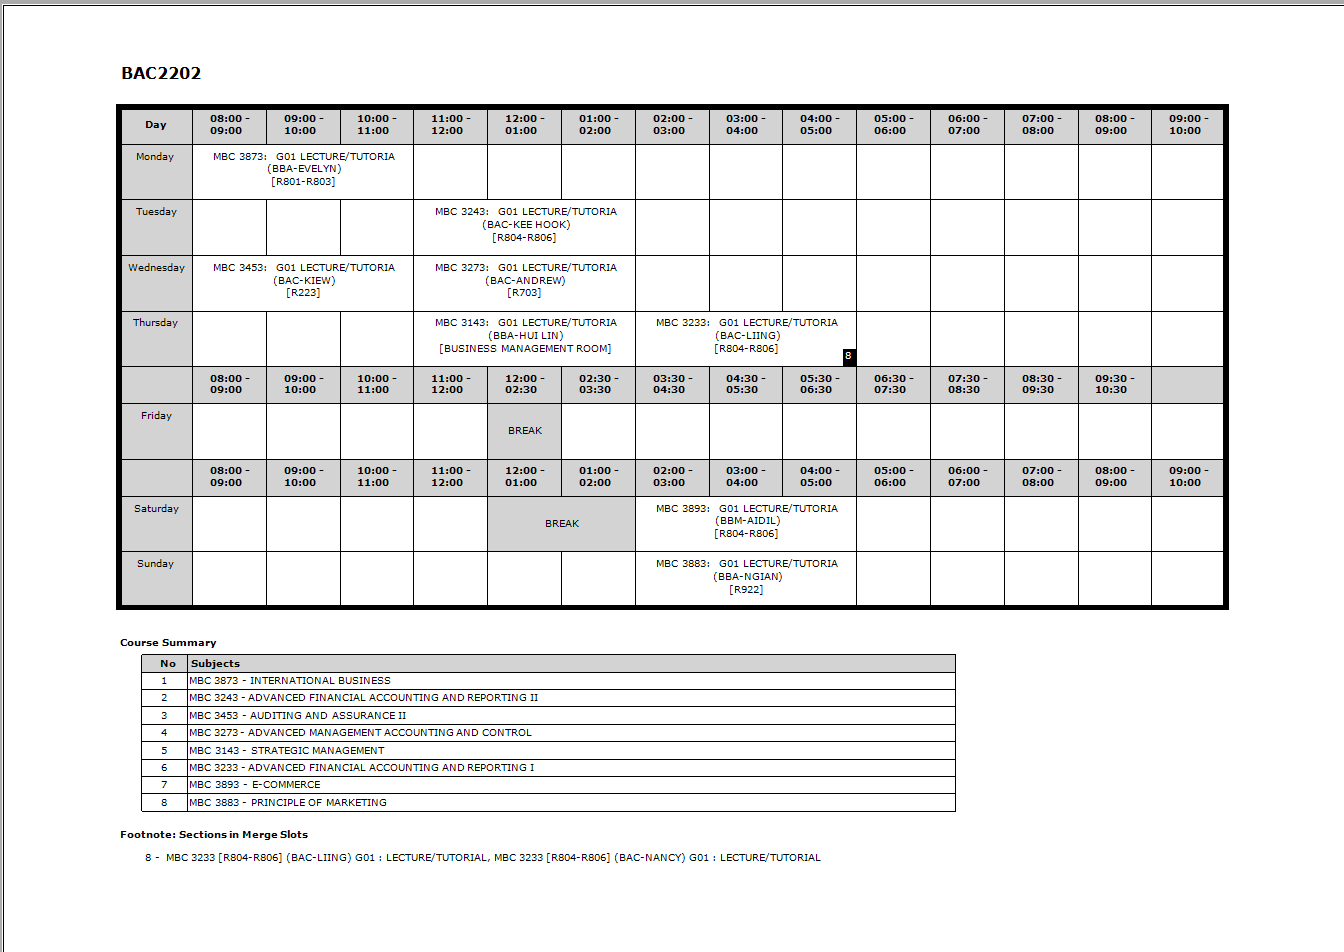
The preview gives one page per batch, headed with the batch name. Each page holds the weekly grid, with the course code, class type, lecturer and room in every slot, followed by the Course Summary listing the subjects that batch takes. Classes that share a merge slot are marked in the grid and listed under Footnote: Sections in Merge Slots.
12.5 Lecturer Timetable Output
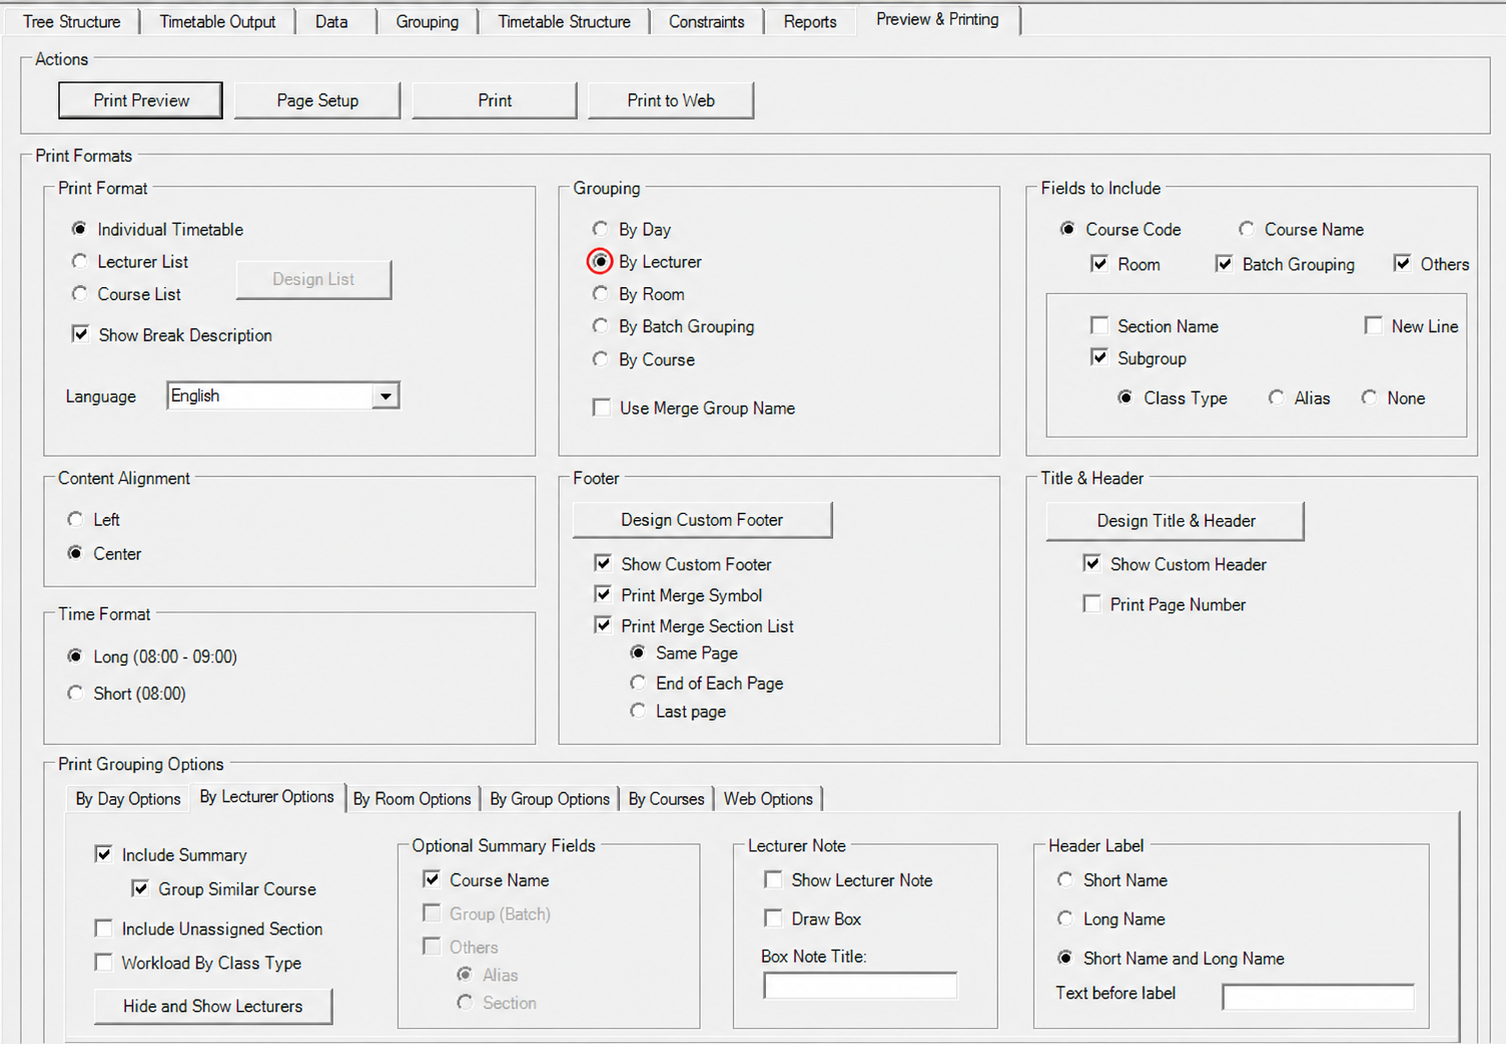
Open the Preview & Printing tab and, under Grouping, select By Lecturer to print one timetable per lecturer.
The By Lecturer Options tab controls what each page carries. Include Summary prints the teaching load summary, Group Similar Course combines repeated sessions of the same course, Include Unassigned Section also lists the classes not yet placed, and Workload By Class Type splits the hours by class type. Hide and Show Lecturers chooses which lecturers are printed, and Header Label sets whether the page is headed with the short name, the long name, or both.
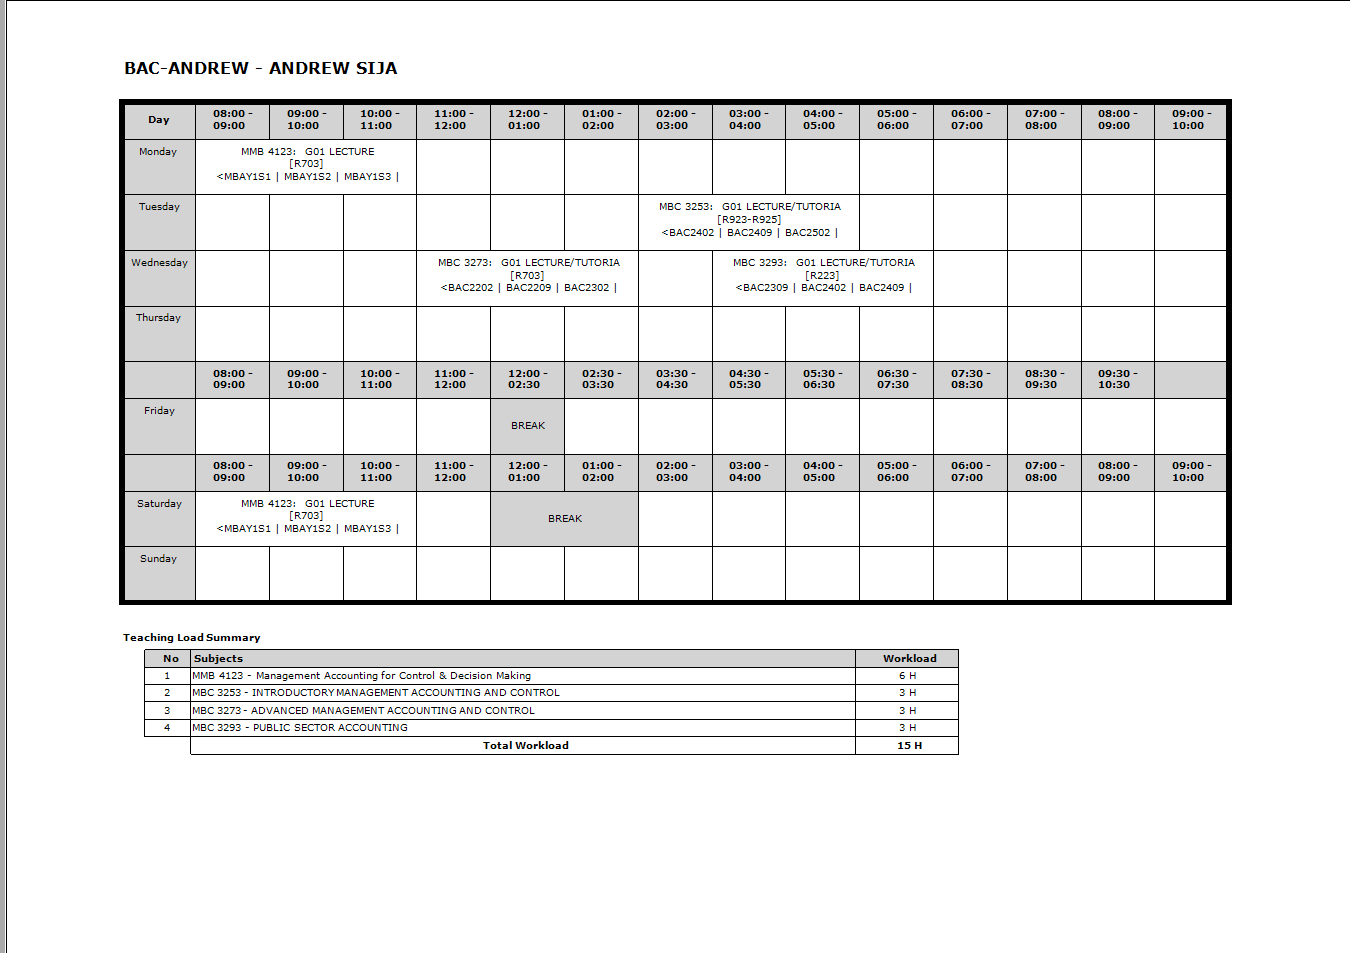
Click Print Preview to build the pages. Each page is headed with the lecturer, shows the weekly grid with the course code, room and the batches taught in every slot, and ends with the Teaching Load Summary. In the example, BAC-ANDREW - ANDREW SIJA teaches four subjects for a Total Workload of 15 H.
12.6 Course Timetable Output
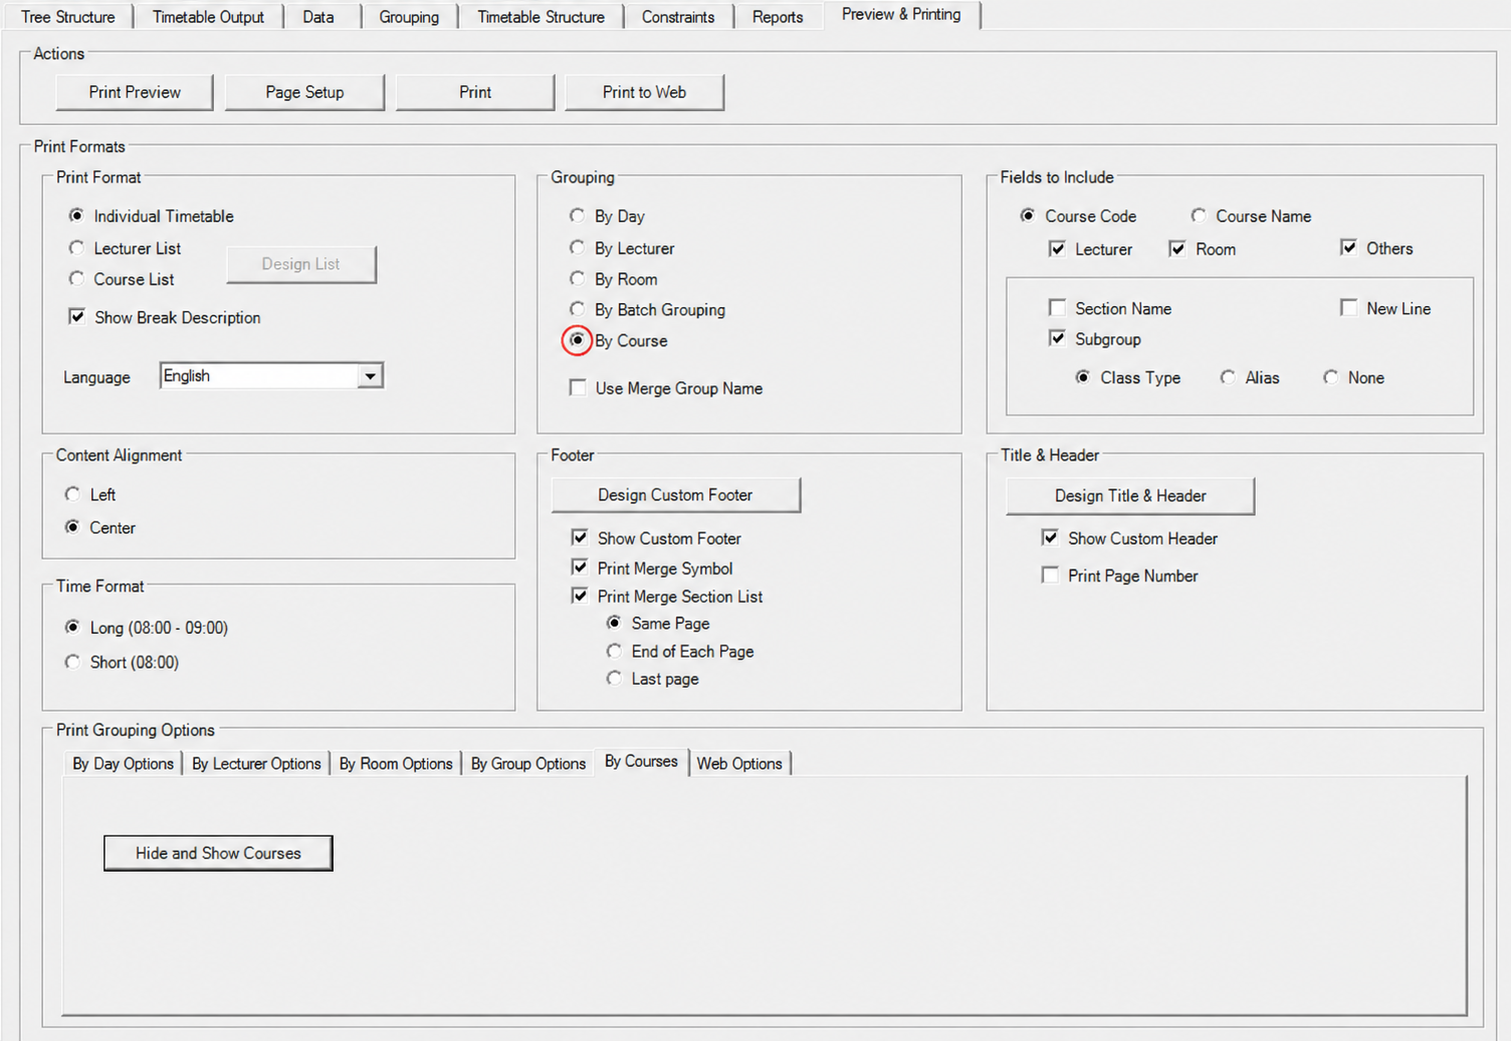
Open the Preview & Printing tab and, under Grouping, select By Course to print one timetable per course. The By Courses tab at the bottom holds a single control, Hide and Show Courses, which chooses the courses to print.
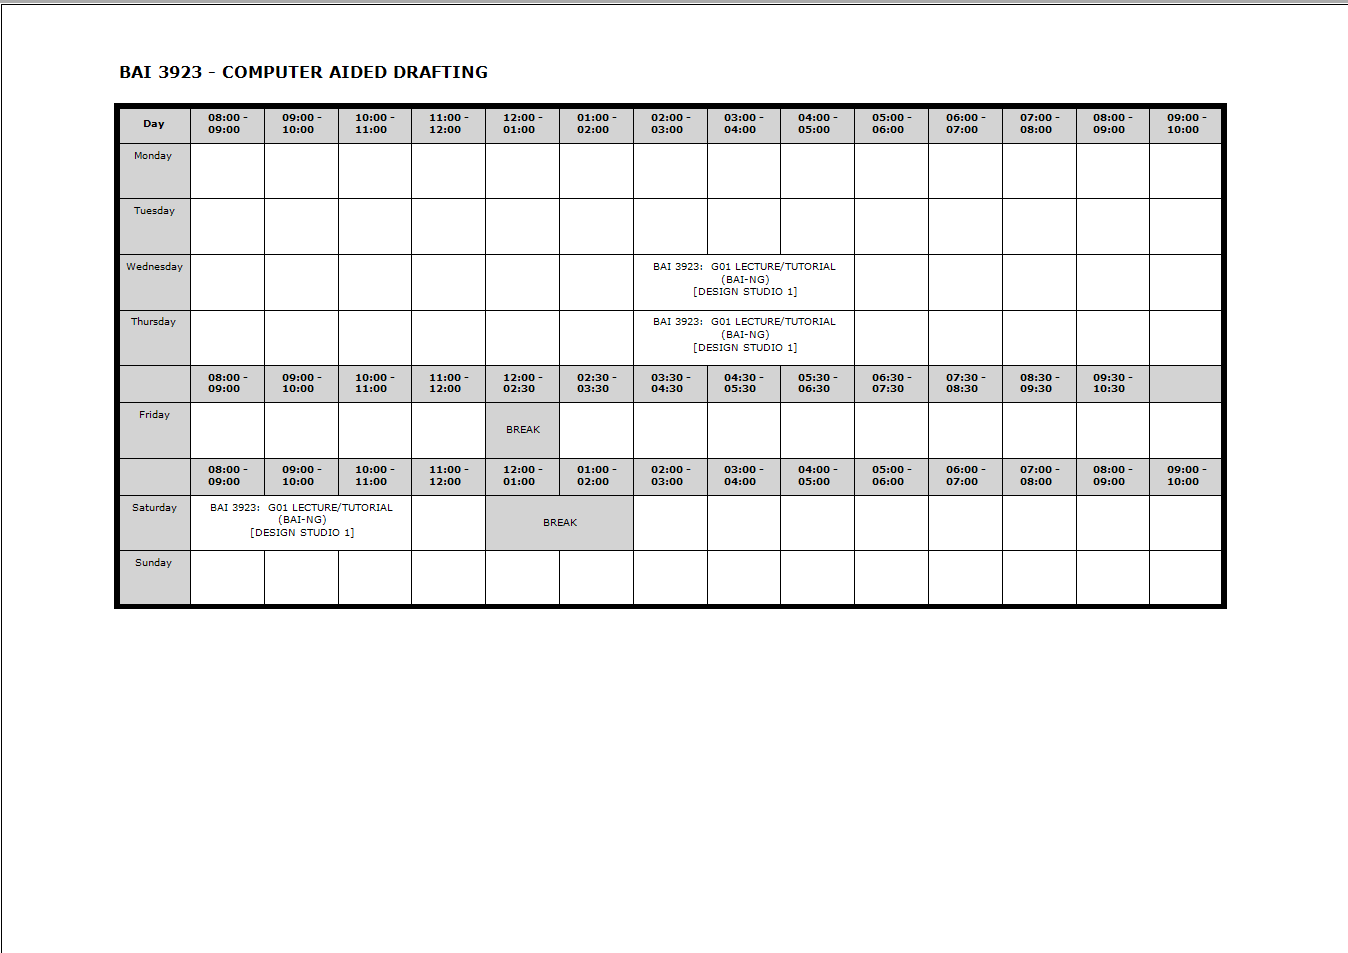
Click Print Preview to build the pages. Each page is headed with the course code and course name and shows only the slots that course occupies, with its class type, lecturer and room. The example, BAI 3923 - COMPUTER AIDED DRAFTING, runs three sessions across Wednesday, Thursday and Saturday.
12.7 Export to E-Campus
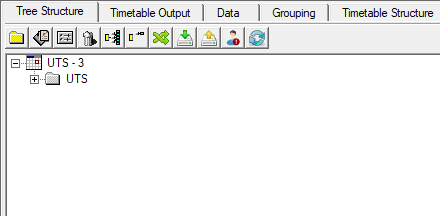
The last step is to push the finished timetable to TPlus E-Campus, where students and lecturers can see it. Open the Tree Structure tab and click the Export icon on the toolbar.

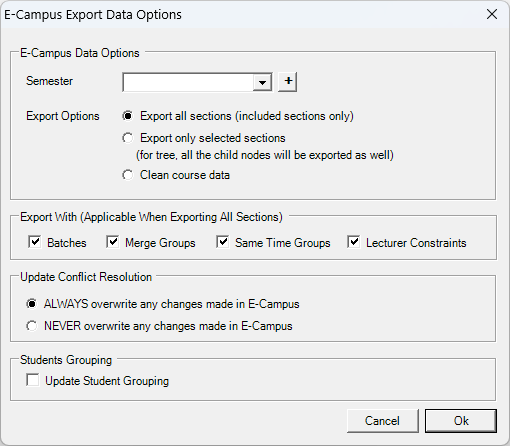
The E-Campus Export Data Options window opens. The most important field here is Semester: it decides which semester in E-Campus the timetable is written to, so set it before anything else. The rest of the window controls how much is sent - Export all sections, Export only selected sections or Clean course data, what is sent with it under Export With, and whether existing E-Campus changes are overwritten under Update Conflict Resolution.
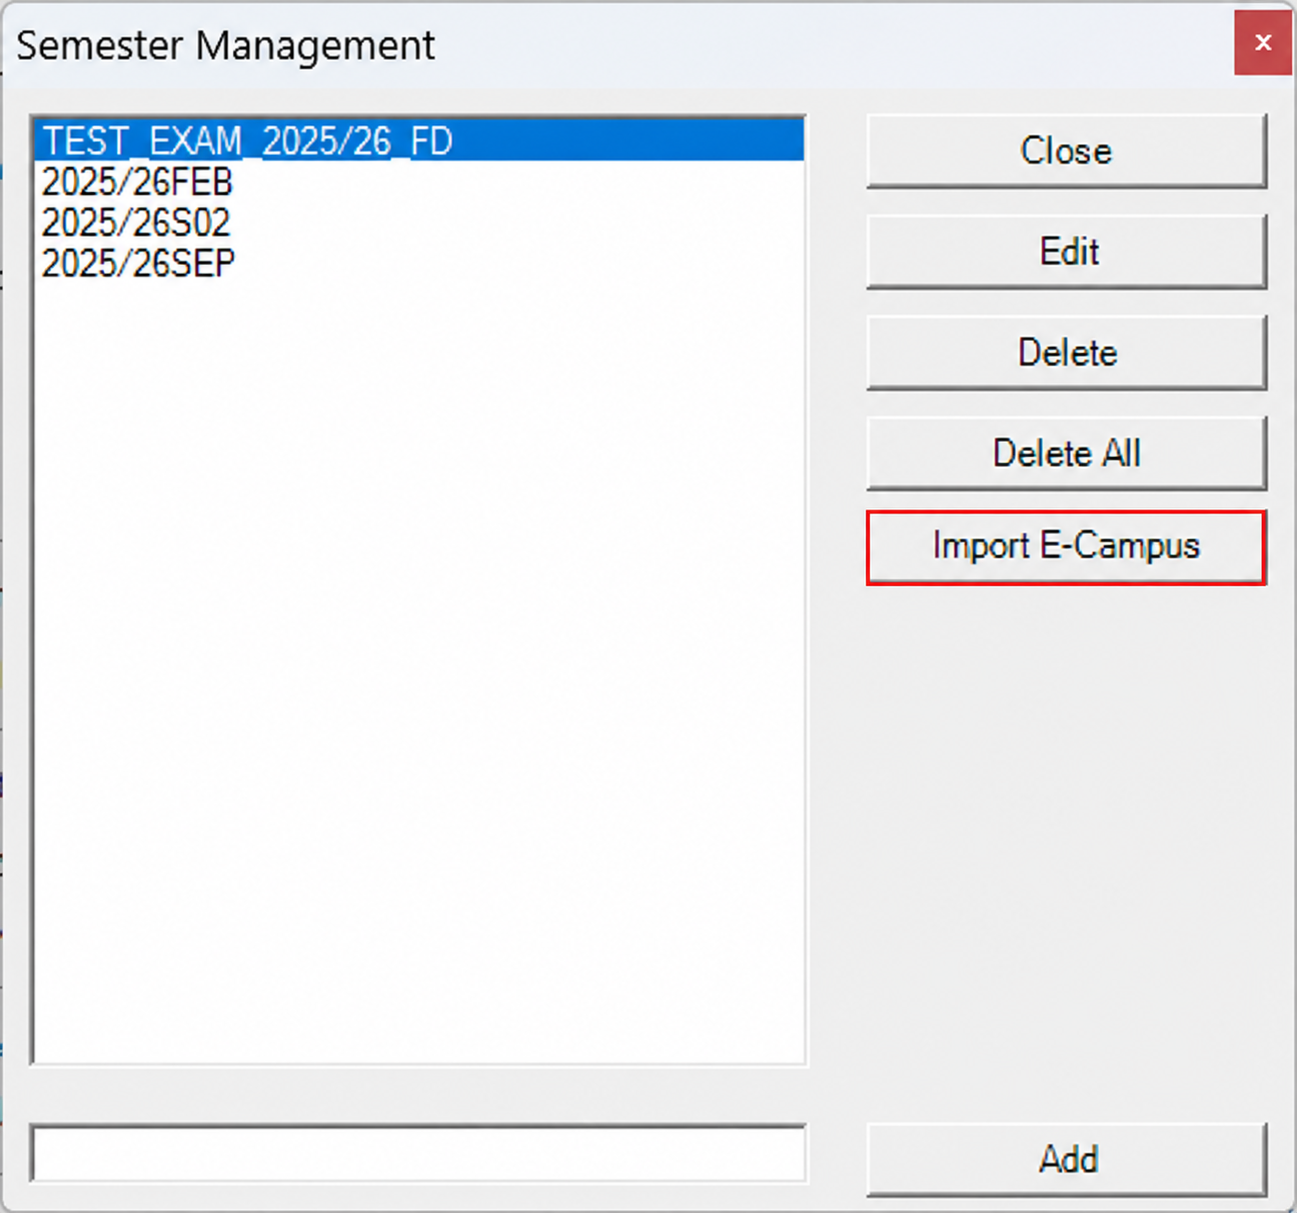
If the semester you need is not in the Semester drop-down, click the + button beside it. The Semester Management window opens with the semesters the system already knows about, and Import E-Campus is what fetches the rest from E-Campus.
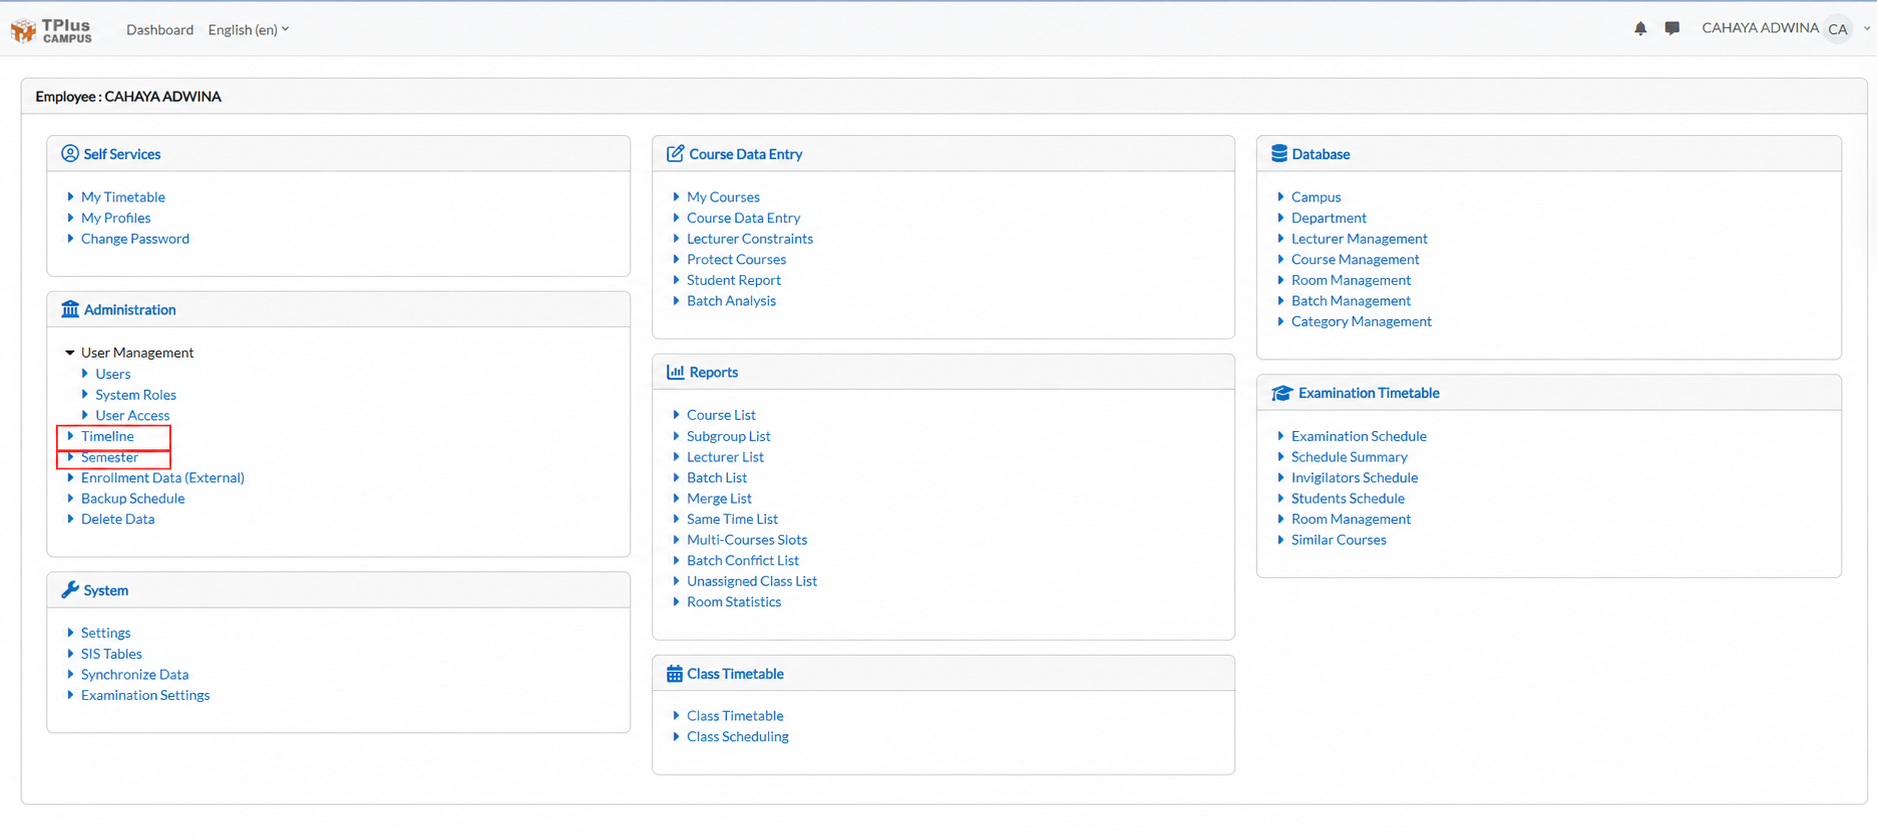
A semester can only be imported once it exists in E-Campus. If it has not been created yet, open TPlus E-Campus and go to Administration, where Timeline and Semester sit under User Management.
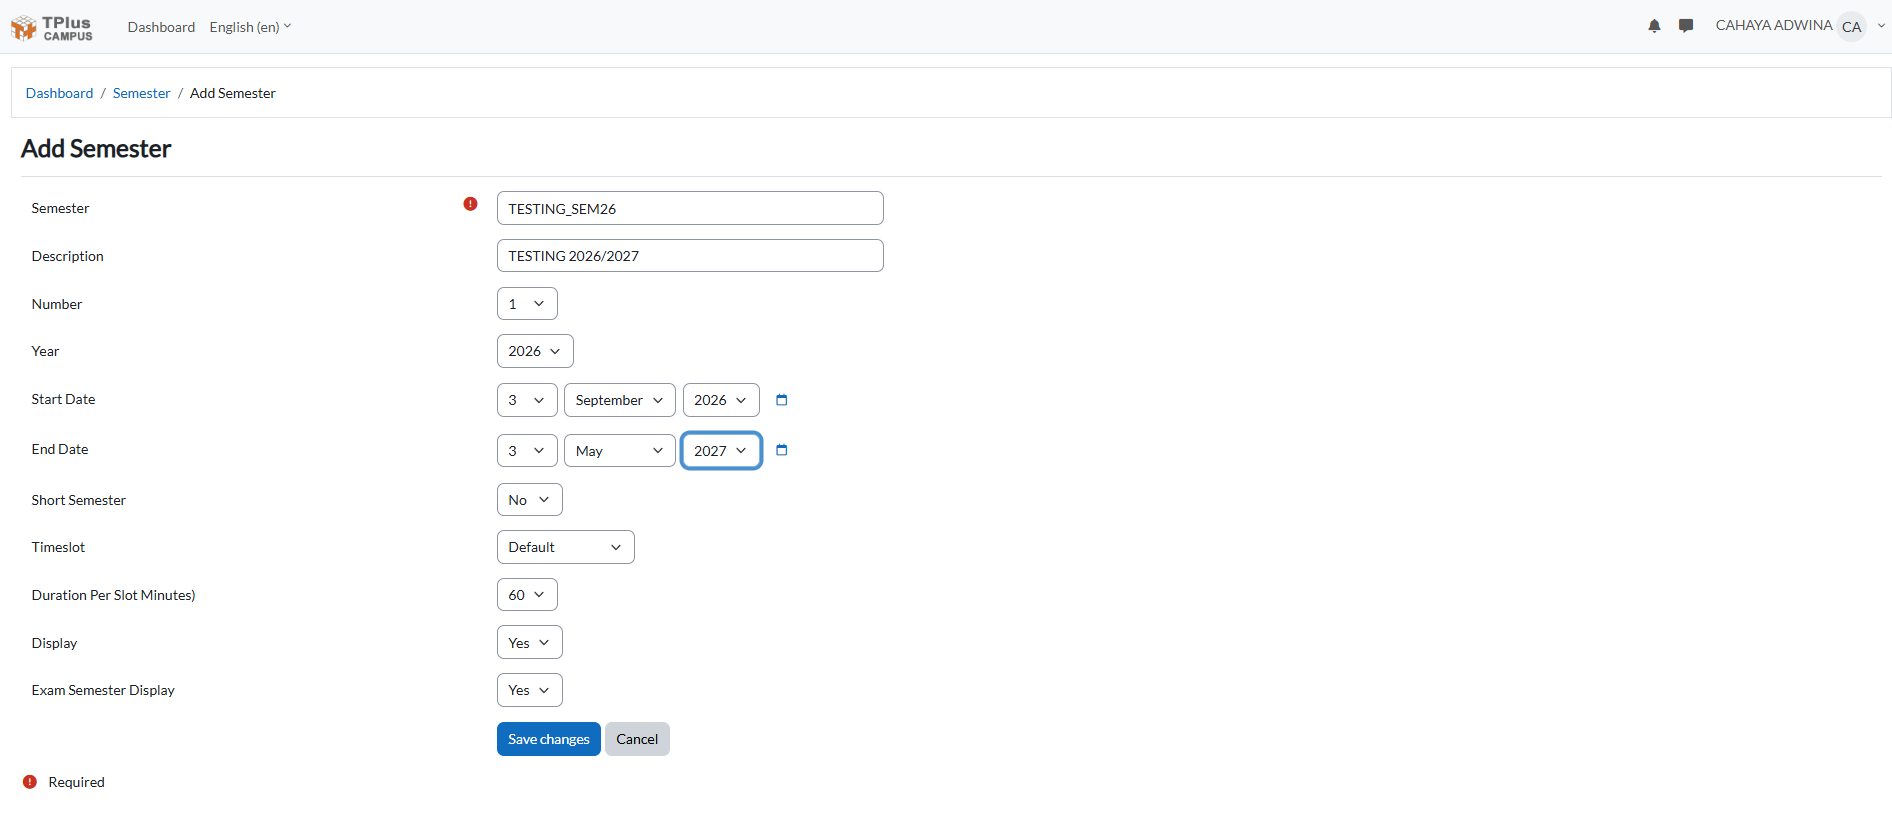
Create the timeline first, then the semester that sits inside it. Both are covered in the E-Campus manual: see Timeline for creating a new timeline, and Semester for creating a new semester. Fill in the Add Semester form and click Save changes.
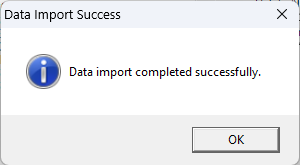
Go back to TPlus Class and click Import E-Campus in the Semester Management window. A confirmation appears once the semesters have been pulled across.
The semester you created is now in the list. In the example, TESTING_SEM26 has come across from E-Campus.
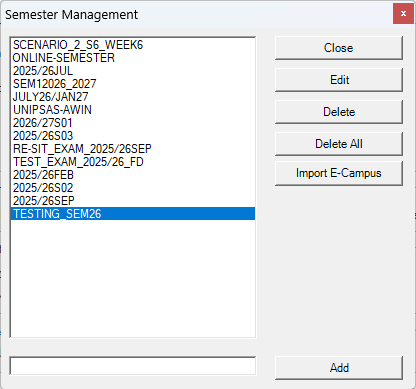
Close Semester Management to return to the export window, select the semester you have just created from the Semester drop-down, check the export options, and click Ok to send the timetable across.
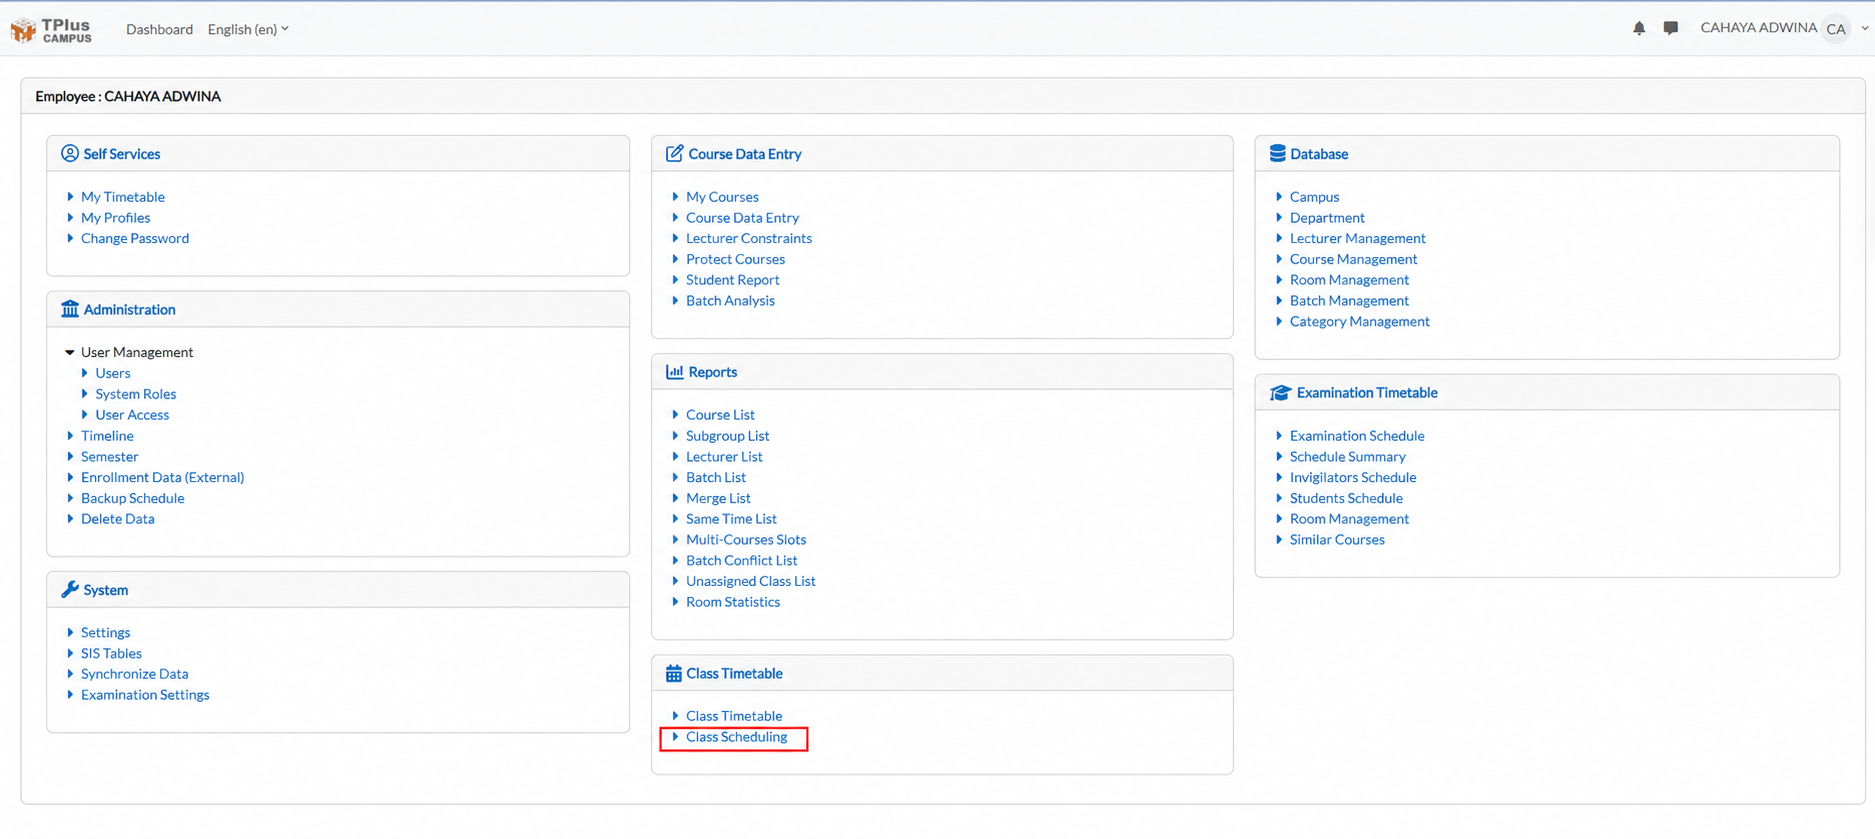
To confirm the result, open TPlus E-Campus and go to Class Timetable.
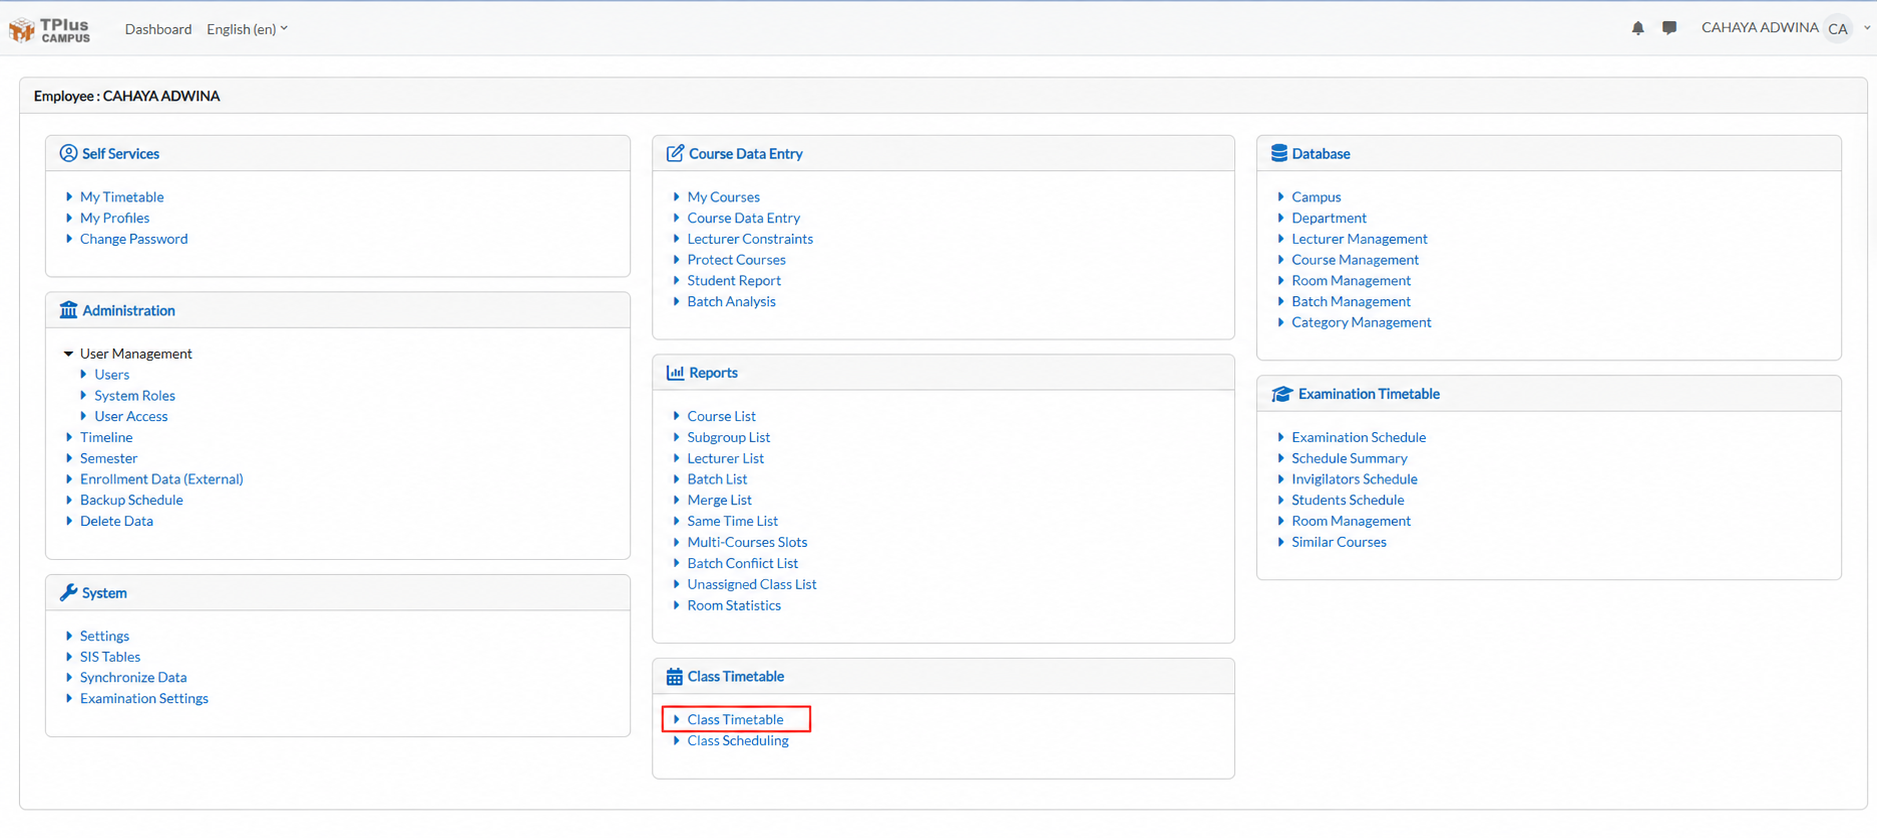
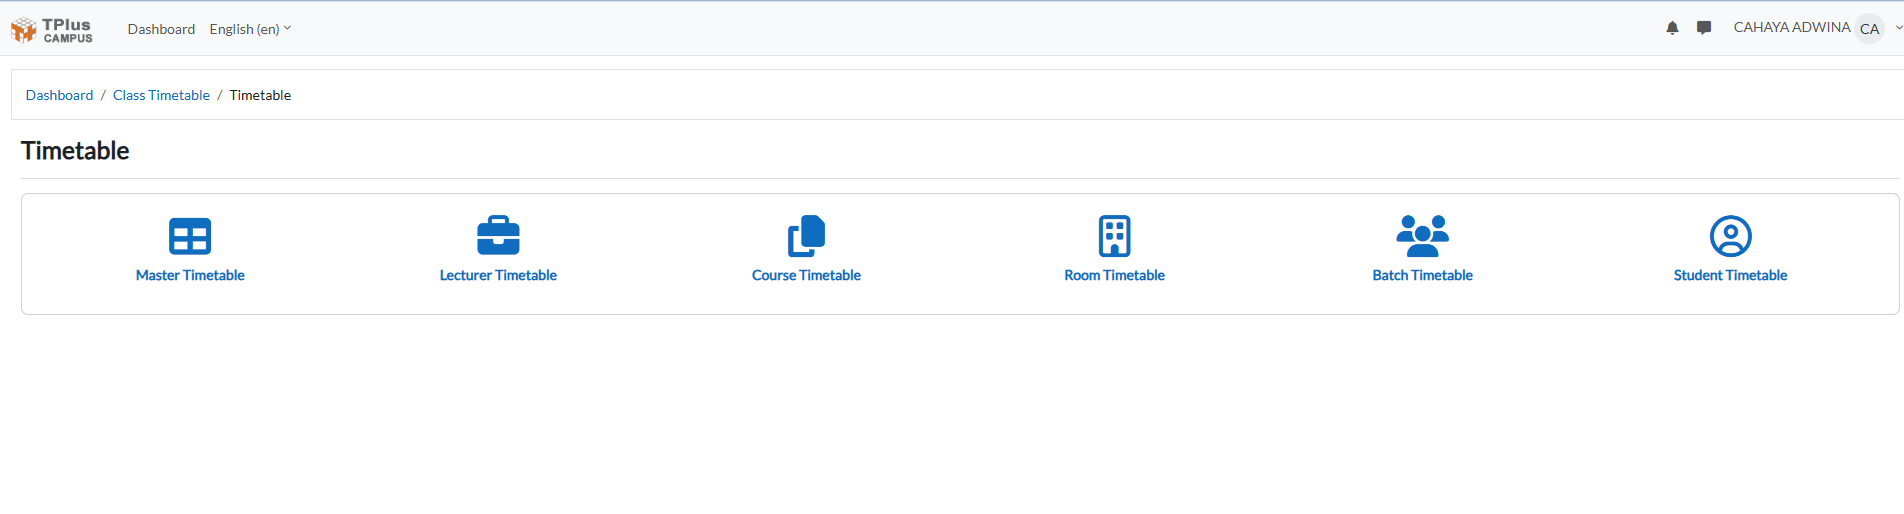
The exported timetable can be read from six angles: Master Timetable, Lecturer Timetable, Course Timetable, Room Timetable, Batch Timetable and Student Timetable.
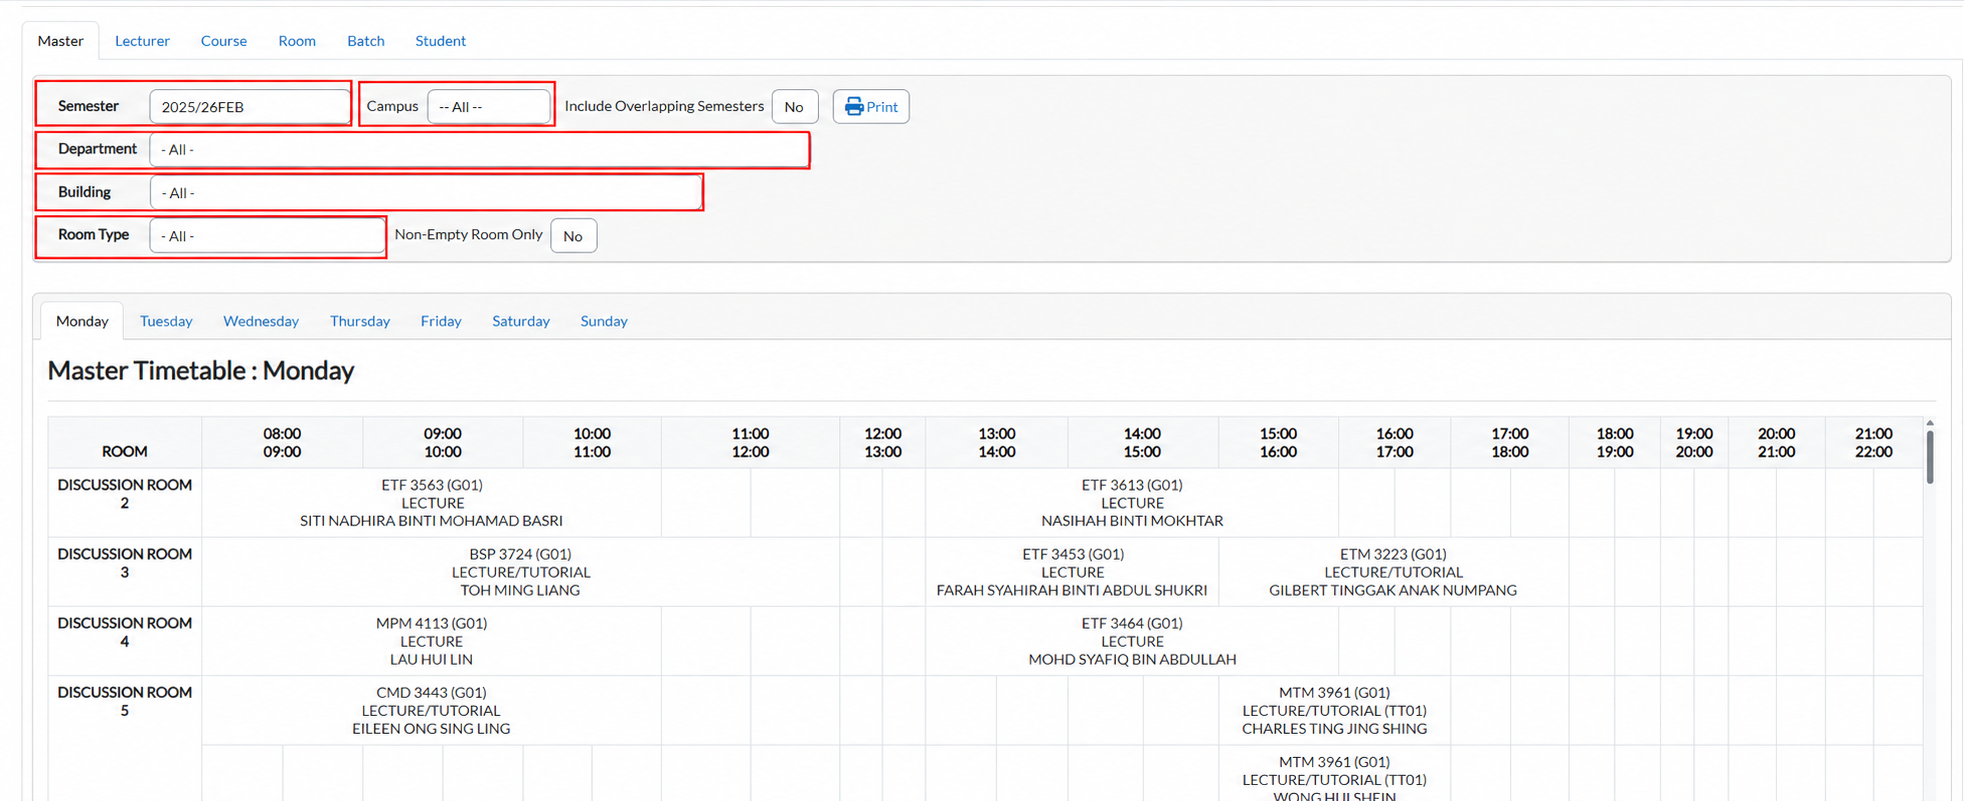
Choose Master Timetable to see the whole schedule laid out room by room. Set Semester to the same semester you created and exported to - the schedule is only stored under that semester, so picking any other one leaves the grid empty. The remaining filters narrow what is shown: Campus, Department, Building and Room Type. Print sends the view to the printer.
Class Scheduling, next to it in the dashboard, is where the exported timetable is adjusted from the E-Campus side.
12.8 Student Timetable Output
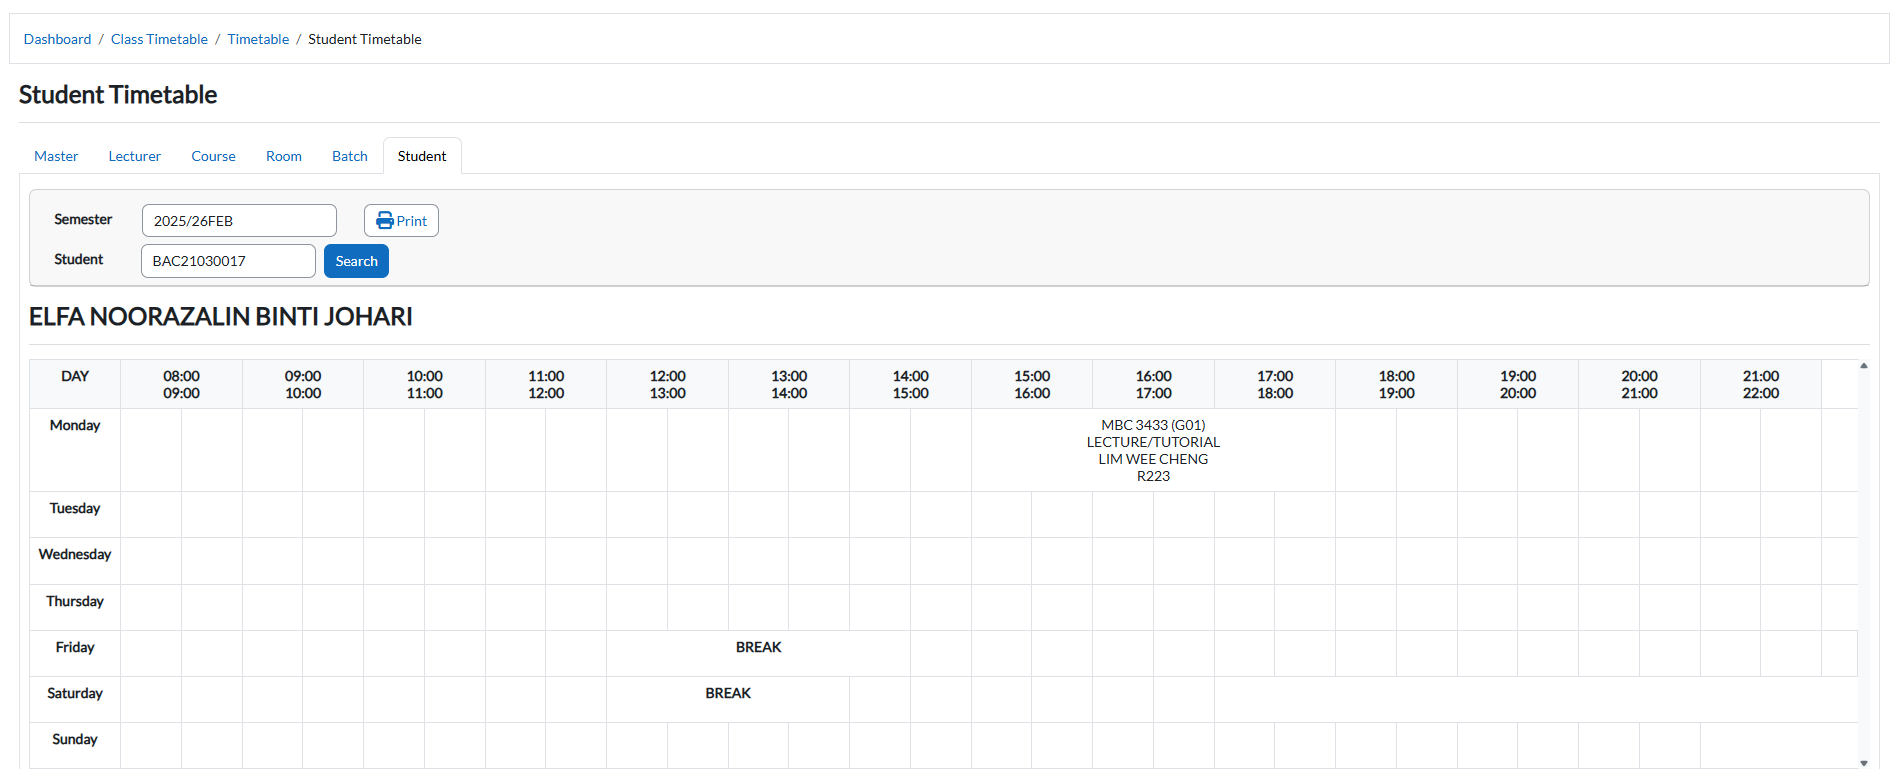
The exported timetable can also be checked one student at a time. In TPlus E-Campus, open Class Timetable, go to Timetable and choose Student Timetable.
Set the Semester to the one you exported to, type the student's ID in the Student field and click Search. The student's name appears above their week, with the course code, class type, lecturer and room in every slot they attend. In the example, BAC21030017 - ELFA NOORAZALIN BINTI JOHARI has MBC 3433 (G01) on Monday from 16:00 to 17:00 with LIM WEE CHENG in R223.