Installation & Setup

This chapter guides you through installation, launching the system, understanding the interface, and creating your first class timetable project.

2.1 System Installation Overview

The TPlus Class system is delivered as an application package. Users must extract the package and confirm that all required system files are available in the extracted directory prior to launching the application.

  1. Open the provided installation folder (or extract the ZIP file if you received a ZIP package).
  2. Ensure the folder contains the main application file and supporting files.
  3. Do not rename, move, or delete any files inside the folder to avoid system errors.
TPlus Class Installation Folder (Extracted Package)
Figure 2.1.1: TPlus Class Installation Folder (Extracted Package)

2.2 Launching the Application

After confirming the installation folder is complete, you can launch the system using the main executable file.

  1. Open the TPlus Class installation folder.
  2. Locate Timetabler Plus.
  3. Double click the file to launch the system
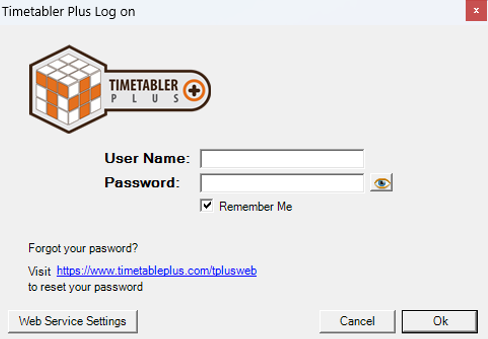
  4. If a login page appears, enter your credentials provided by the administrator.
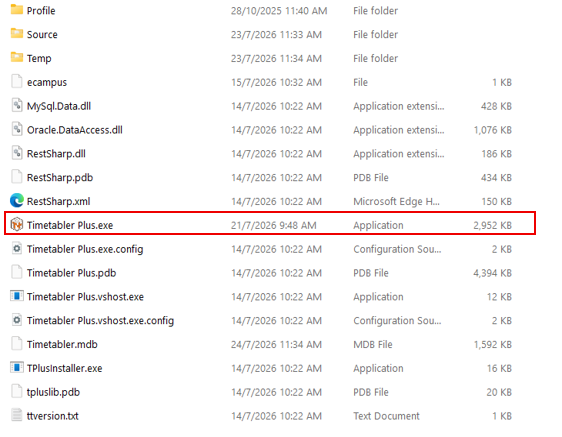
Main Executable File
Figure 2.2.1: Main Executable File
System Login Screen
Figure 2.2.2: System Login Screen
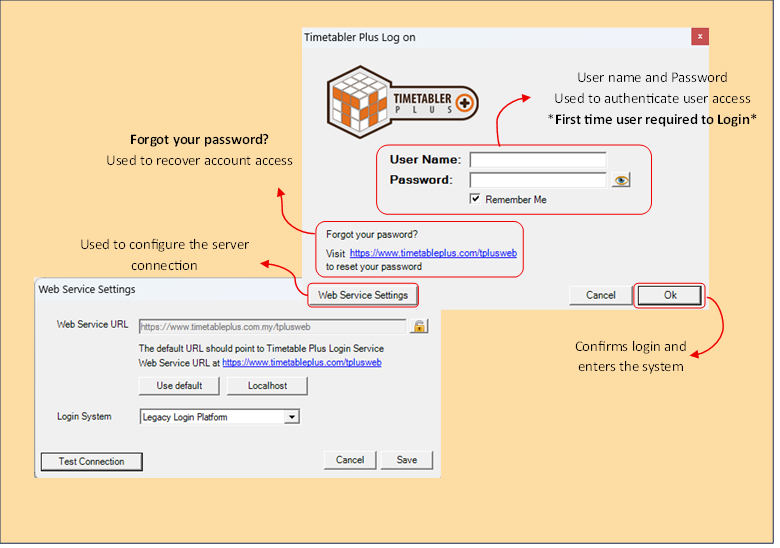
Login Screen Fields Explanation
Figure 2.2.3: Login Screen Fields Explanation

2.3 System Integration Settings

What is TPlus E-Campus?

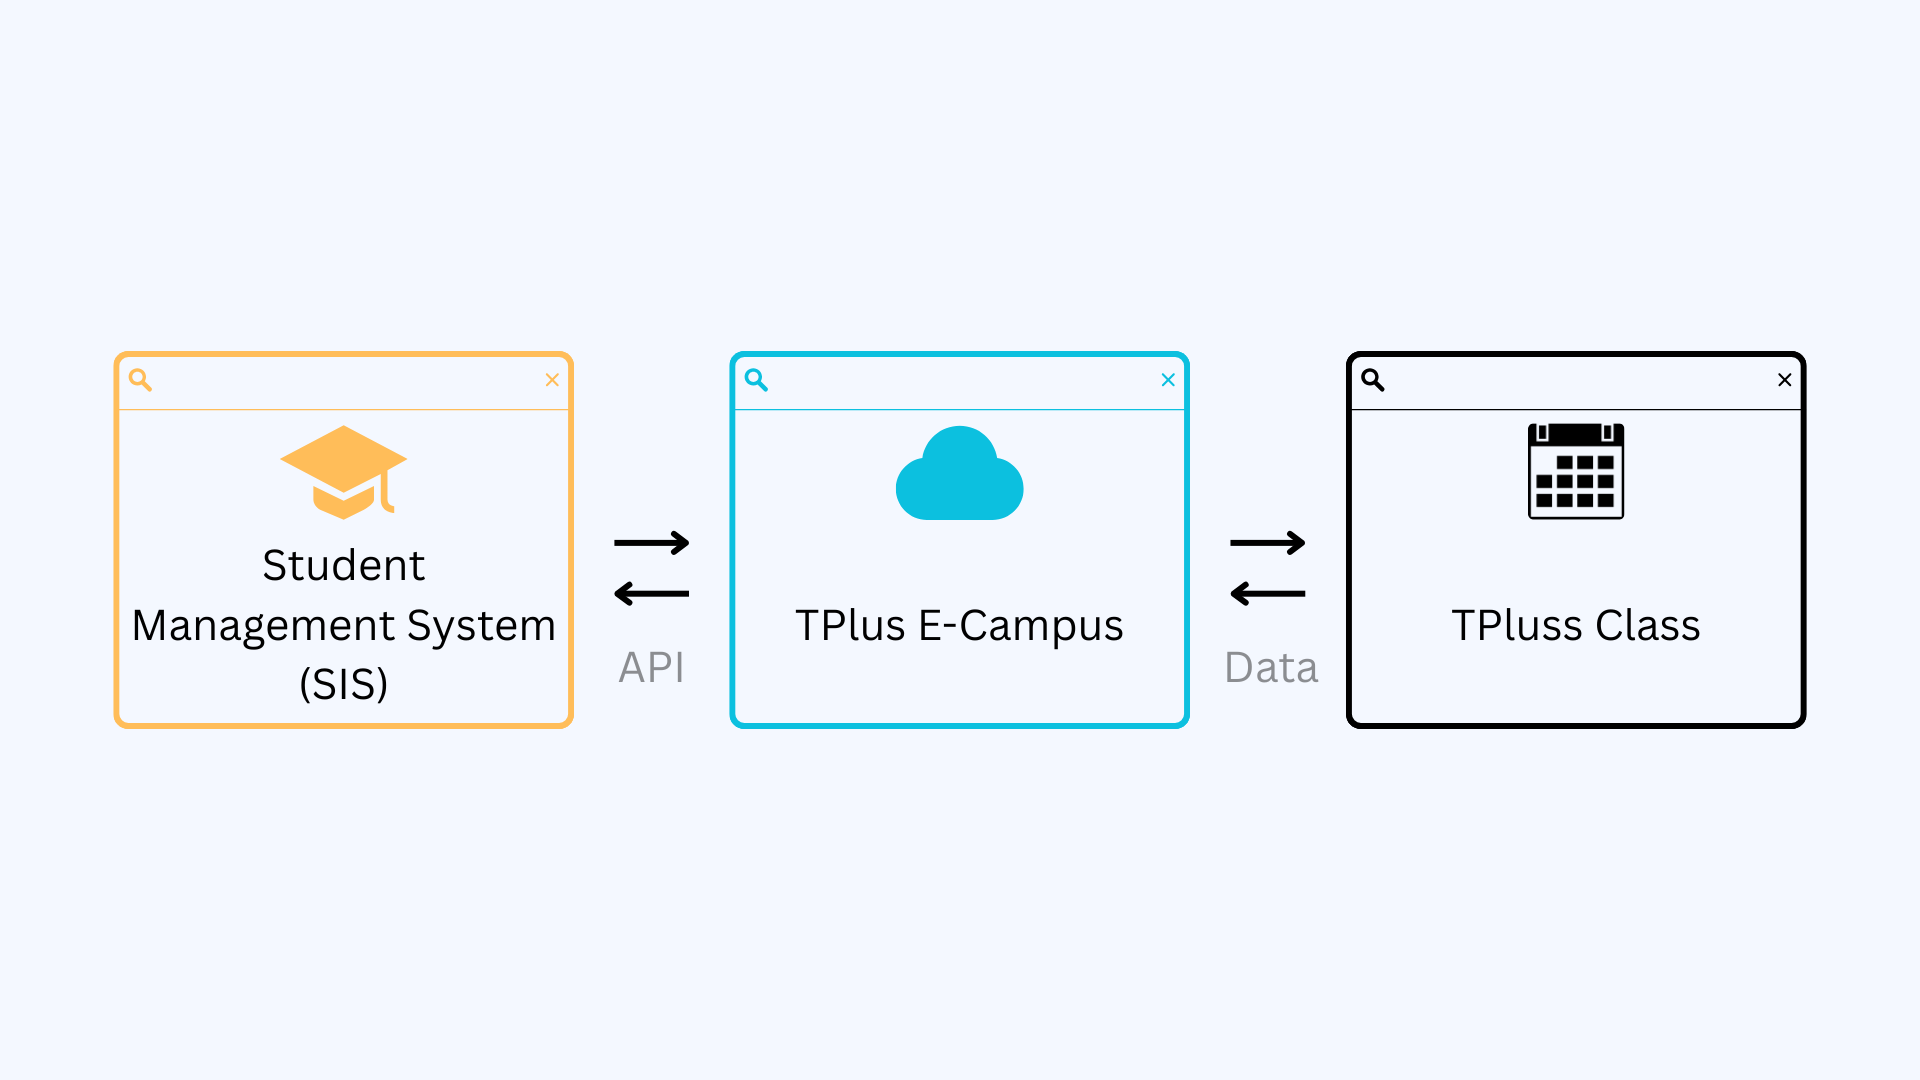
TPlus E-Campus is a web-based portal that integrates directly with the institution's Student Management System using API connectivity, ensuring real-time data synchronization.

Relationship of TPlus E-Campus with TPlus Class

TPlus Class seamlessly retrieves the required data from TPlus E-Campus through direct API integration, ensuring users always have access to the latest information without manual data transfer.

To access the settings, navigate to Database Menu then select E-Campus Settings from the drop-down menu.

Integration Between Student Management System, TPlus E-Campus, and TPlus Class
Figure 2.3.1: Integration Between Student Management System, TPlus E-Campus, and TPlus Class

2.3.1 Settings and Setup (Import Database)

Before importing data from E-Campus, ensure that the E-Campus Settings have been configured correctly. These settings allow the TPlus Class system to establish a connection with the E-Campus portal for data synchronization.

E-Campus Settings
Figure 2.3.1.1: E-Campus Settings

E-Campus Settings window will pop-up. The window will consist of two sections.

E-Campus Settings Window
Figure 2.3.1.2: E-Campus Settings Window
  1. Settings
  2. Connection

    Before importing data, you must first connect TPlus Class to your E-Campus Student Information System (SIS). Once connected, complete the required fields using the information provided by your E-Campus administrator. The descriptions of each field and the required values are provided below.

    • Profiles: This field is typically left with the default profile and does not require any changes unless instructed by your E-Campus administrator.
    • E-Campus URL: This field is fixed to the website that hosts the online database and should not be modified. By default, the URL is set to https://www.timetableplus.com/timetable/
      UTS example : https://uts.timetablehub.com/
    • E-Campus User ID: Enter the User ID that you use to log in to the TPlus E-Campus system.
    • Institute: Select your institution from the drop-down list. If your institution is not available, click the Add (+) button to create a new institution before proceeding.

After finished fill in the slots, click Test Connection button.

Test Connection Button
Figure 2.3.1.3: Test Connection Button

A confirmation message will appear, indicating that the operation was completed successfully.

Successfull Connection Message
Figure 2.3.1.4: Successful Connection Message

Once all the required information has been entered and the connection has been successfully verified, click Save to store the configuration settings.

After the settings have been saved, TPlus E-Campus will establish the connection and begin synchronizing data, allowing all available information to be fetched seamlessly for use within the system.