Data Entry
Enter class scheduling data, either imported from TPlus E-Campus or keyed in manually.
7.1 Import from E-Campus
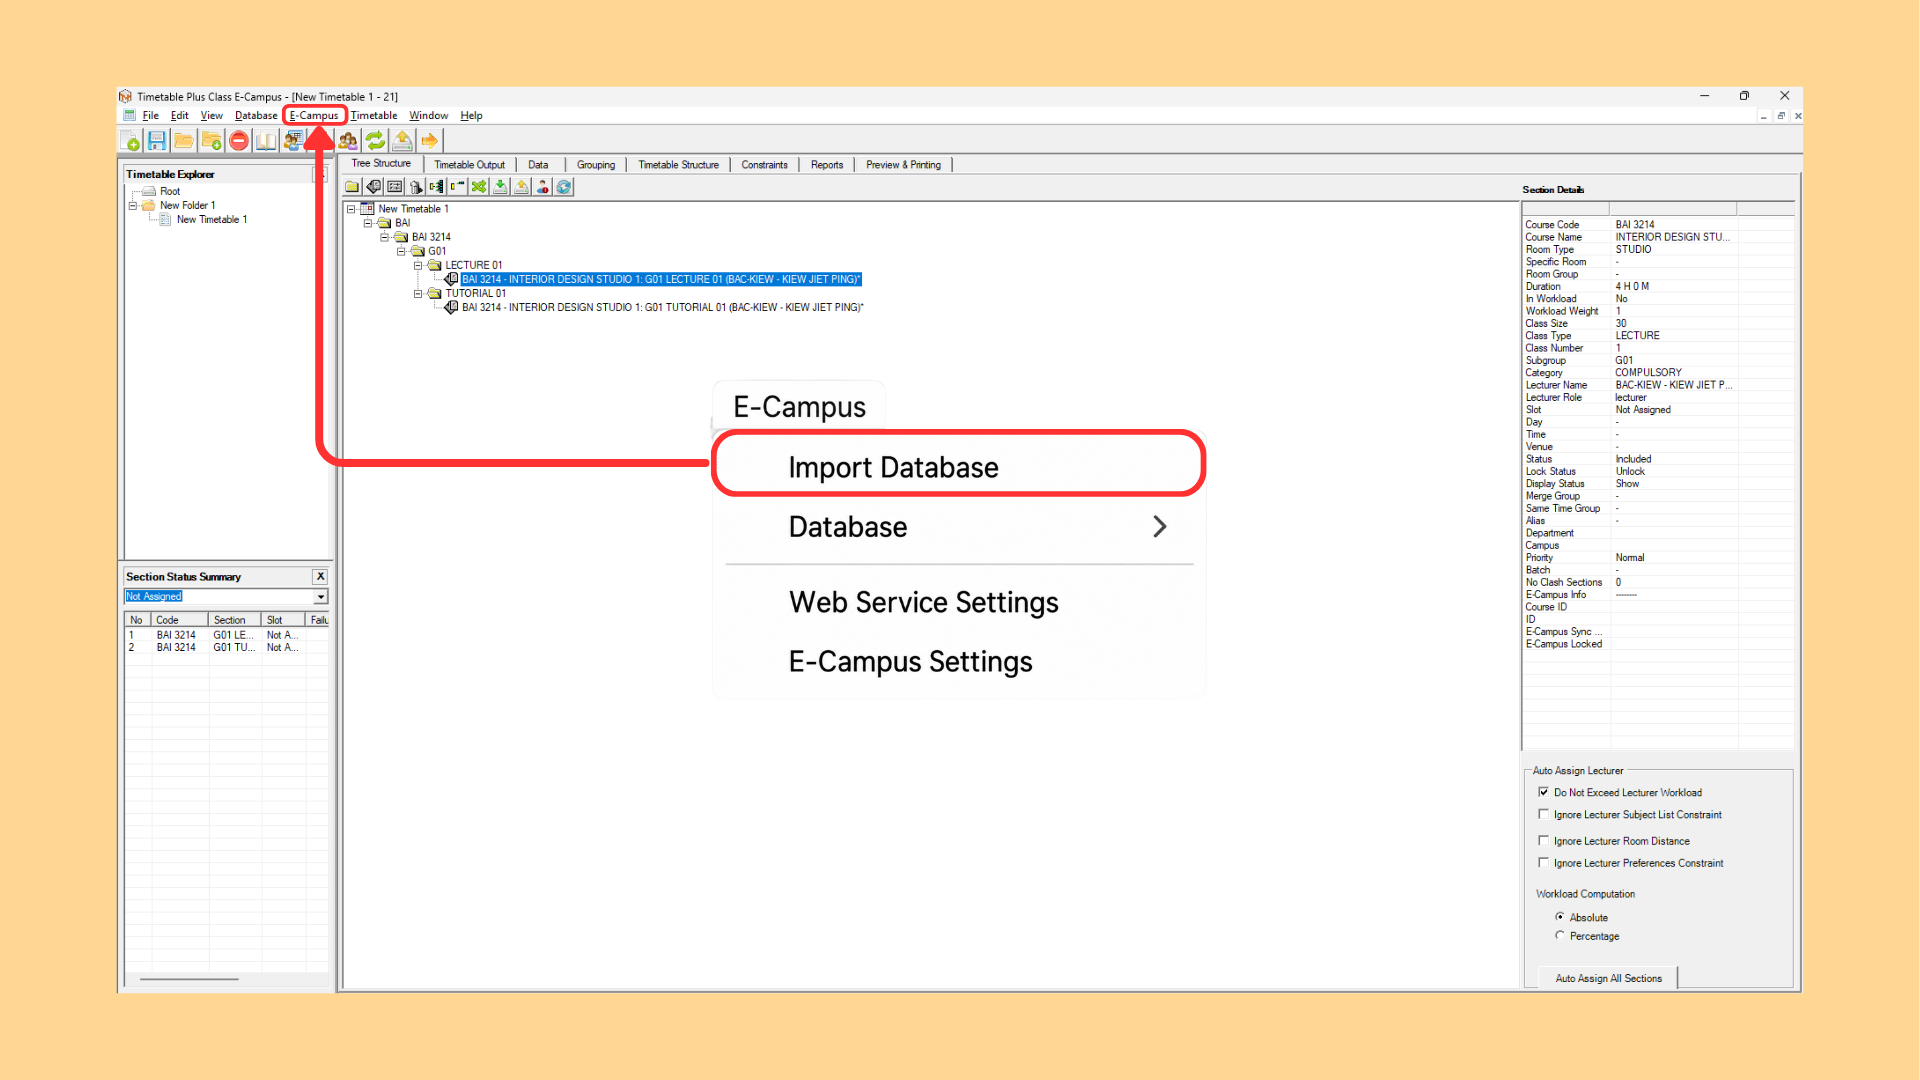
Users may import a database directly from TPlus E-Campus using the shortcut provided under the E-Campus tab, at E-Campus > Import Database.
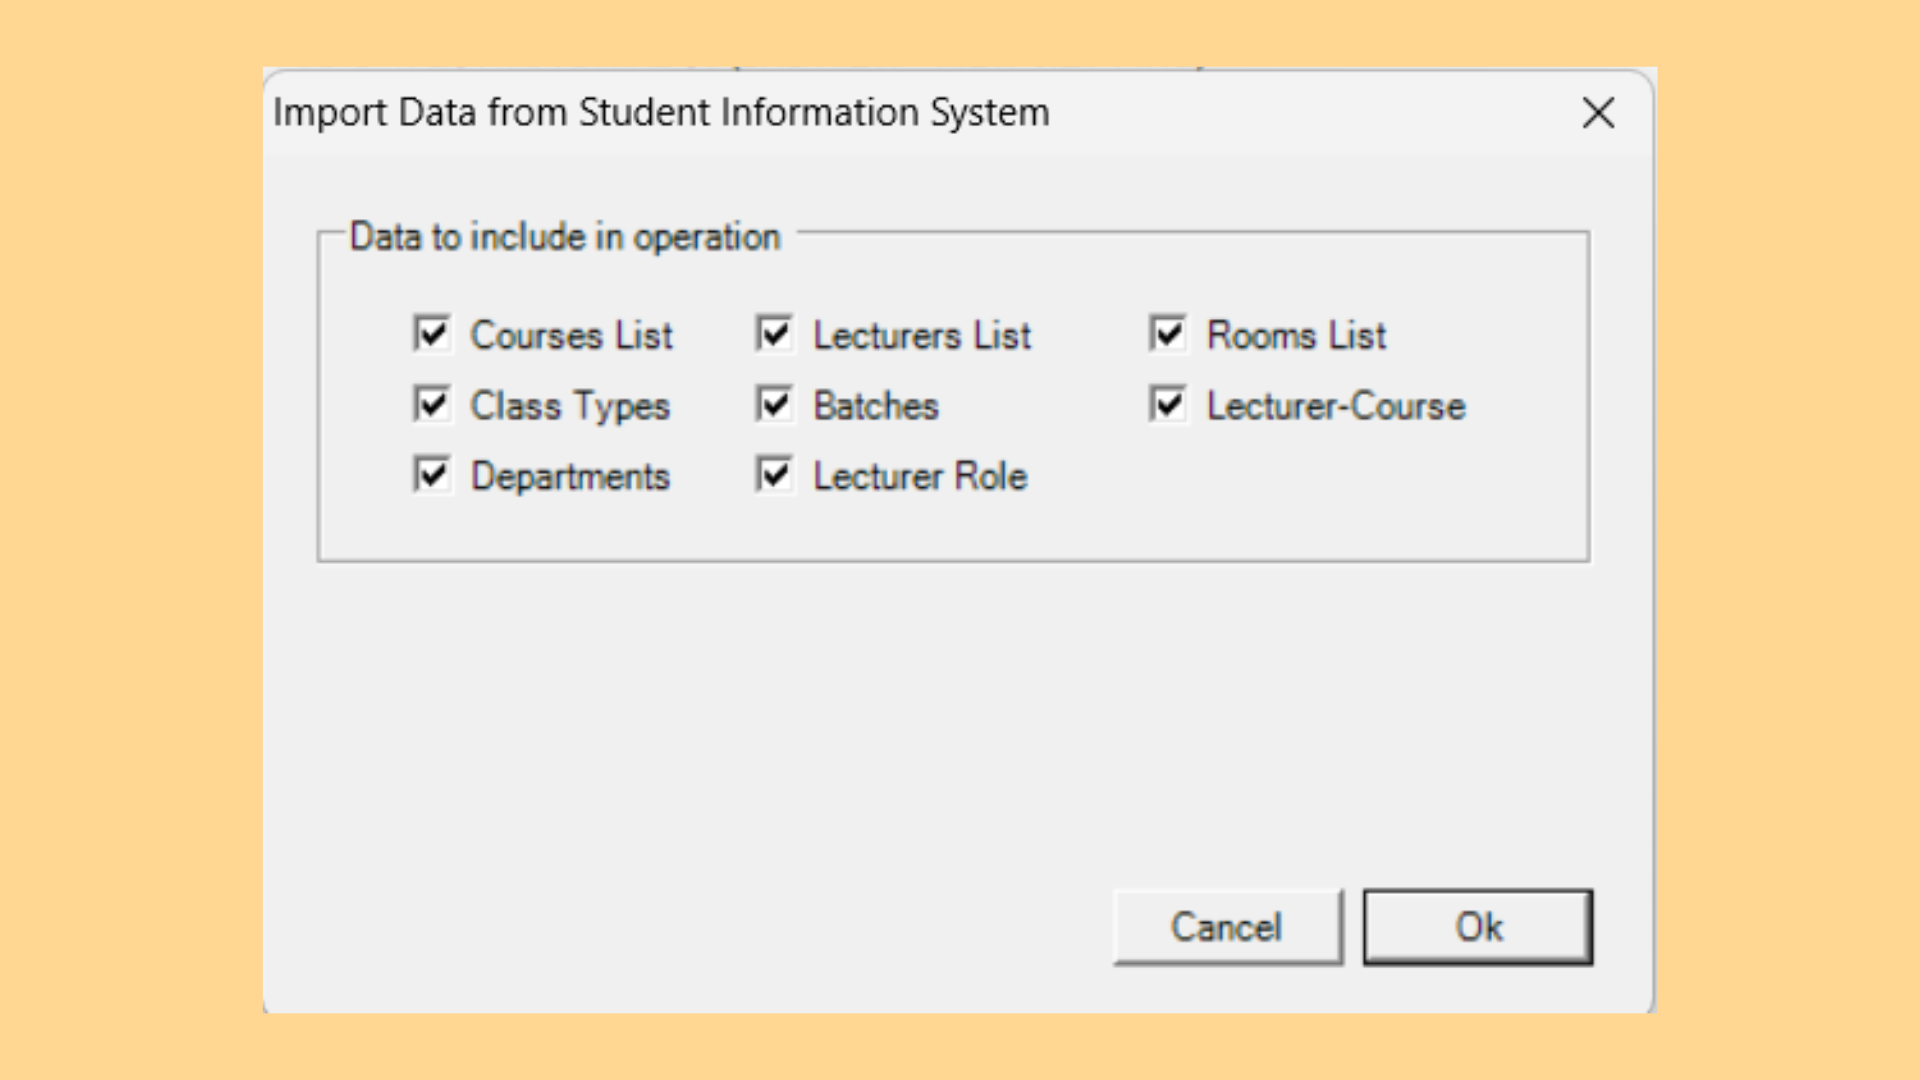
This is the option that user will be display after user attempting to import database. User can choose which data does they need from the Student Information System.
7.2 Manual Entry
The manual Data Entry feature enables users to create classes, subgroups and sections by linking a semester to its associated courses, lecturers and rooms. Optional arrangements may also be configured during this process, including merging, same time classes and team teaching.
7.2.1 Tree Structure
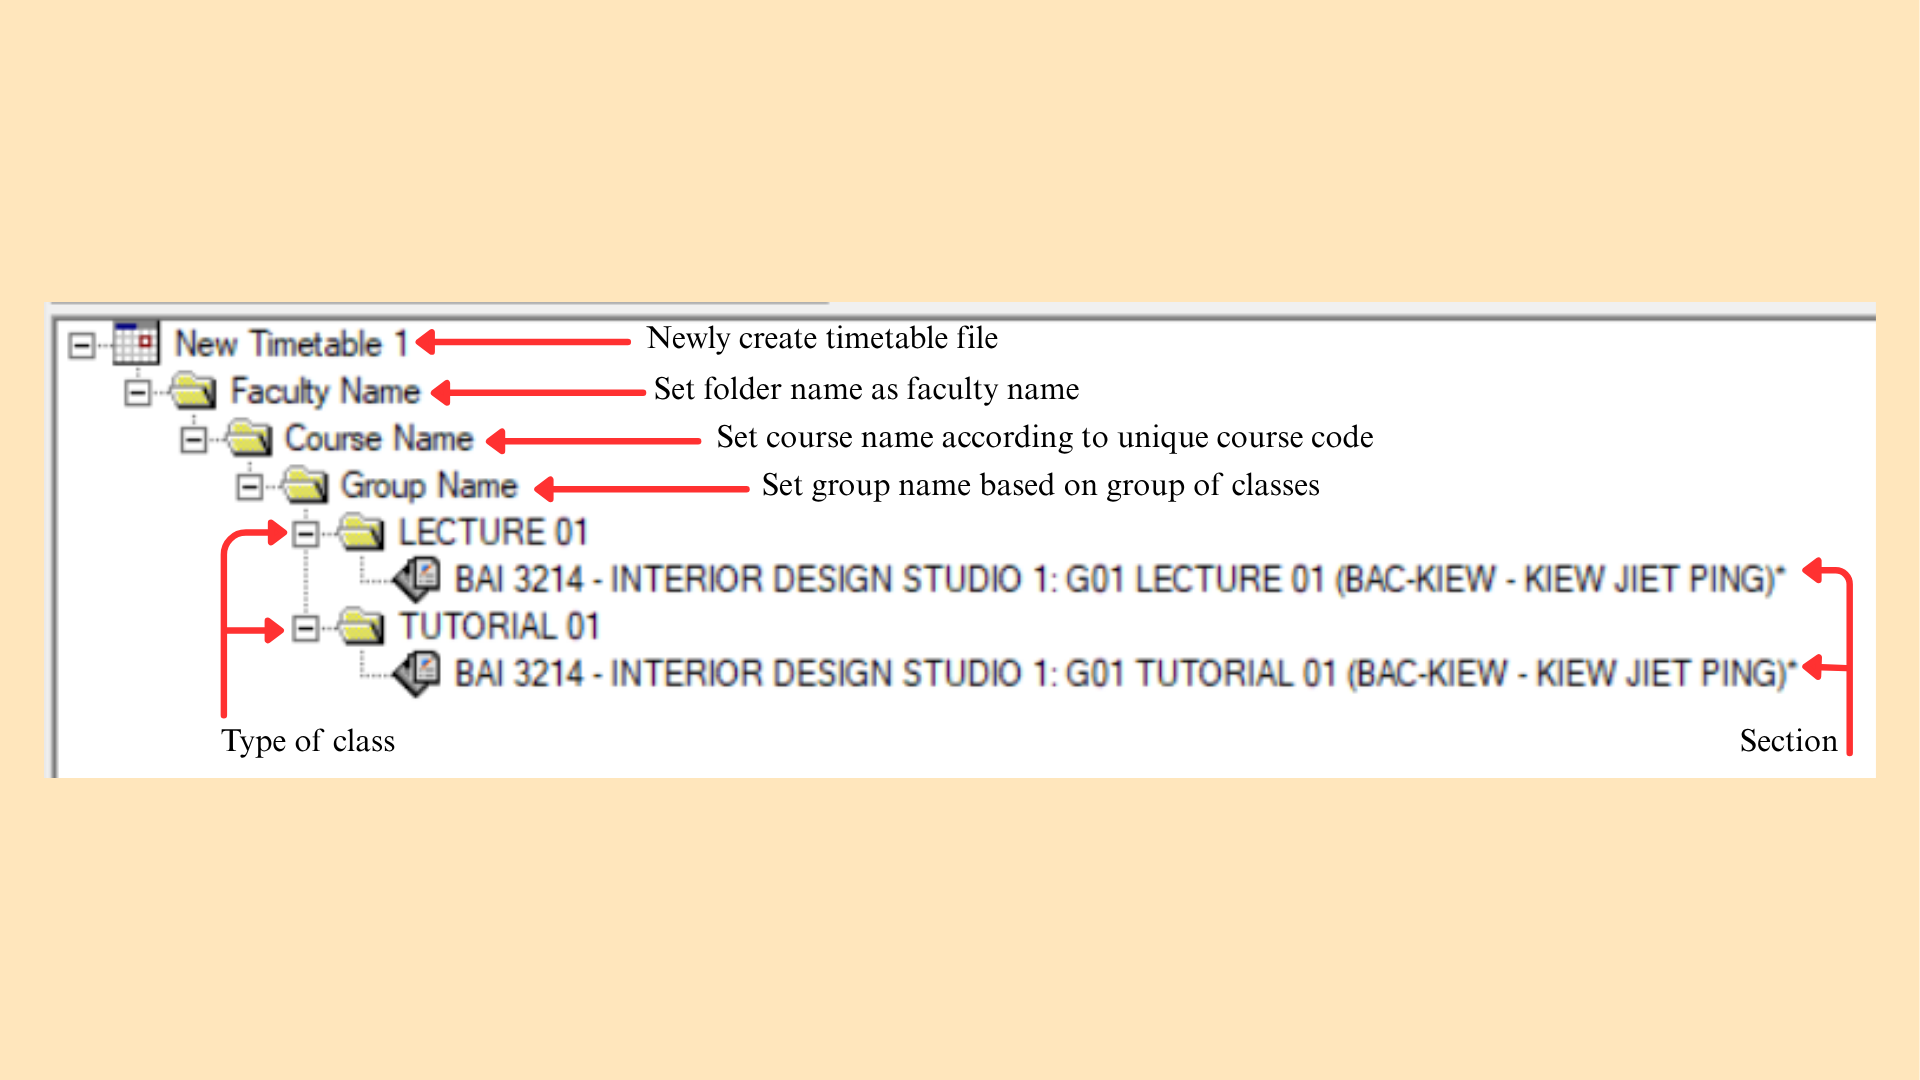
This is tree structure, it consists of Parent-Child connection. Figure below shows the example of the template folder.
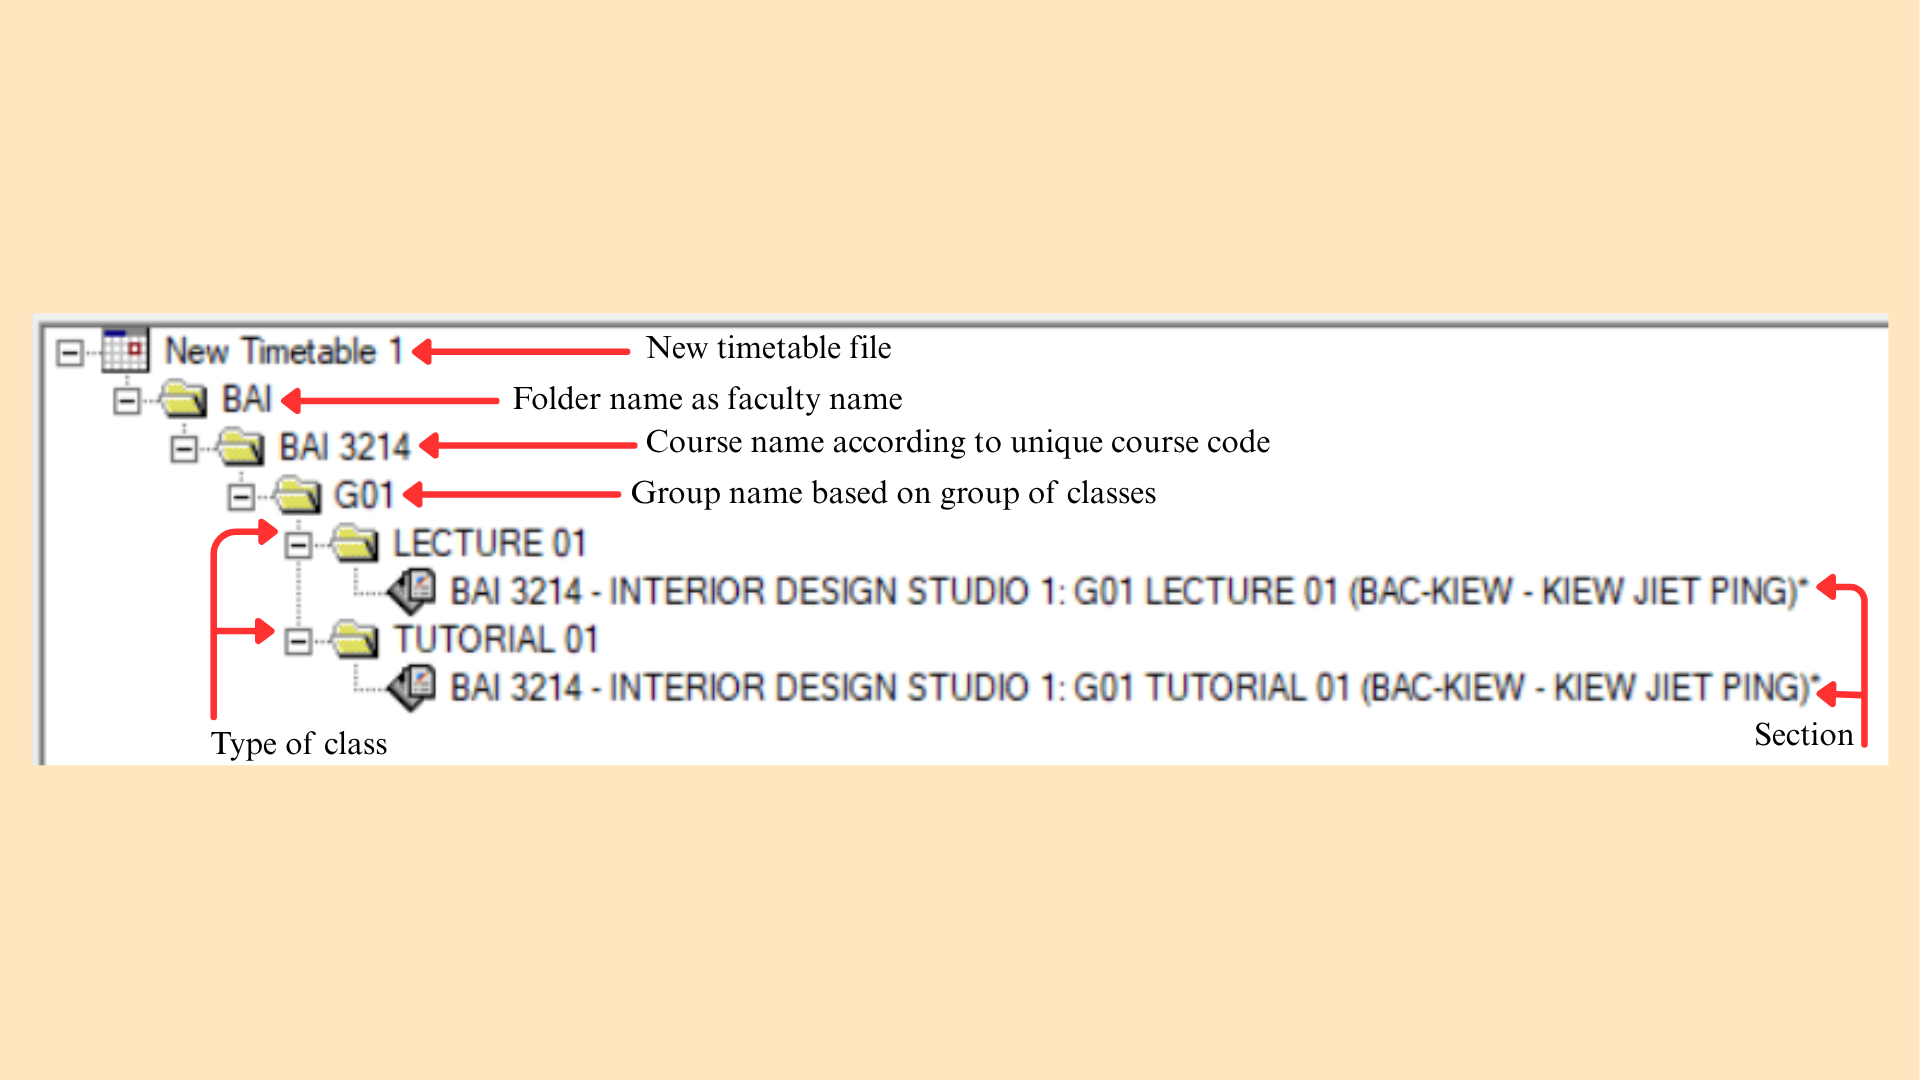
7.2.2 Section Properties
User need to enter all the information that is required in order to register a class in the system. Every functionalities will be explained further.
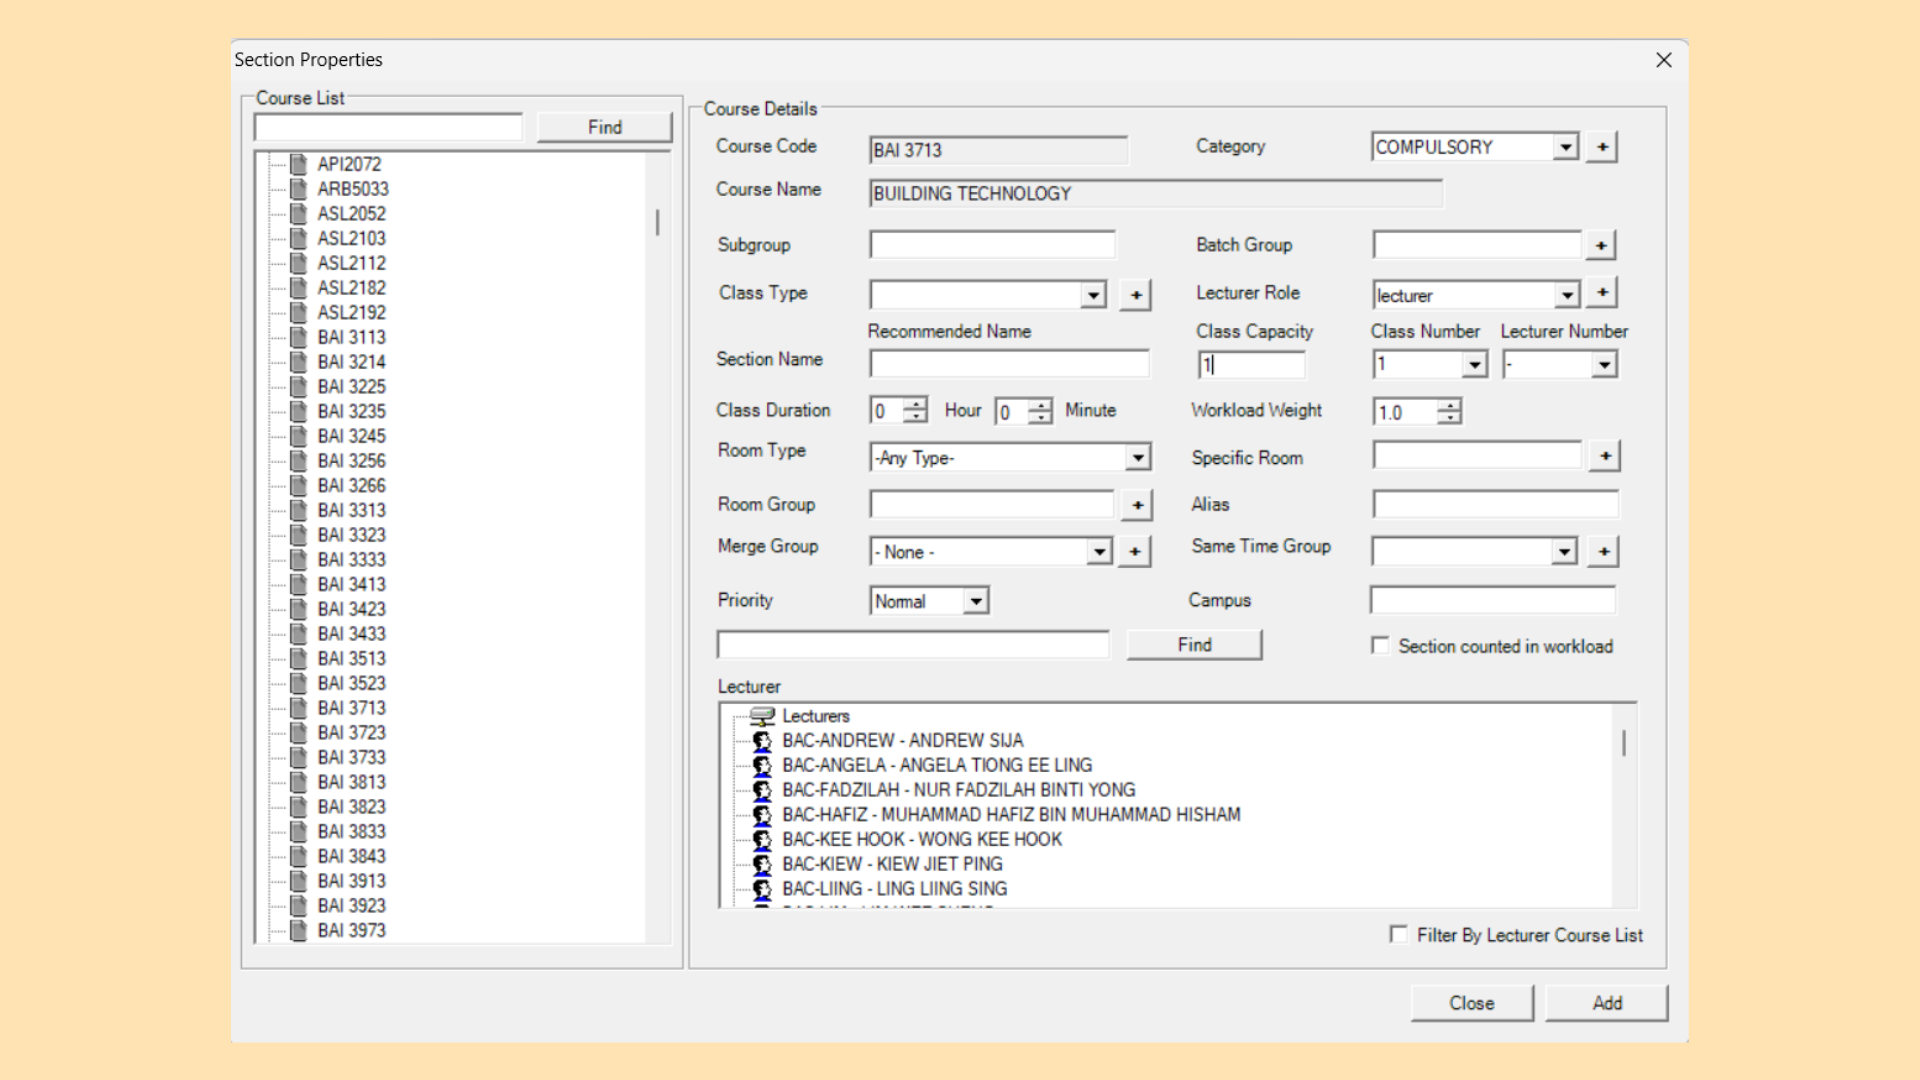
Course List: List of courses from course database with find shortcut for easier navigation.
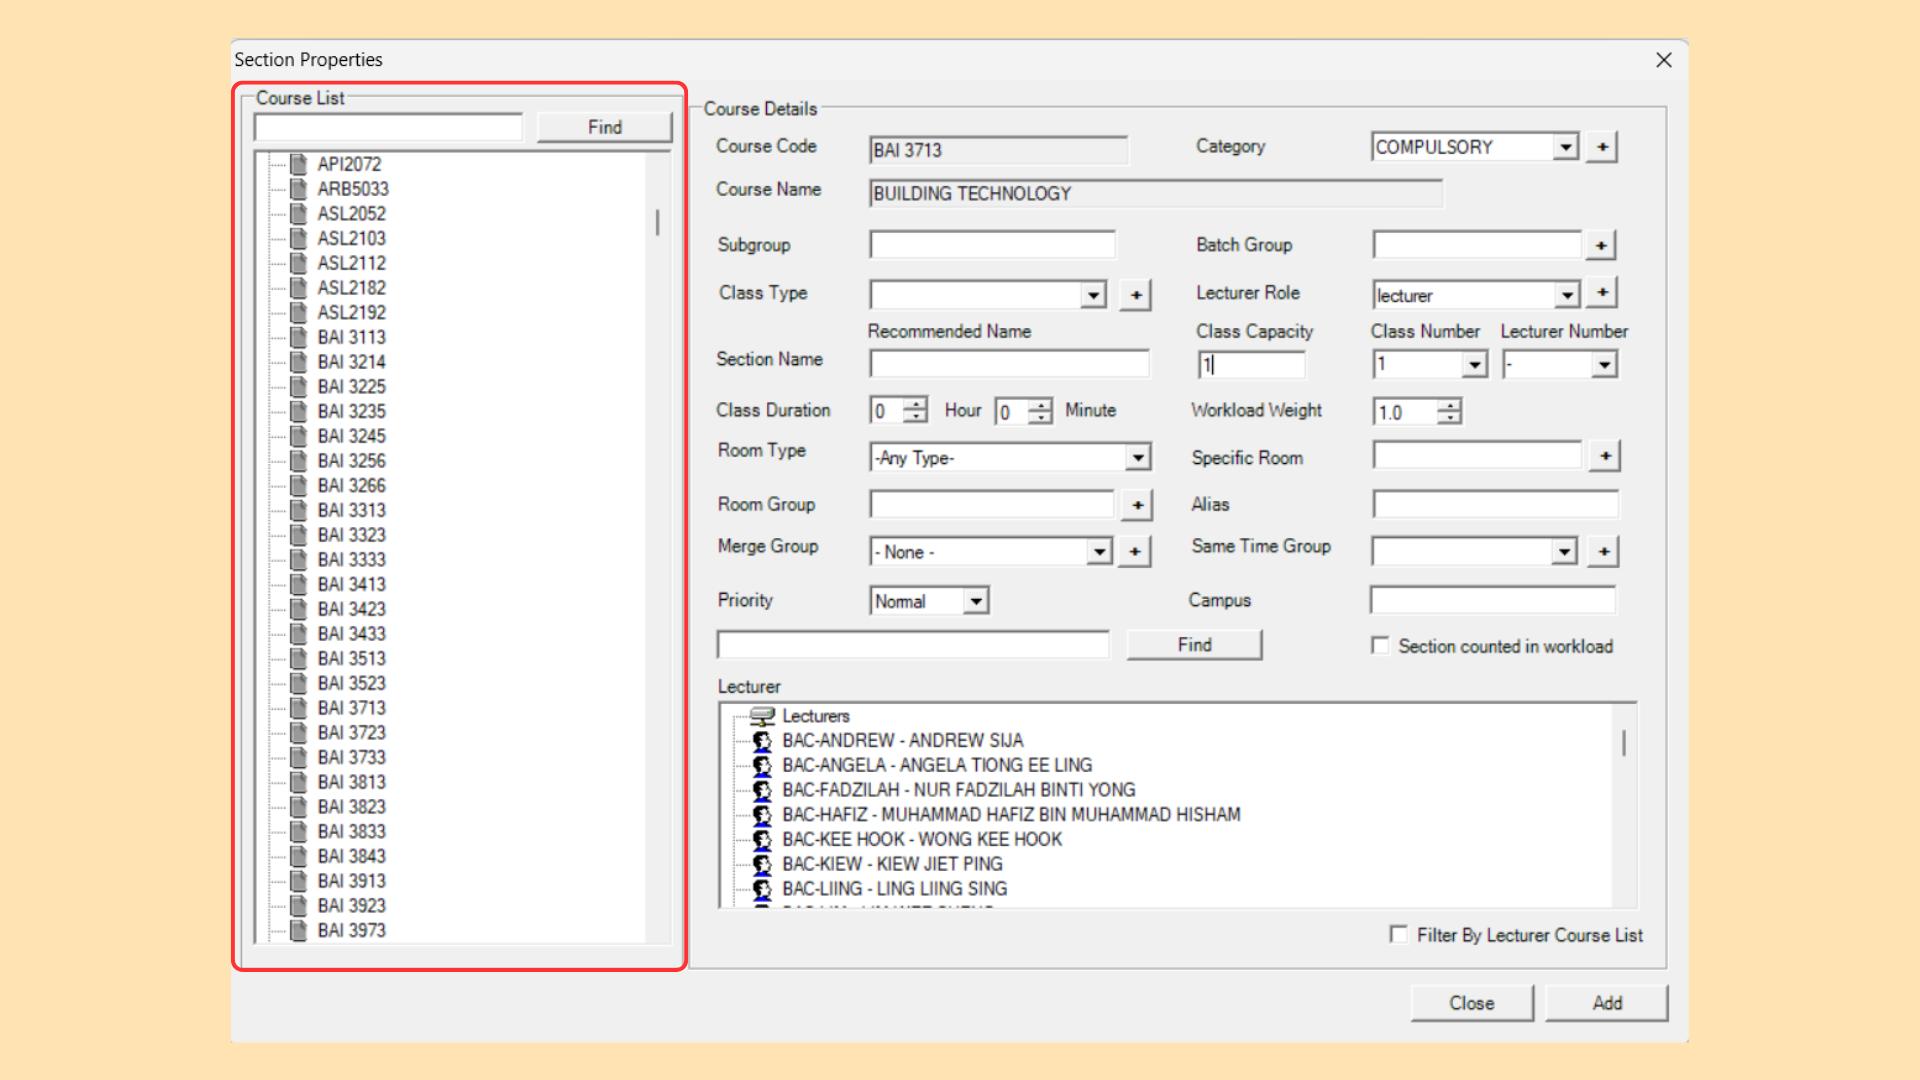
Course Code: Unique code attached with course name to avoid redundancy.
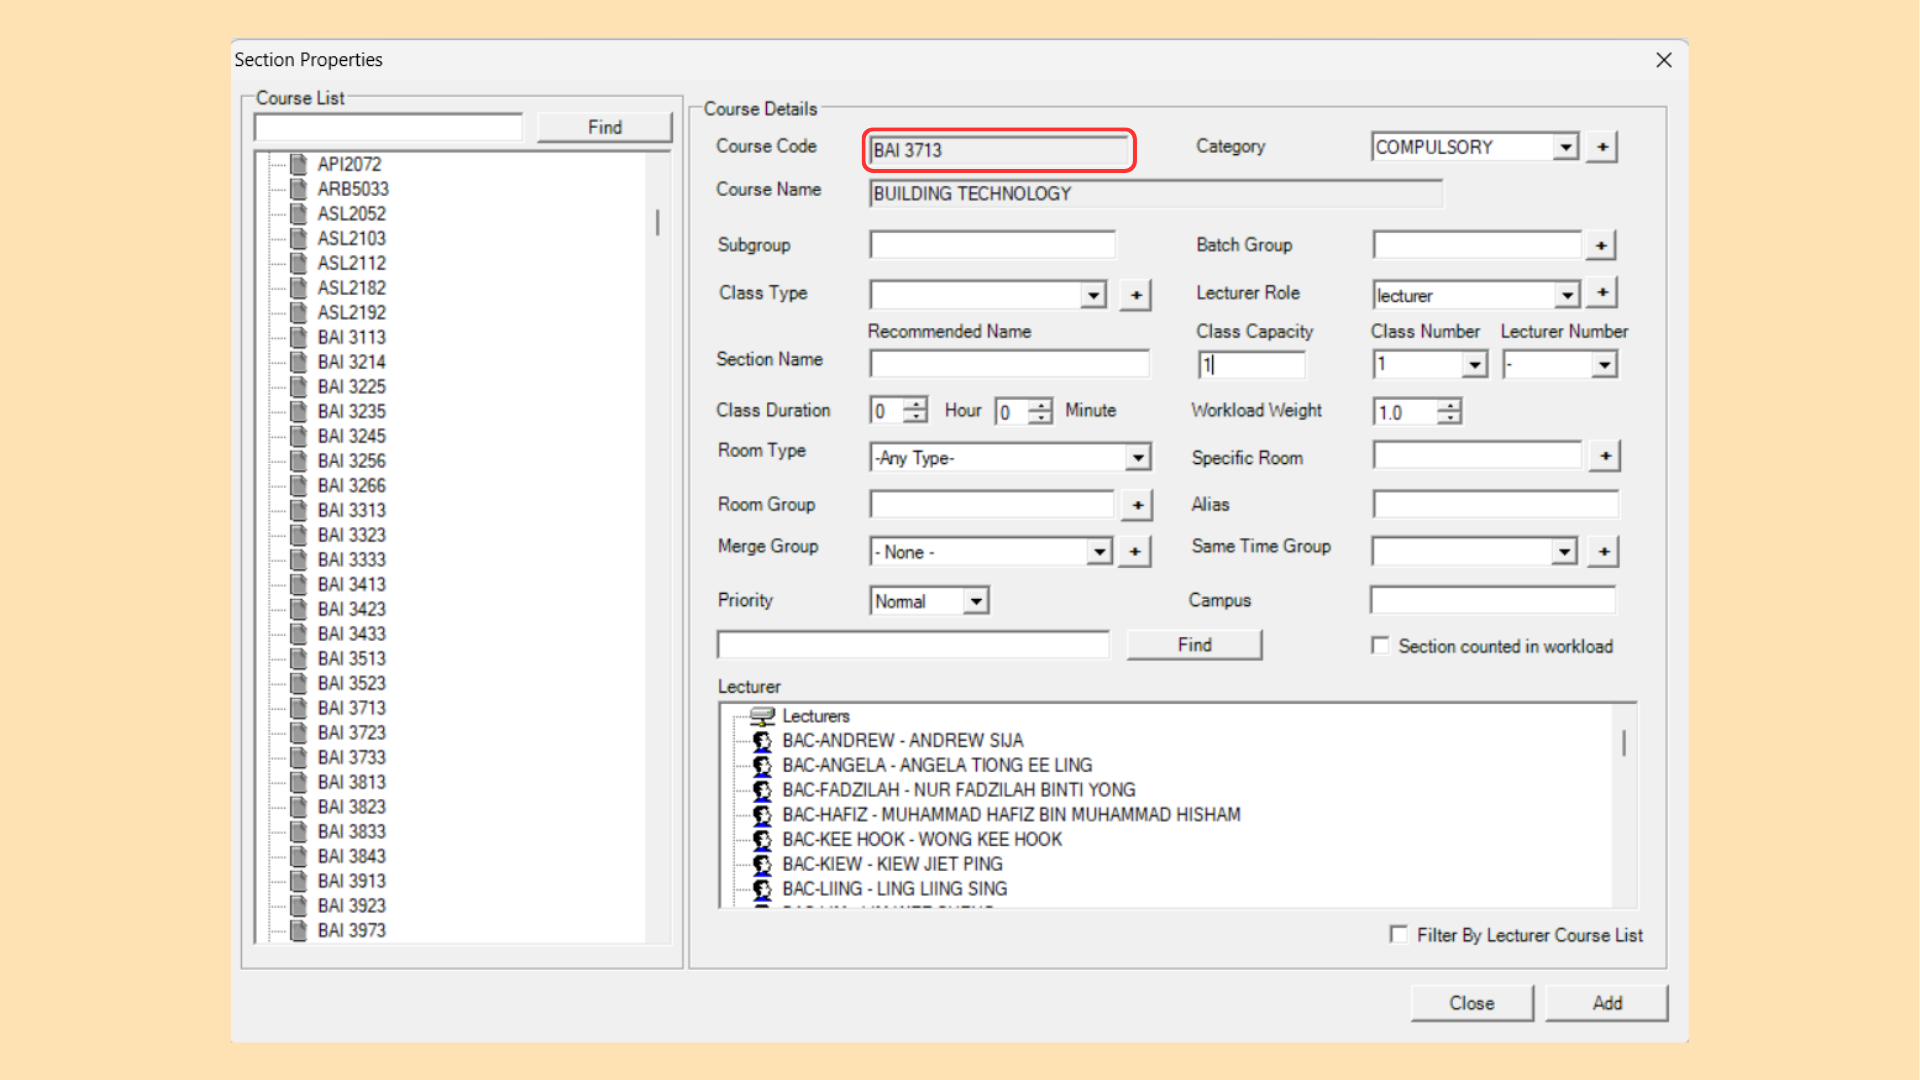
Category: Type of subject (e.g Core, Compulsory, Elective).
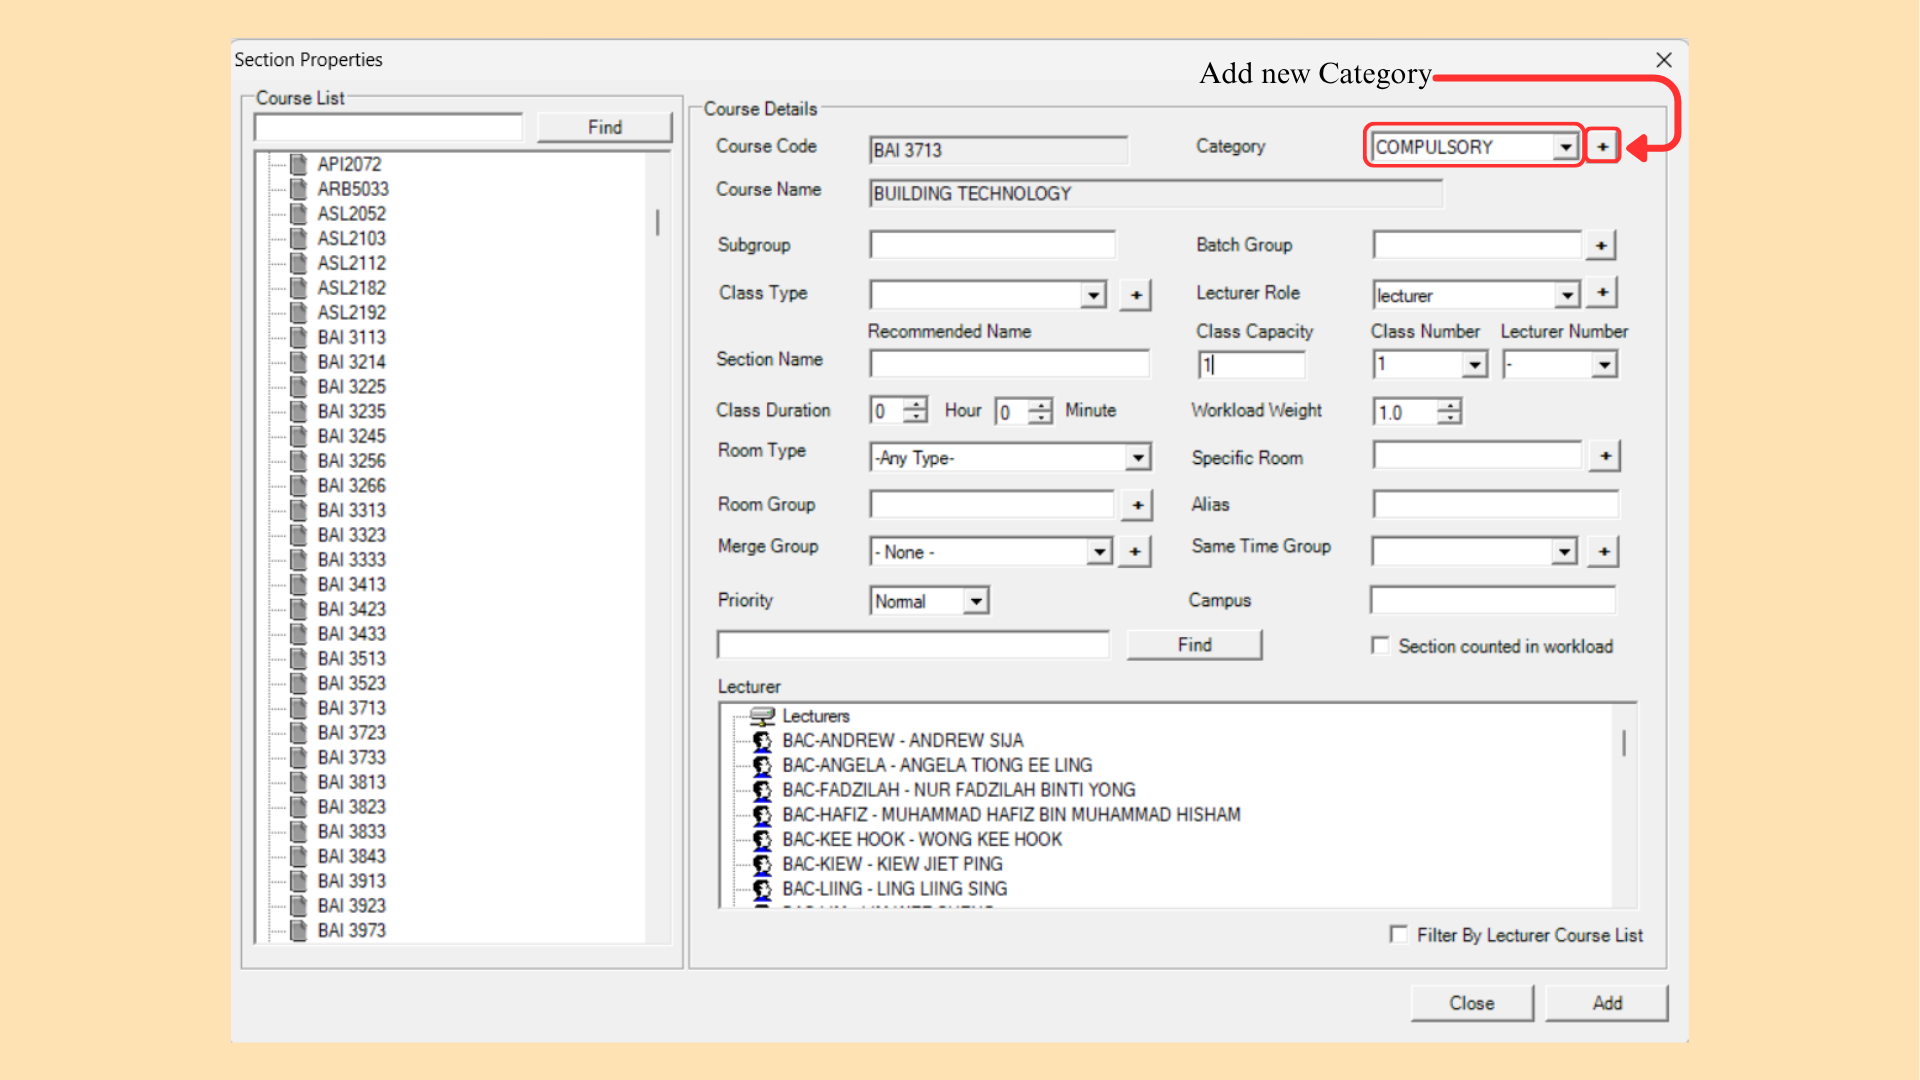
Category Management: User will be able to edit or delete Category on Category Management. User also able to Import directly from E-Campus platform or add new one through the software.
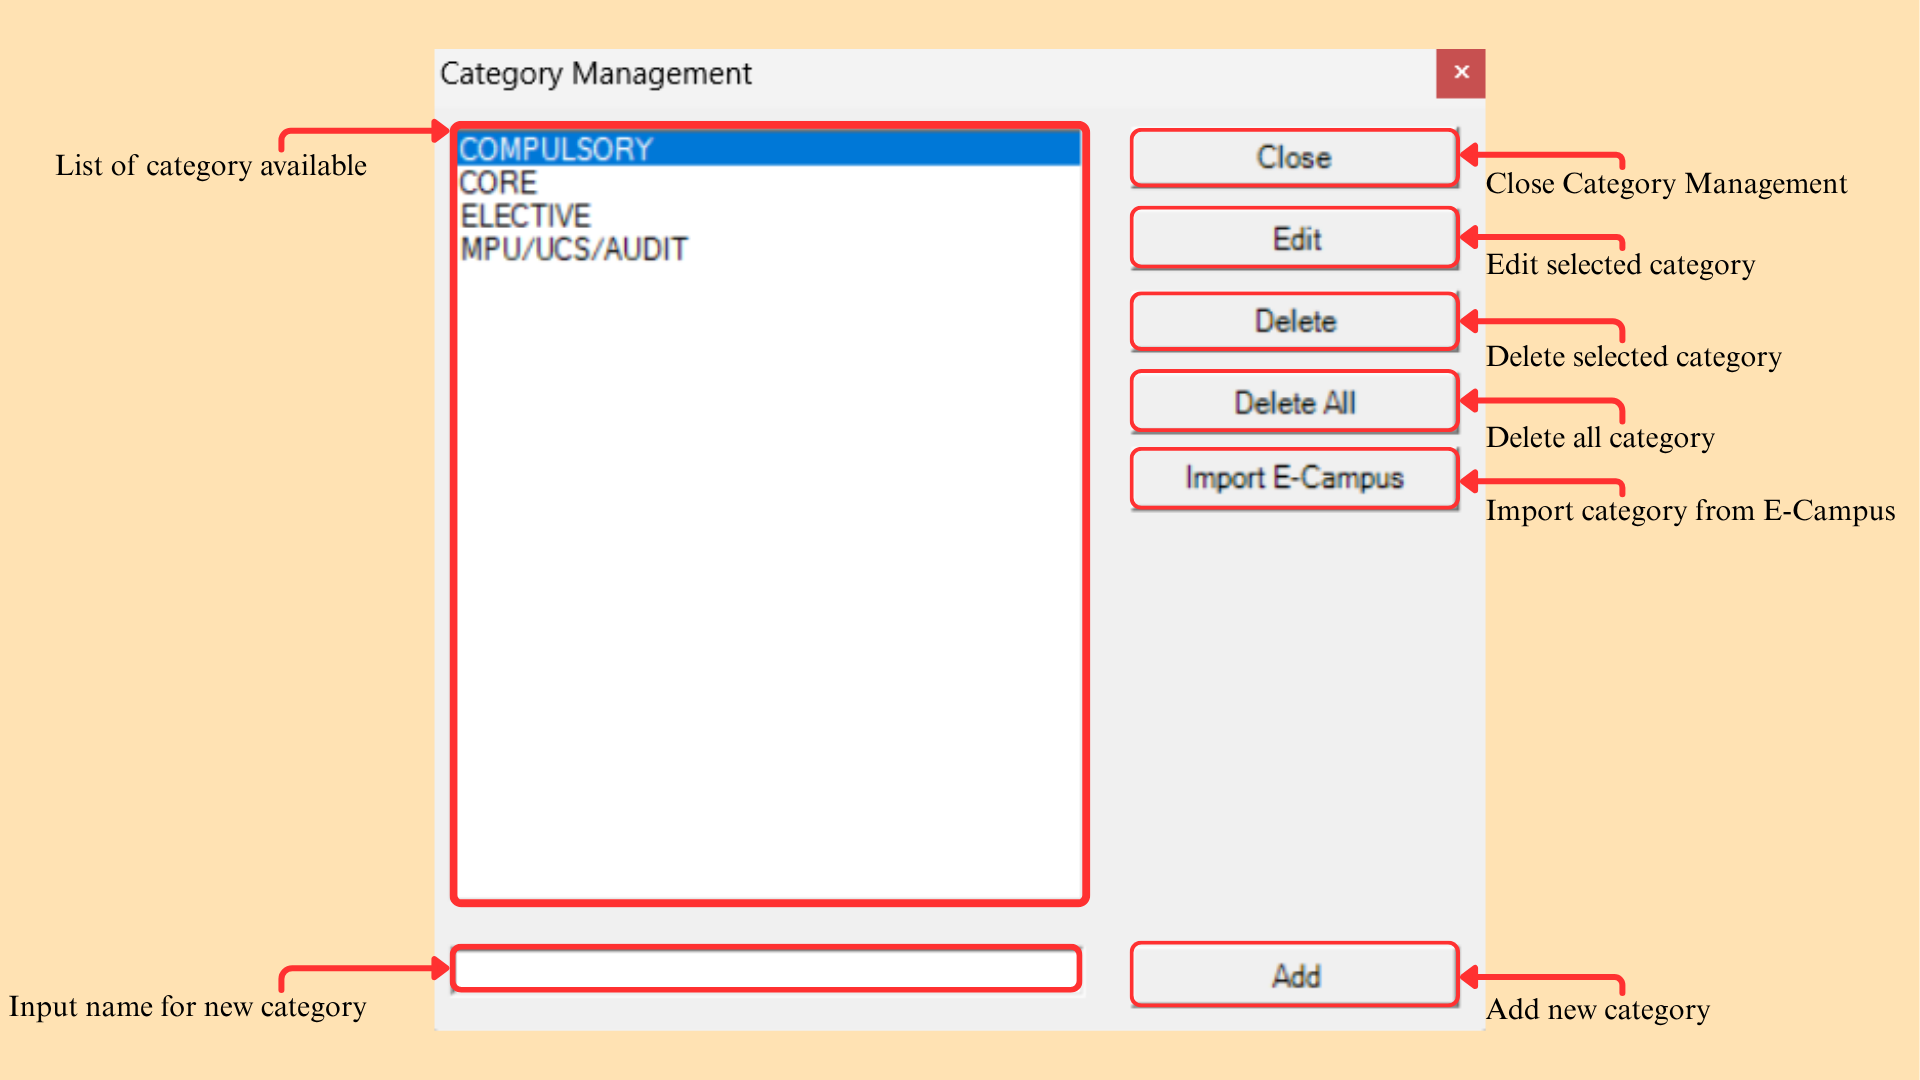
| Function | Description |
|---|---|
| List of category available | Shows every category currently defined. |
| Input name for new category | Type the name of the category to be added. |
| Add | Adds the new category. |
| Edit | Edits the selected category. |
| Delete | Deletes the selected category. |
| Delete All | Deletes all categories. |
| Import E-Campus | Imports the categories from E-Campus. |
| Close | Closes Category Management. |
Table 7.1: Category Management Functions
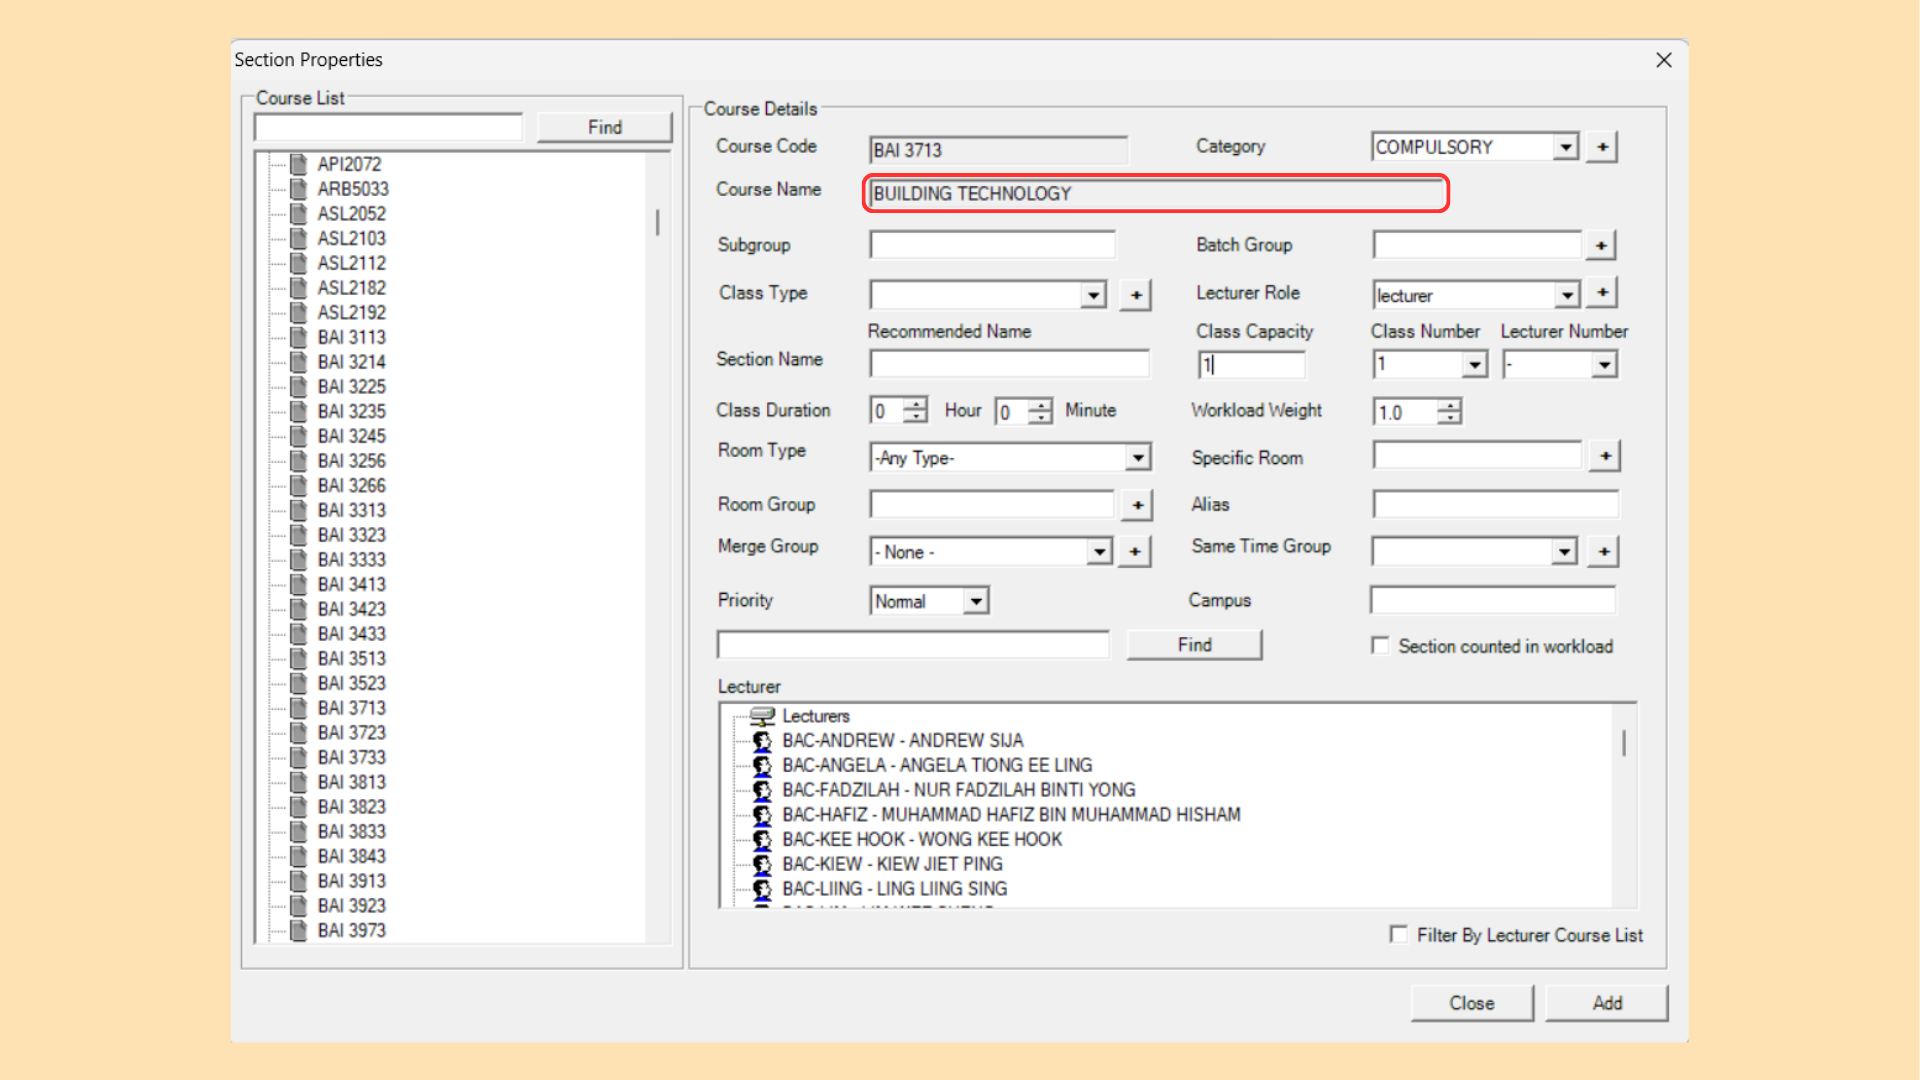
Course Name: Name of courses attached with unique course code.
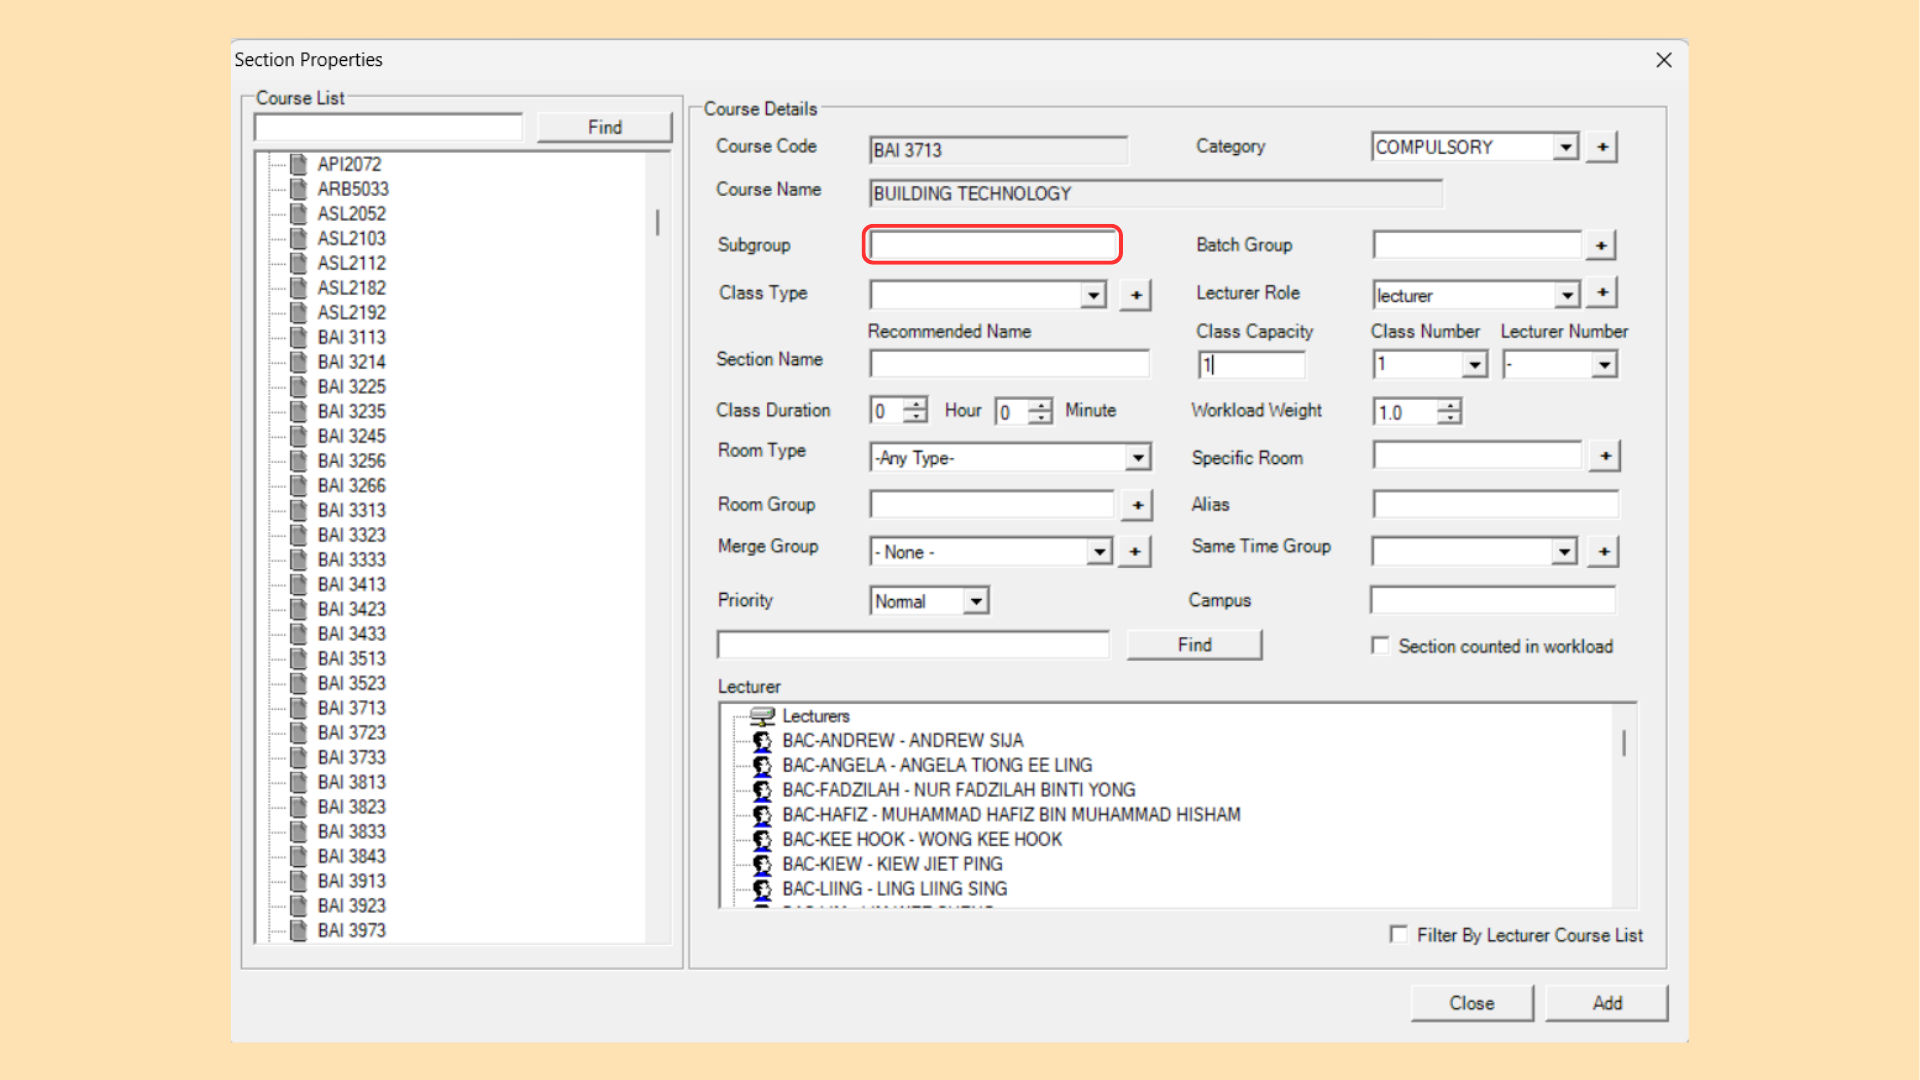
Subgroup: Group name according to how many group with same class.
Batch Group: Group of students assigned to the class.
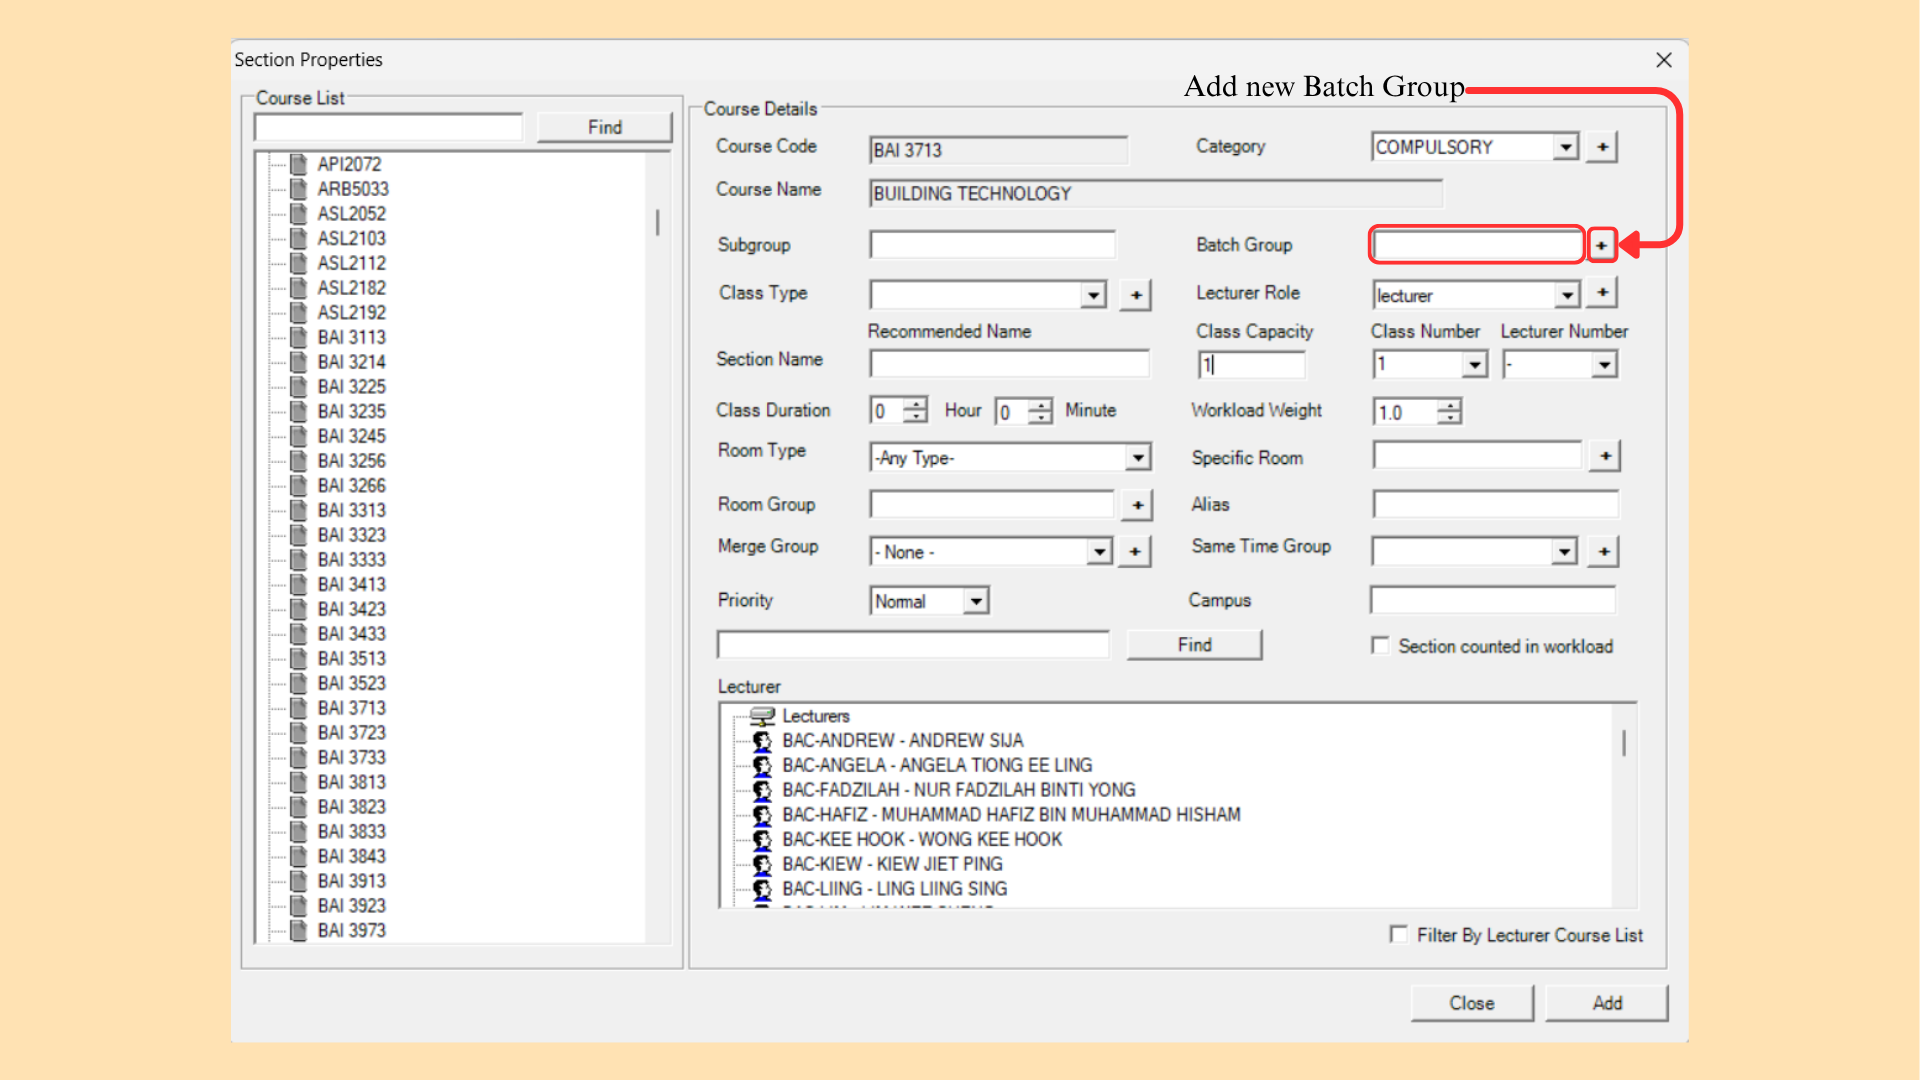
Batch Group Management: User will be able to Select/Unselect batch group that is associated with the course. User also able to create new Batch Group on Batch Group Management and have option to select it for the course or not.
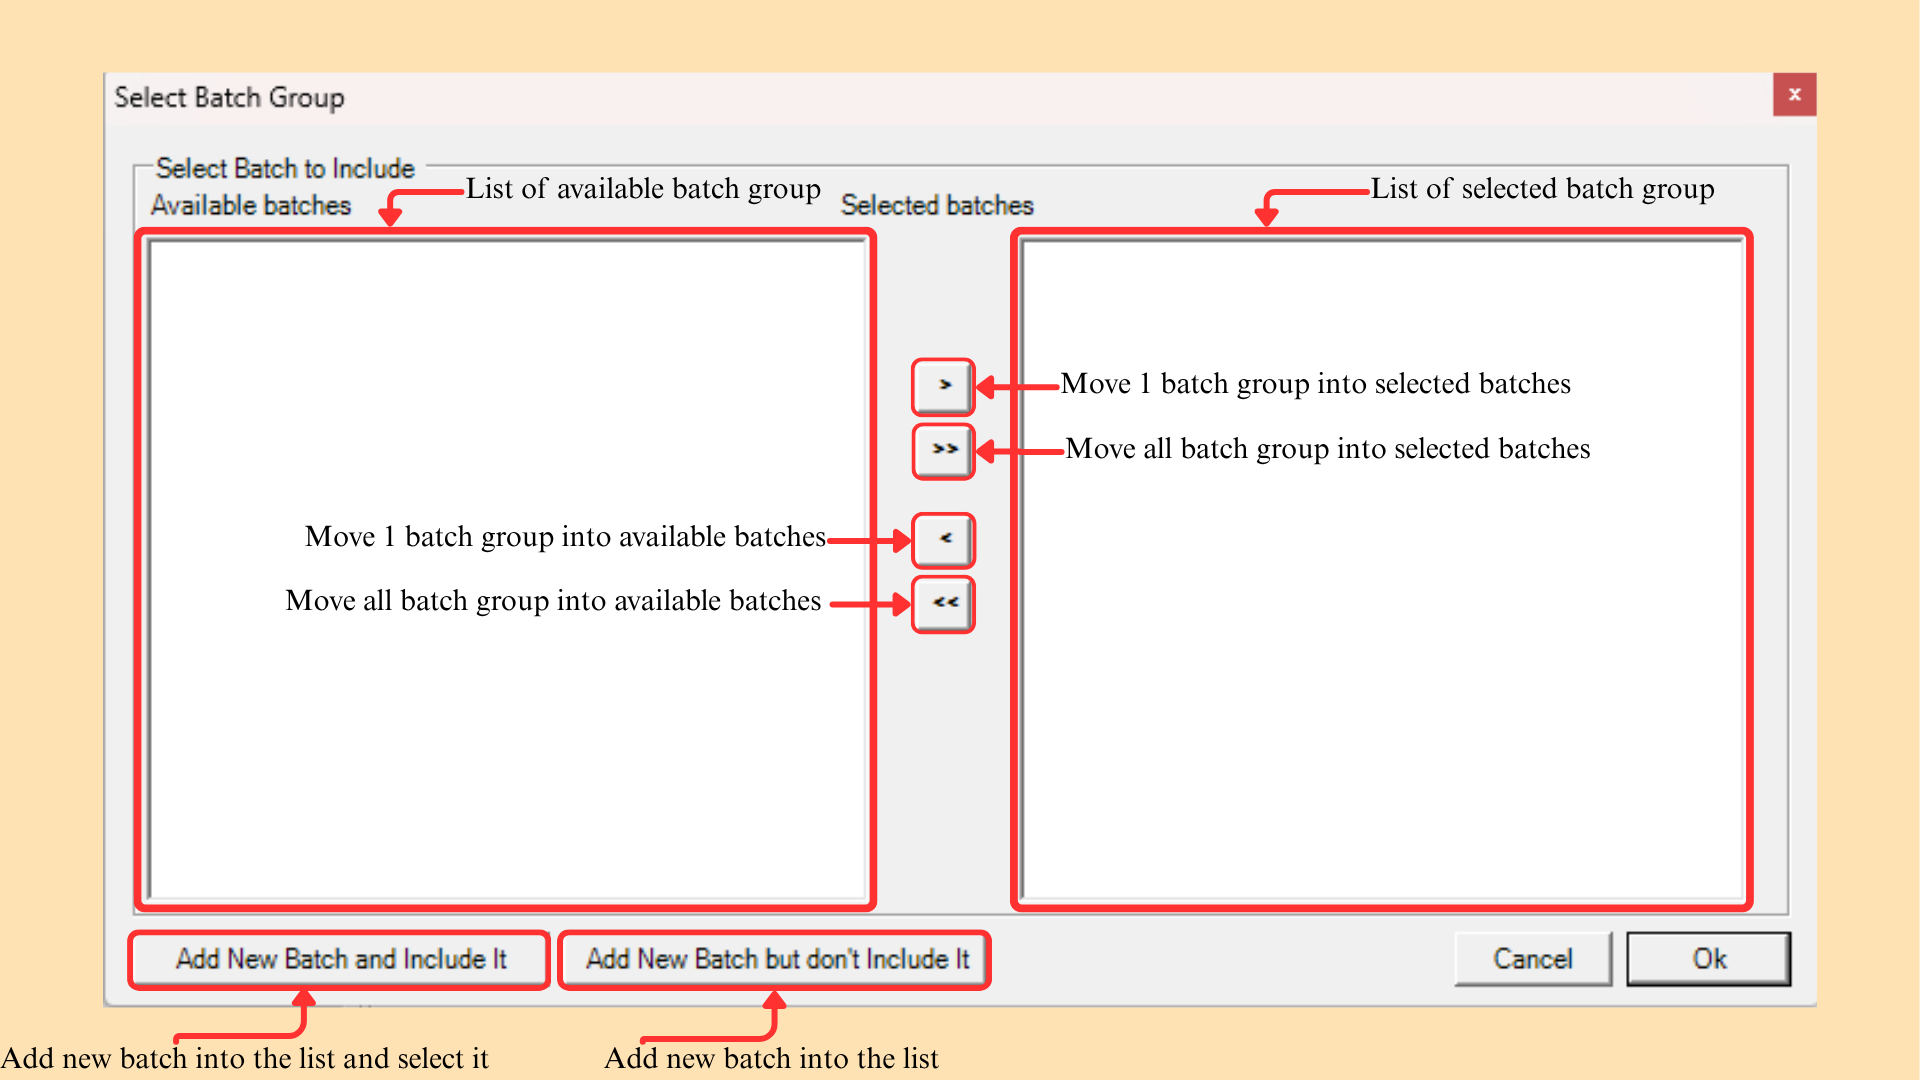
| Function | Description |
|---|---|
| Available batches | List of available batch groups. |
| Selected batches | List of selected batch groups. |
| > | Moves one batch group into Selected batches. |
| >> | Moves all batch groups into Selected batches. |
| < | Moves one batch group back into Available batches. |
| << | Moves all batch groups back into Available batches. |
| Add New Batch and Include It | Adds a new batch into the list and selects it. |
| Add New Batch but don’t Include It | Adds a new batch into the list without selecting it. |
| Ok / Cancel | Confirms or discards the selection. |
Table 7.2: Select Batch Group Functions
Class Type: Type of class (e.g Lecture, Tutorial).
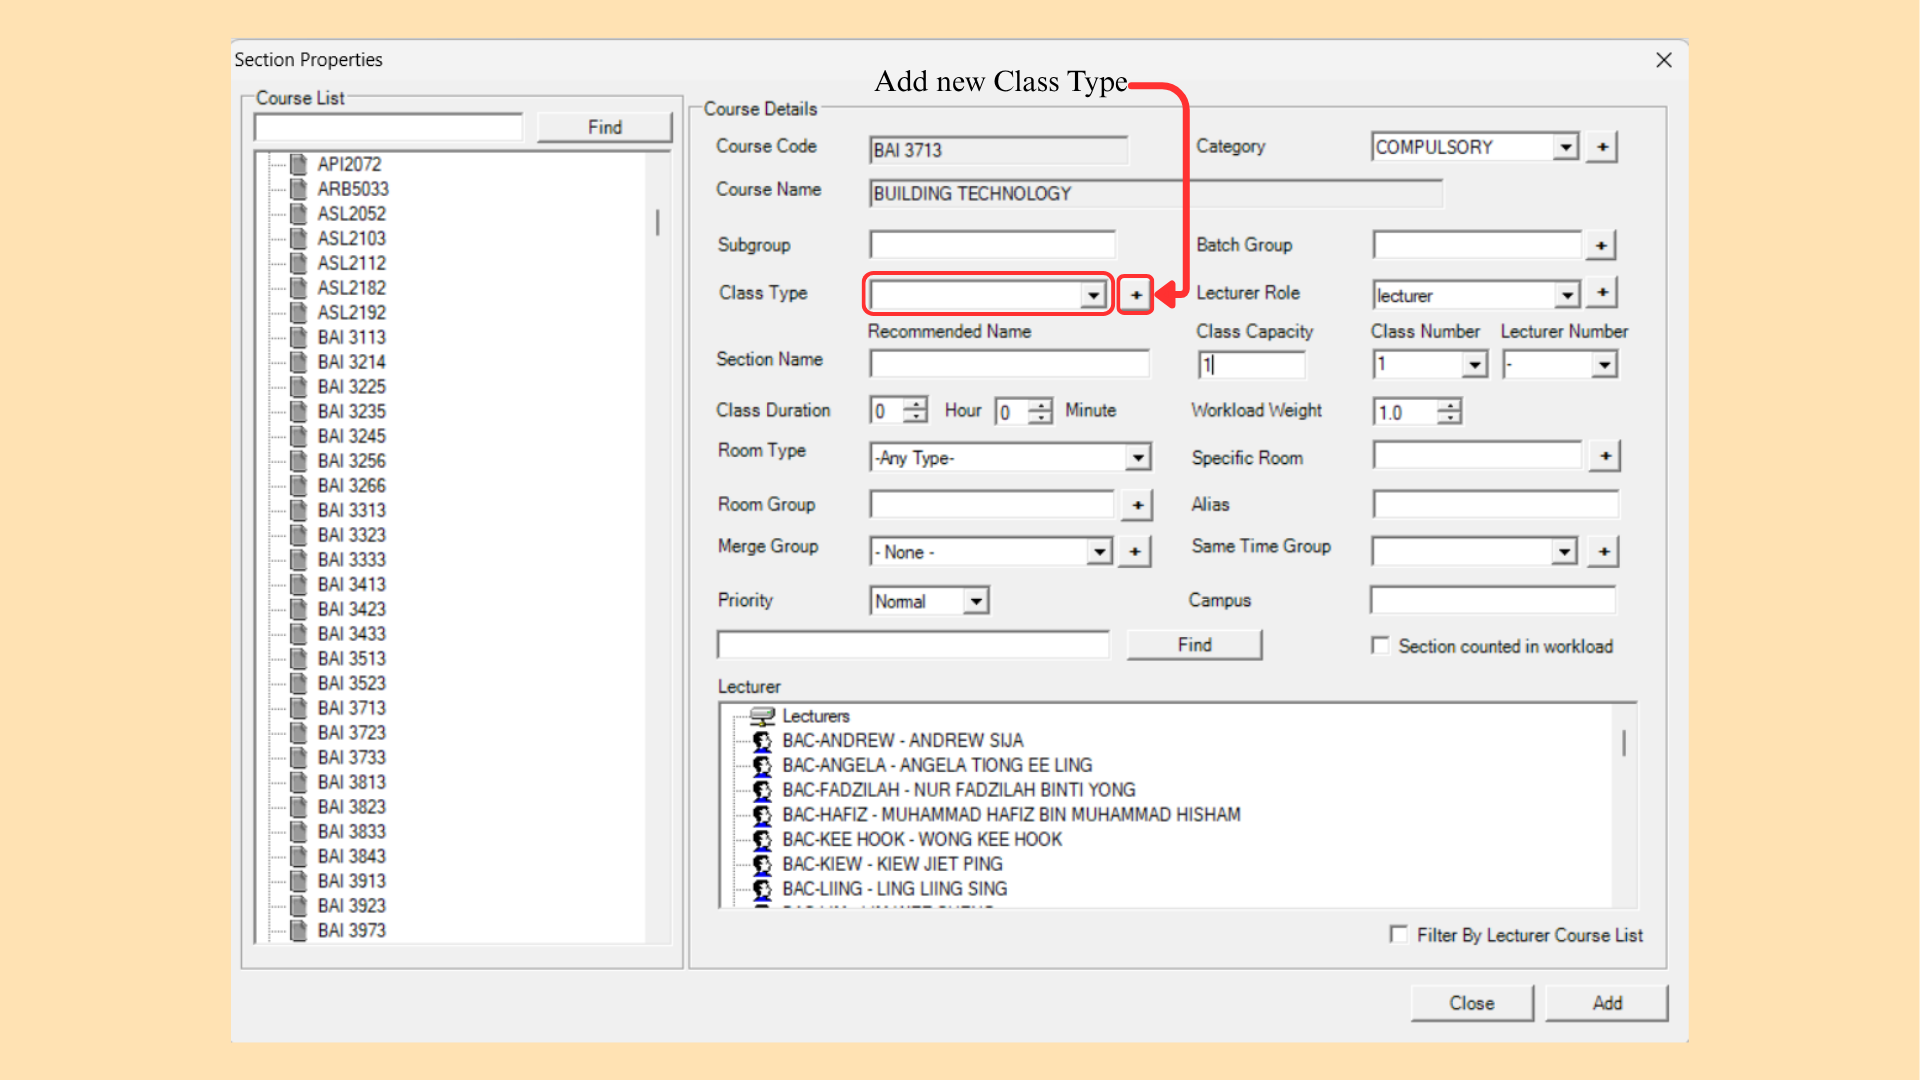
Class Type Management: User will be able to edit or delete Class Type on Class Type Management. User able to import the list from TDAT (timetable) file or import directly from E-Campus platform. User also able to export the database as CSV file.
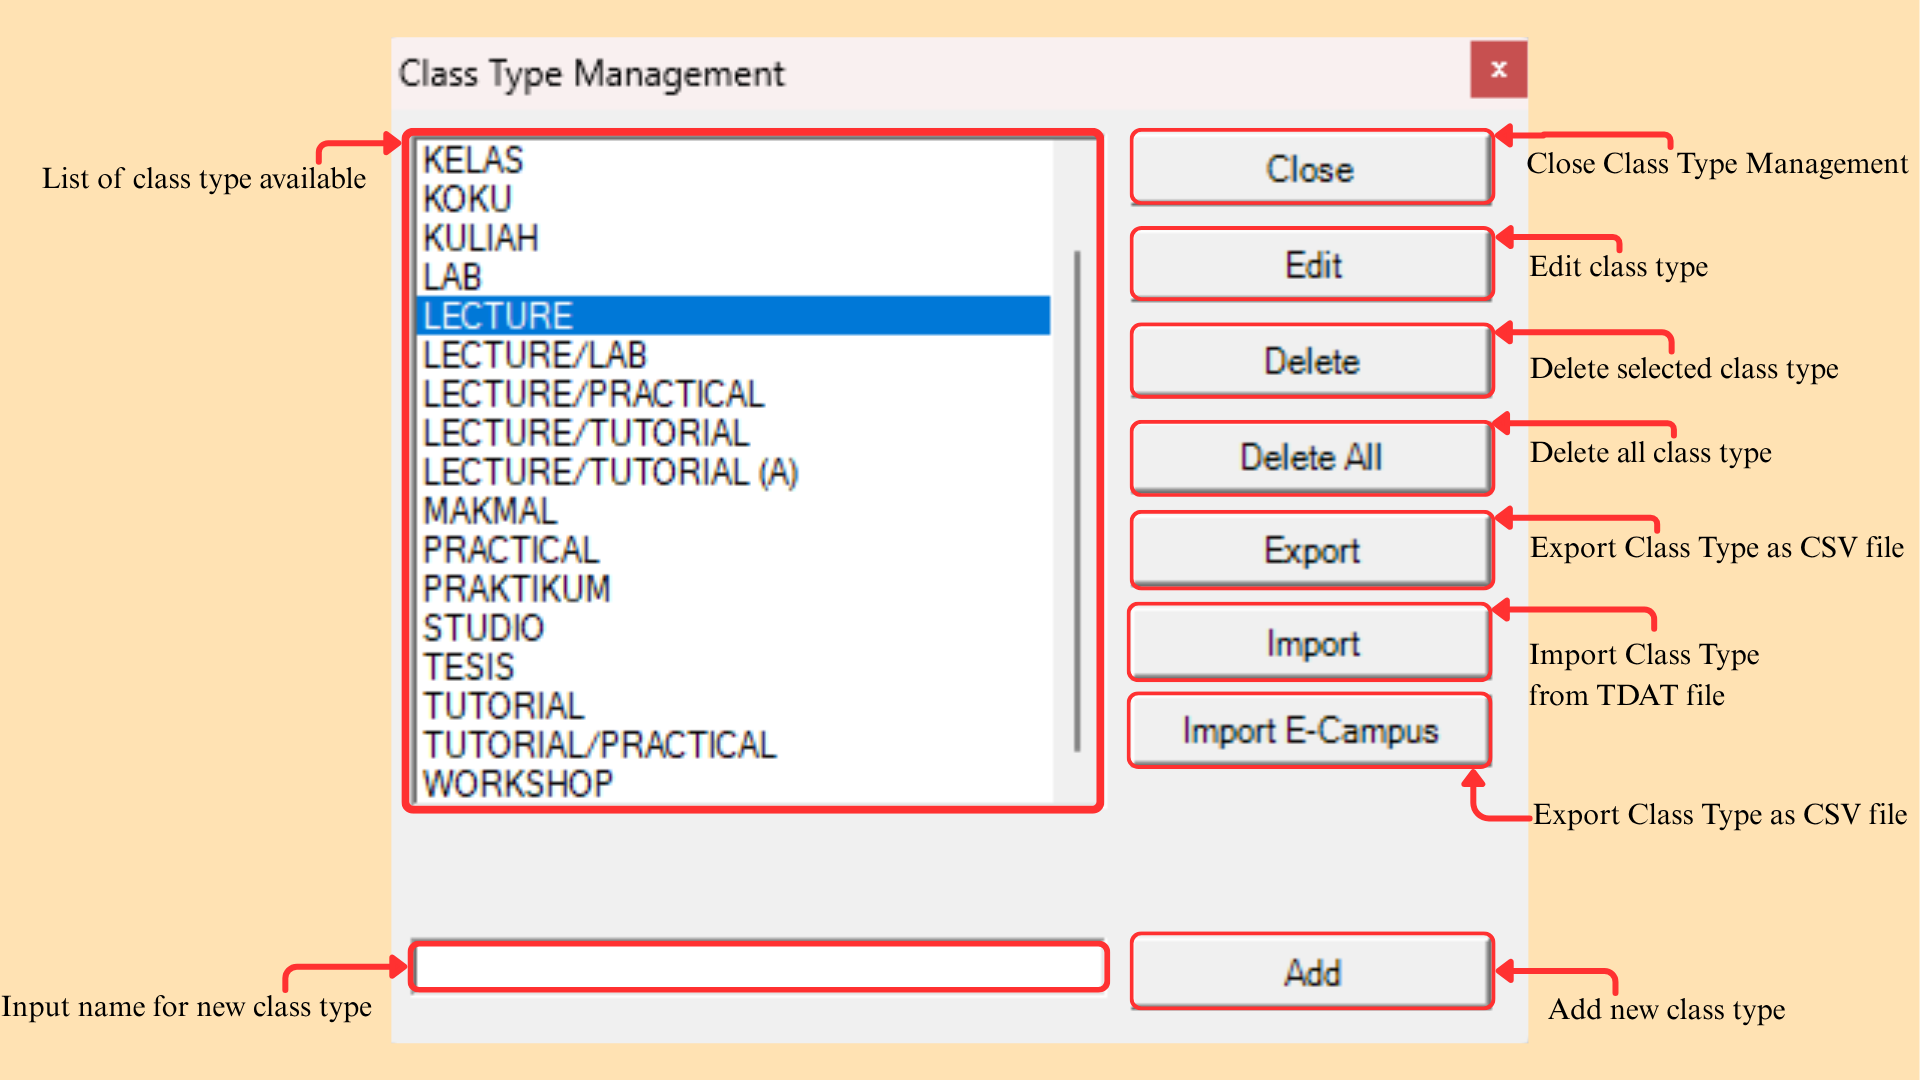
| Function | Description |
|---|---|
| List of class type available | Shows every class type currently defined. |
| Input name for new class type | Type the name of the class type to be added. |
| Add | Adds the new class type. |
| Edit | Edits the selected class type. |
| Delete | Deletes the selected class type. |
| Delete All | Deletes all class types. |
| Export | Exports the class types as a CSV file. |
| Import | Imports the class types from a TDAT file. |
| Import E-Campus | Imports the class types from E-Campus. |
| Close | Closes Class Type Management. |
Table 7.3: Class Type Management Functions
Lecturer Role: Identification of tutor classification (e.g Lecturer, Lab Assistant).
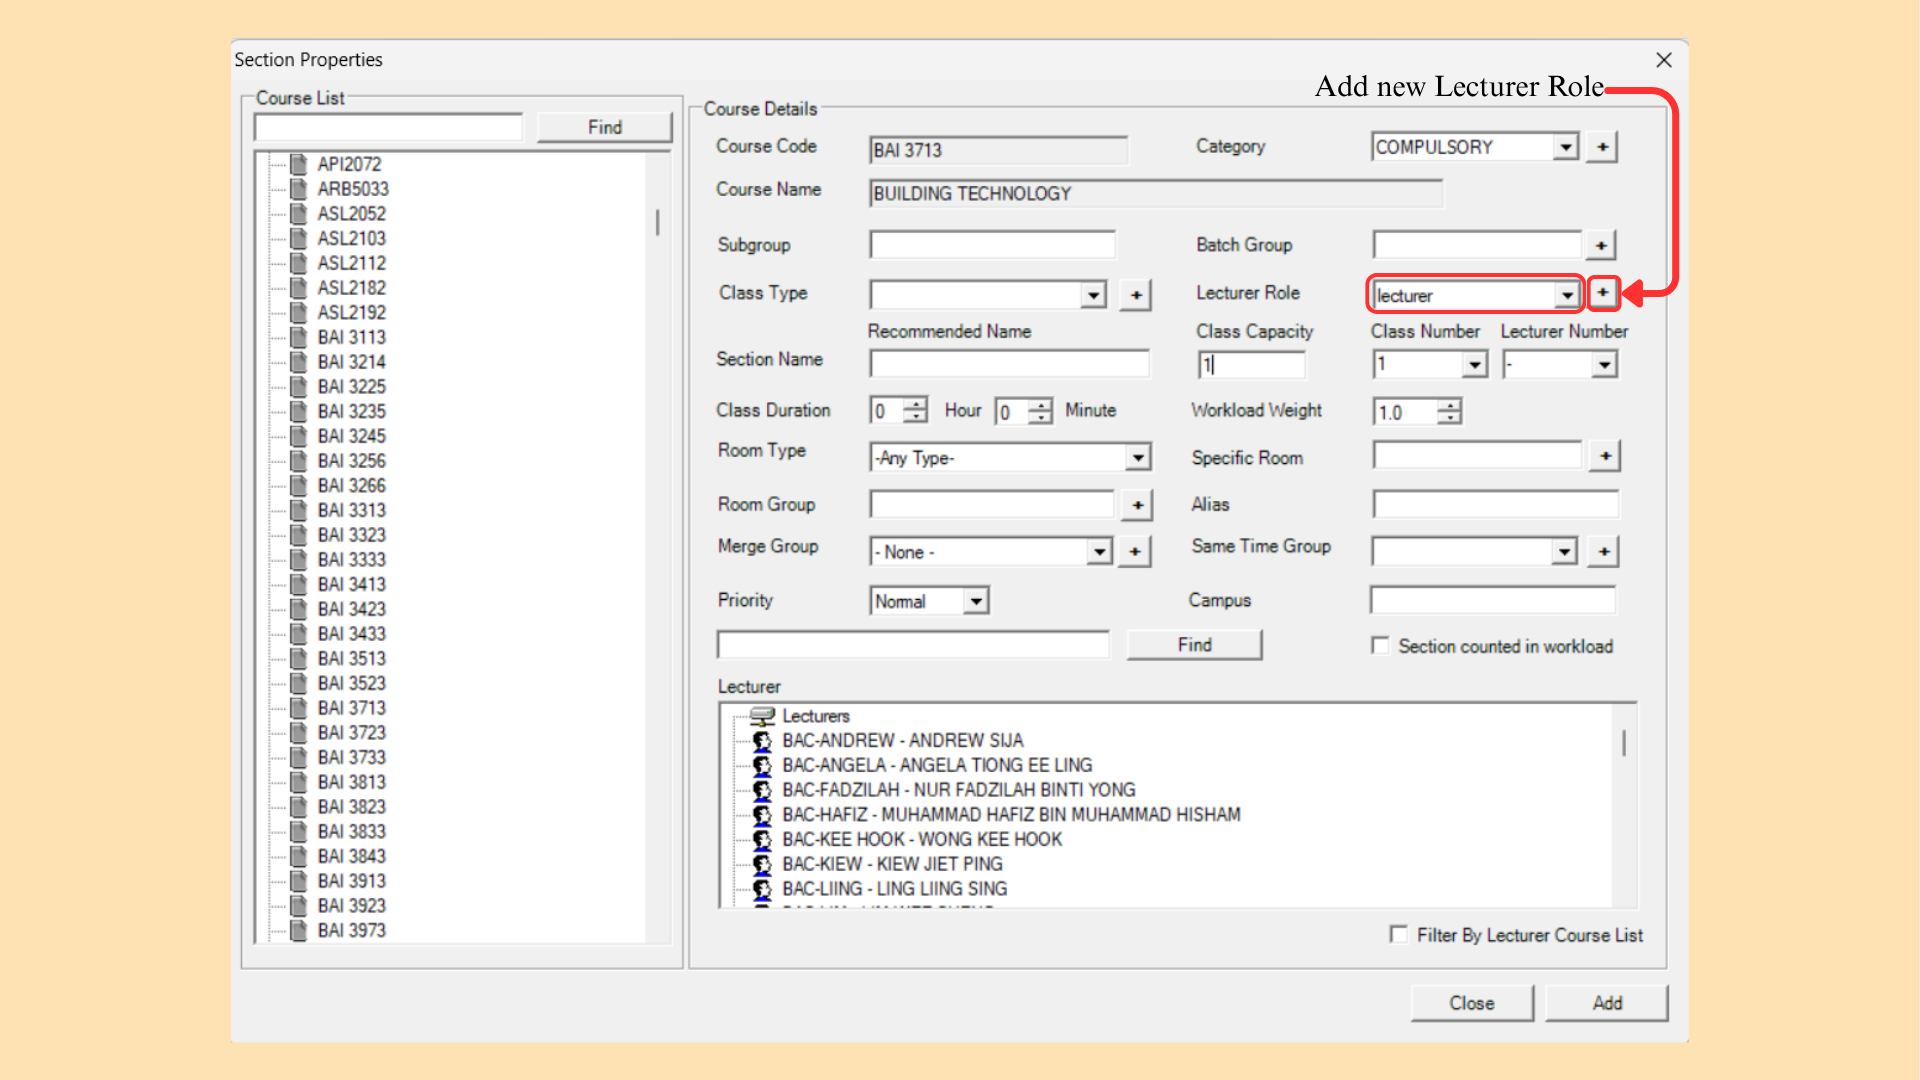
Lecturer Role Management: User will be able to edit or delete Lecturer Role on Lecturer Role Management. User also able to Import directly from E-Campus platform or add new one through the software.
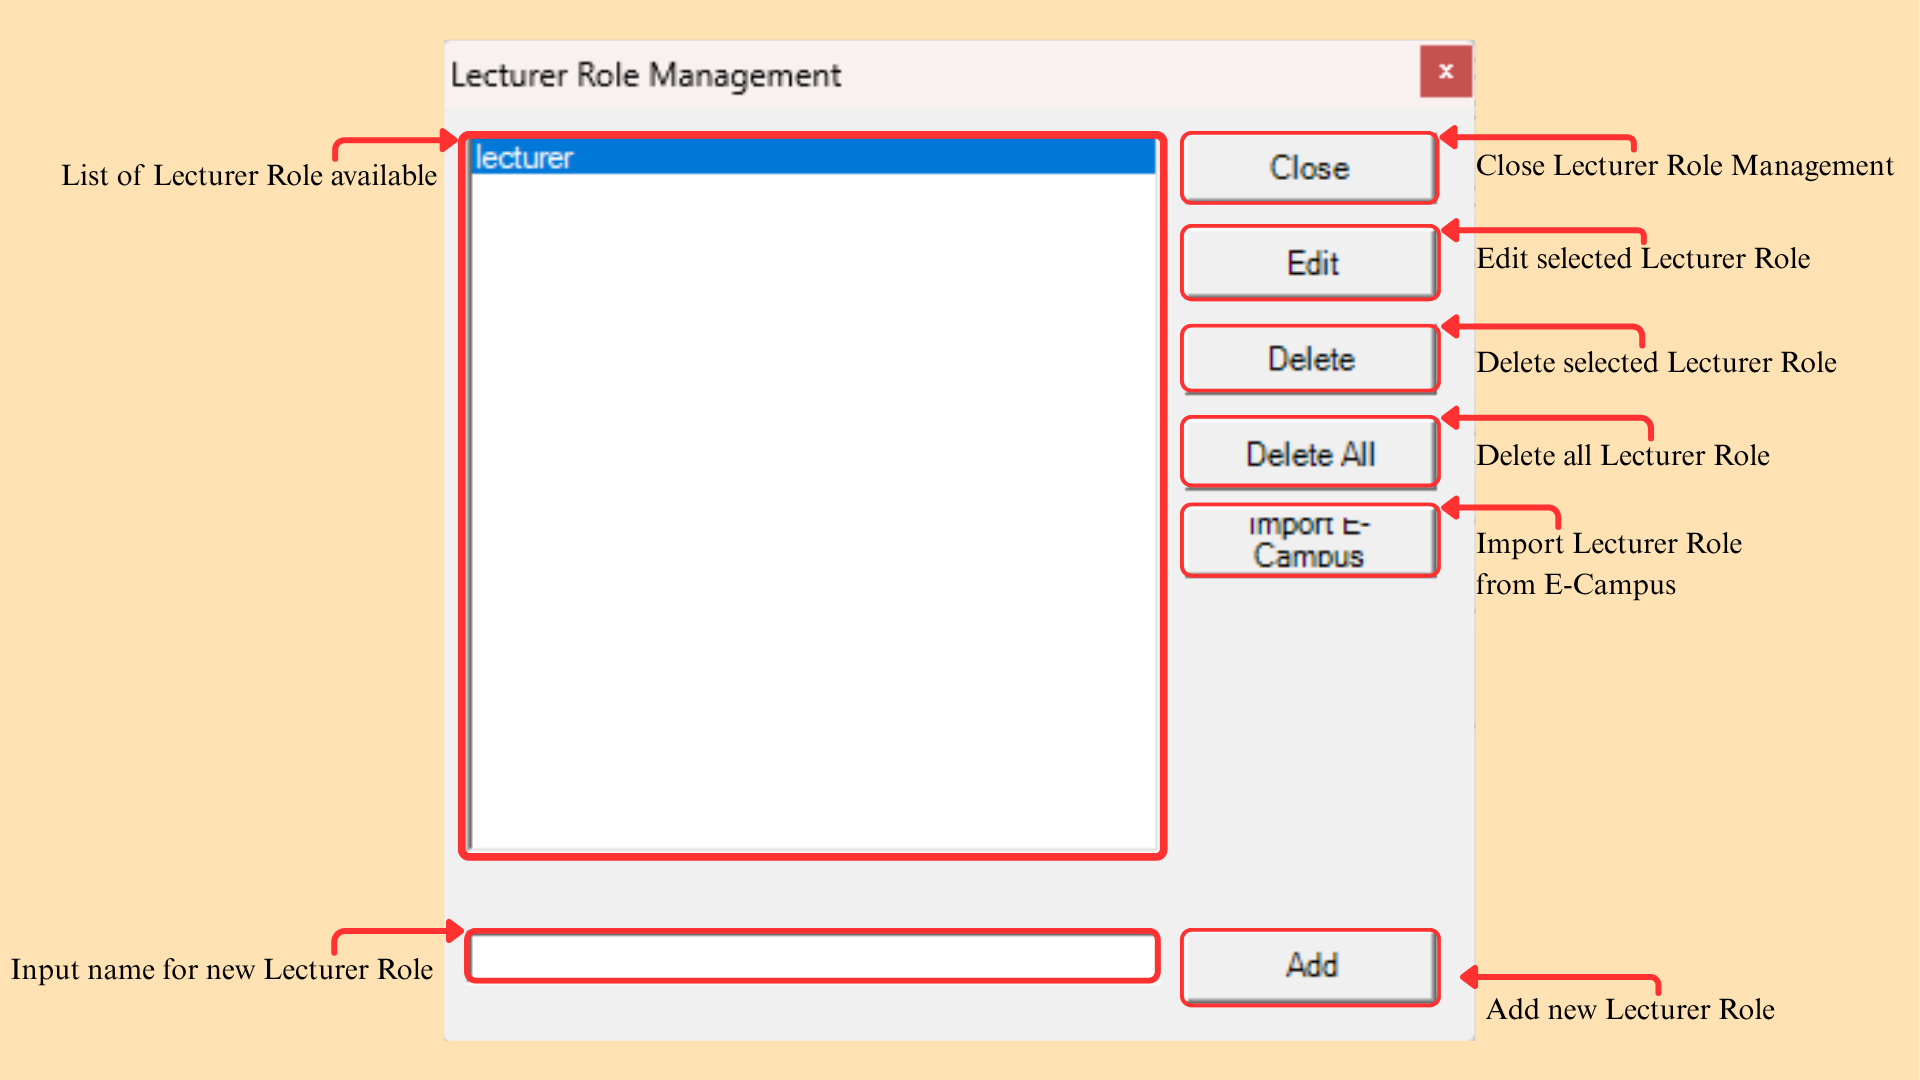
| Function | Description |
|---|---|
| List of Lecturer Role available | Shows every lecturer role currently defined. |
| Input name for new Lecturer Role | Type the name of the lecturer role to be added. |
| Add | Adds the new lecturer role. |
| Edit | Edits the selected lecturer role. |
| Delete | Deletes the selected lecturer role. |
| Delete All | Deletes all lecturer roles. |
| Import E-Campus | Imports the lecturer roles from E-Campus. |
| Close | Closes Lecturer Role Management. |
Table 7.4: Lecturer Role Management Functions
Section Name: Combination of Course Code, Course Name, Subgroup, Class Type, Class Number and Lecturer Name.
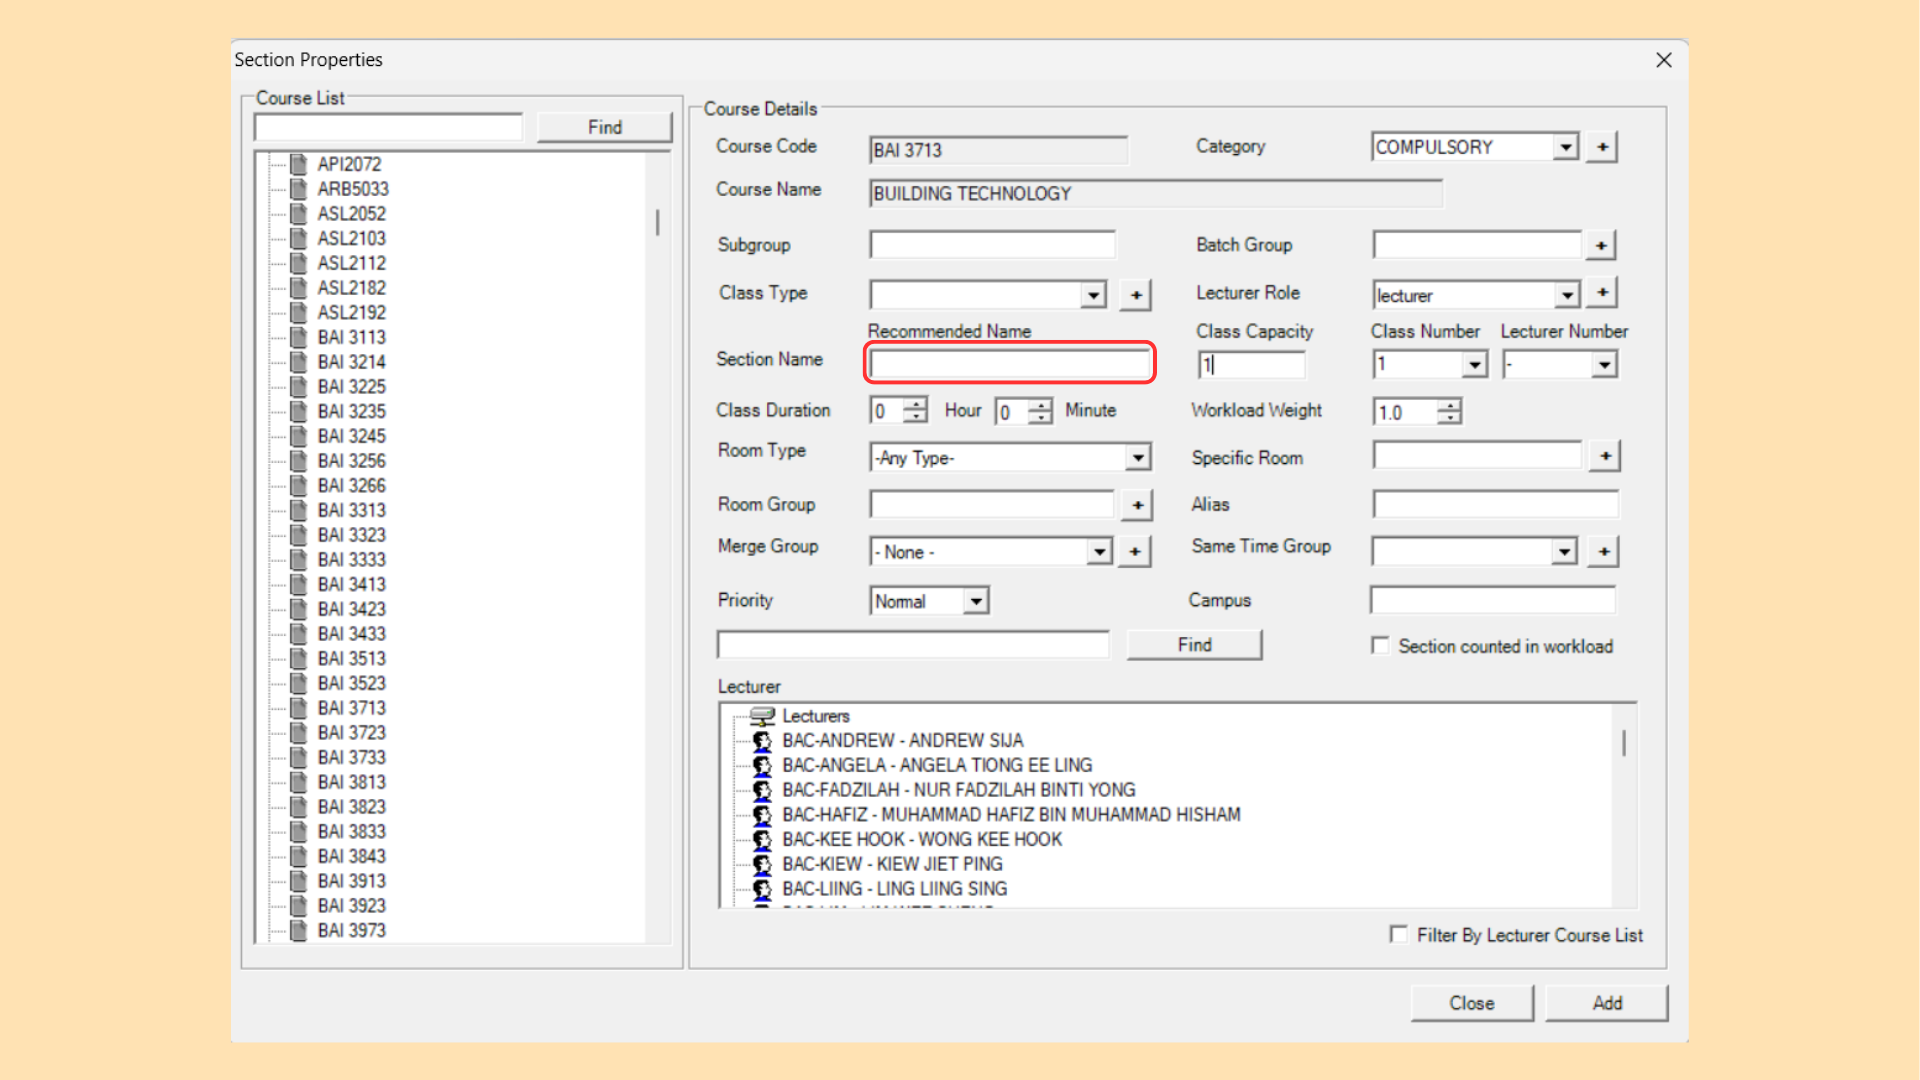
Class Capacity: Number of student for the class.
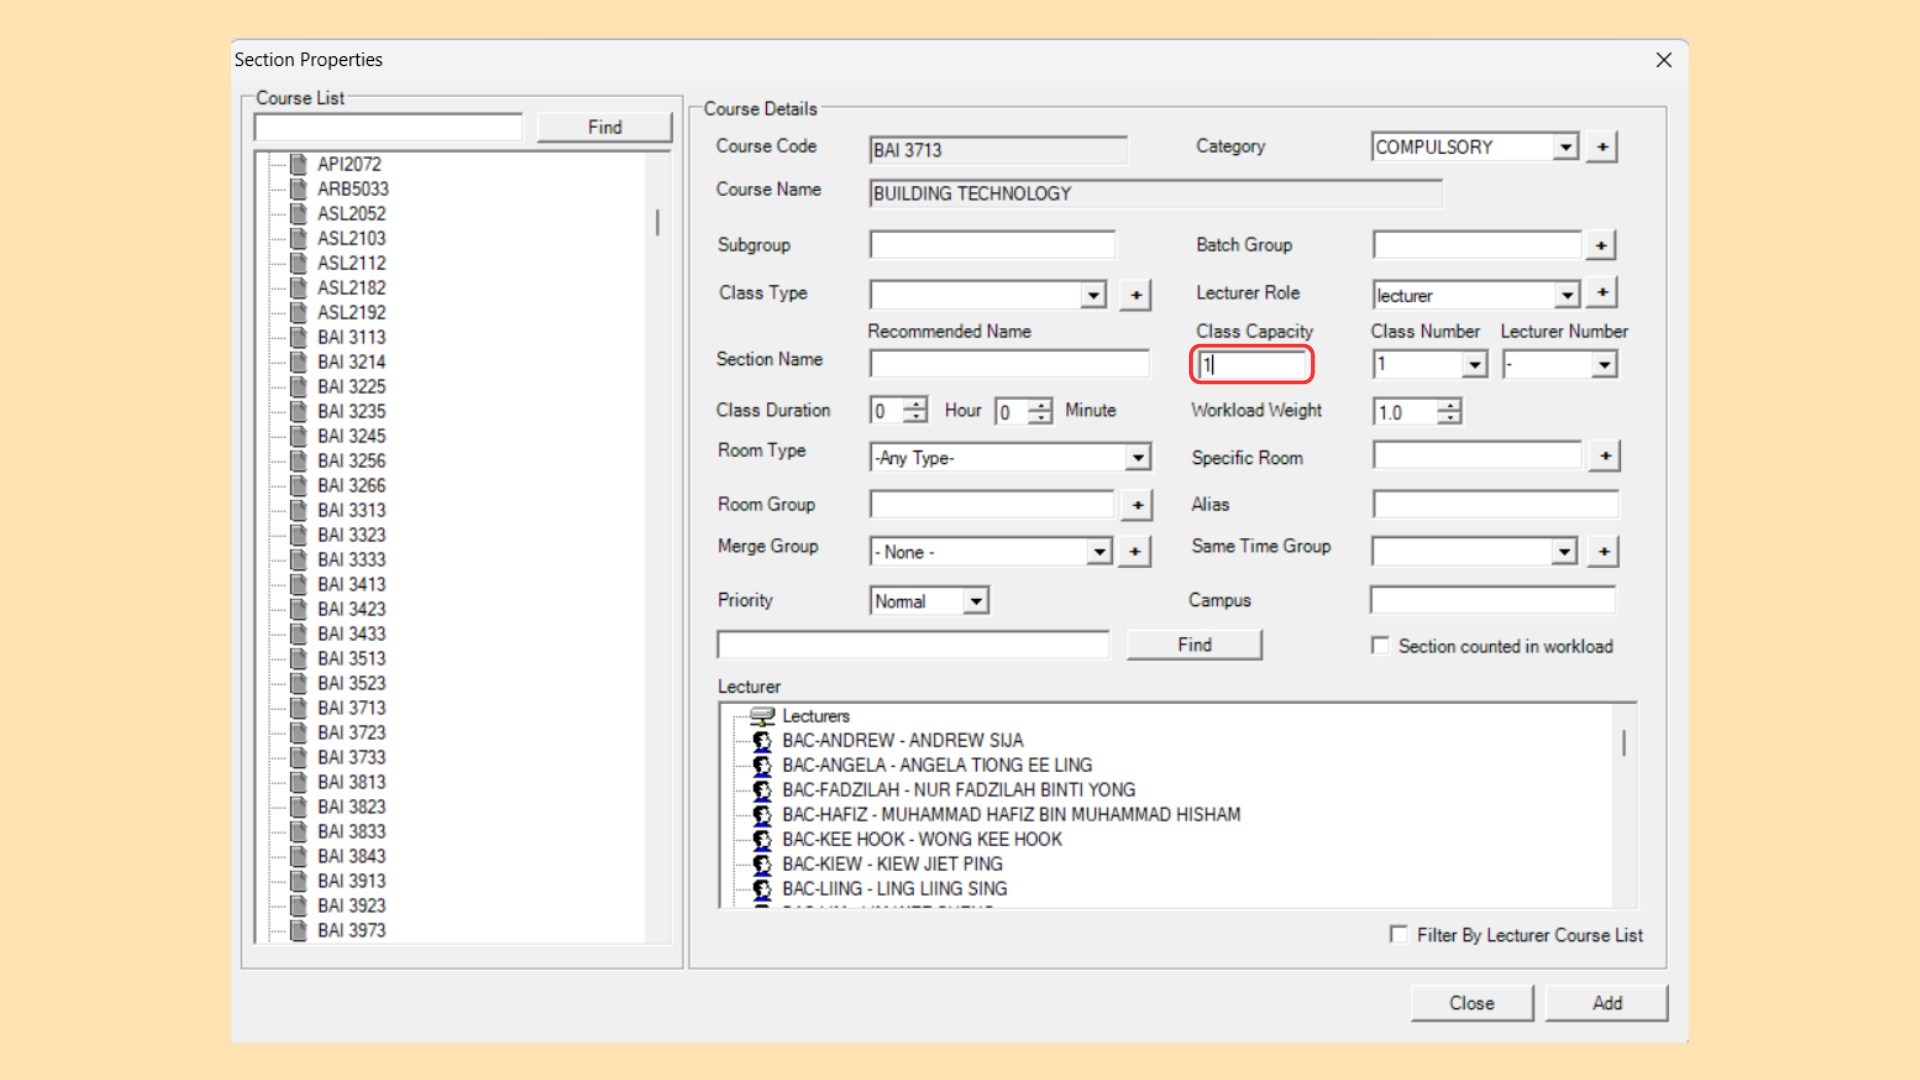
Class Number: Number of class in same subgroup.
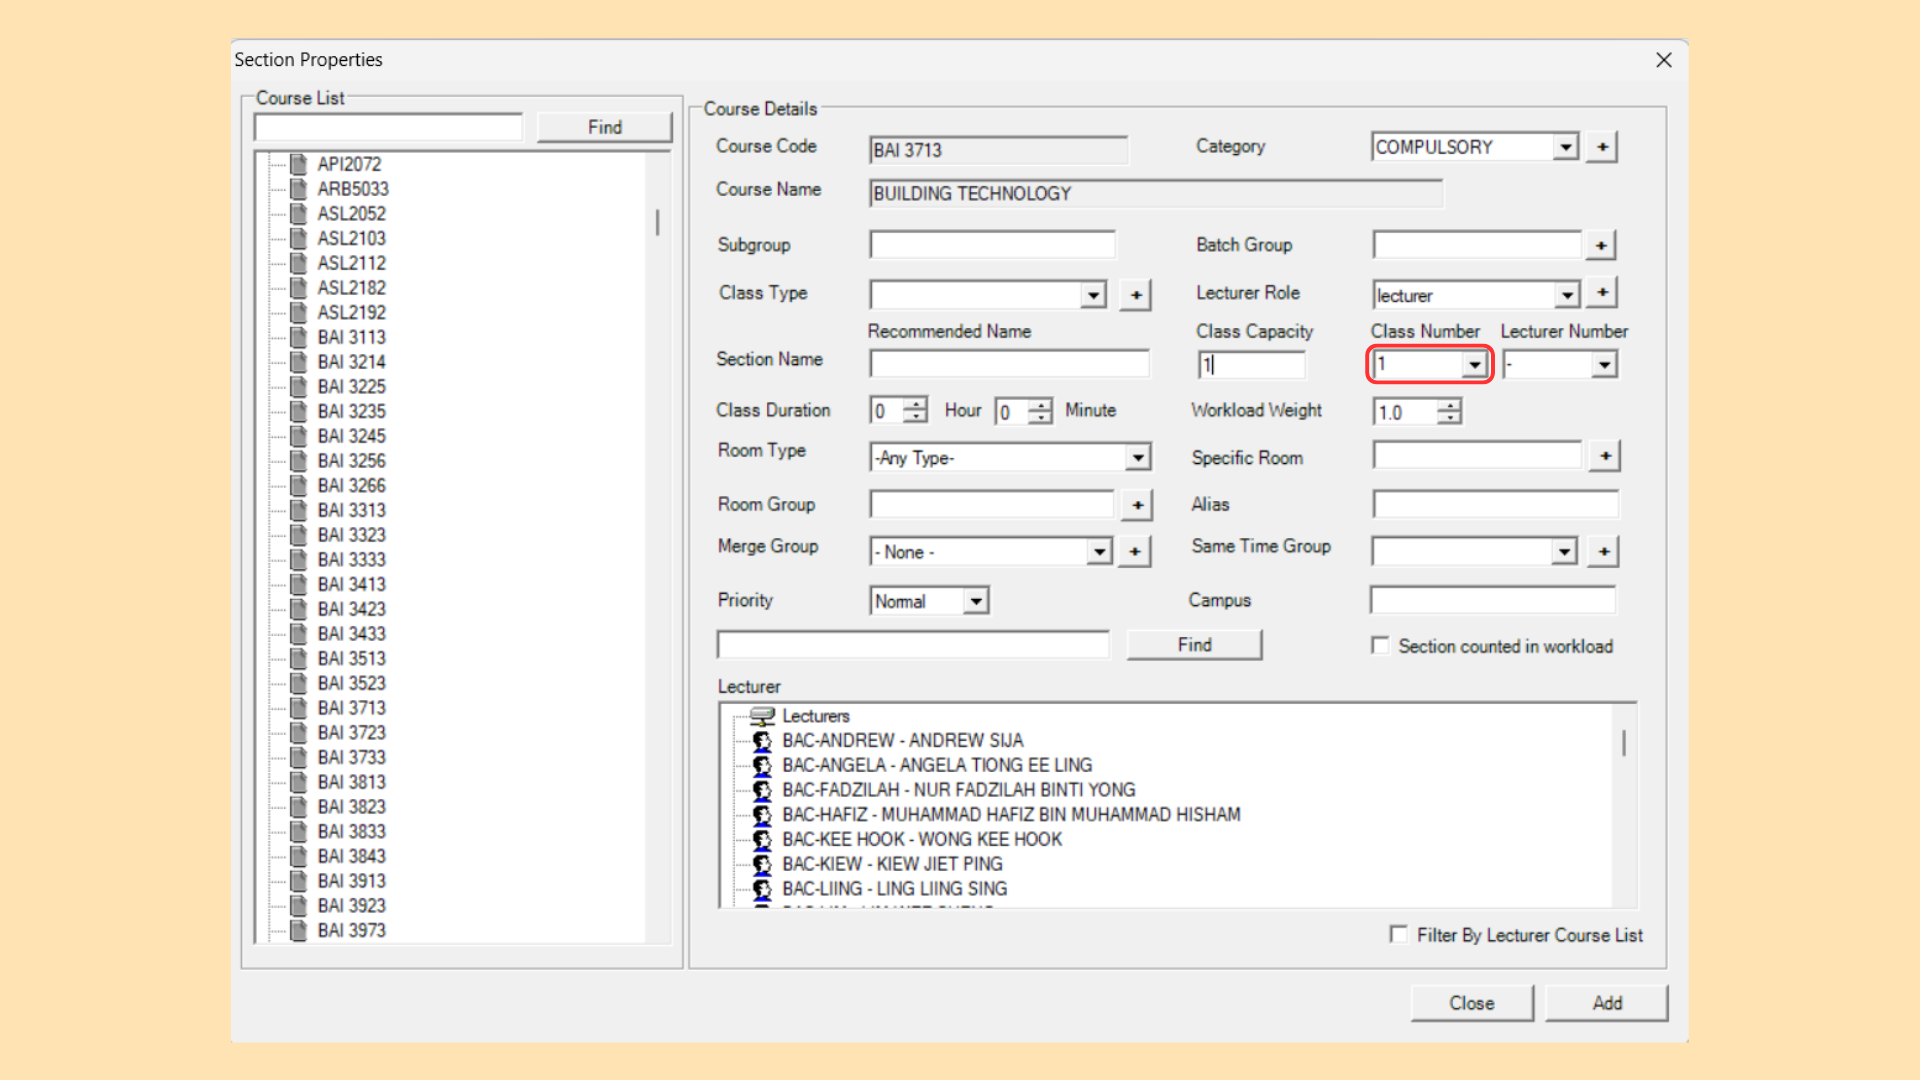
Lecturer Number: Number for the assigned lecturer of the course.
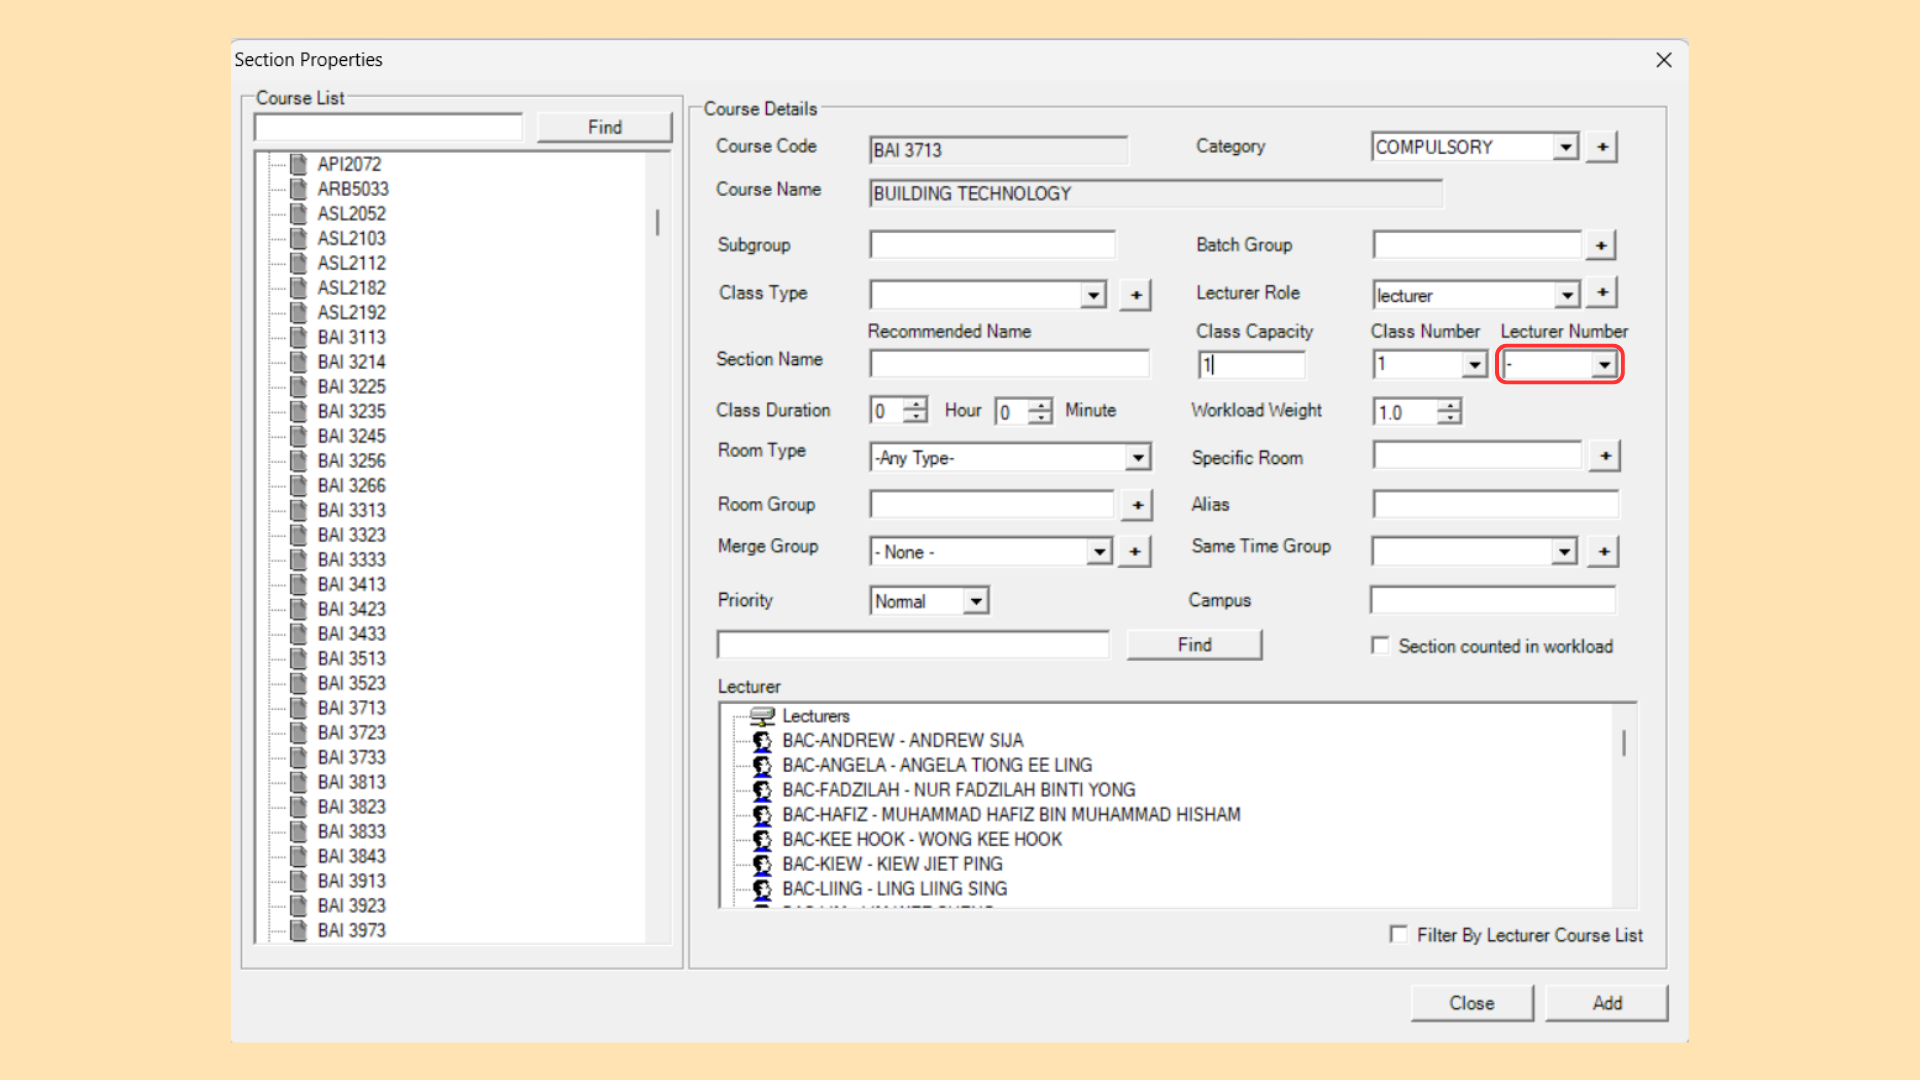
Class Duration: Time for the class, able to set the hours and minutes. The duration is entered as two separate values, Hour and Minute, each with its own spinner. Both start at 0, so a class lasting one and a half hours is entered as Hour 1 and Minute 30.
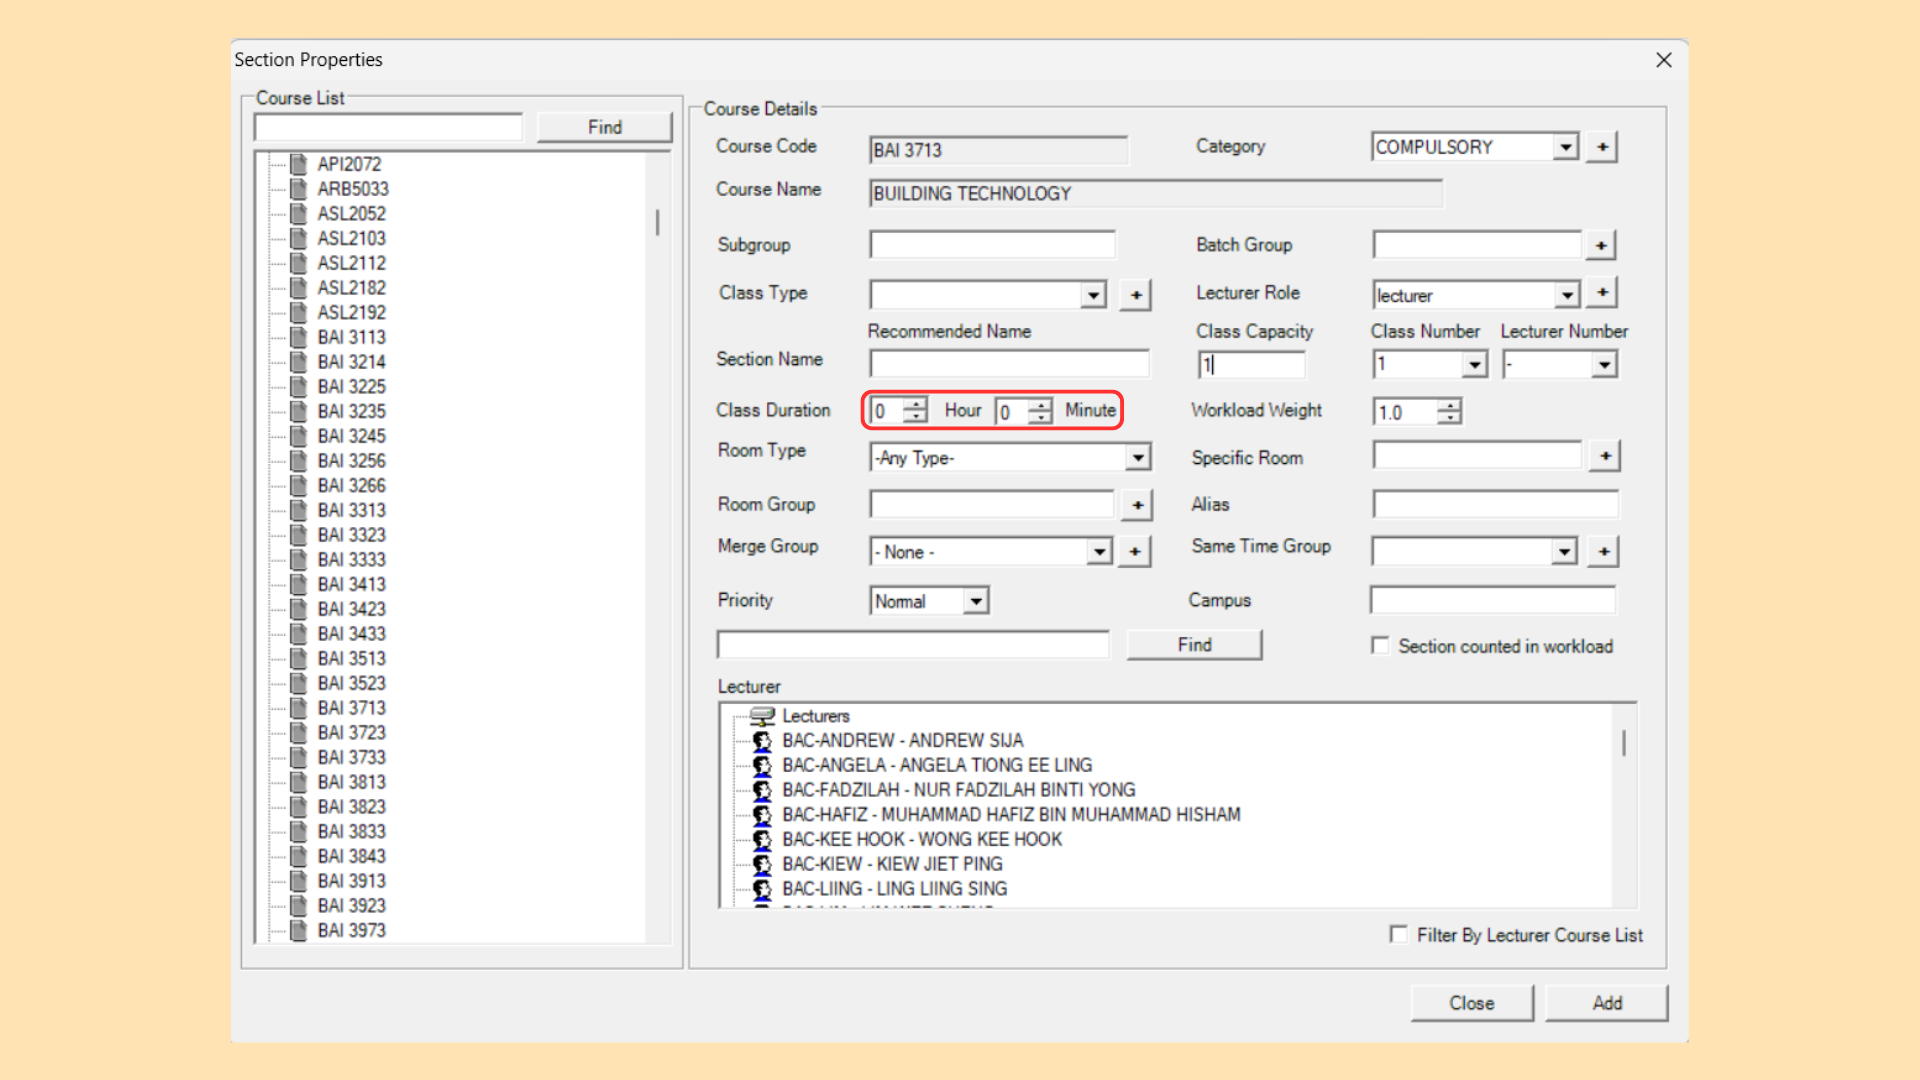
Workload Weight: Number of hours assigned to lecturers.
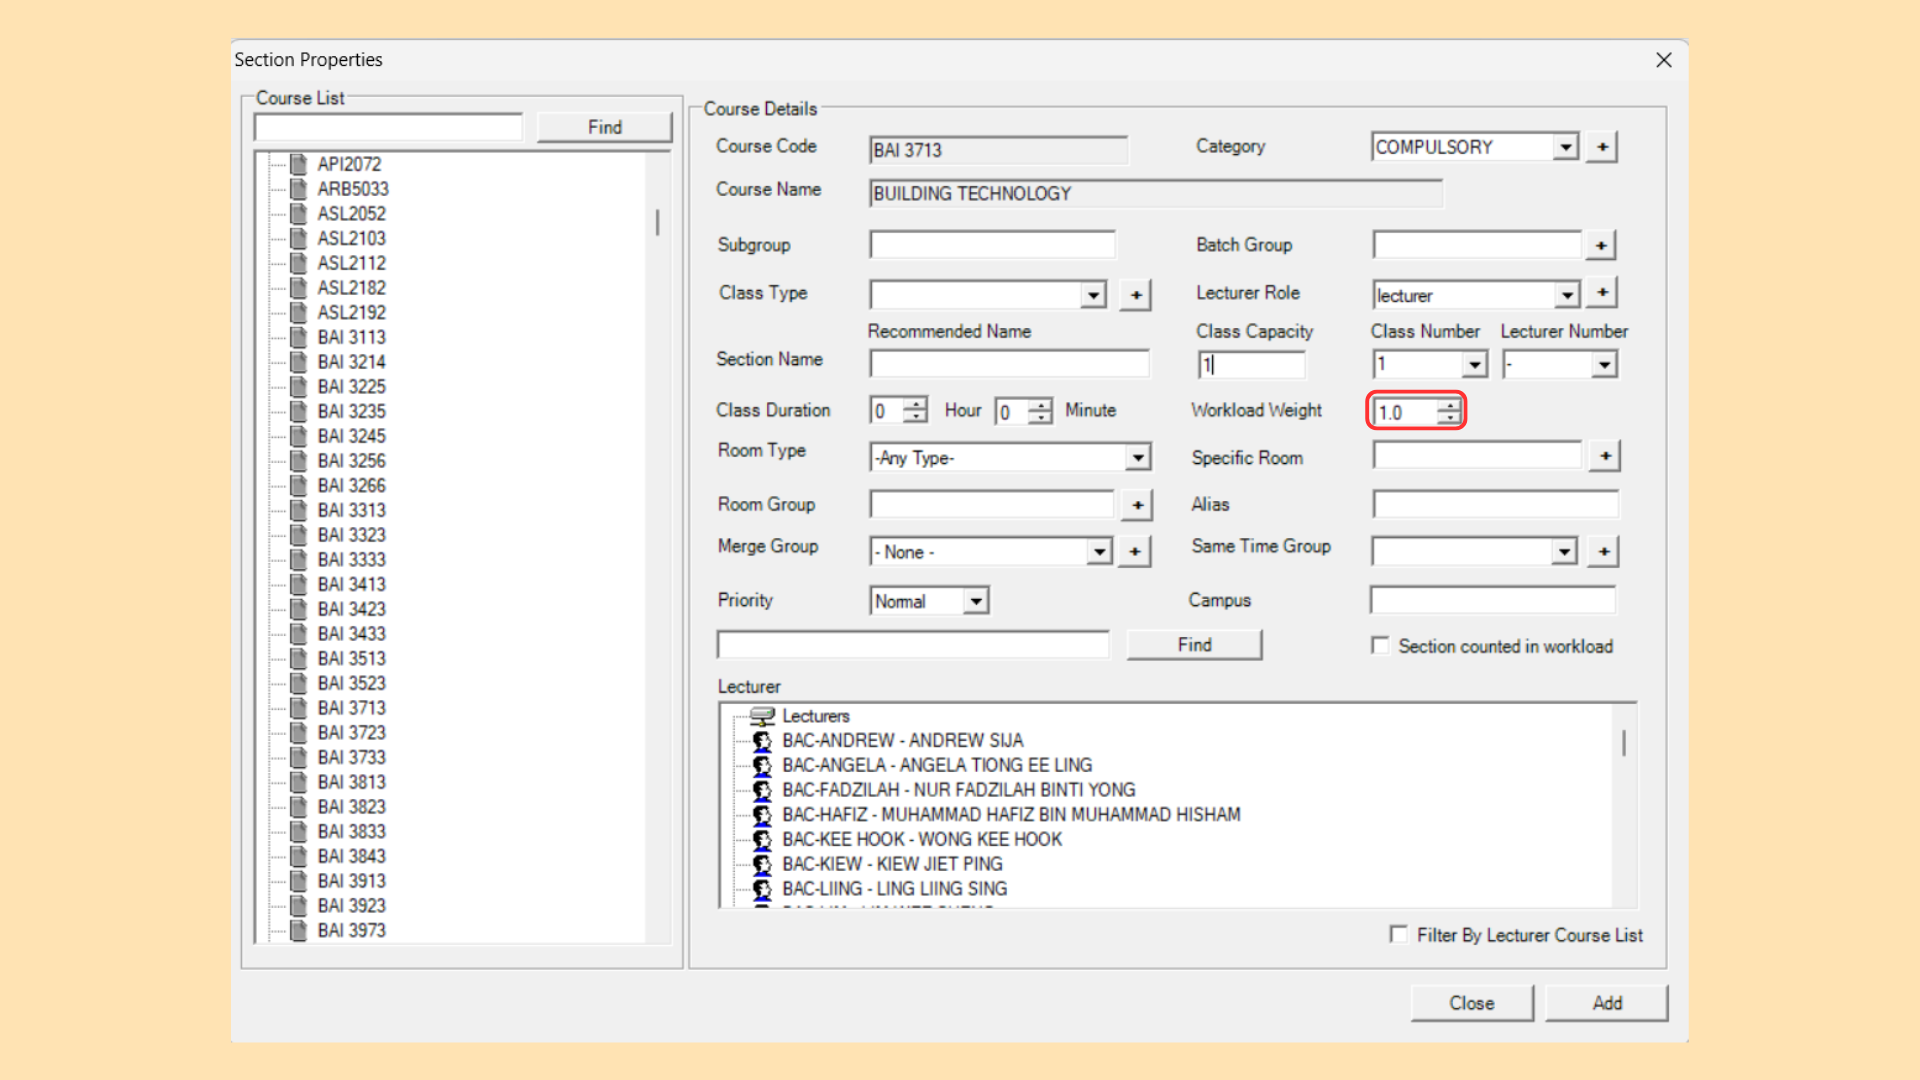
Room Type: Type of room assigned according to class type (e.g Studio, Lab).
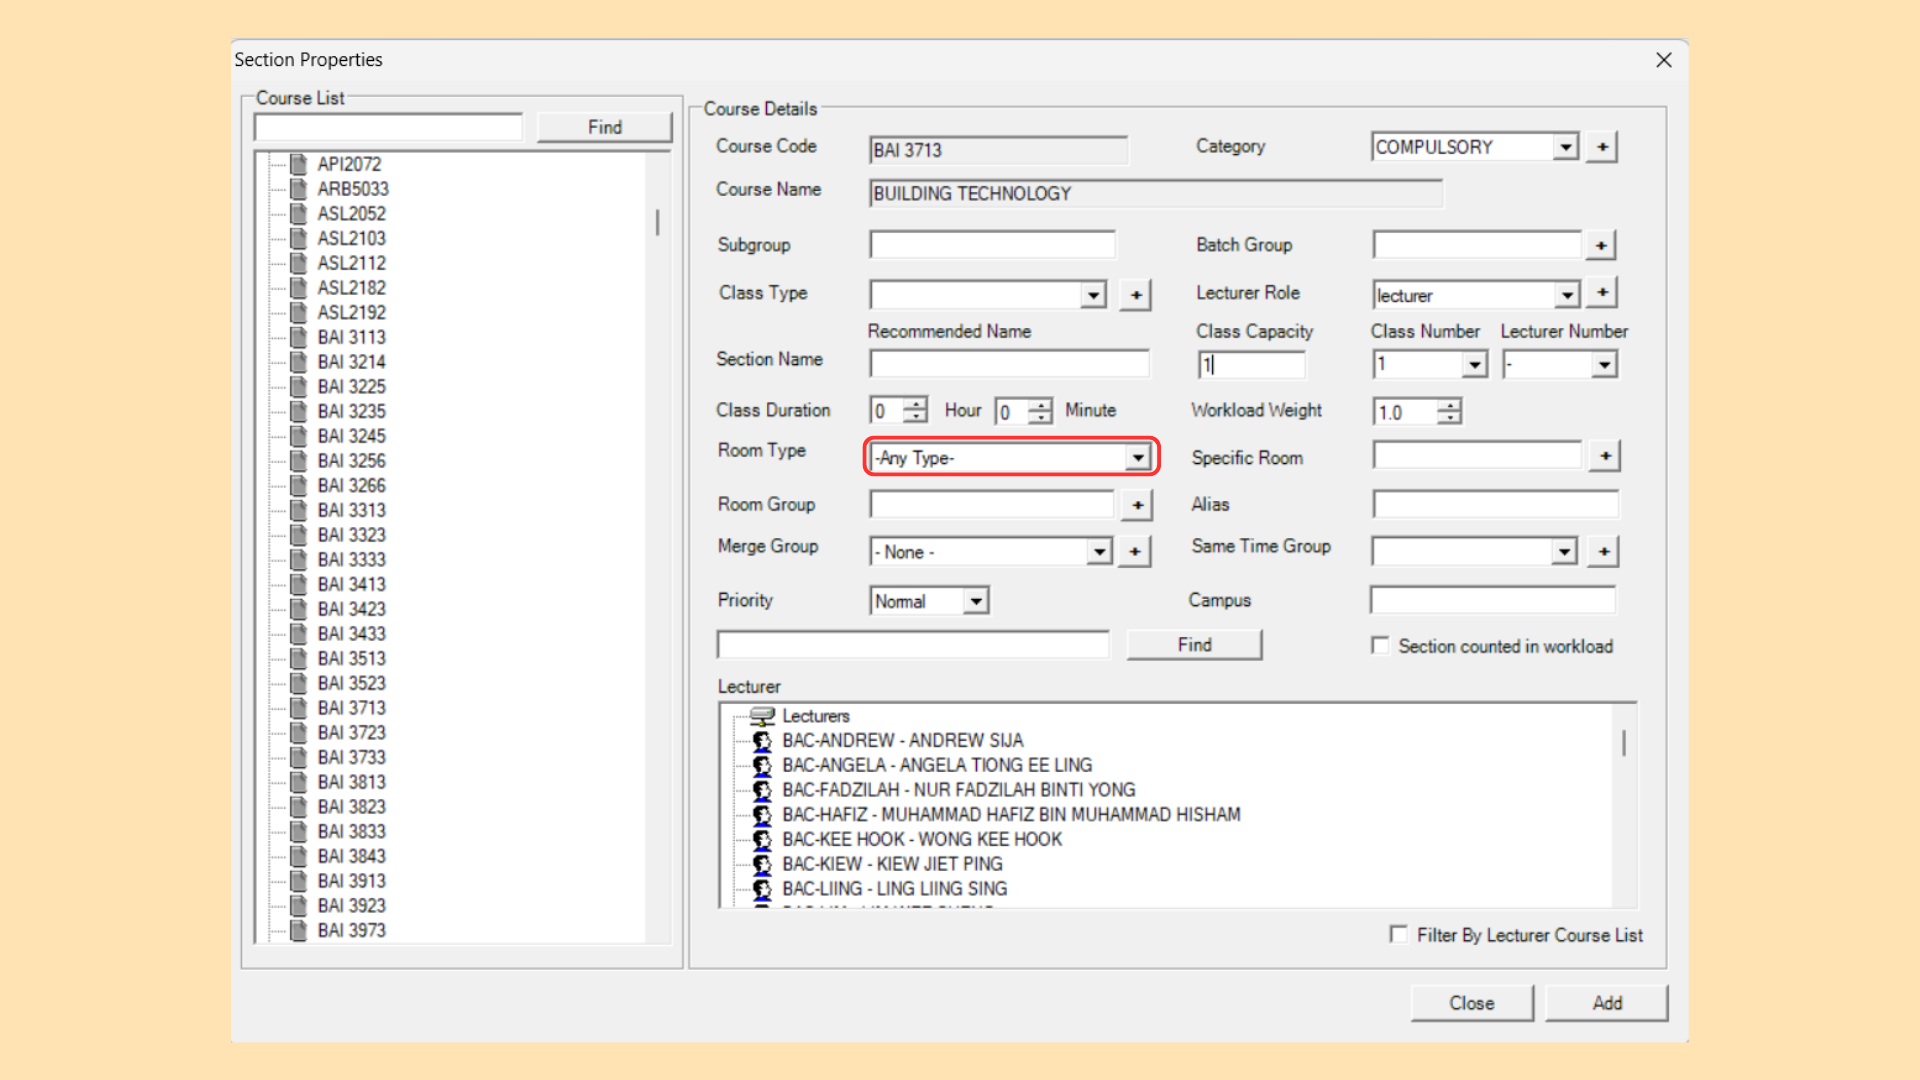
Specific Room: Assign class to specific room (e.g Studio 1, Tutorial 4).
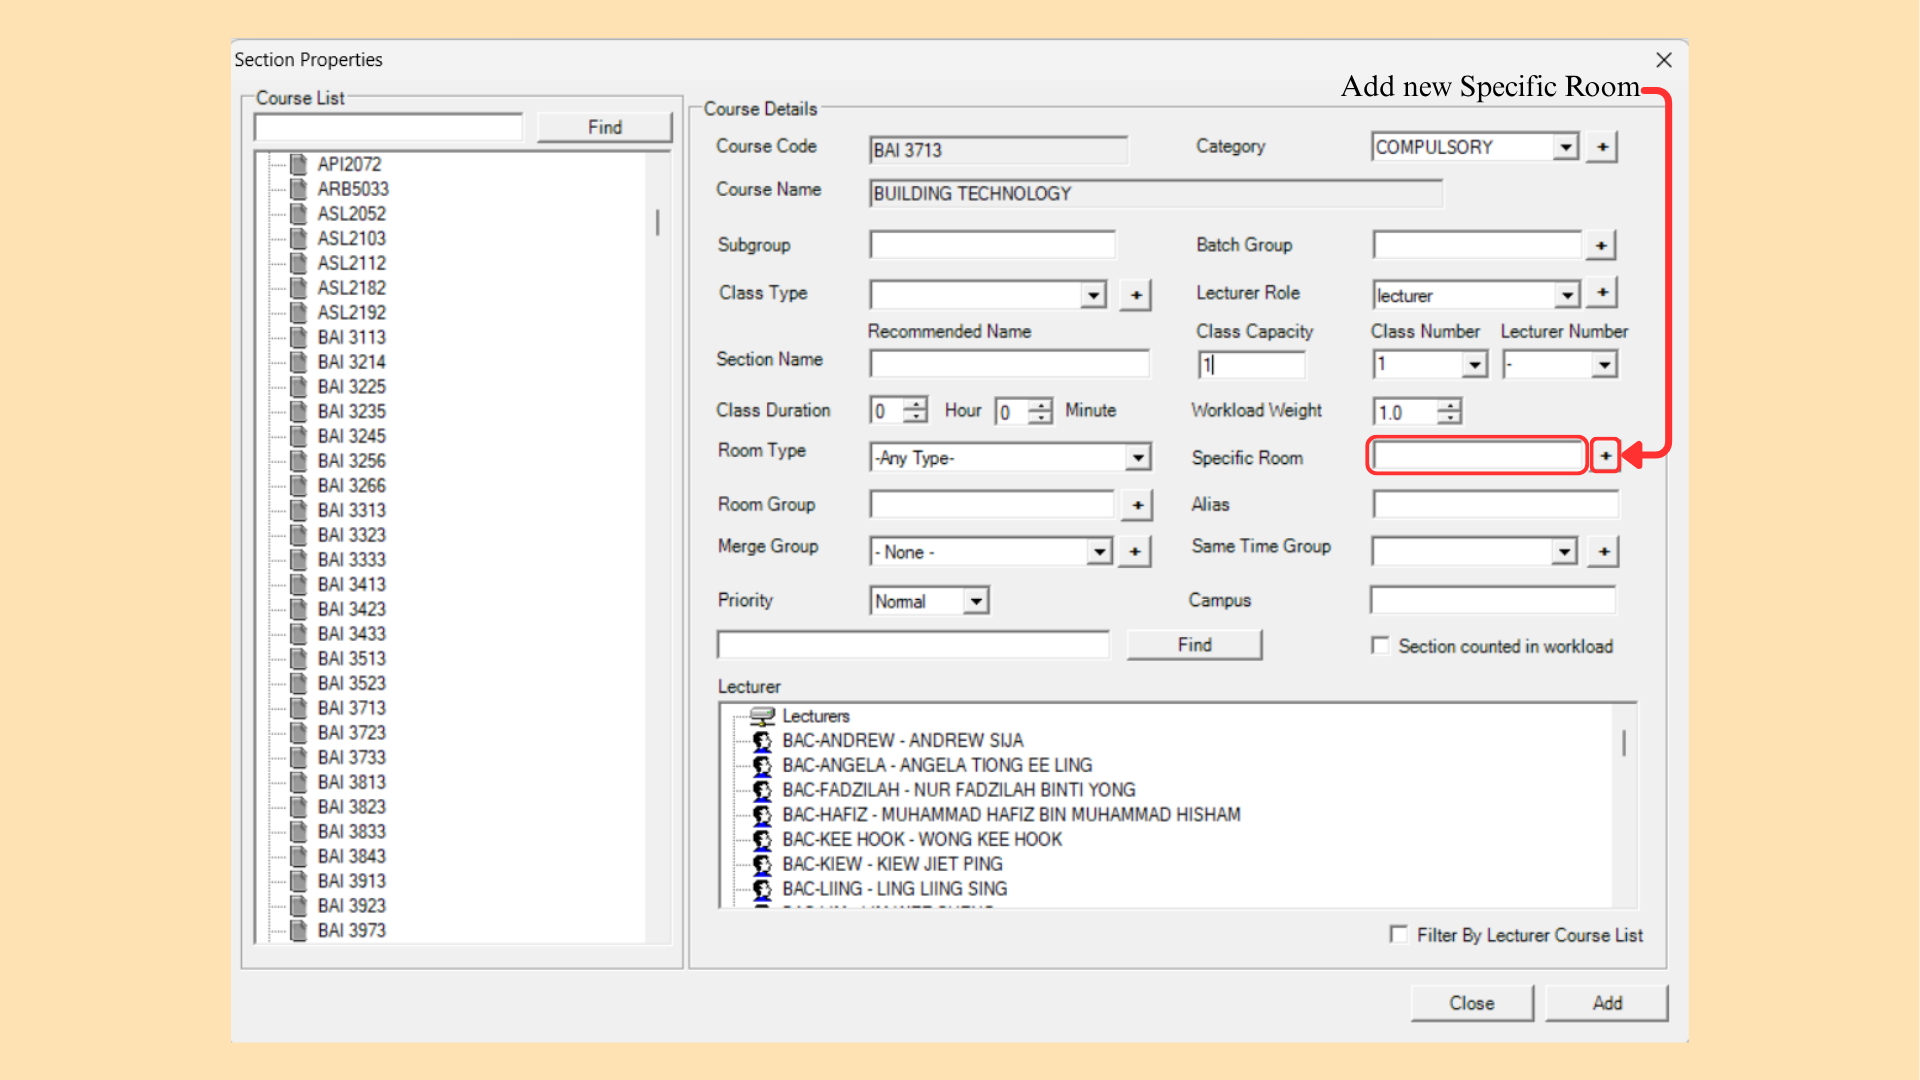
Specific Room Management: User will be able to Select/Unselect Room that is associated with the course.
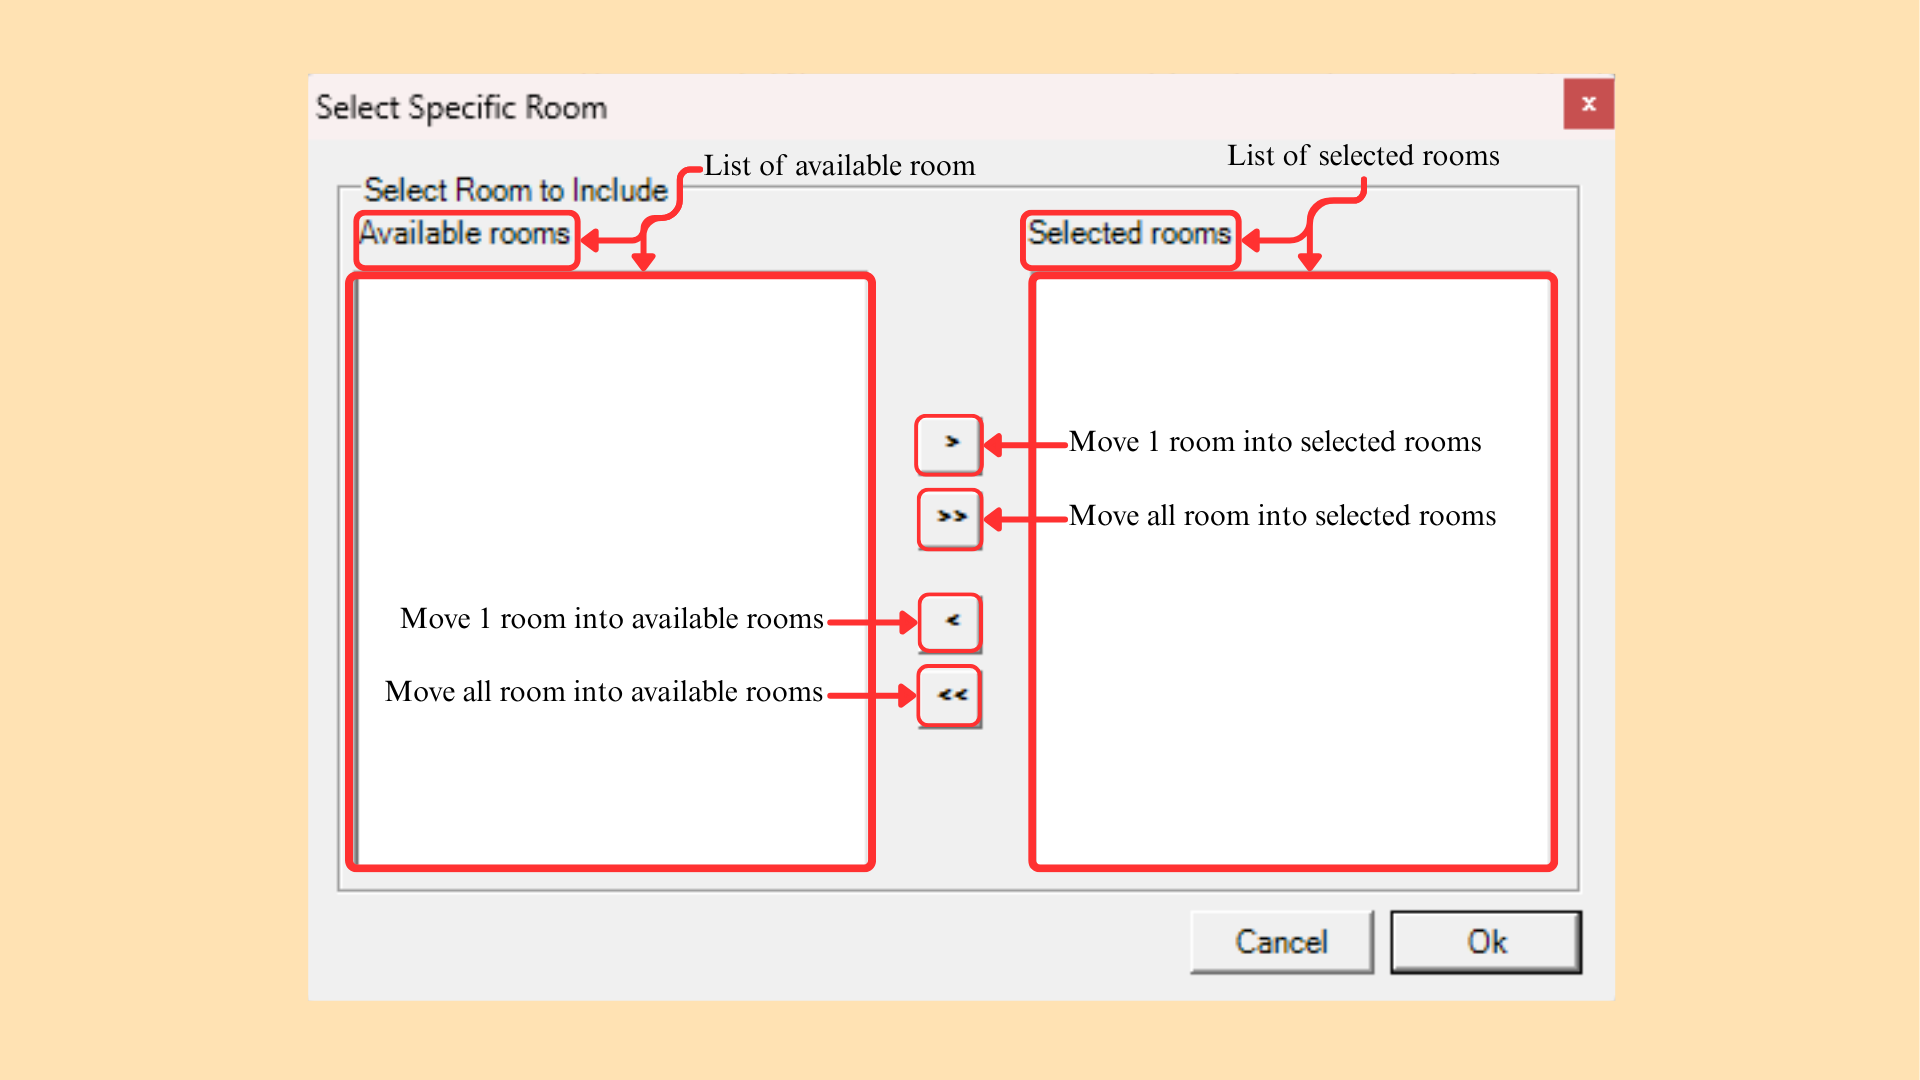
| Function | Description |
|---|---|
| Available rooms | List of available rooms. |
| Selected rooms | List of selected rooms. |
| > | Moves one room into Selected rooms. |
| >> | Moves all rooms into Selected rooms. |
| < | Moves one room back into Available rooms. |
| << | Moves all rooms back into Available rooms. |
| Ok / Cancel | Confirms or discards the selection. |
Table 7.5: Select Specific Room Functions
Room Group: Same type of room grouped together.
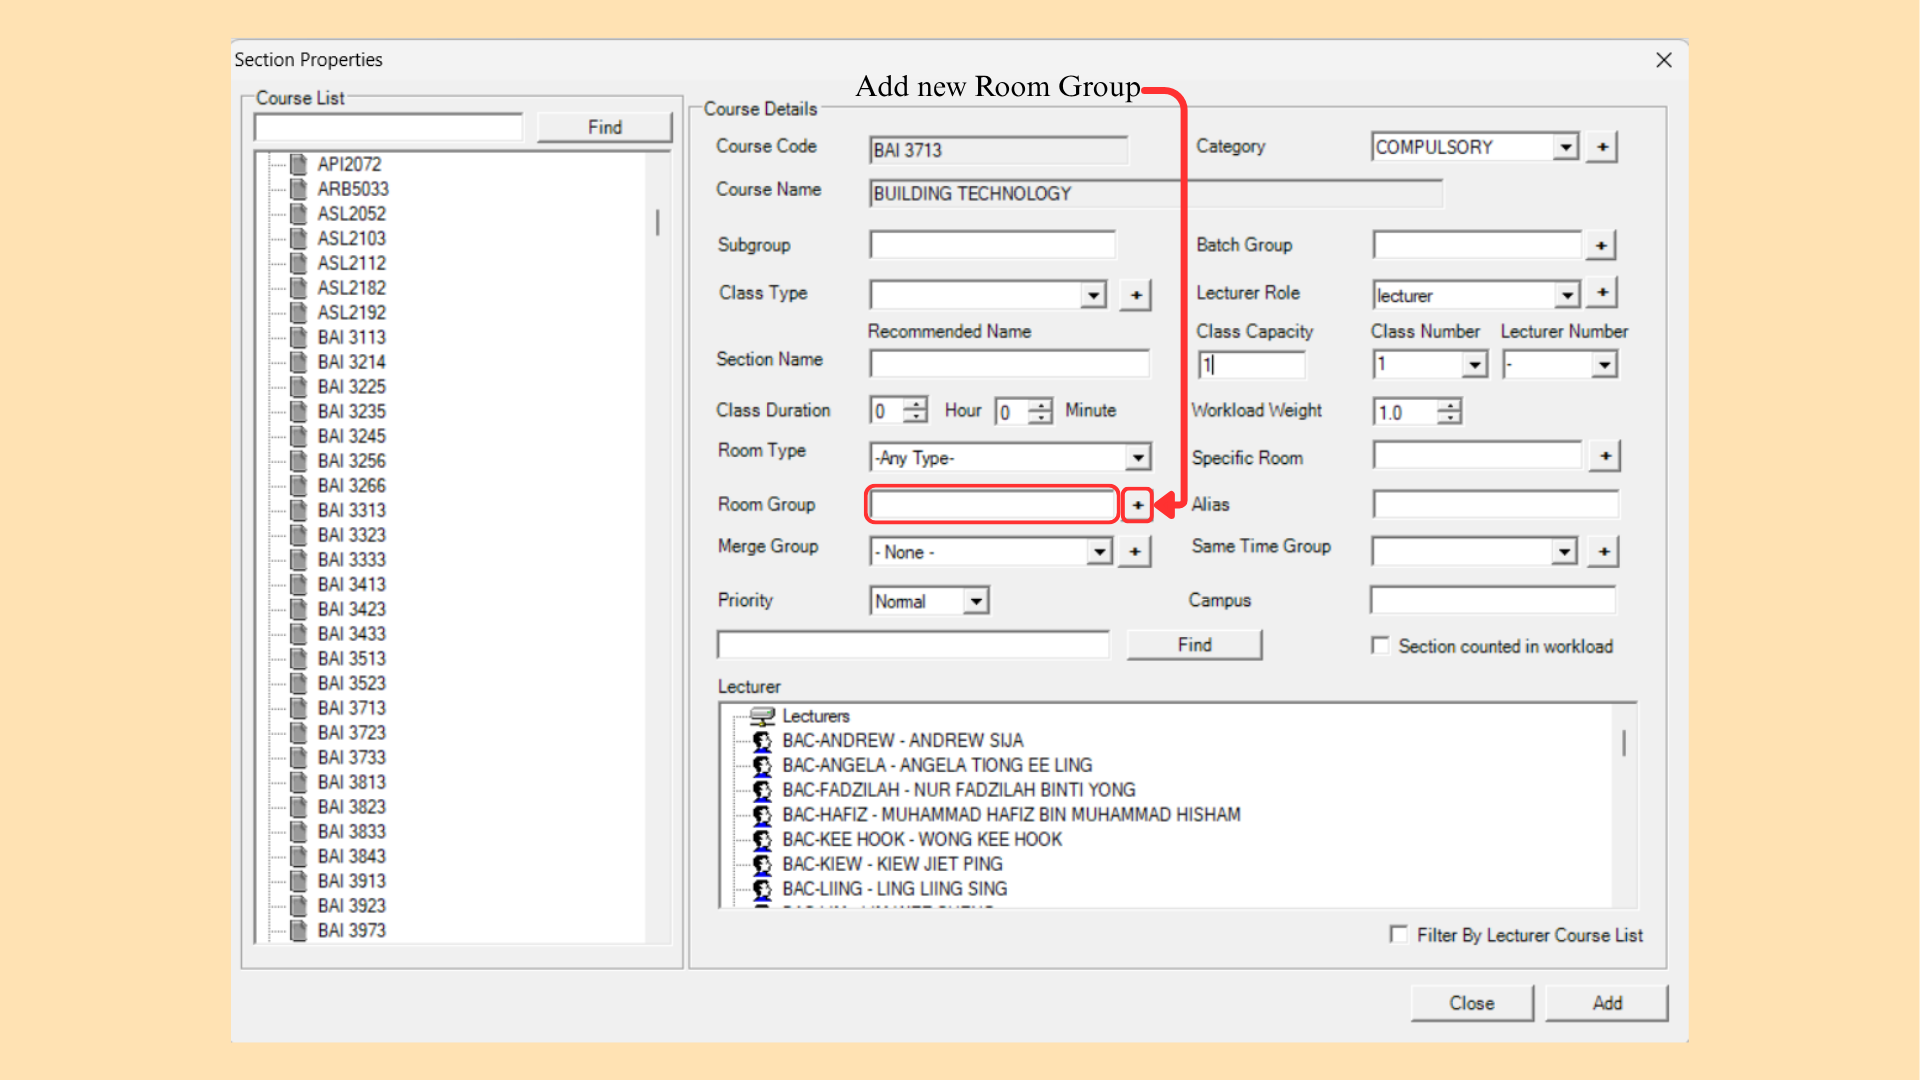
Room Group Management: User will be able to Select/Unselect specific Room Group that is associated with the course.
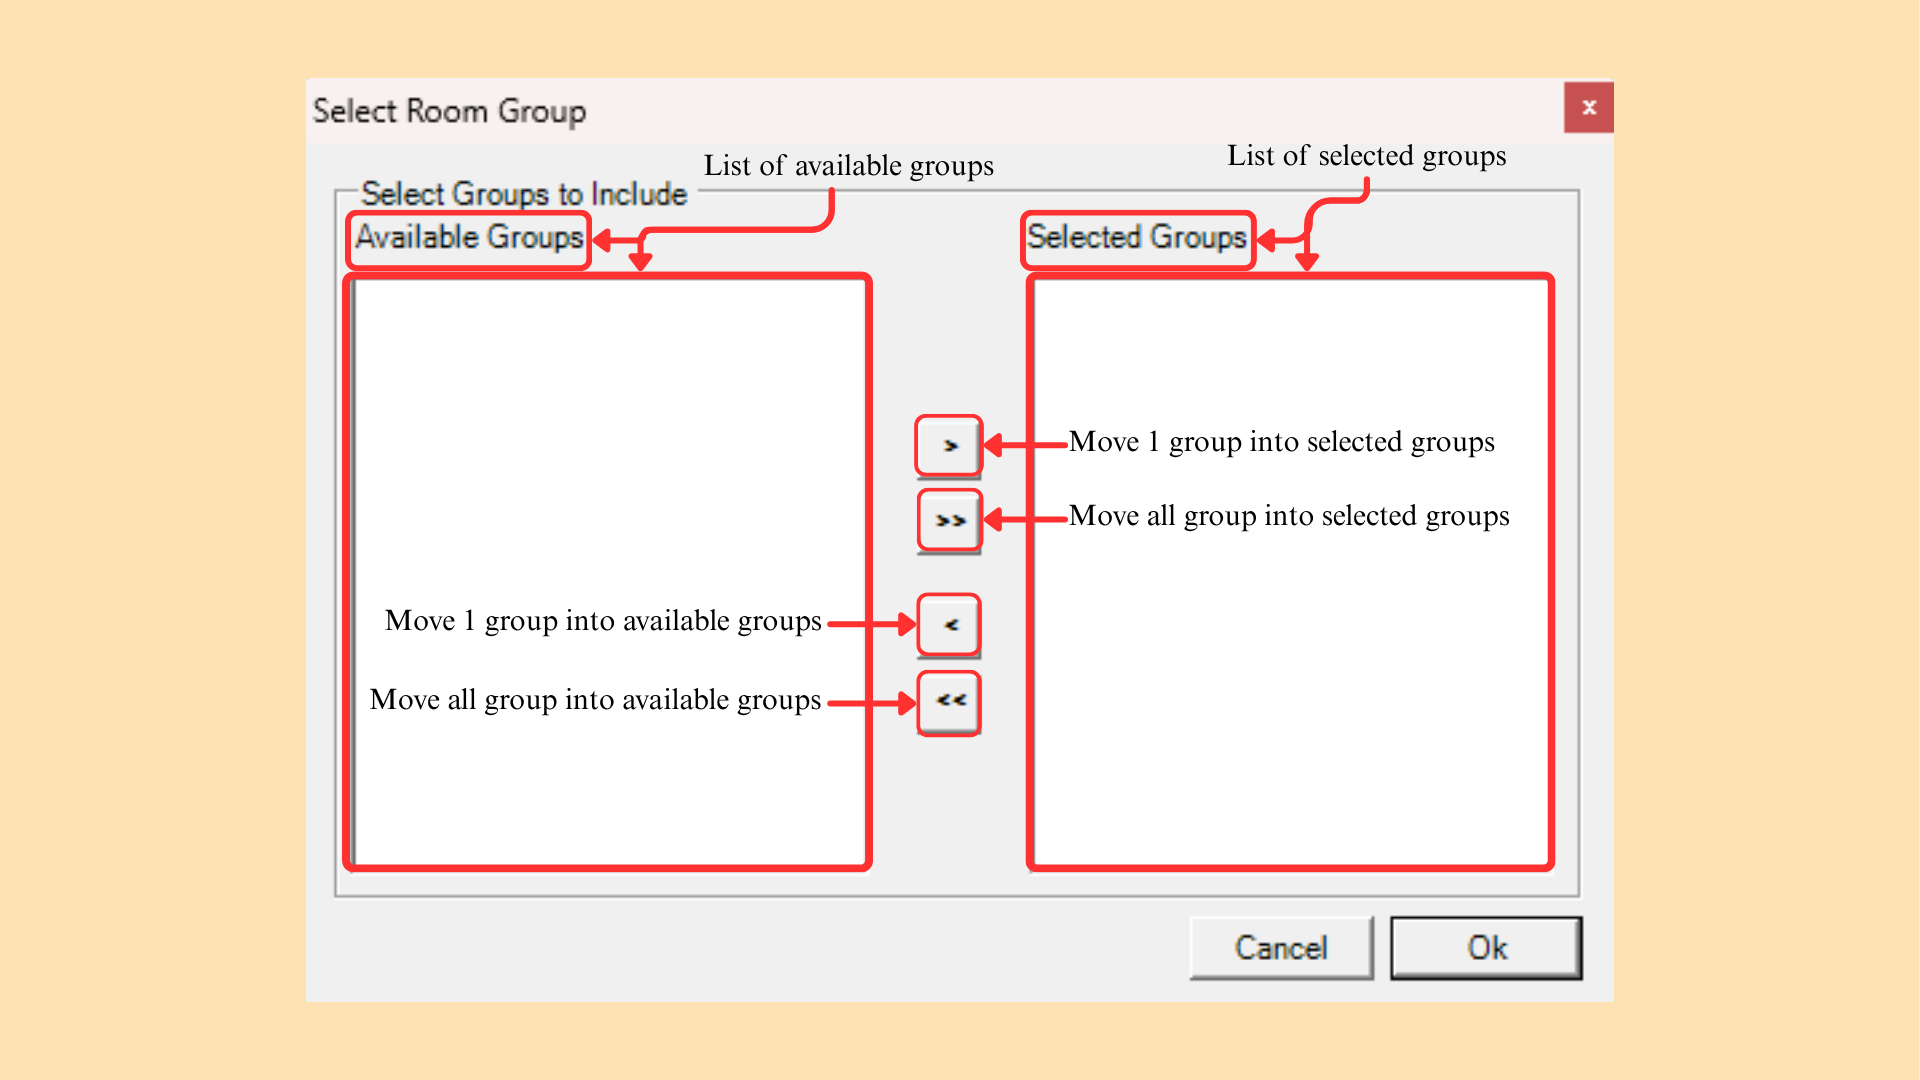
| Function | Description |
|---|---|
| Available Groups | List of available room groups. |
| Selected Groups | List of selected room groups. |
| > | Moves one group into Selected Groups. |
| >> | Moves all groups into Selected Groups. |
| < | Moves one group back into Available Groups. |
| << | Moves all groups back into Available Groups. |
| Ok / Cancel | Confirms or discards the selection. |
Table 7.6: Select Room Group Functions
Alias: Extra note displayed on timetable upon generation.
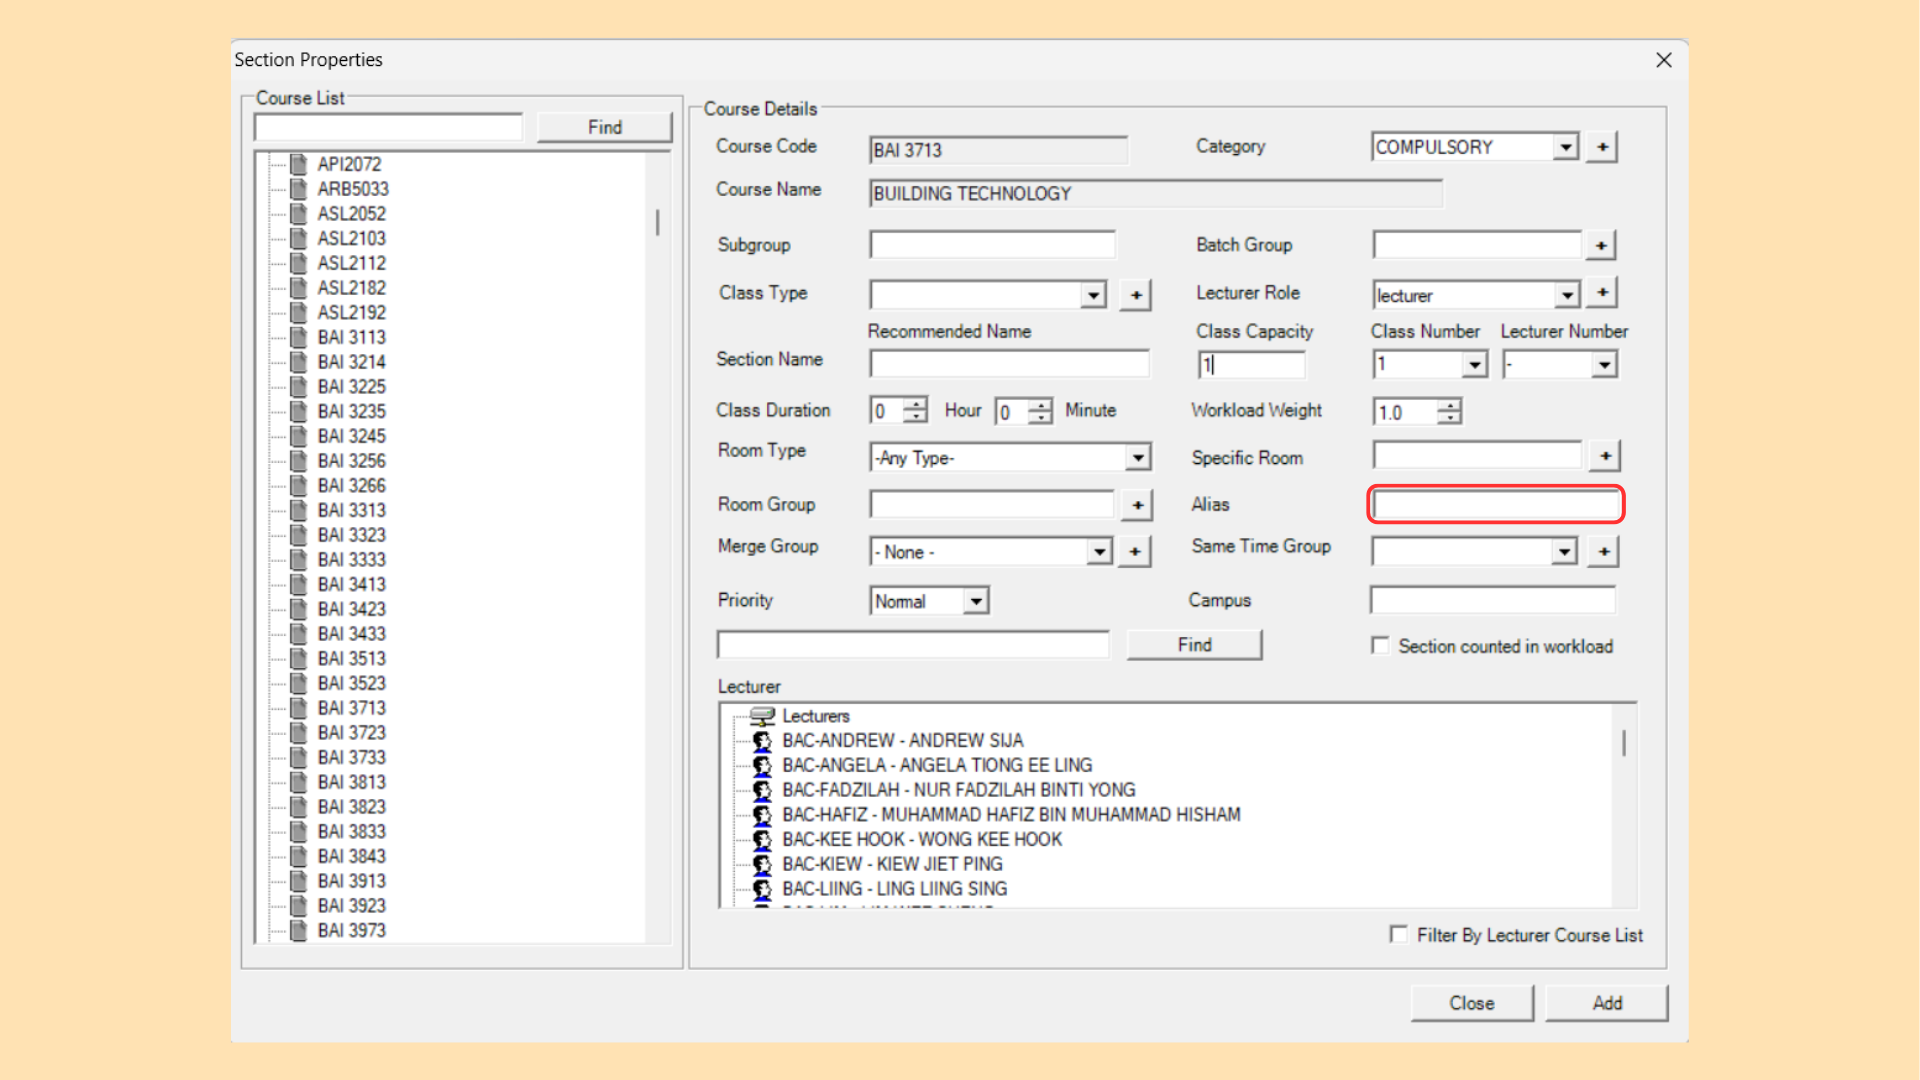
Merge Group: Group that merge few courses together that going at same time and same room.
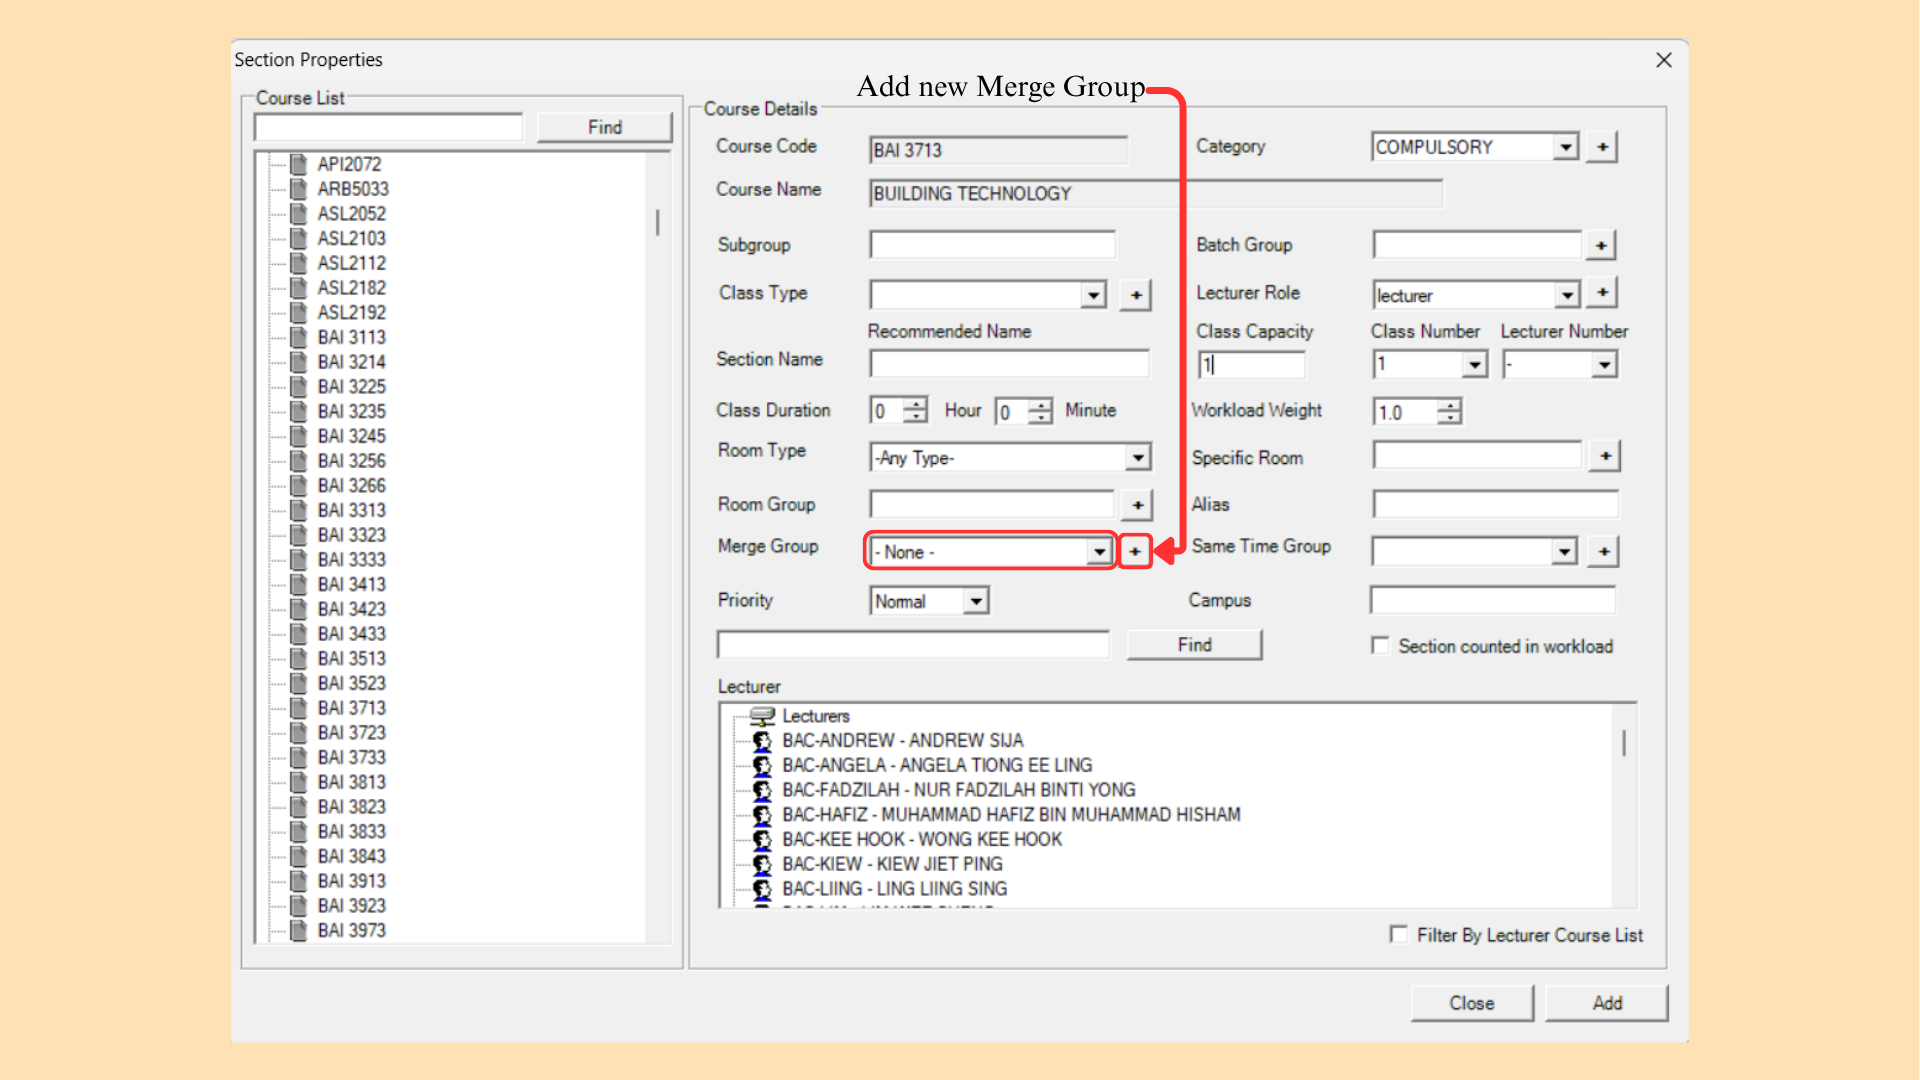
Same Time Group: Group that merge few courses together that going at same time but different room.
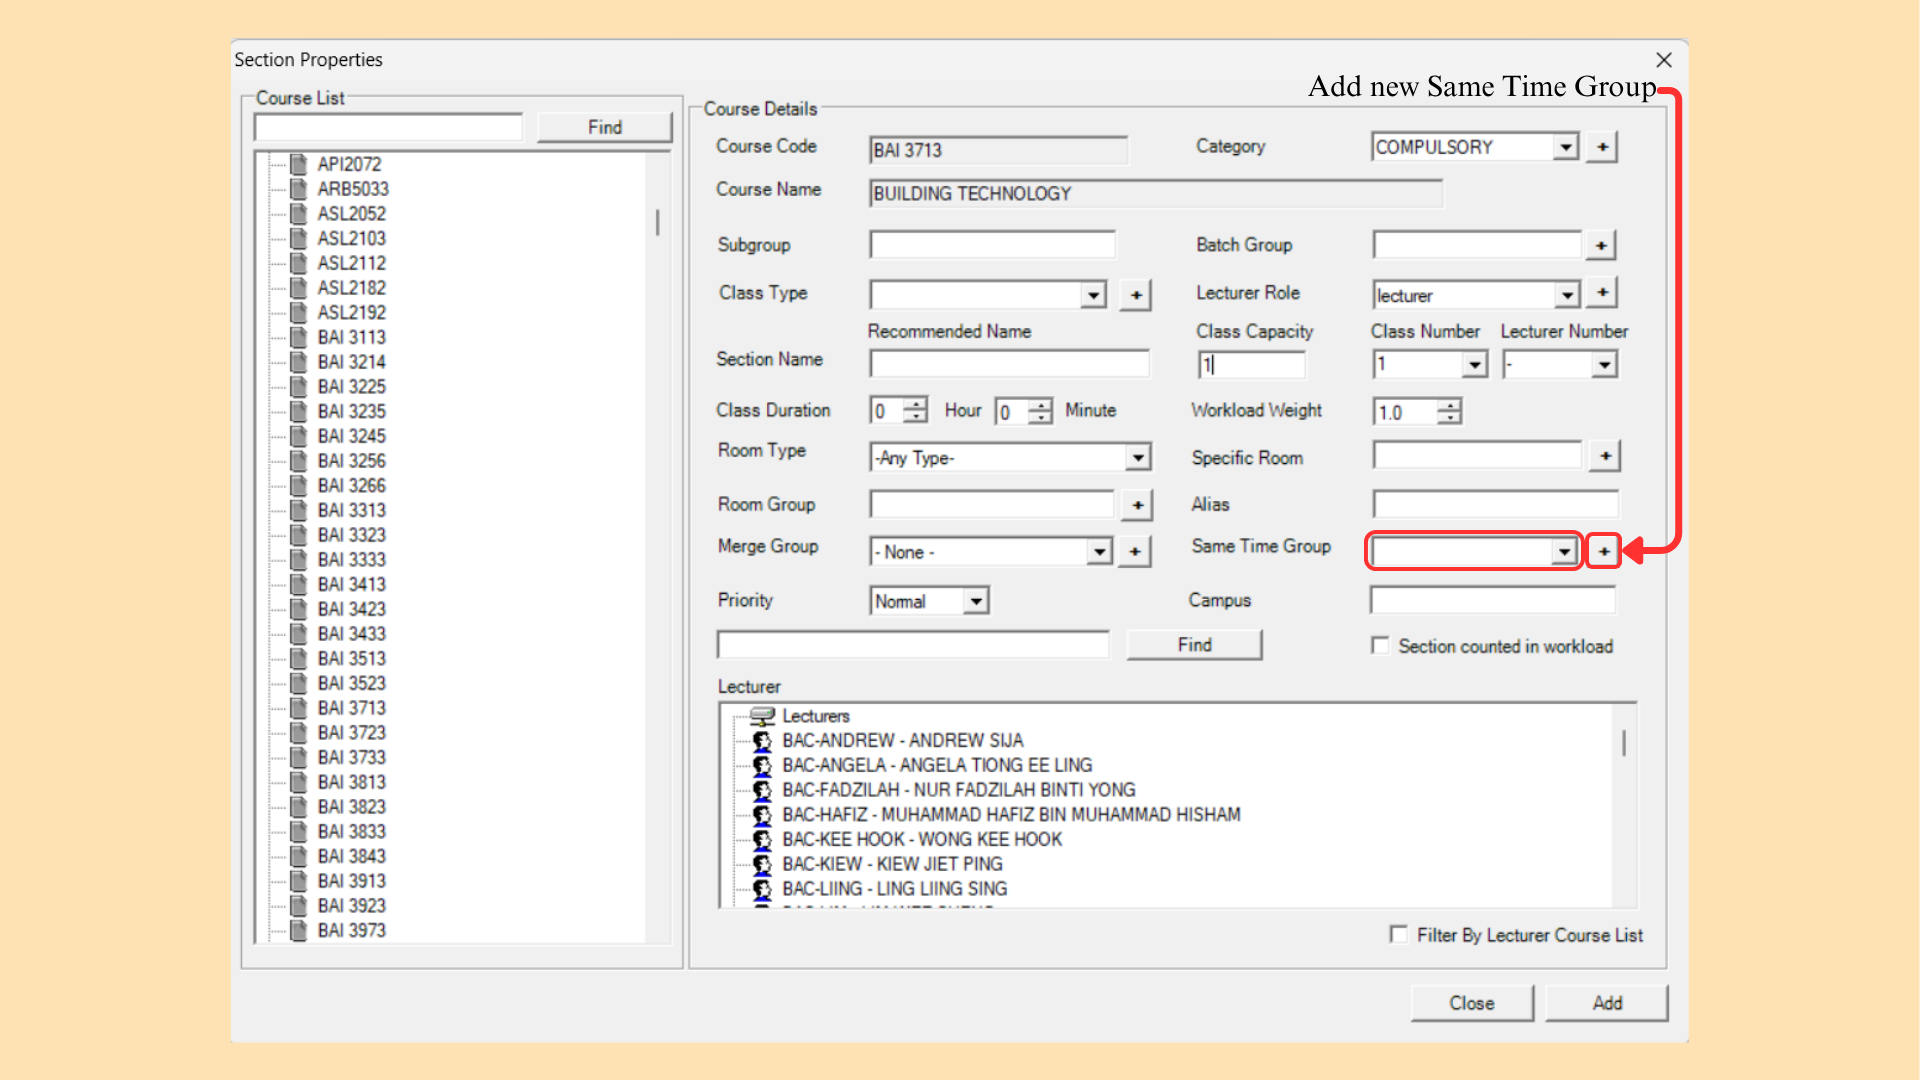
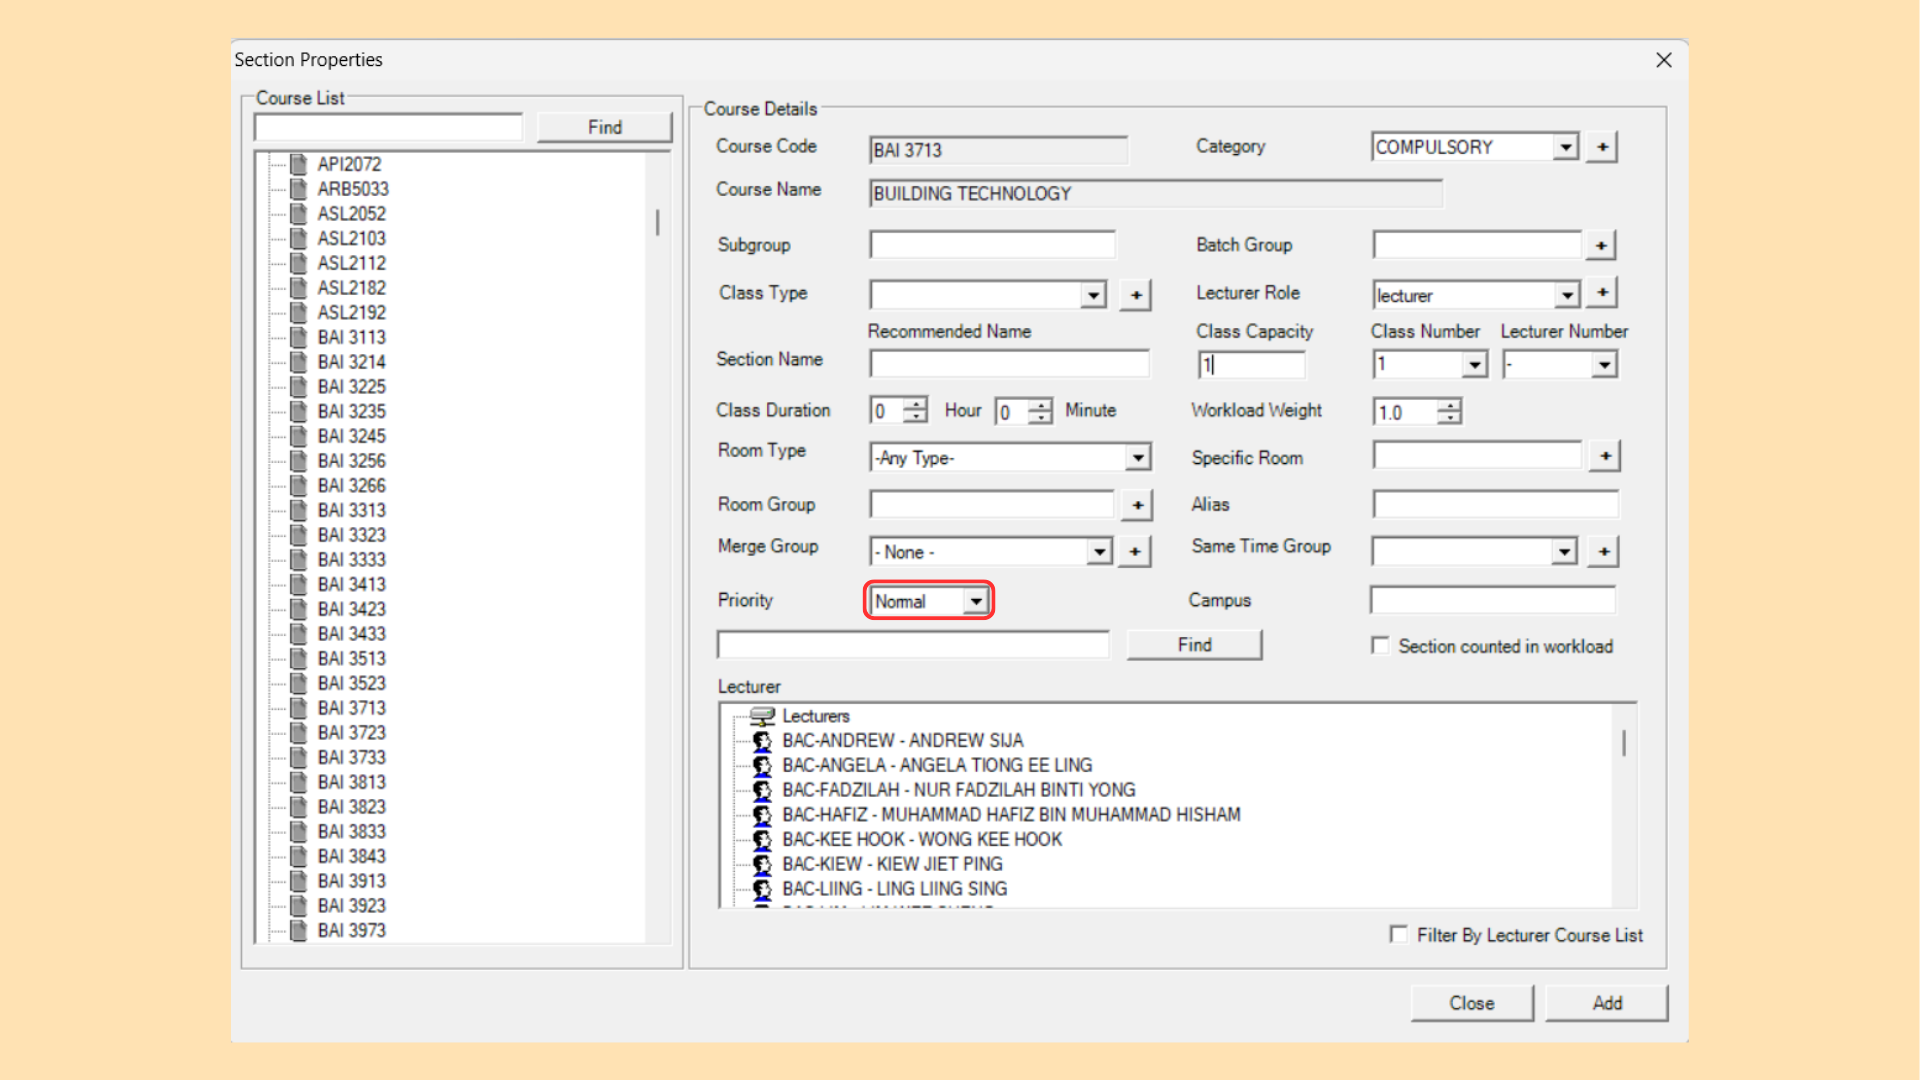
Priority: Set priority for auto generation function.
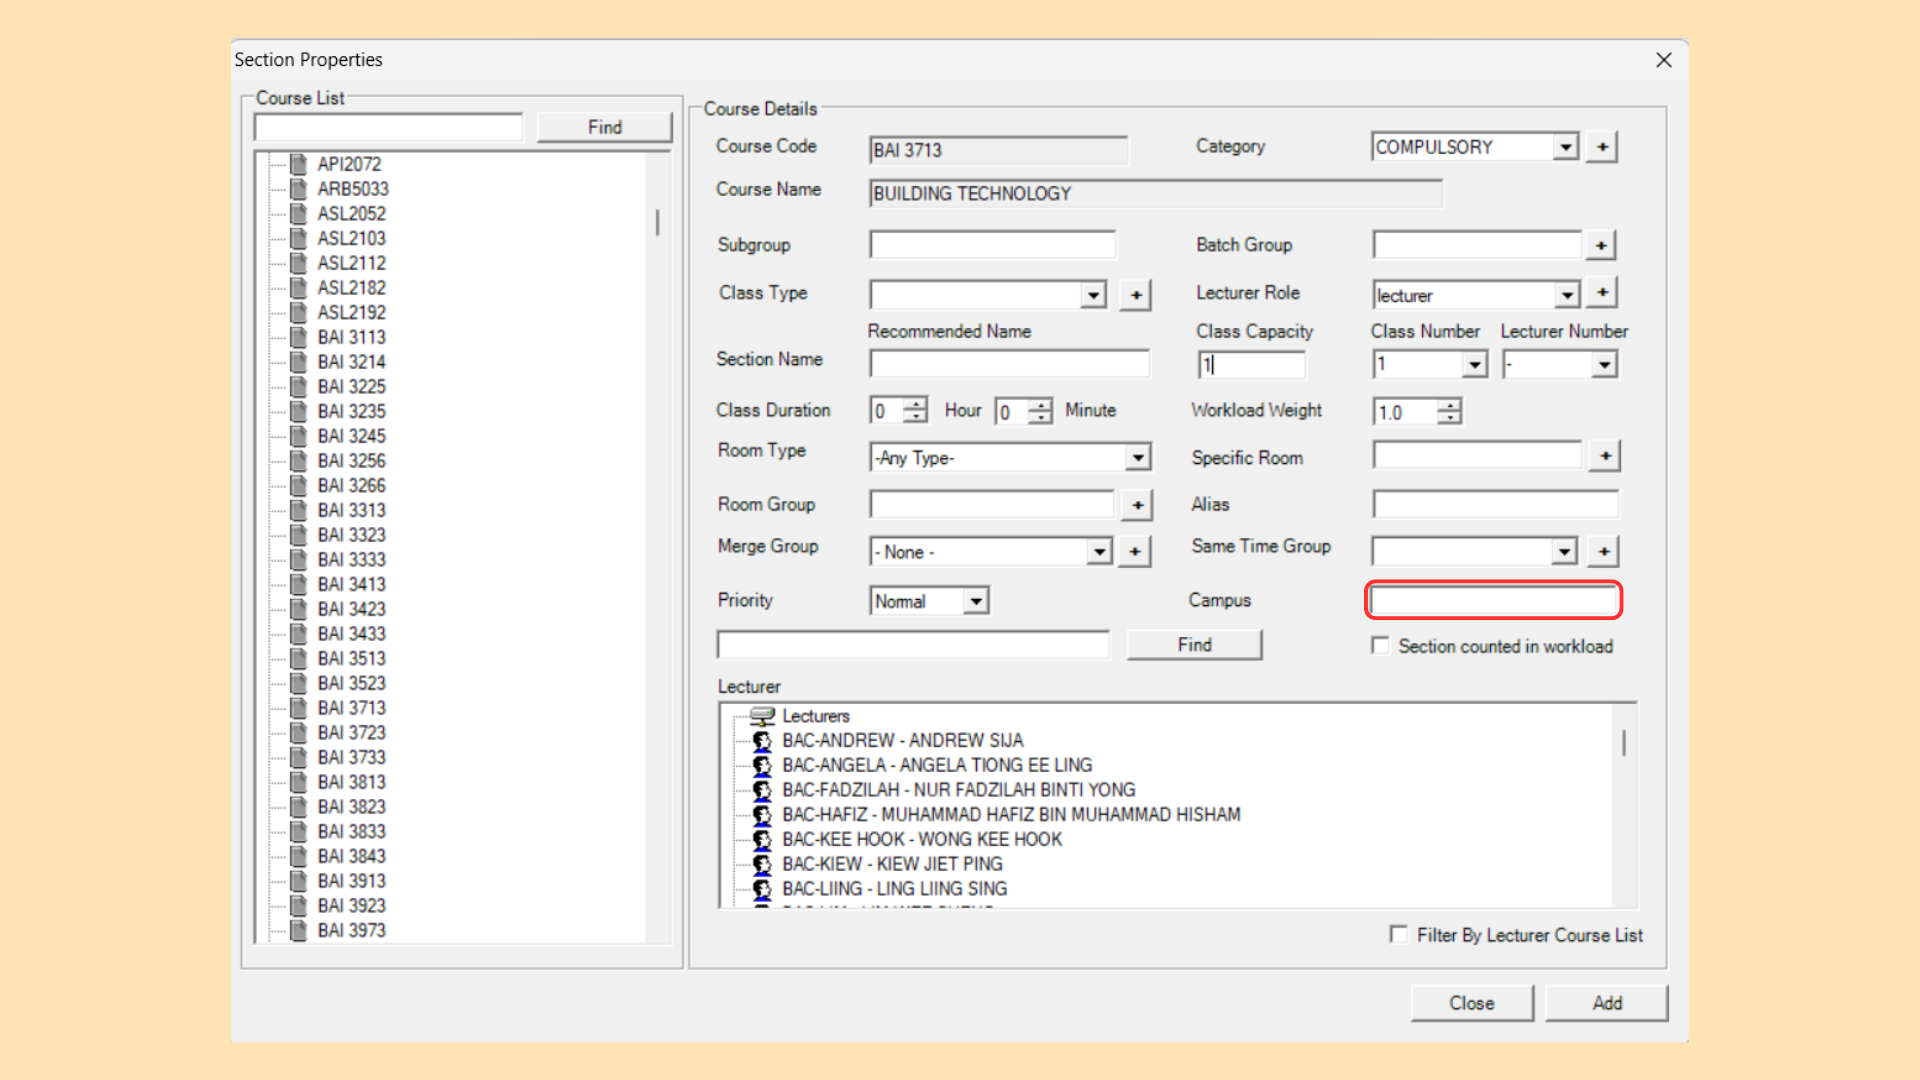
Campus: Campus of the class being going on.
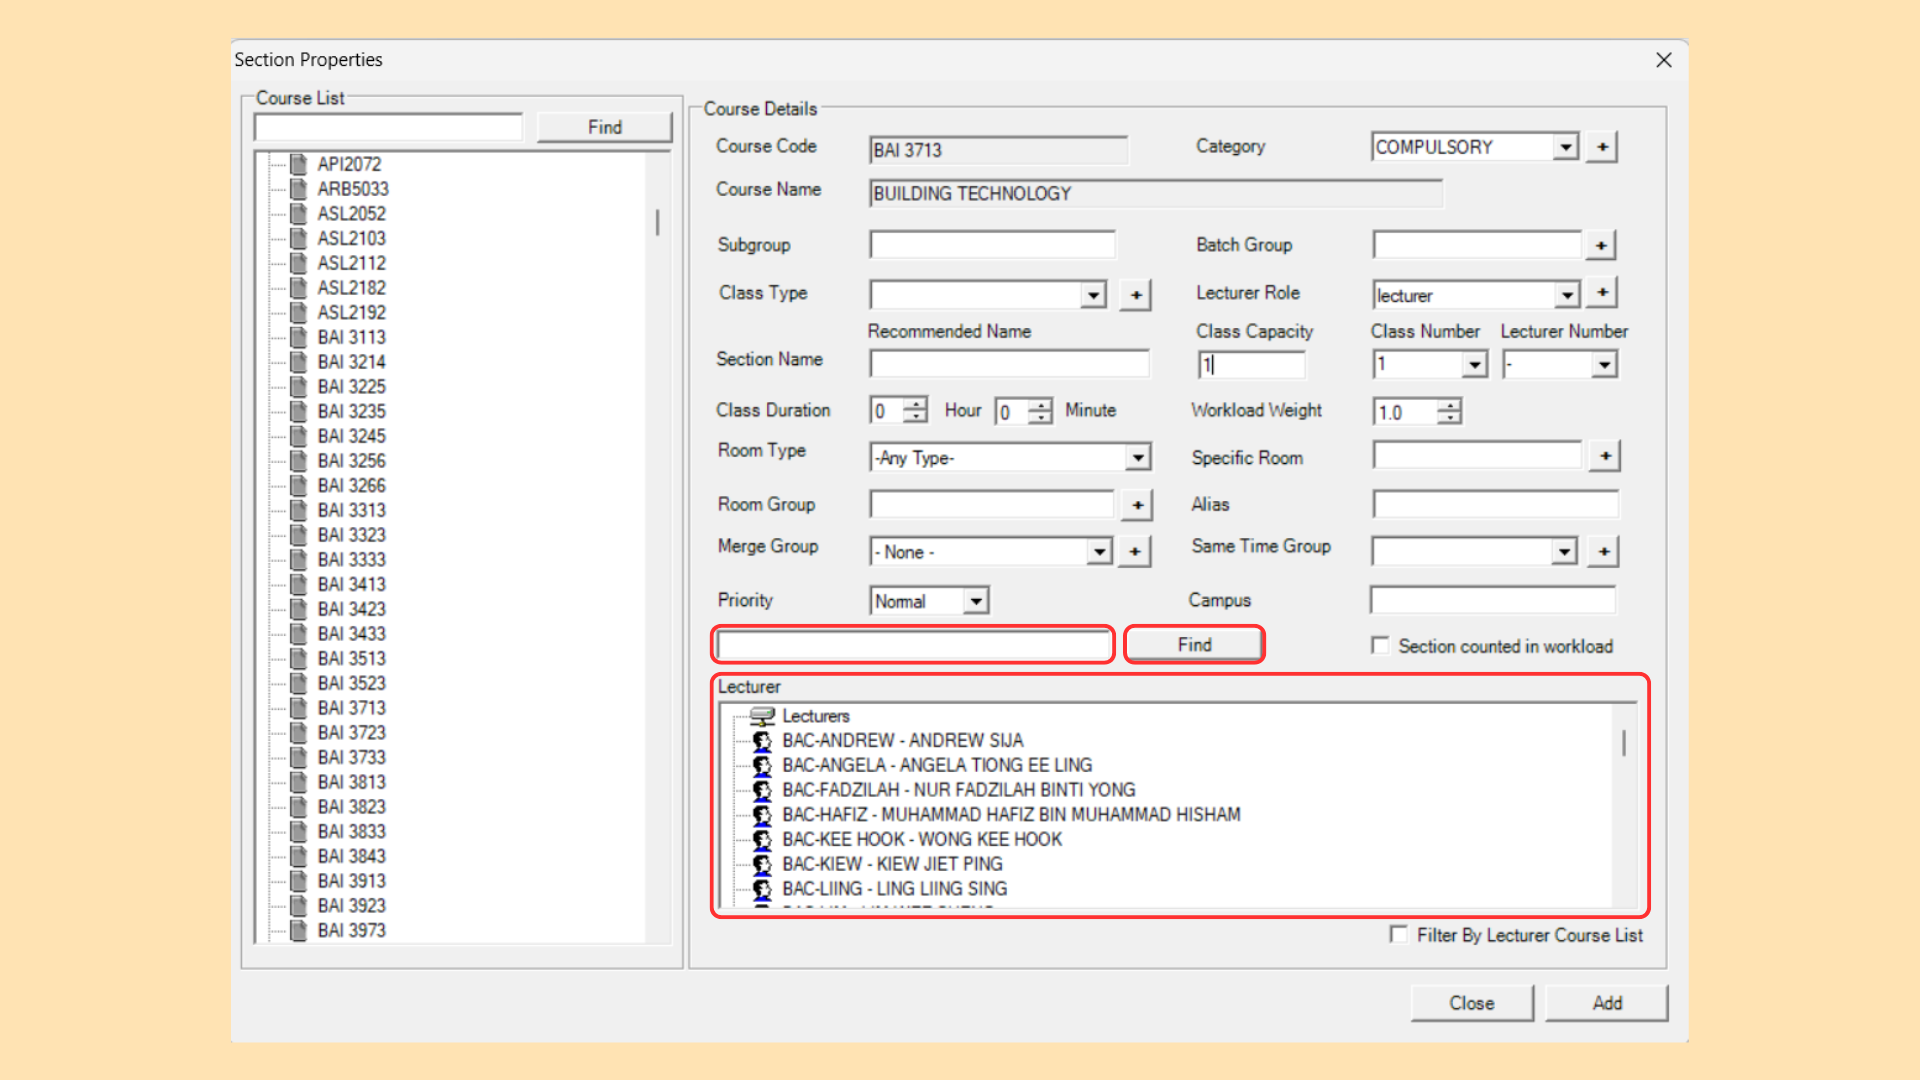
Lecturer List: Lecturer list fetch from lecturer management database and find shortcut for easier navigation.
7.2.3 Merge Class
Merging combines two or more subgroups into a single shared timetable slot. The merged subgroups are scheduled together, occupying the same time slot and the same room.
To create a Merge Group, there are 3 simple steps to do so.
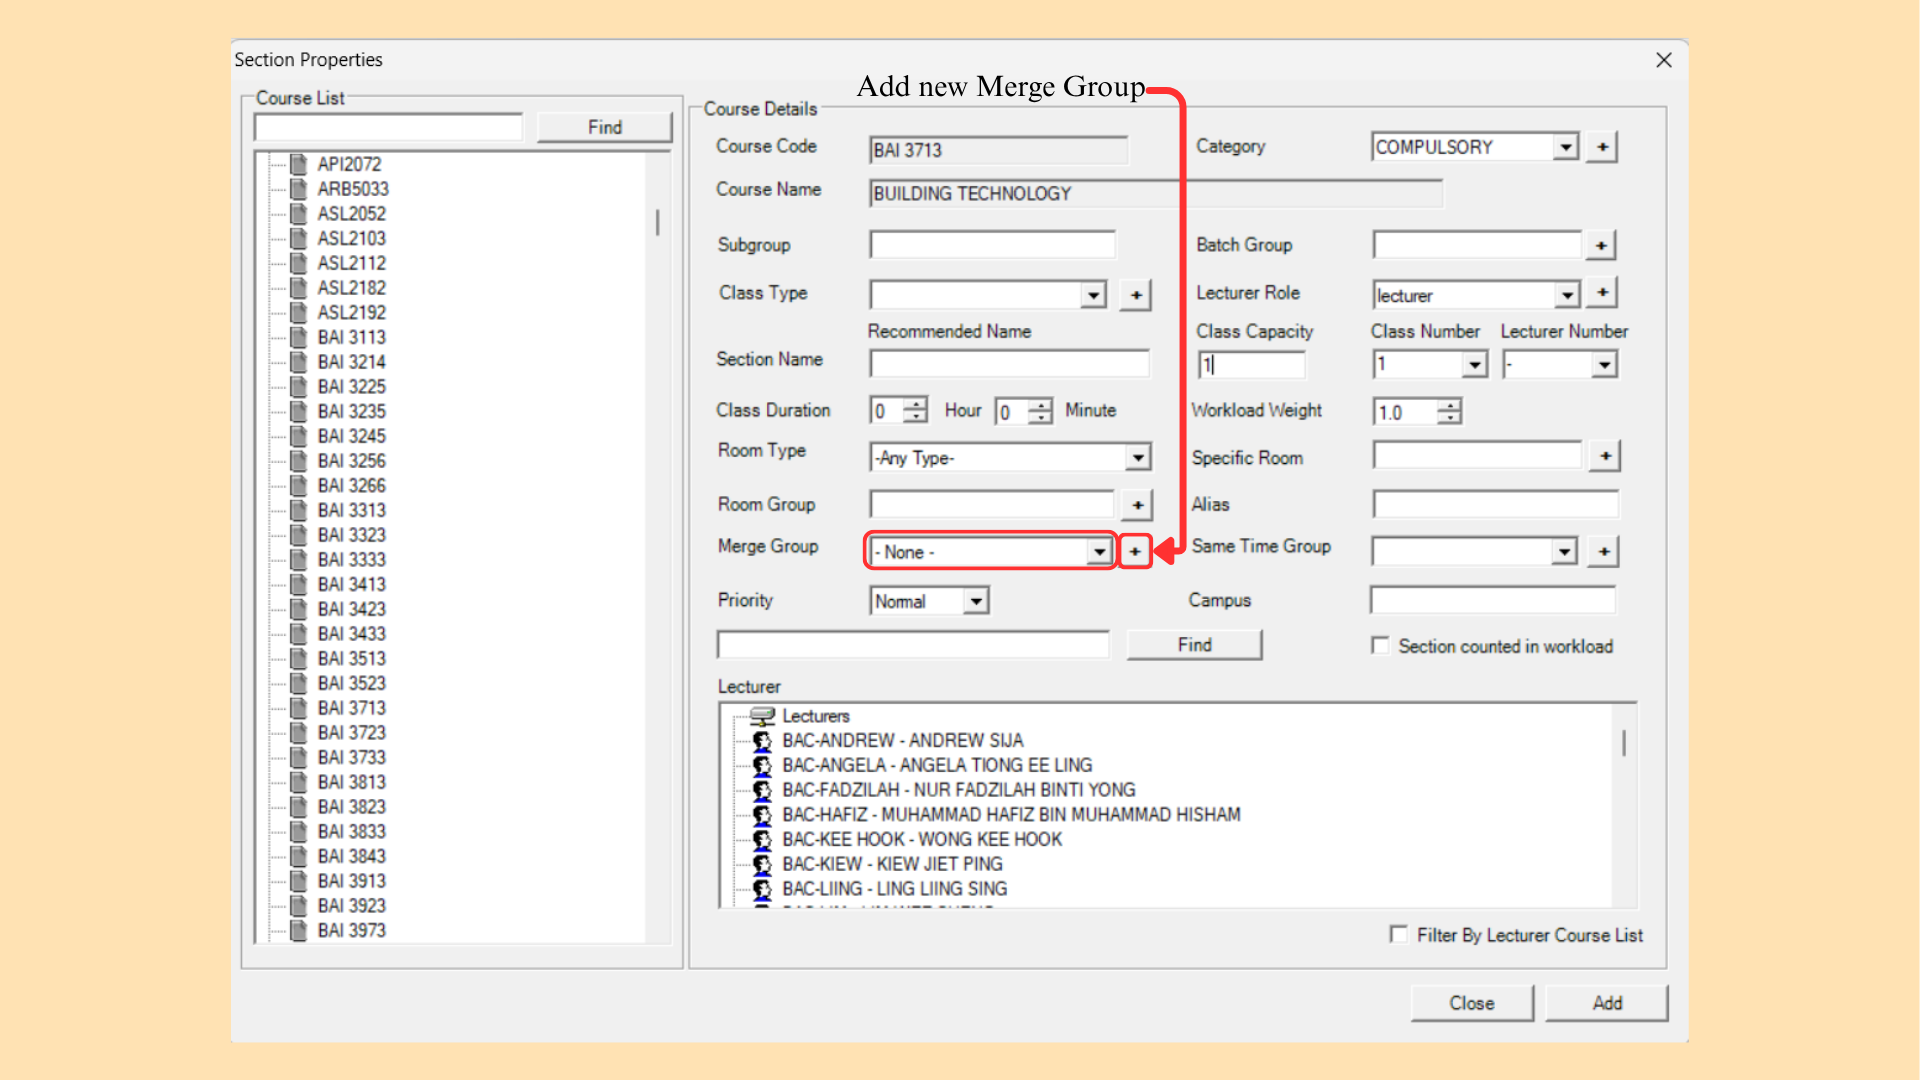
Step 1: Create a new Merge Group through Section Properties.
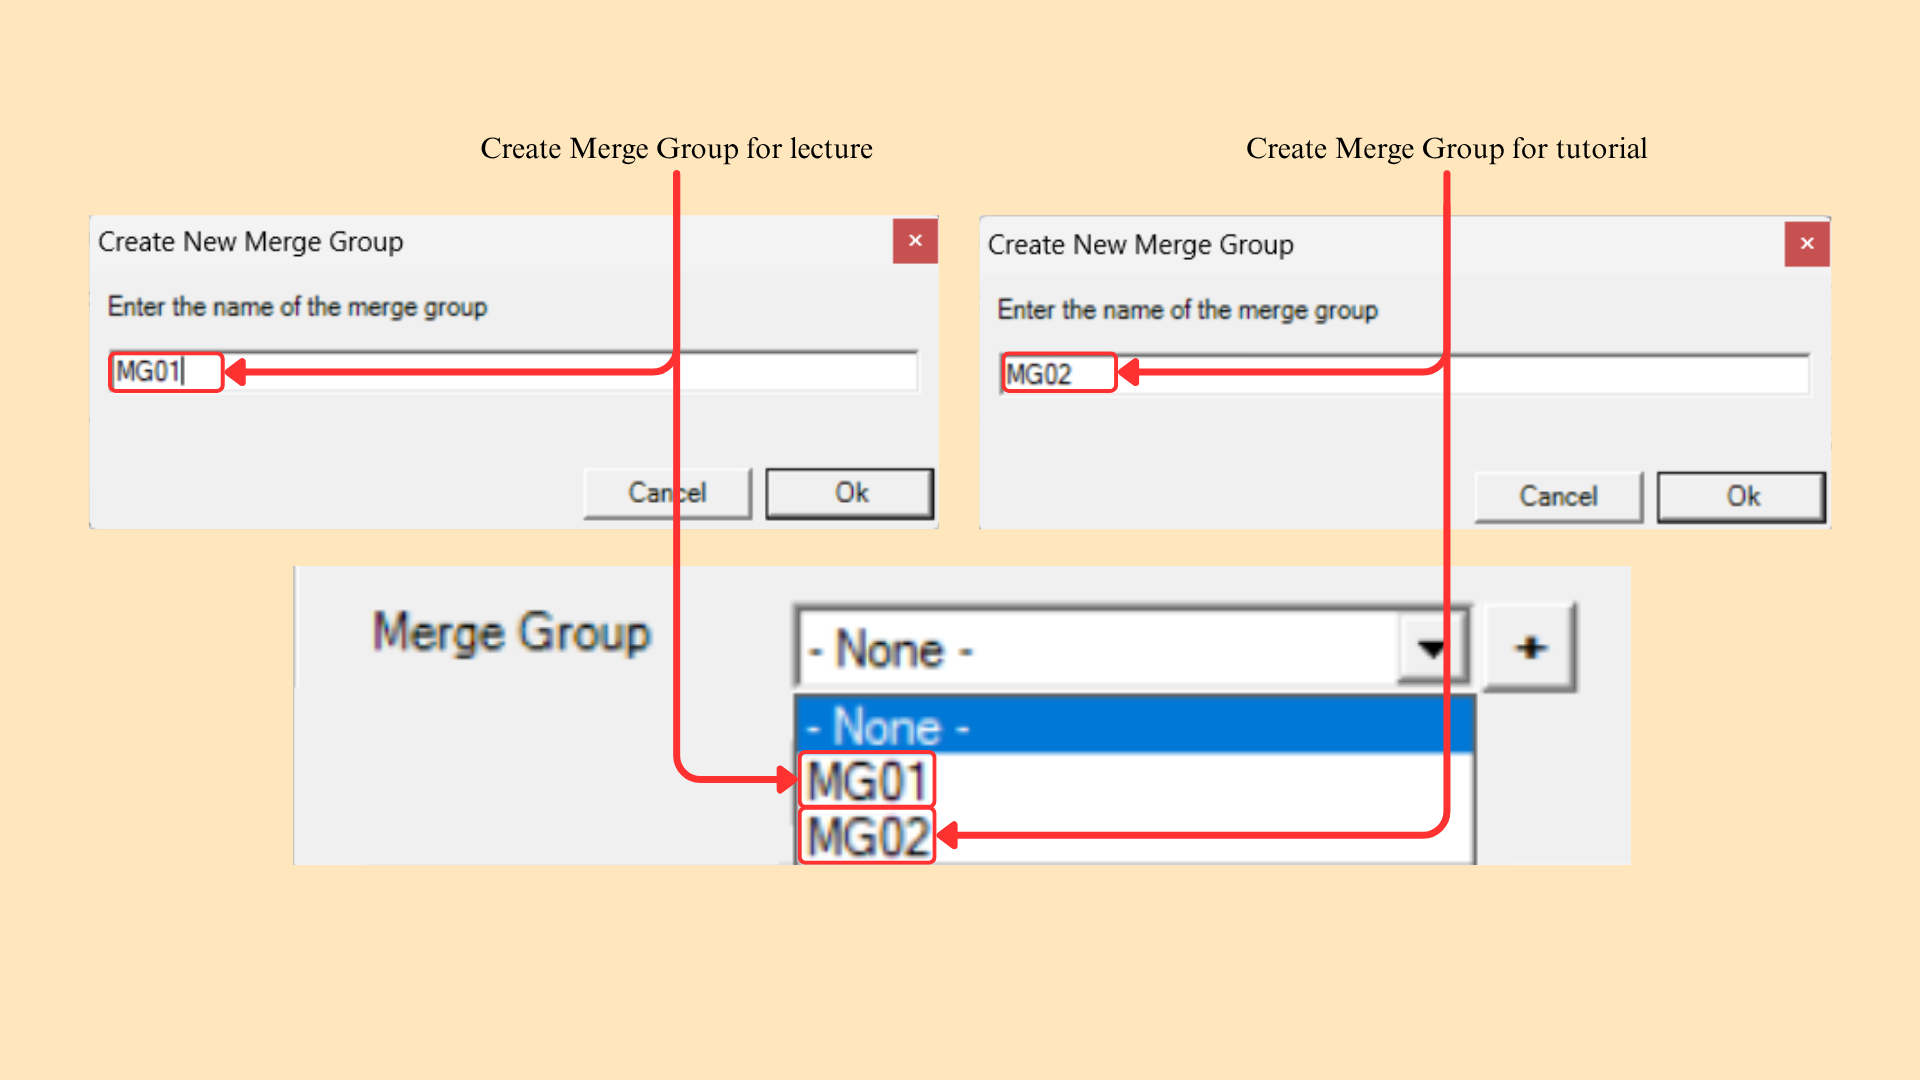
Step 2: Enter the name of the Merge Group.
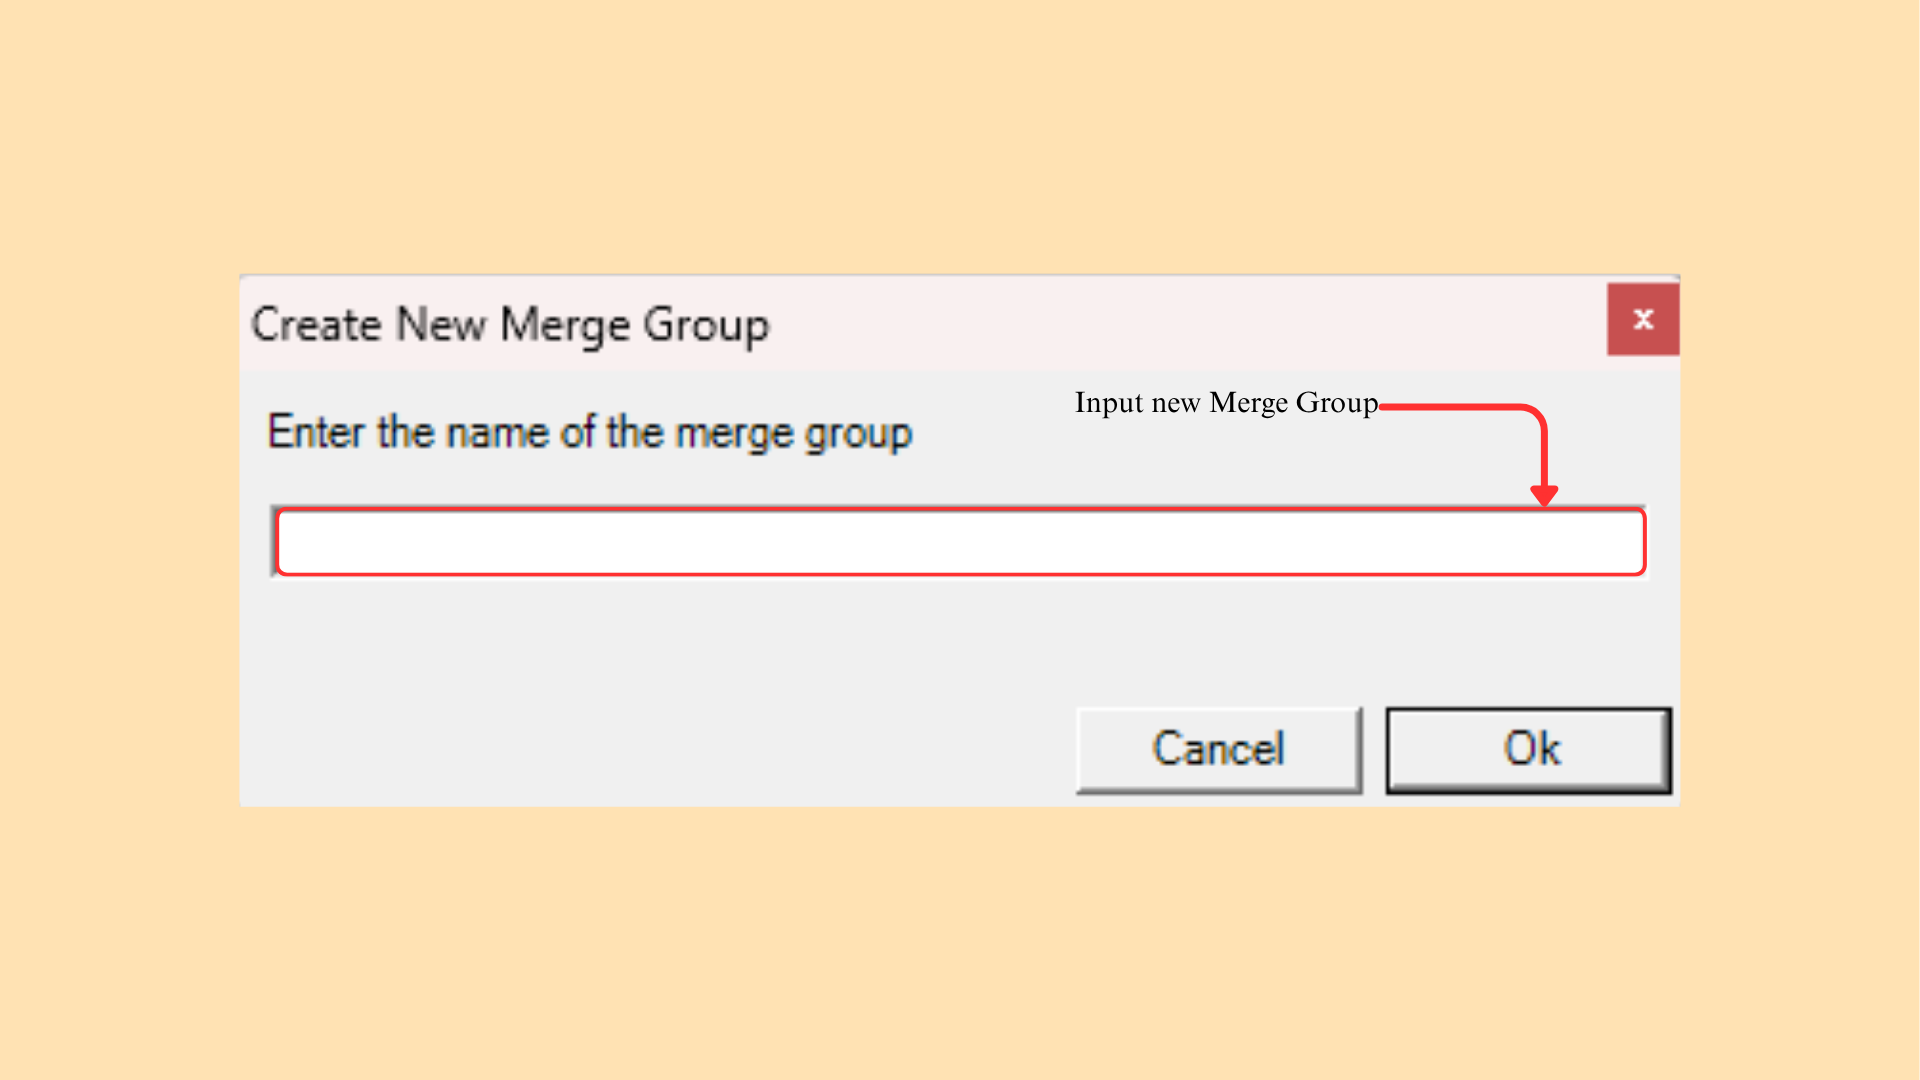
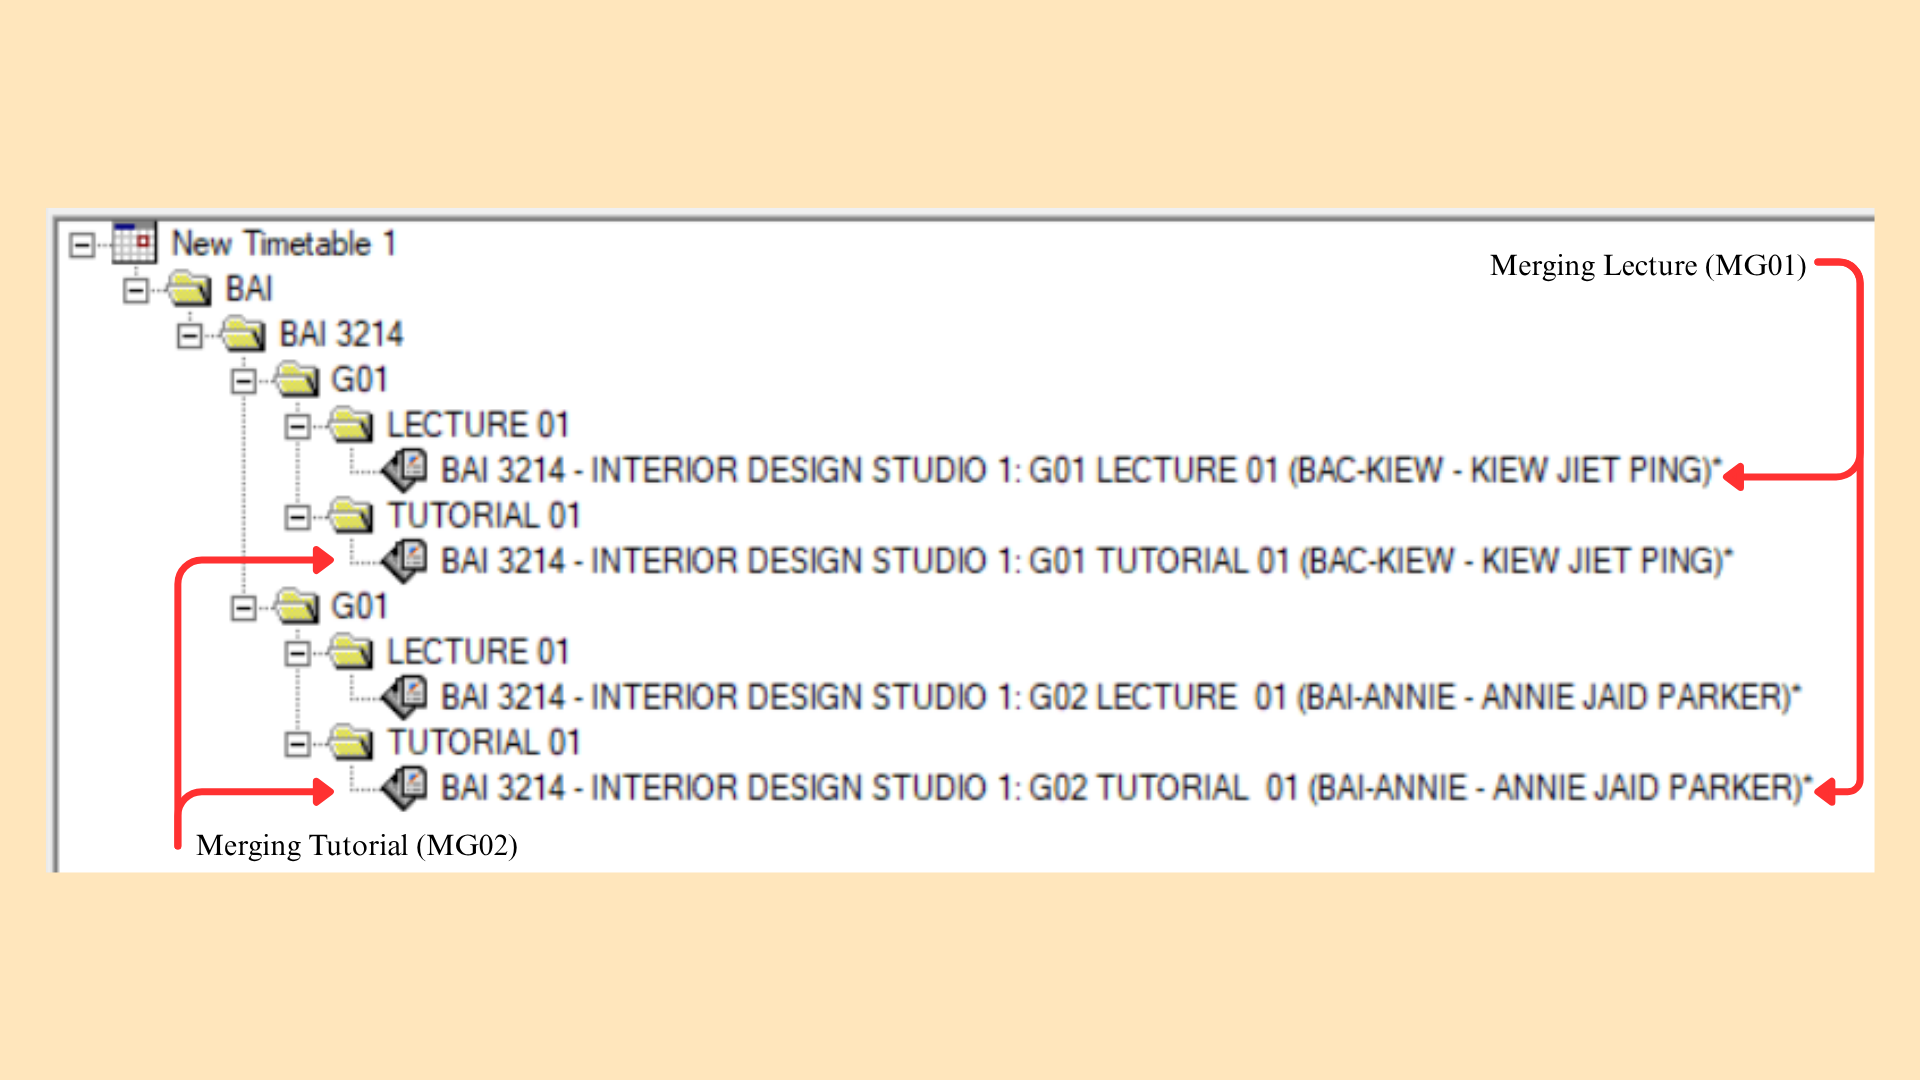
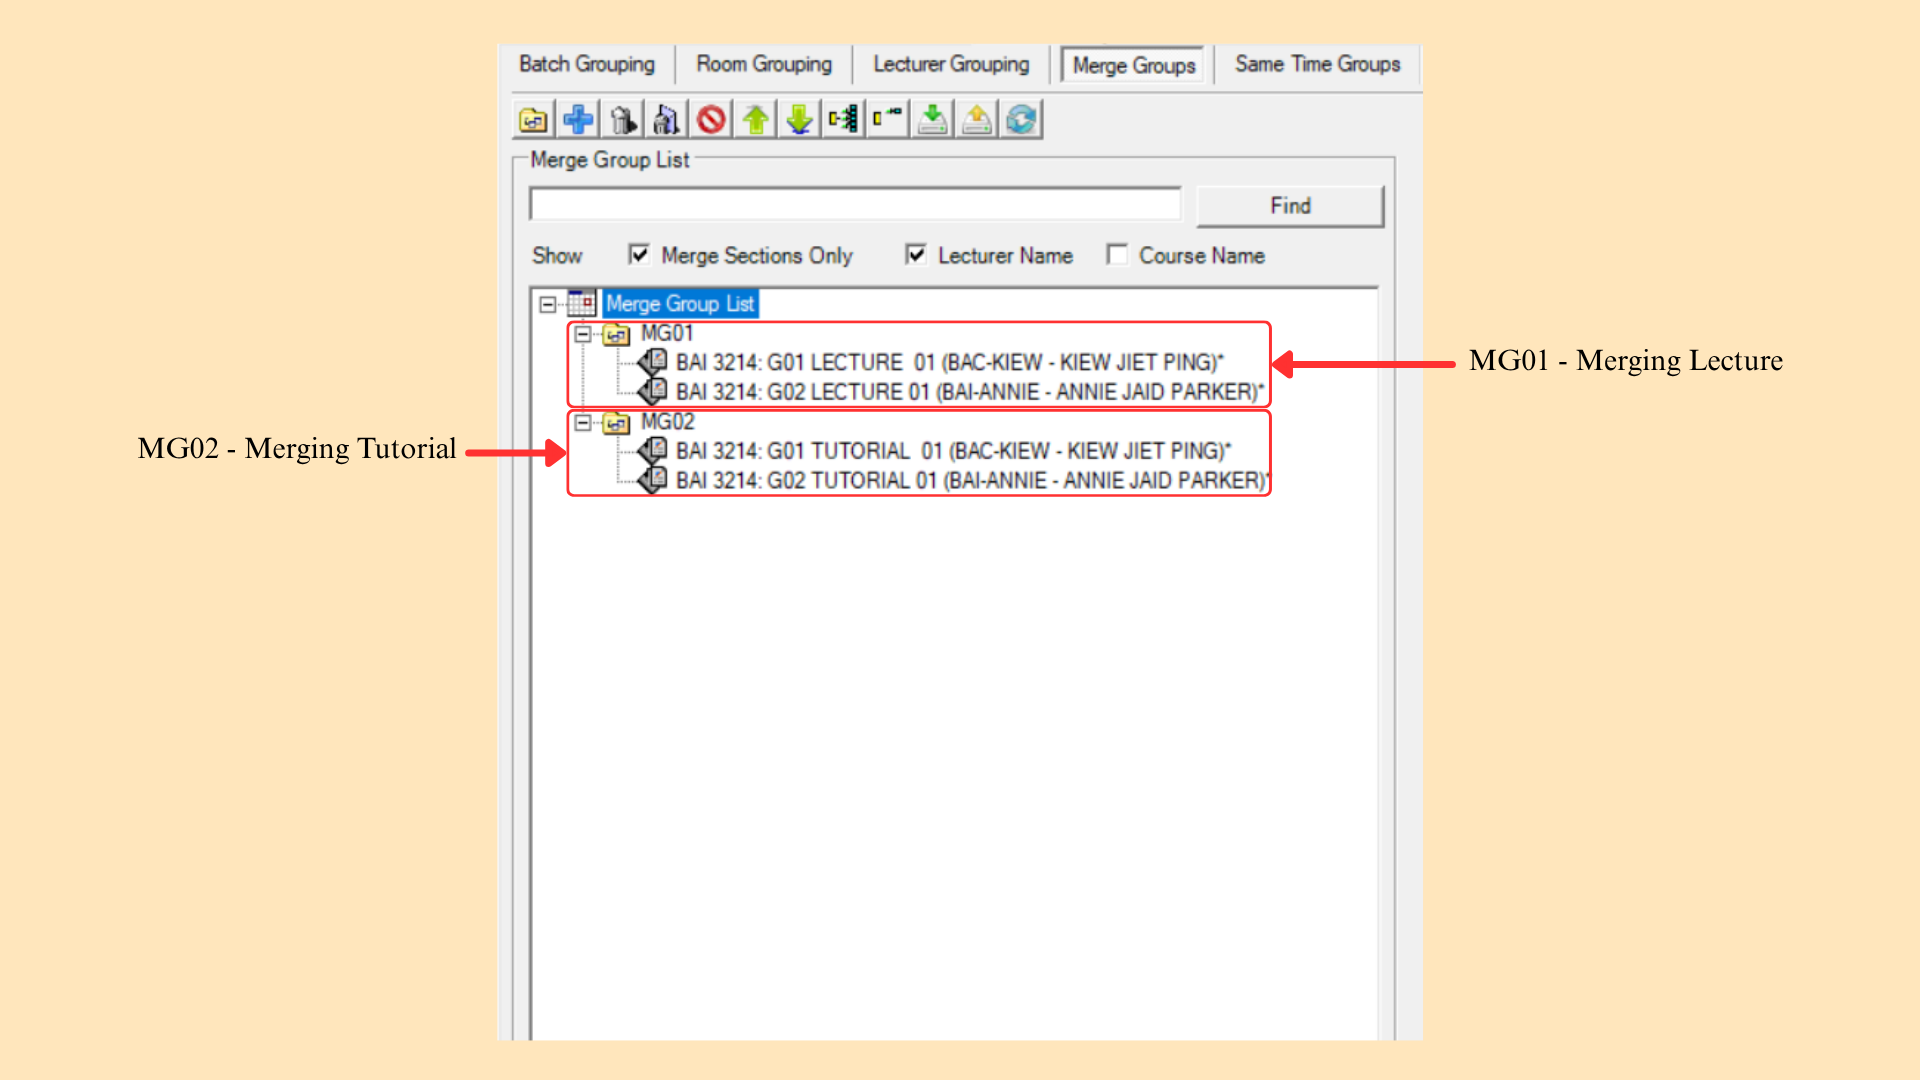
Step 3: For this example, we do MG01 for Merging Lecture group and MG02 Merging Tutorial group. The newly created will be display in Merge Group in Section Properties.
This is the test file we'll be using for MG01 – Merging Lecture Group and MG02 – Merging Tutorial Group.
You can see the Merge records created on Data > Merge List.
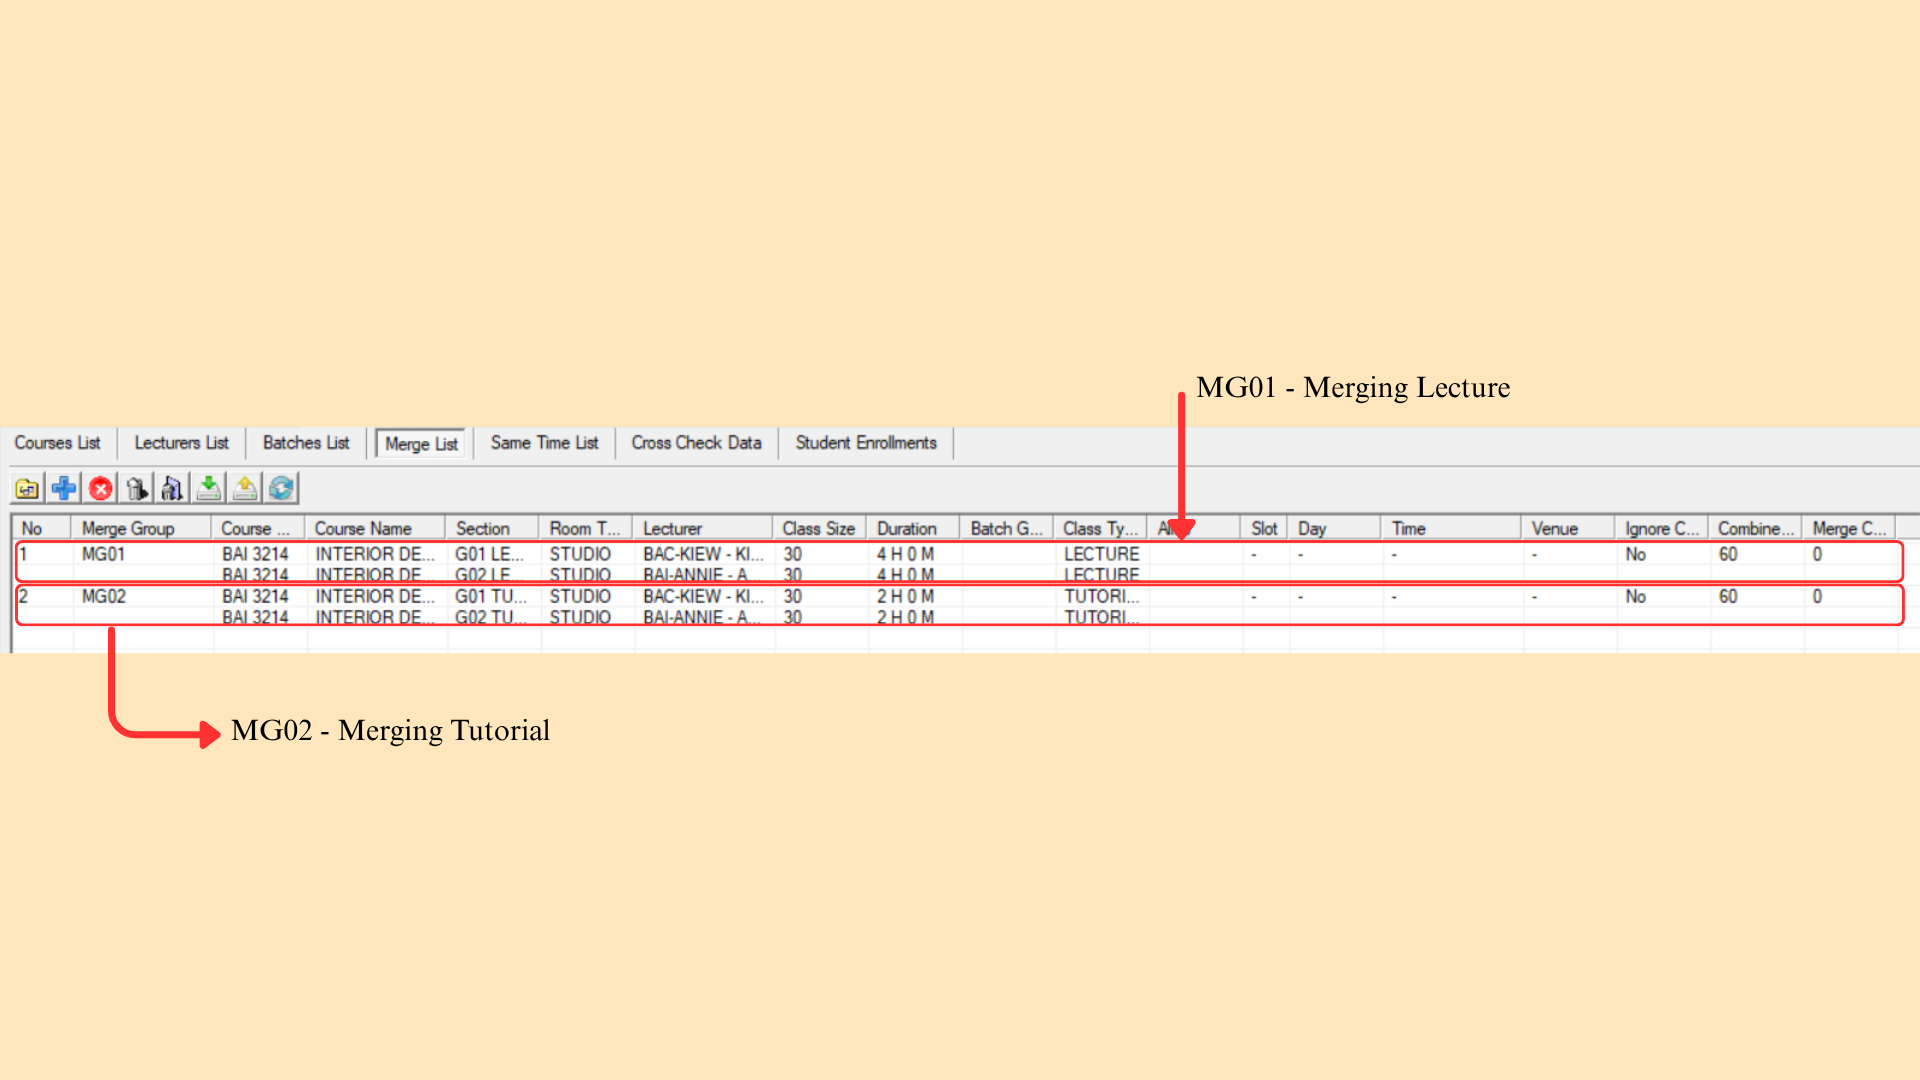
The same records also appear on Grouping > Merge Groups.
7.2.4 Same Time Class
A same time class arrangement schedules two or more different subjects or subgroups to run at precisely the same time slot, but in separate venues. Unlike merging, students do not attend a single combined session; they are instead divided into separate classes, each attending their own course in its respective venue.
To create a Same Time Group, there are 3 simple steps to do so.
Step 1: Create a new Same Time Group through Section Properties.
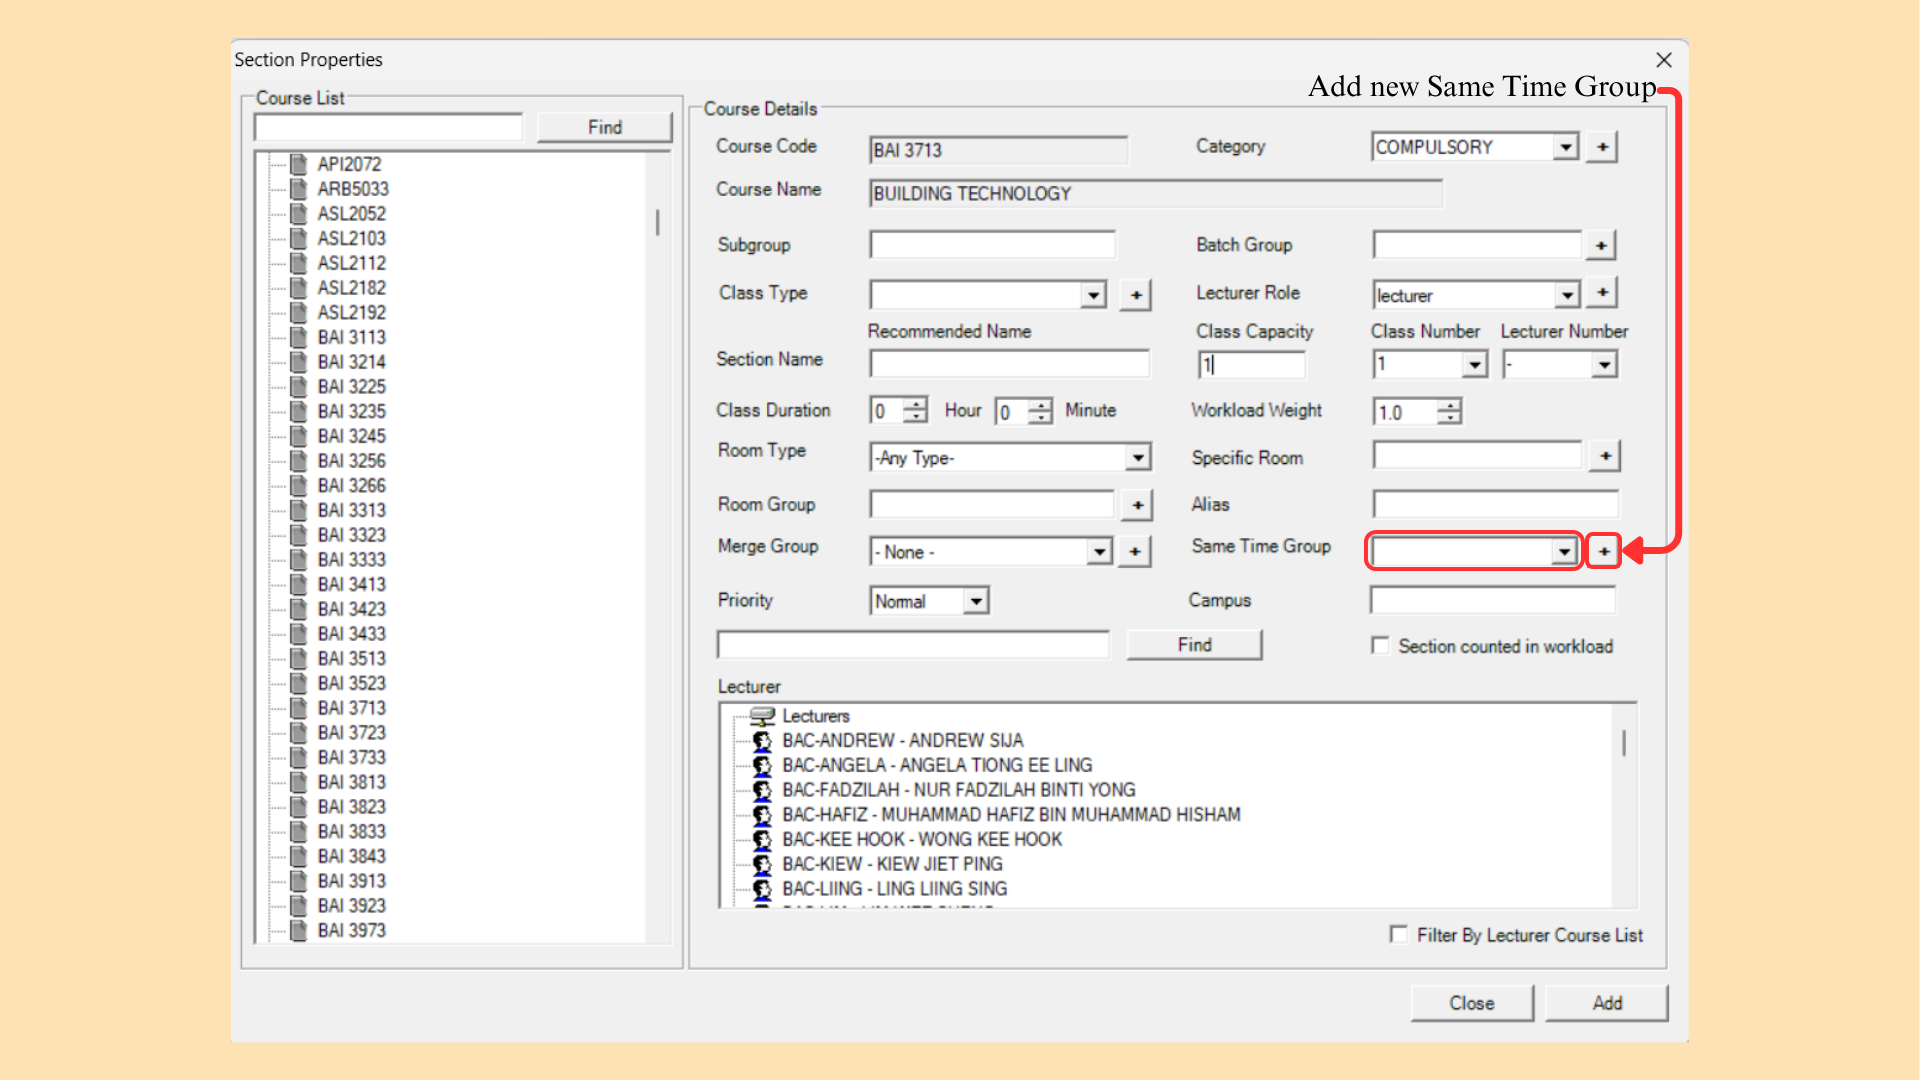
Step 2: Enter the name of the Same Time Group.
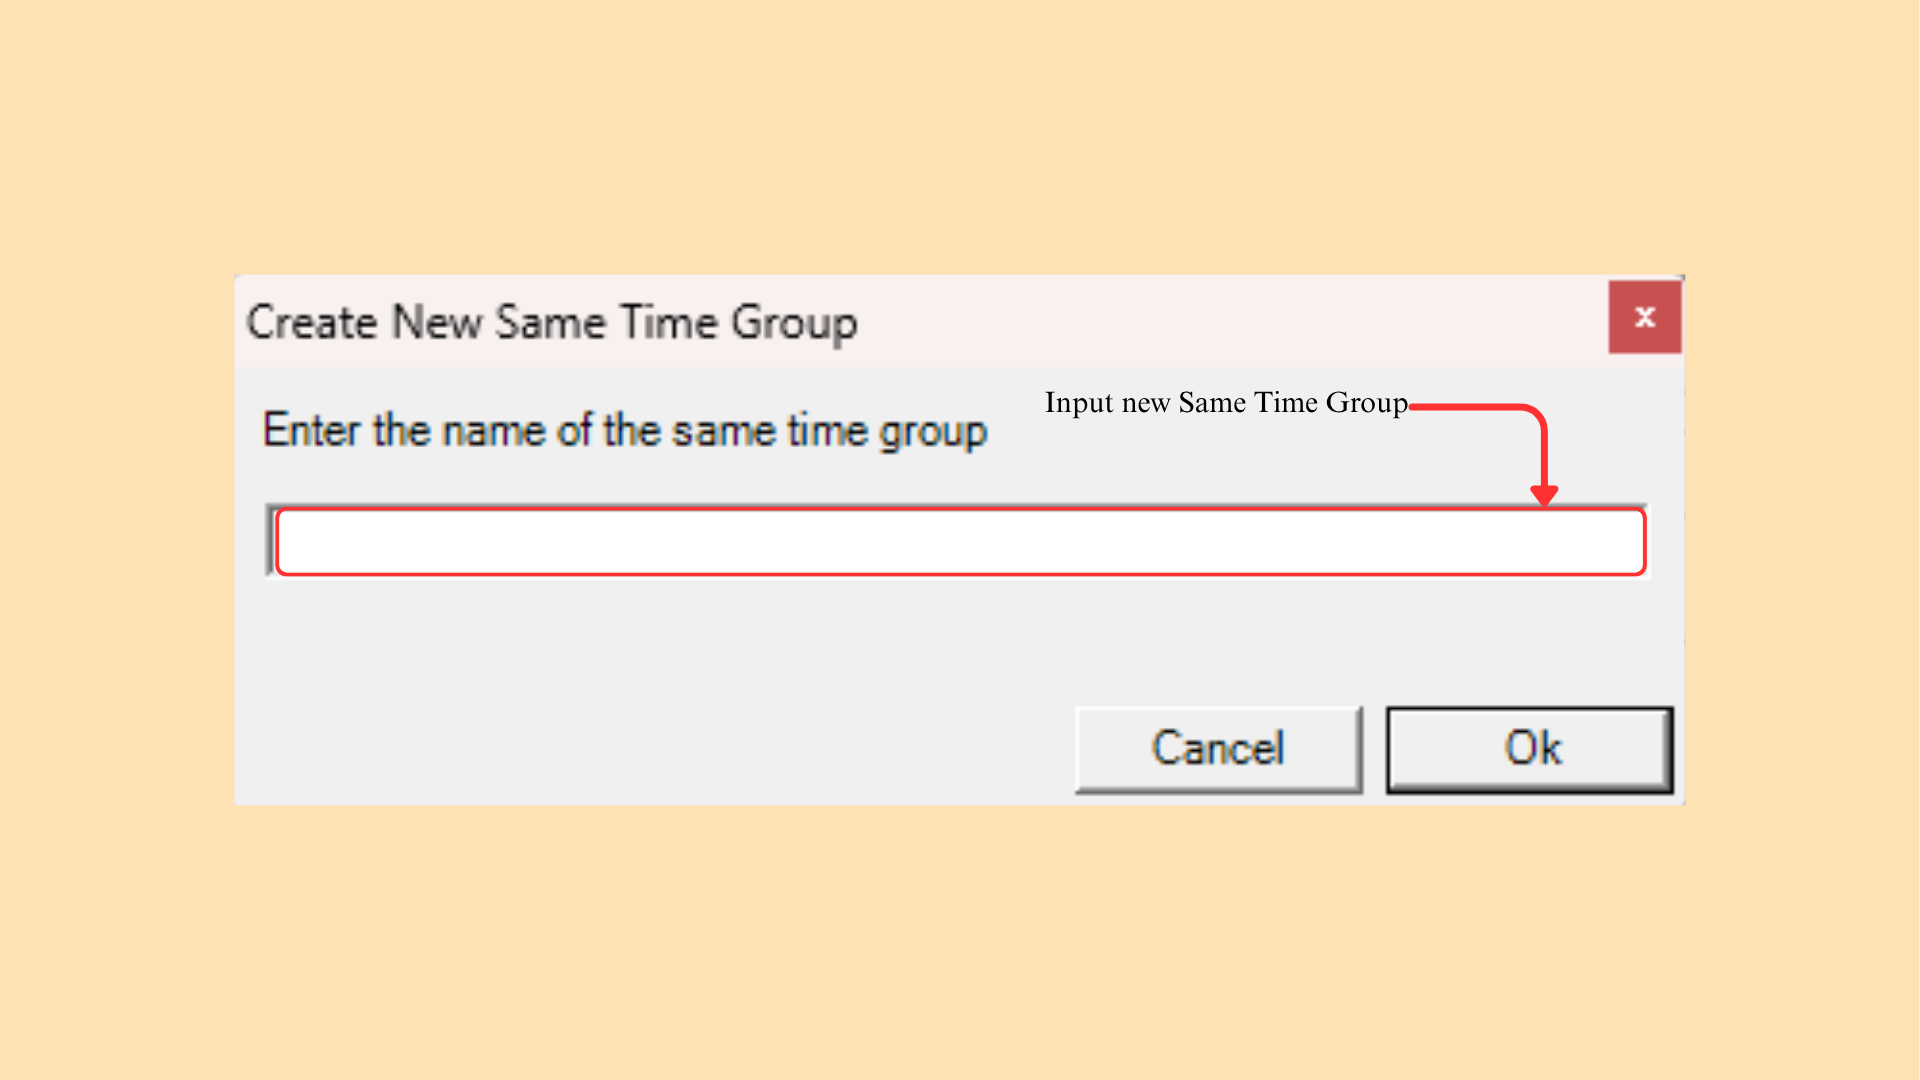
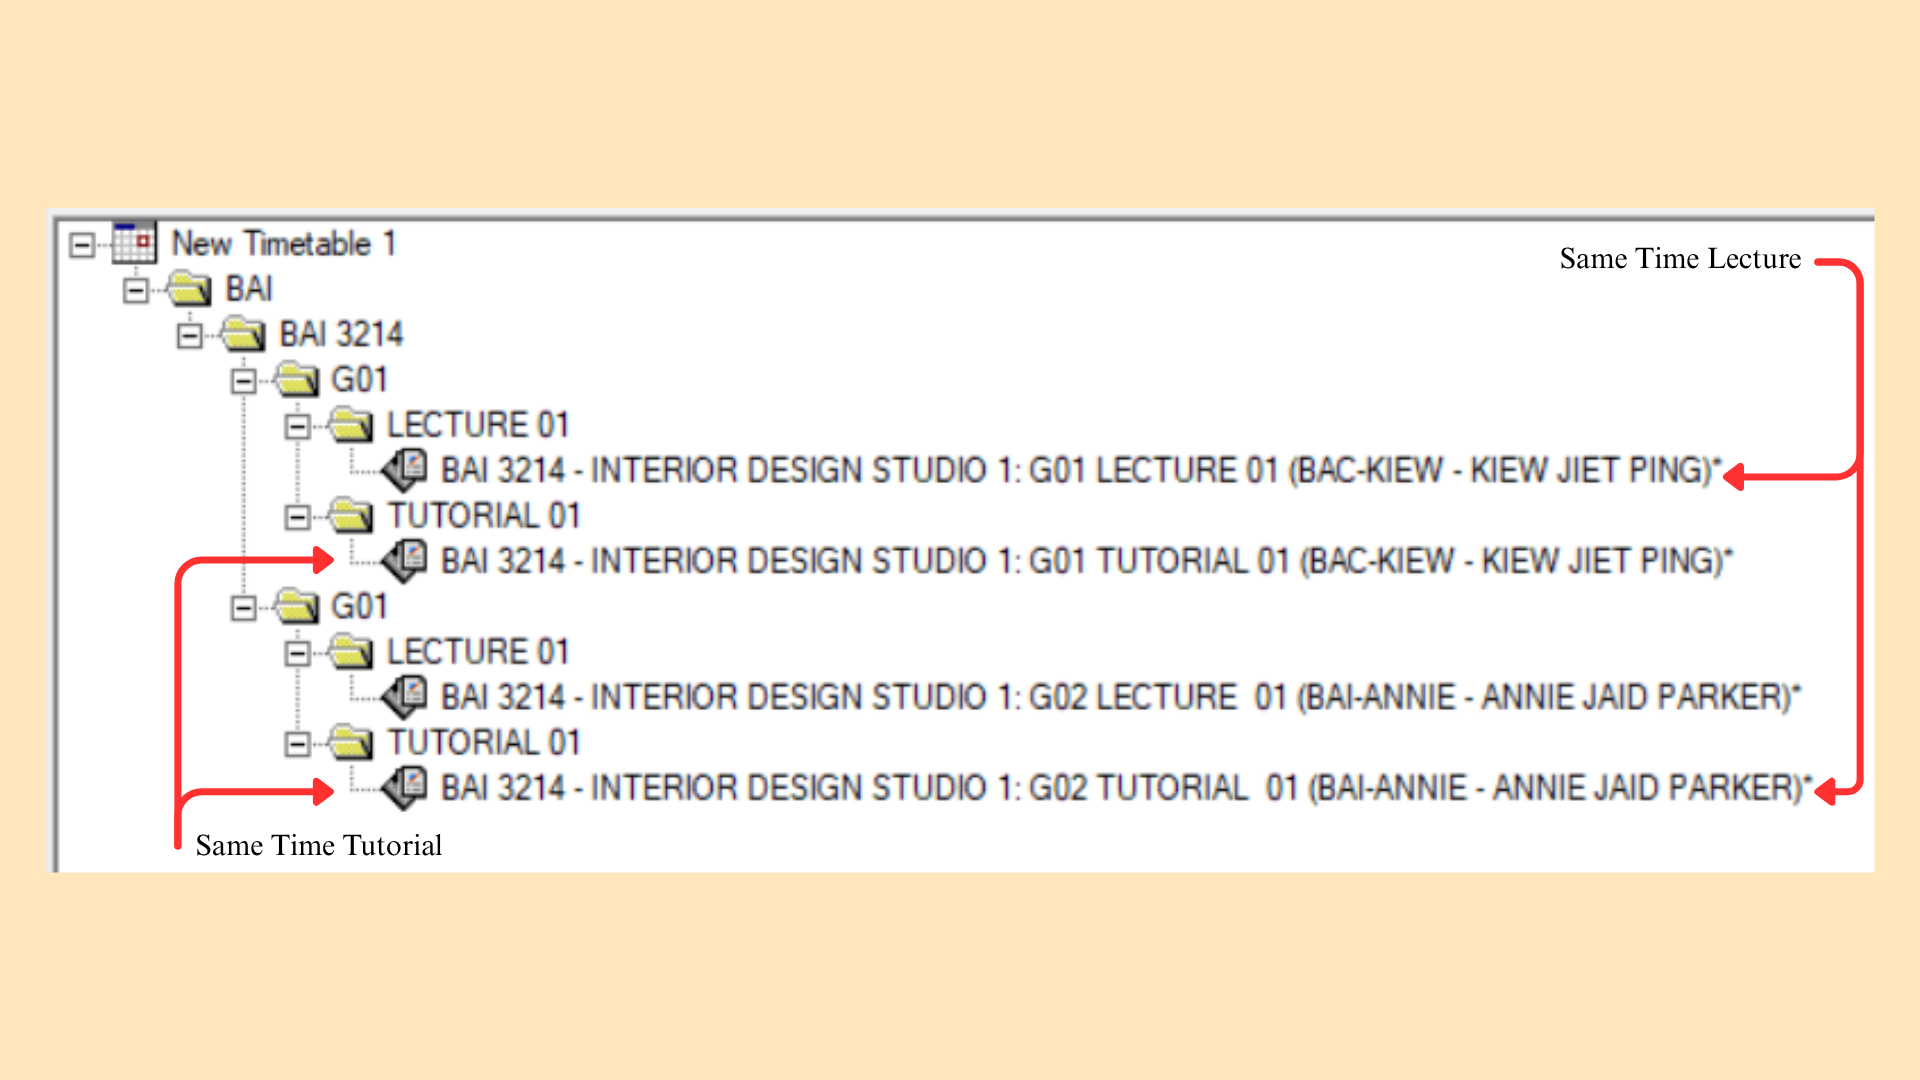
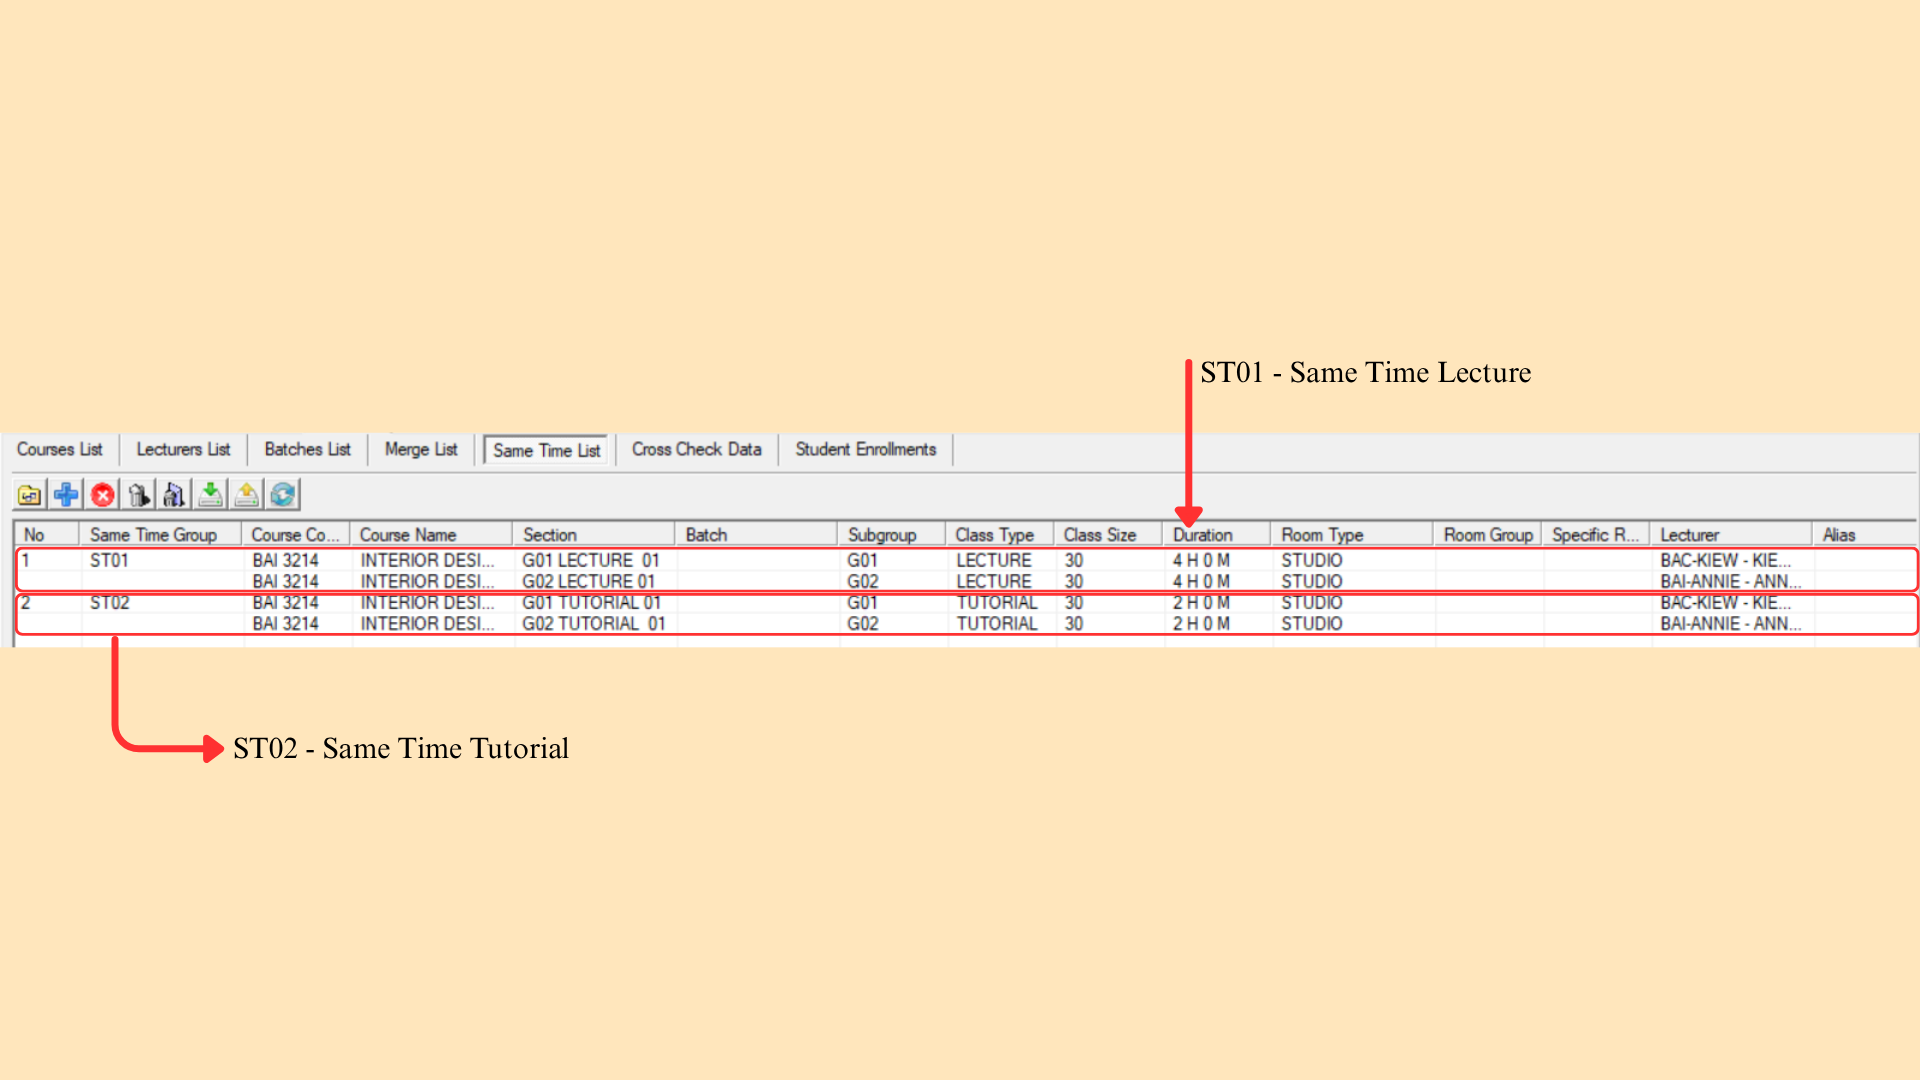
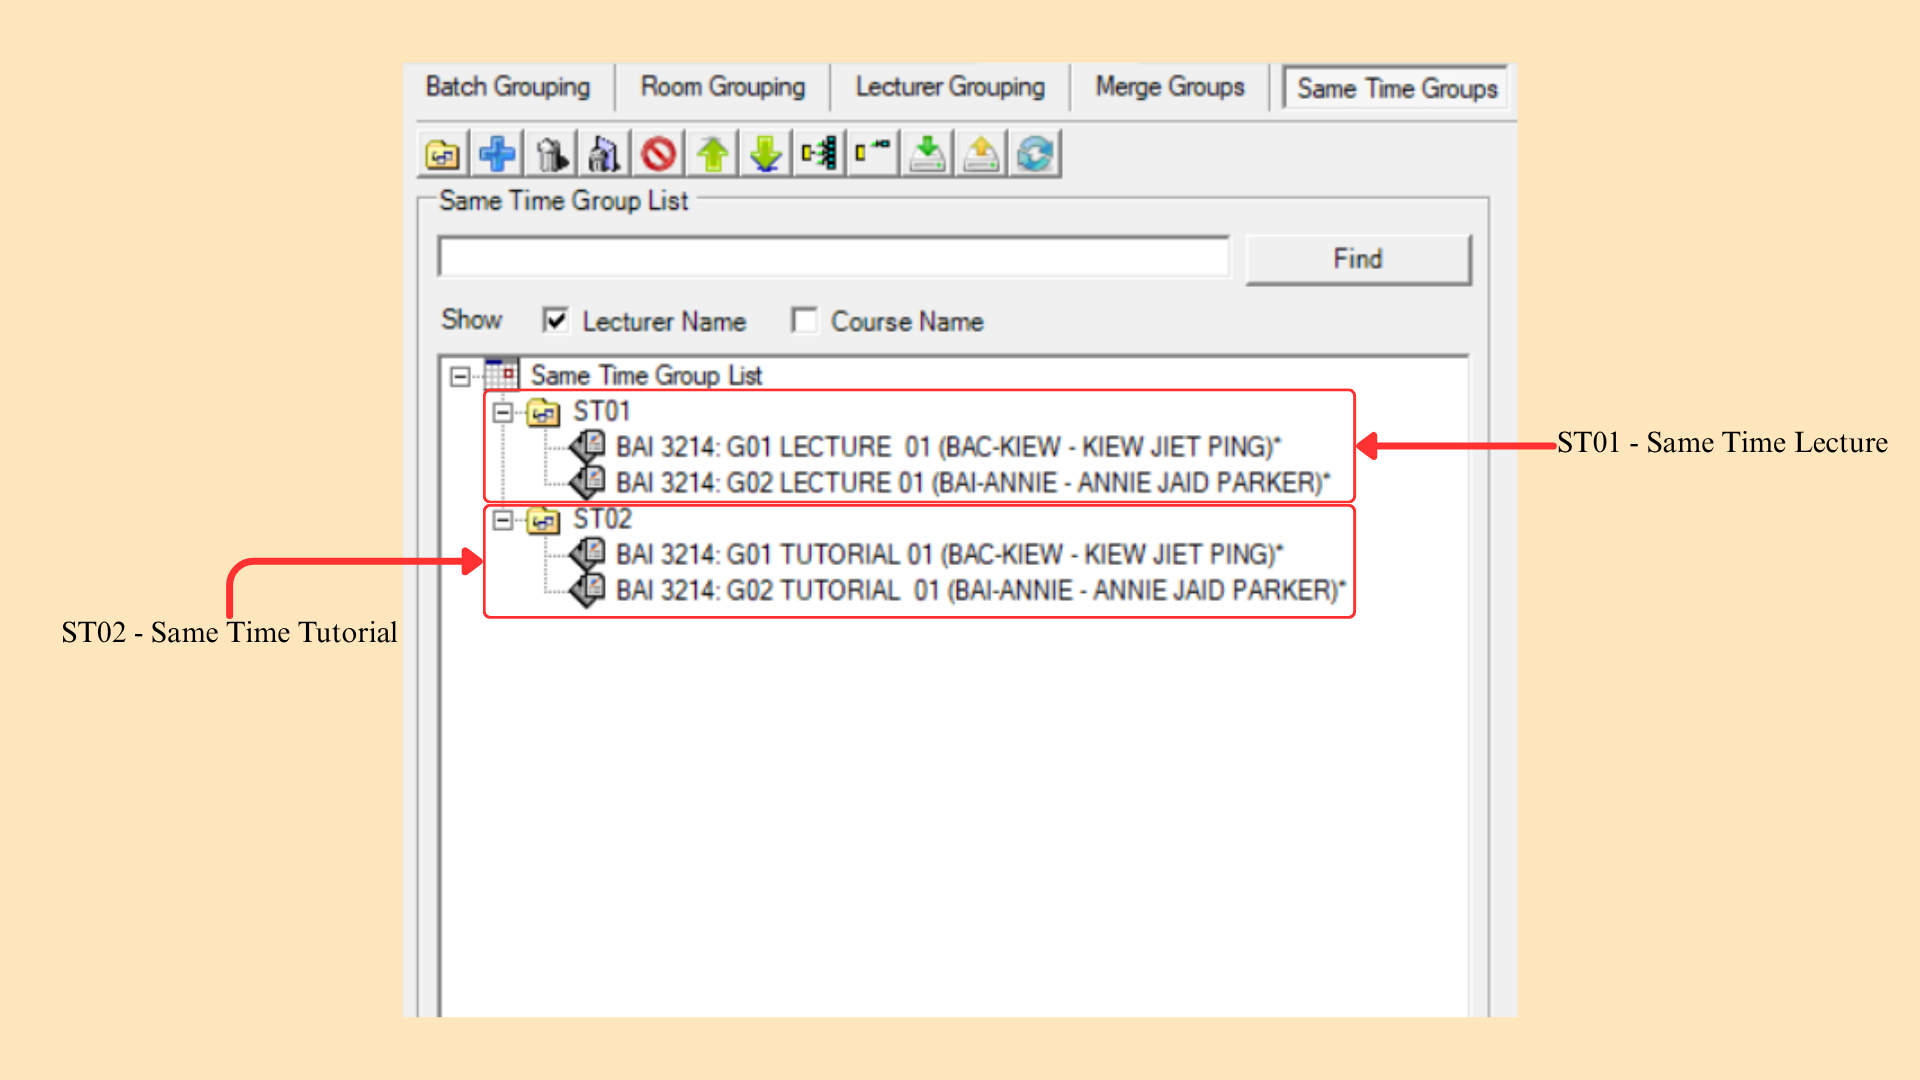
Step 3: For this example, we do ST01 for Same Time Lecture group and ST02 Same Time Tutorial group. The newly created Same Time Group will be display in Same Time Group in Section Properties.
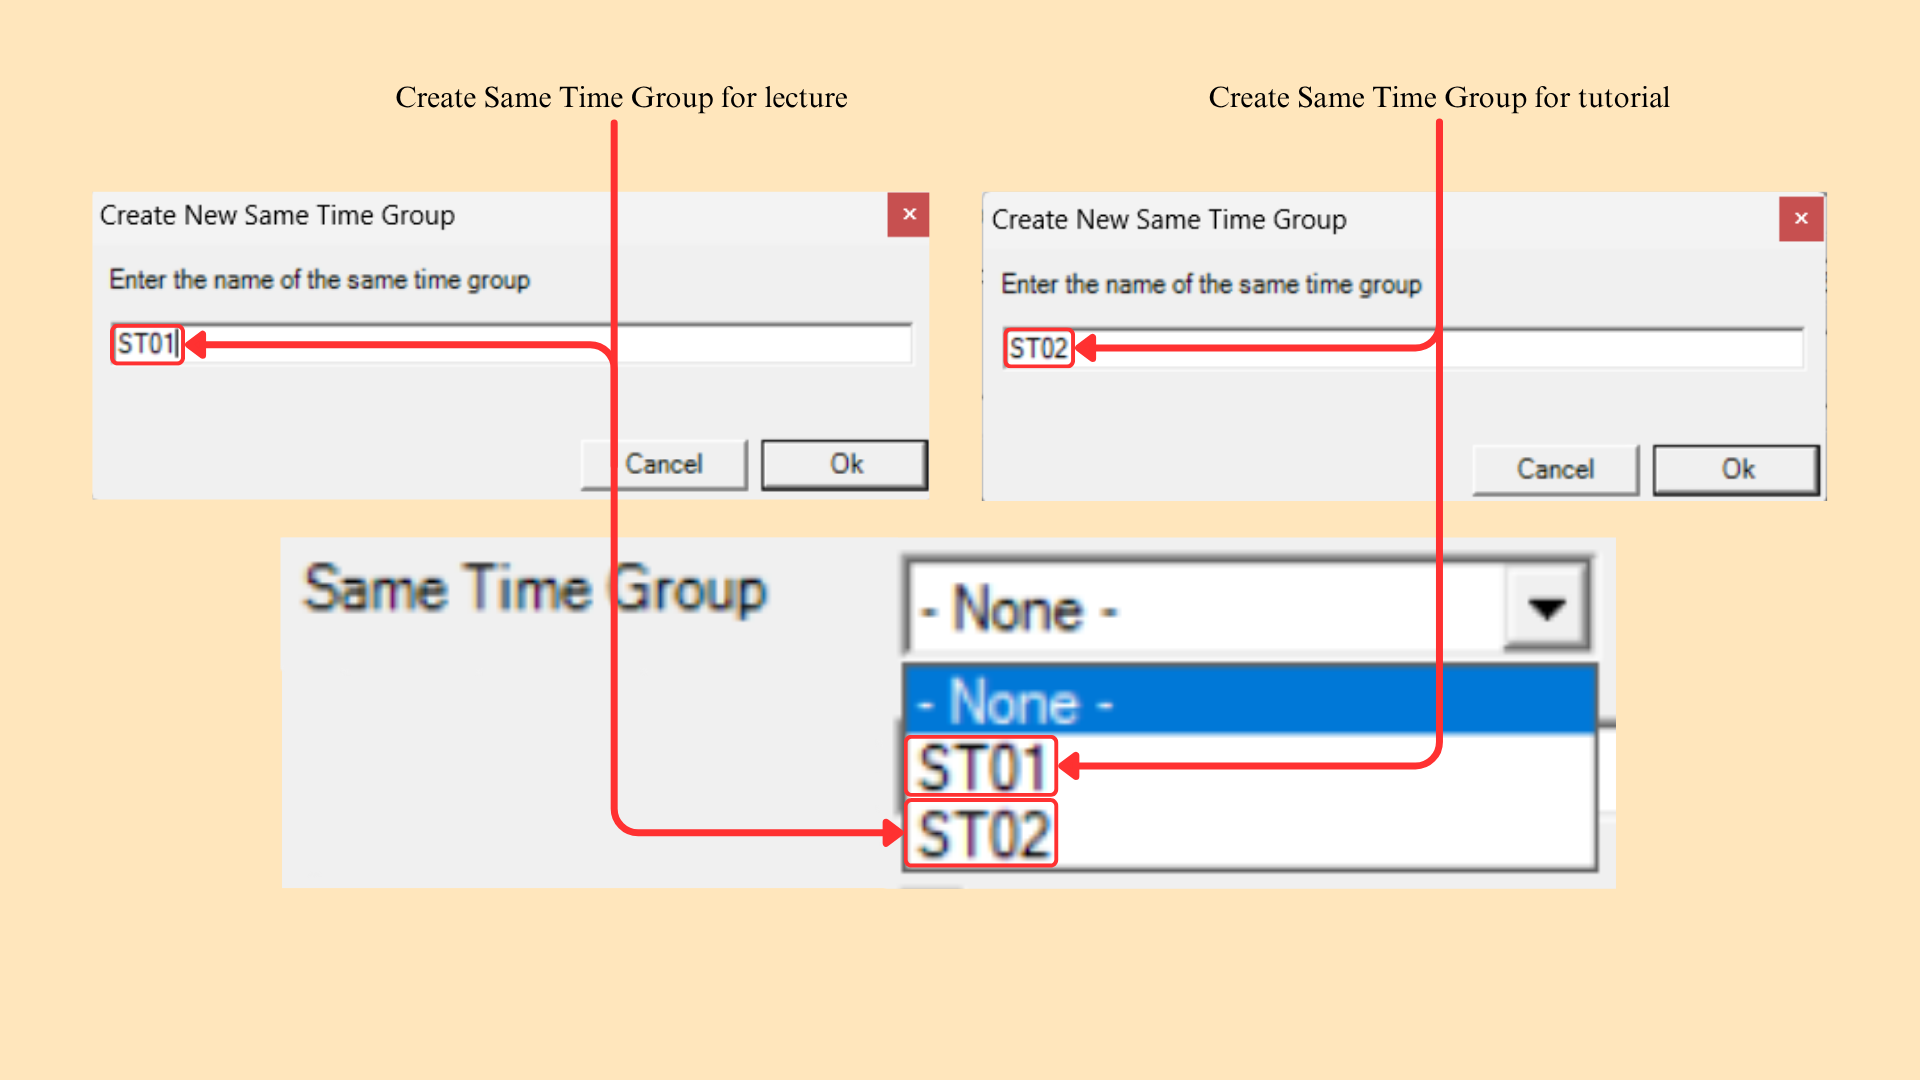
This is the test file we'll be using for ST01 – Same Time Lecture Group and ST02 – Same Time Tutorial Group.
You can see the Same Time records created on Data > Same Time List.
The same records also appear on Grouping > Same Time Groups.
7.2.5 Team Teaching
Team teaching assigns two or more lecturers to the same subgroup class, with each lecturer conducting the class alternately rather than concurrently. The lecturers are linked through a shared team teaching code, which allows the system to recognise their assignments as a single class rather than as separate sessions.
This template of tree structure is specifically for Team Teaching.
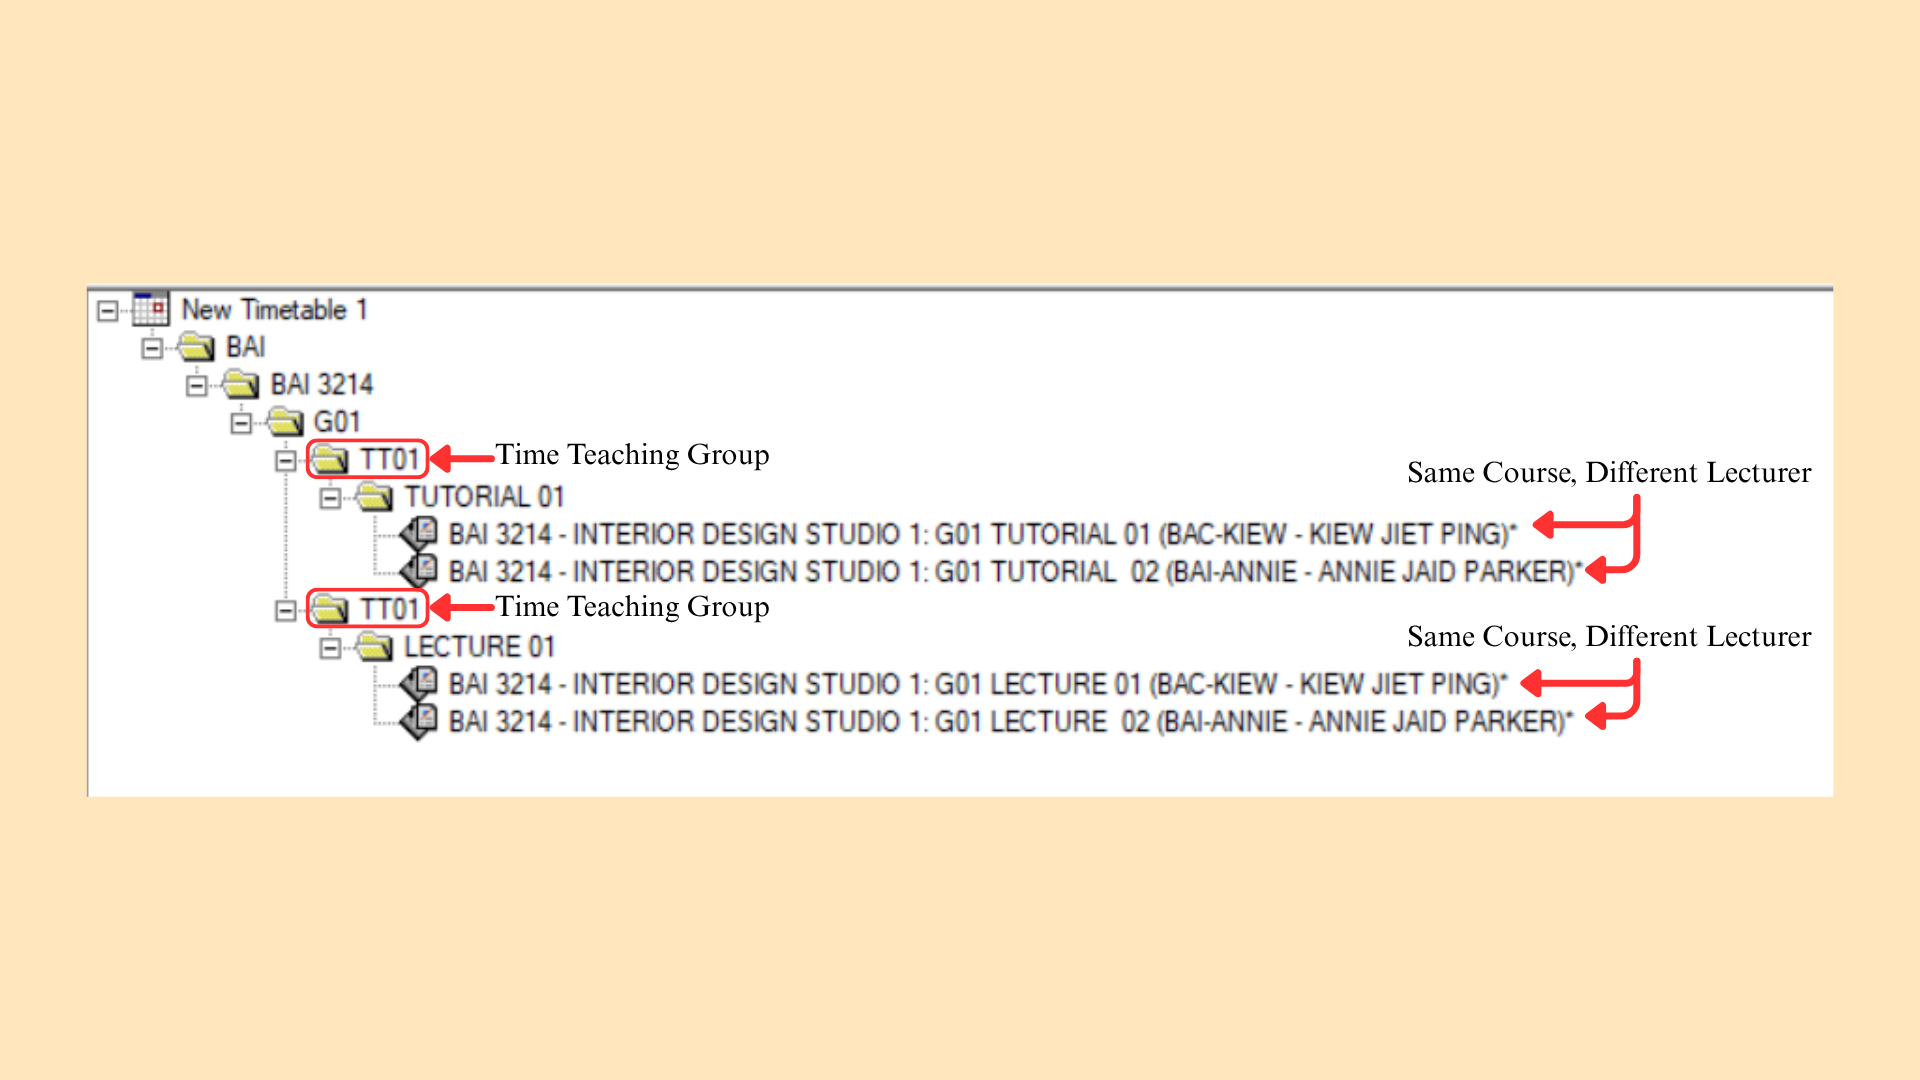
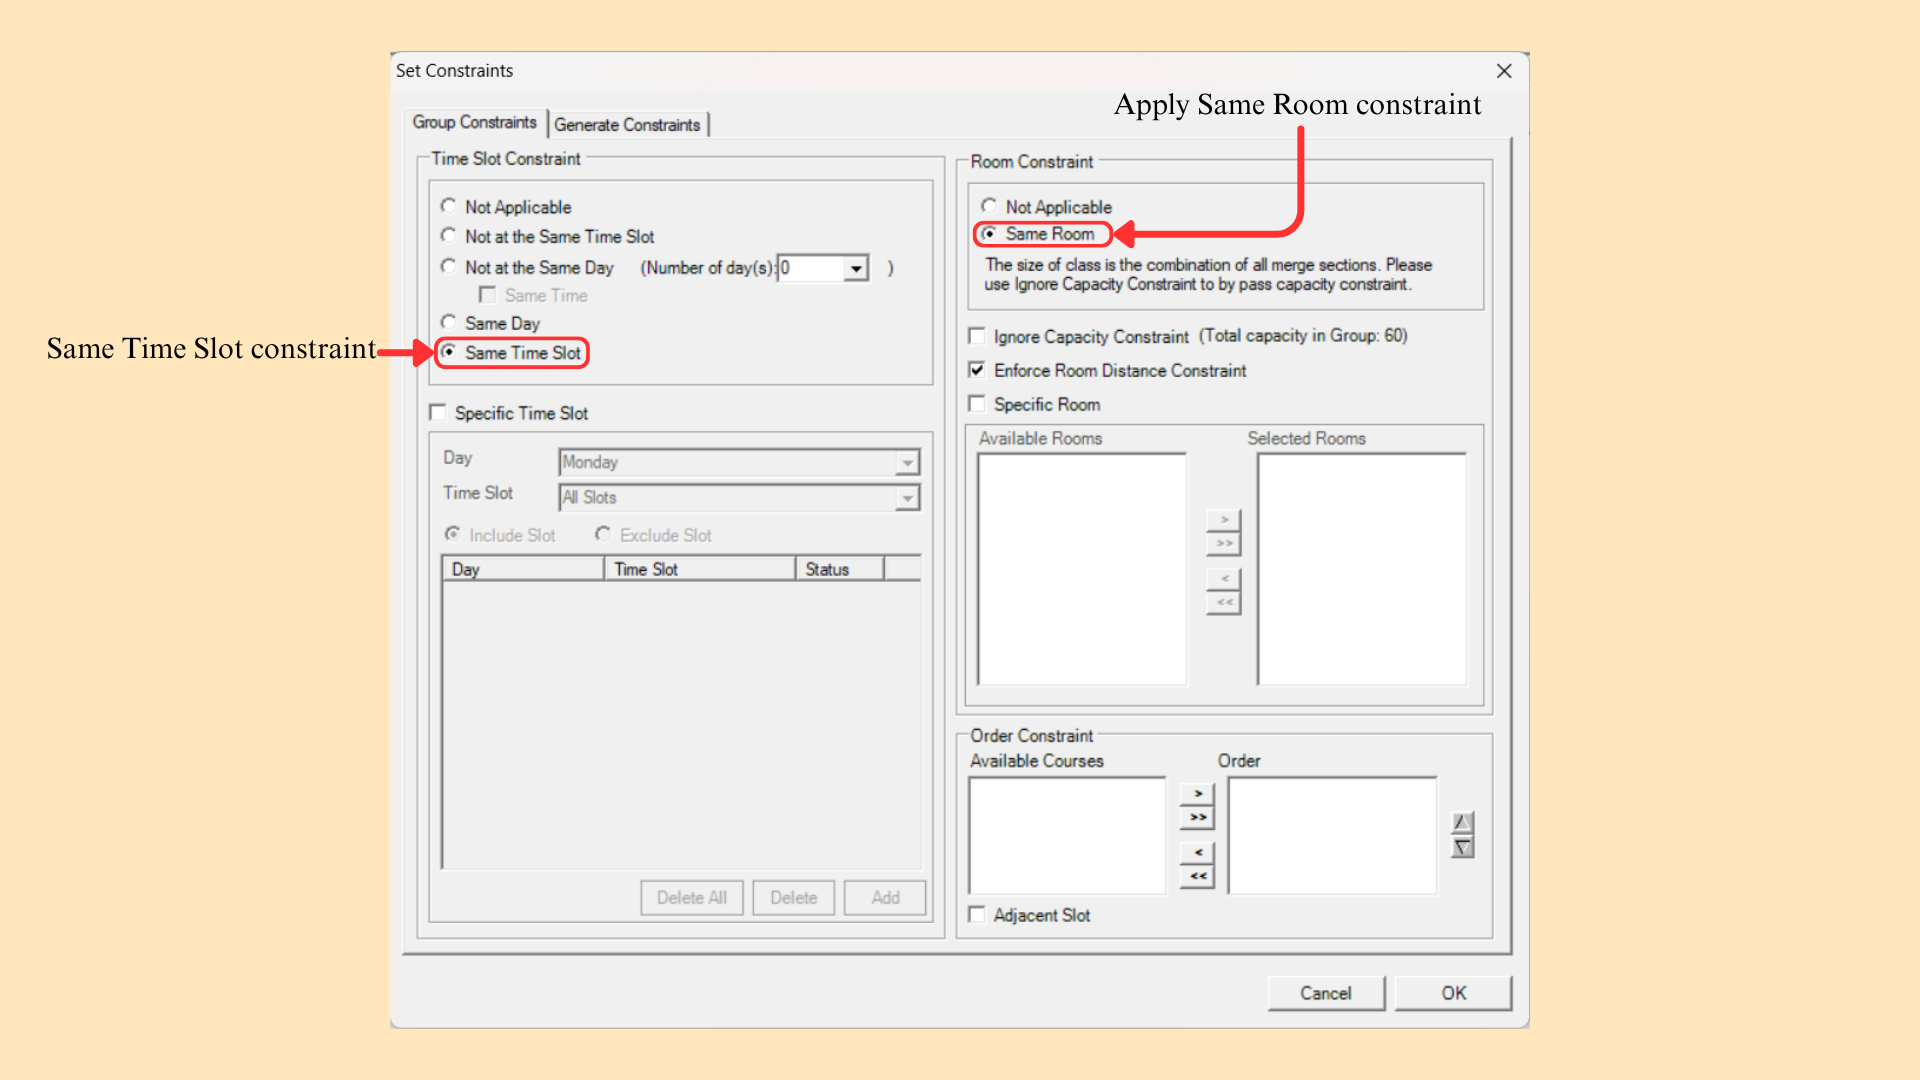
To effectively apply Team Teaching Constraint, User need to set Same Time Slot and Same Room constraint. This shortcut is provided through double click on Team Teaching Folder which consists of all the sections under the same Team Teaching Constraint (e.g TT01).