Semester
Administrators and authorised users can access this module
Dashboard > Administration > Semester
Semester records define the academic periods used across timetable scheduling, course data entry, and public viewing. Each semester has a date range, a timeslot configuration, and an optional room assignment.
Overview
The Semester page lists all academic semesters registered in the system. Each row shows the semester identifier, its number, year, description, date range, and display settings.
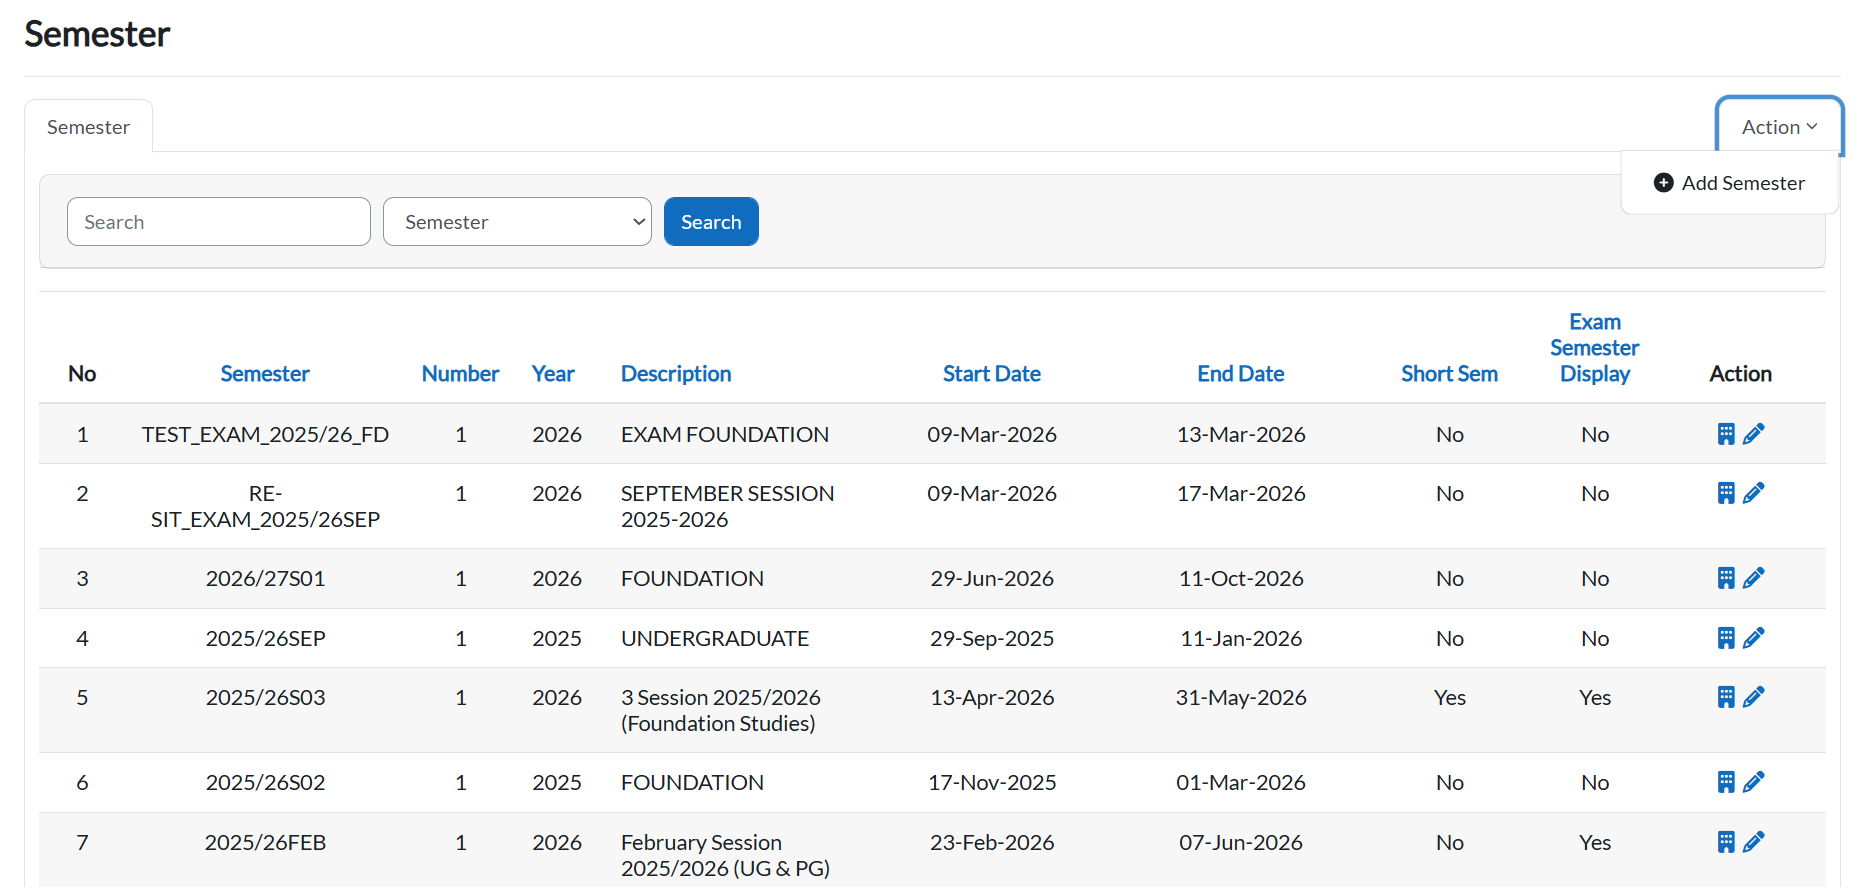
Table Columns
- Semester: The semester identifier code (e.g.
2025/26S02,2025/26FEB). - Number: The semester sequence number within the academic year.
- Year: The calendar year this semester falls in.
- Description: A descriptive label for the semester (e.g. Undergraduate, Foundation Studies).
- Start Date / End Date: The active date range for this semester.
- Short Sem: Whether this is a short semester (Yes / No).
- Exam Semester Display: Whether this semester is shown in the exam timetable public view (Yes / No).
- Action:
 (room tagging) and
  (edit).
Search
- Search: Type a keyword and choose Semester from the dropdown, then click Search.
Add New
Create a new semester record by filling in the required fields. Required fields are marked with a red exclamation mark (!).
Steps
- Click the Action dropdown and select Add Semester.
- Fill in the required and optional fields.
- Click Save Changes to create the semester, or Cancel to discard.
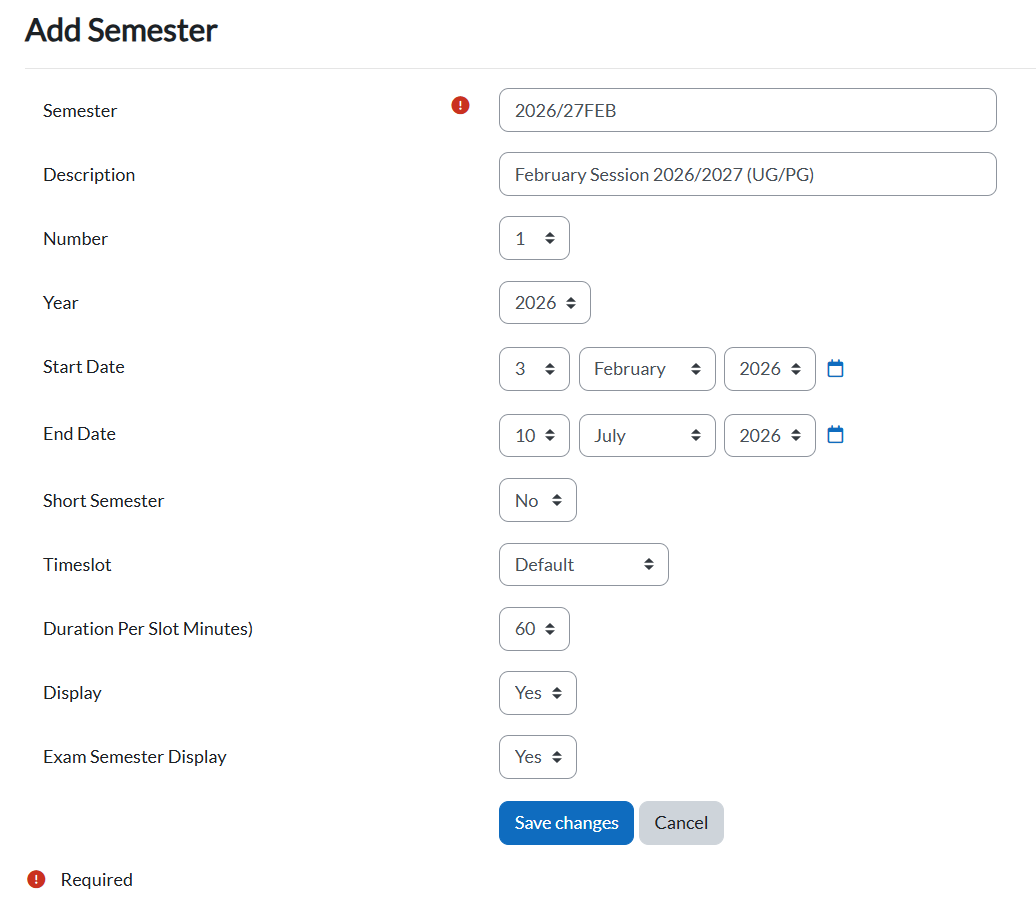
Field Reference
- Semester *: The unique semester code (e.g.
2026/27FEB). Use a consistent naming convention. - Description: A human-readable label for this semester (e.g. February Session 2026/2027 (UG/PG)).
- Number: The sequence number of this semester within the academic year.
- Year: The calendar year this semester belongs to.
- Start Date: The first day of the semester. Select day, month, and year using the dropdowns or the calendar picker.
- End Date: The last day of the semester. Select using the same dropdowns or calendar picker.
- Short Semester: Set to Yes if this is a shorter-than-standard semester period.
- Timeslot: The timeslot configuration to use for this semester. Set to Default to use the system-wide timeslot, or select a custom timeslot if configured.
- Duration Per Slot (Minutes): The length of each timetable slot in minutes (e.g. 60).
- Display: Set to Yes to make this semester visible in the standard public timetable view.
- Exam Semester Display: Set to Yes to include this semester in the exam timetable public view.
Edit
Update the details of an existing semester.
Steps
- Locate the semester in the table.
- Click the in the semester row.
- Update the relevant fields; the same fields as the Add Semester form are available.
- Click Save Changes to confirm, or Cancel to discard.
Start & End Date
The Start and End Date define the active window for each semester. The system uses these dates to determine which semesters are currently active, and critically, multiple semesters can be active at the same time if their date ranges overlap.
- Start Date: The date from which this semester becomes active. The timetable and data entry for this semester are accessible from this point.
- End Date: The date after which this semester is considered closed. Once passed, the semester timetable is removed from the public view (if Display is set to Yes).
Overlapping / Concurrent Semesters
It is common for institutions to run more than one semester at the same time, for example, a standard undergraduate semester running alongside a short foundation semester, or a re-sit exam semester that overlaps with the start of a new semester.
The system supports this by treating any semester whose date range includes today's date as currently active. If two semesters overlap in dates, both will be treated as active simultaneously. This means:
- Both semesters may appear in the timetable selector for data entry and scheduling.
- Both timetables may be visible in the public view at the same time (if Display is set to Yes for each).
- Room availability and constraints are evaluated per semester; a room tagged to one semester is not automatically available in the other.
Semester-Room Tagging
Semester-Room Tagging controls which rooms are available for each semester. During data entry and timetable generation, the system only shows rooms that have been tagged to the selected semester; rooms not tagged to that semester will not appear as options, regardless of their availability.
Why This Matters
Different programmes often run on different semester codes and use physically separate sets of rooms. For example:
- Foundation programmes may have their own semester (e.g.
2026/27S01) and use a dedicated set of classrooms or studios. - UG/PG programmes run under a different semester (e.g.
2026/27FEB) and use a separate set of rooms.
By tagging only the relevant rooms to each semester, you ensure that data entry users and the timetable engine only see and schedule into the correct physical spaces for their programme, preventing cross-programme room conflicts and keeping the scheduling list clean.
How to Open
From the Semester list, click the in the Action column of the semester you want to configure. This opens the room tagging interface for that semester.
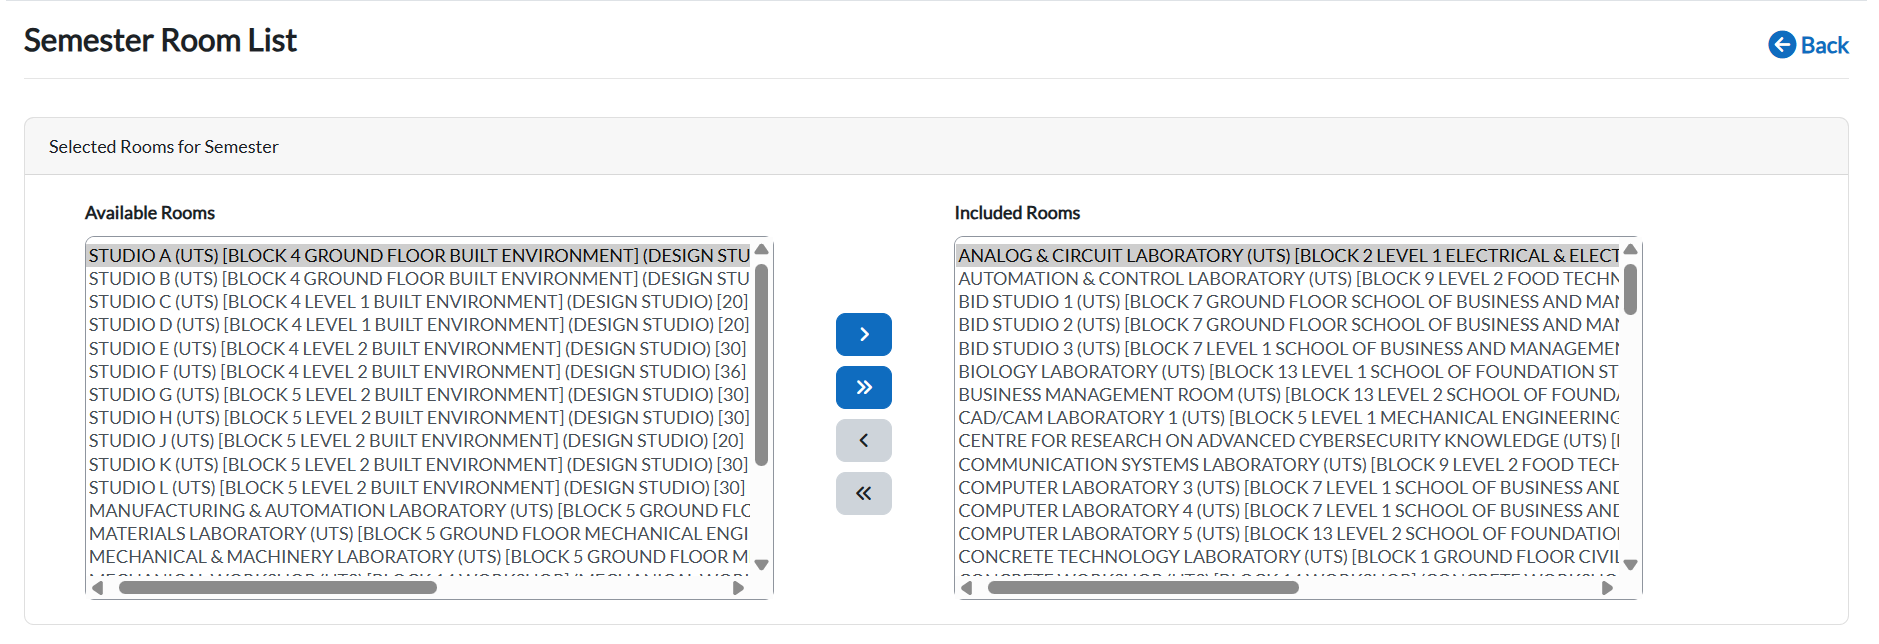
Steps to Tag Rooms
- Click the
 on the semester row to open its room tagging page.
 - Select rooms from the Available list on the left and click › to move them to Included. Use » to move all rooms at once.
- To remove a room, select it from the Included list and click ‹.
- Save the changes when done.