Auto Generate / Manually Assign
Before generating the timetable, ensure that all constraints have been reviewed and configured correctly. There are two (2) options for generating the timetable: use the Auto Generate button or you can Manually Assign.
10.1 Auto Generate
Auto Generate lets the system build the timetable for you. It takes every section that is included, finds a slot and a room for each one, and places it without breaking the constraints you have set.
Before running it, make sure the earlier chapters have been completed in order: Database, Timetable Structure, Data Entry, Constraint and Pre-Generate Analysis. The database must hold the courses, rooms, lecturers and batches; the teaching days, time slots and breaks must be set; every section needs a lecturer, room type, class size and duration; the constraints must be applied; and the lists should be checked so missing records and capacity problems are fixed first.
Before we auto generate the timetable, you must check whether you want to include or exclude any sections, and whether you want to include or exclude any slots. Both are set before the generator is run, and both change what the generator is allowed to do.
10.1.1 Include / Exclude (Section)
Include / Exclude (Section) decides which sections the generator may place. An included section takes part in generation; an excluded section is skipped and left unassigned.
Use it to generate in stages. Whatever runs first gets the widest choice of slots, so place the hardest sections first:
- Sections with constraints: fixed to a certain room, day or time range. See Section 8.1 General Constraint.
- Merge groups: need one room big enough for the combined size. See Section 7.2.3 Merge Class.
- Same time groups: must all be placed in the same slot. See Section 7.2.4 Same Time Class.
- Sections with lecturer constraints: limited to the lecturer's available days or hours. See Section 8.2 Lecturer Constraint.
In practice that means two steps: exclude everything first, then include back only the hard sections, run the generator, and include the rest afterwards.
Exclude
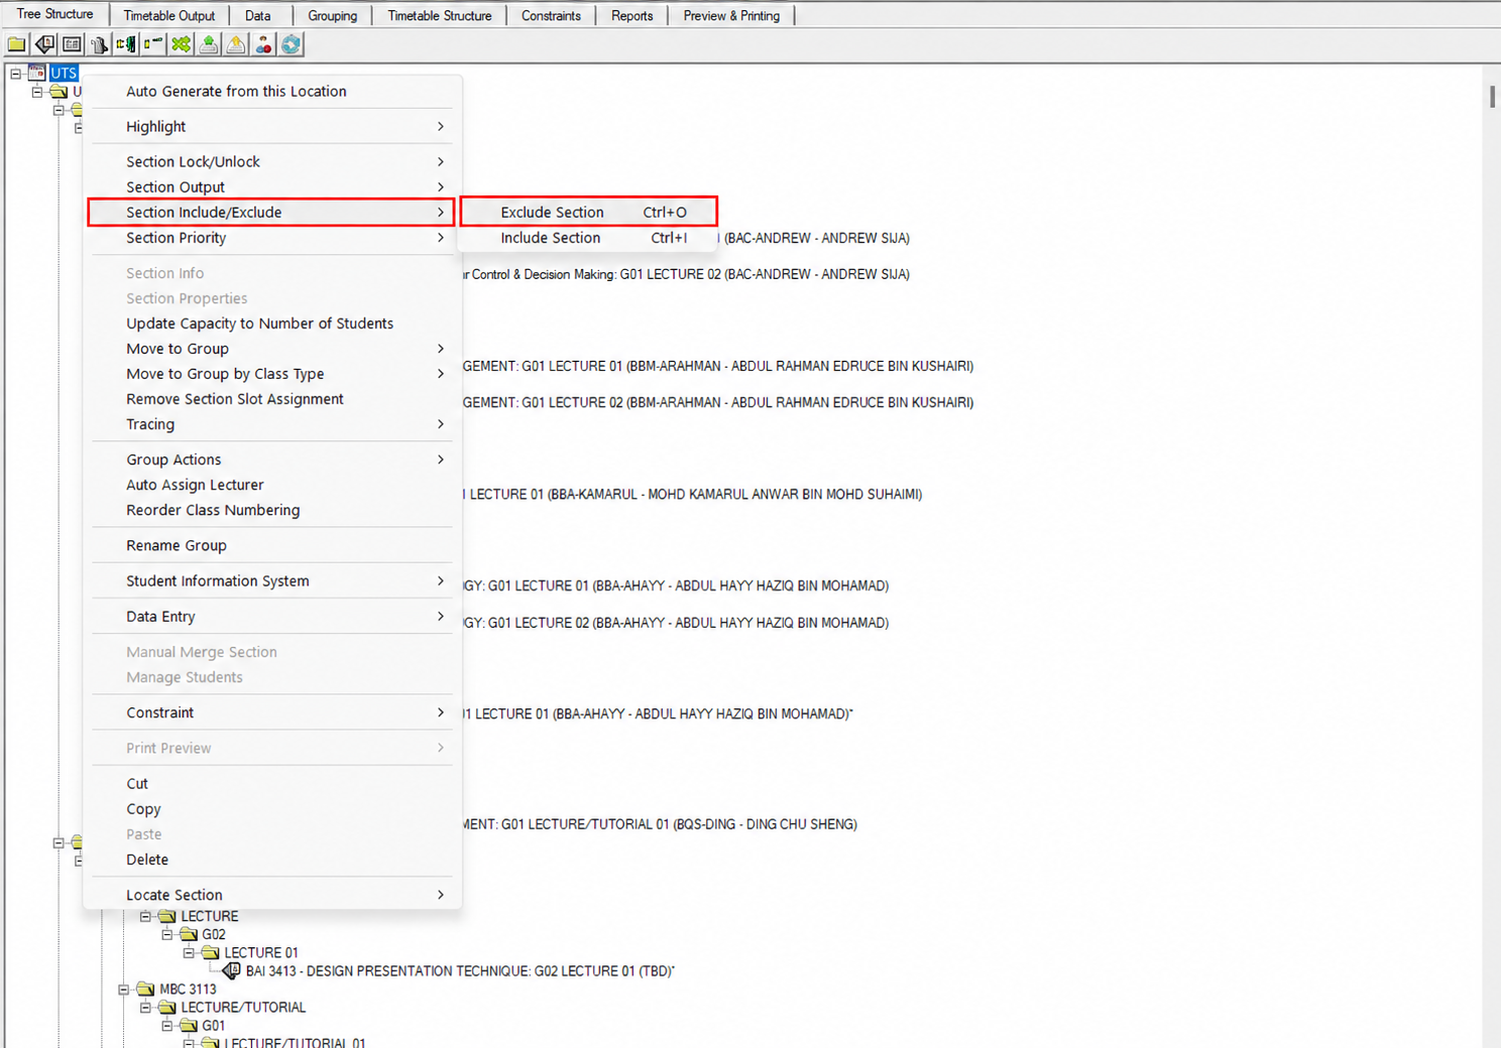
Open the Tree Structure tab and right click the root folder to cover everything at once, or right click a single course or section to exclude just that one. Choose Section Include/Exclude, then Exclude Section (Ctrl+O).
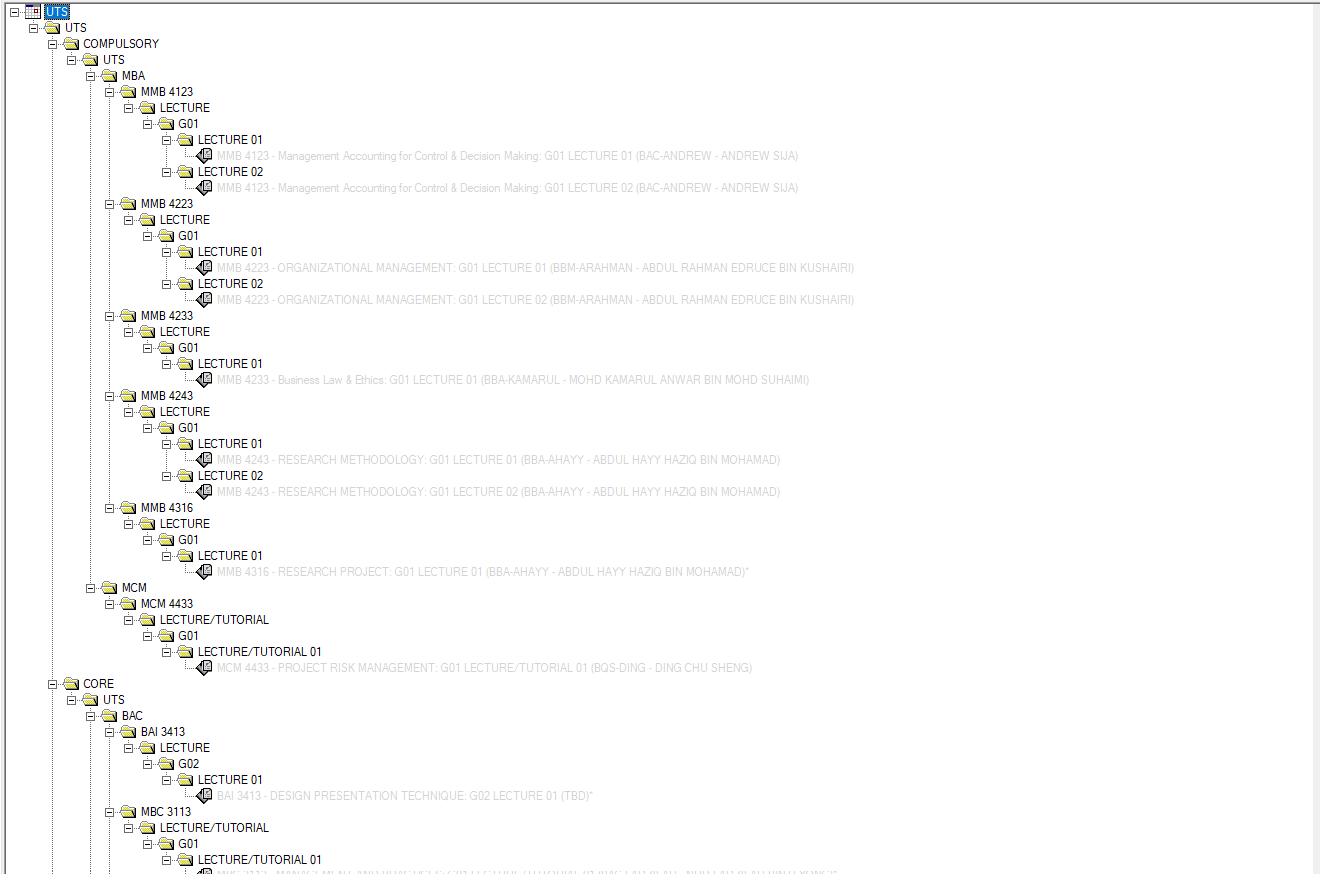
The exclusion is inherited down the tree. When you exclude a parent (the main folder), every child under it is excluded as well the folders inside it, and every section inside those folders. Excluding the root folder therefore excludes the whole timetable in one step, which is why it is the quickest way to start a staged run.
The excluded sections turn grey in the tree. Grey means the generator will skip them, so nothing is placed until you include them again.
Include
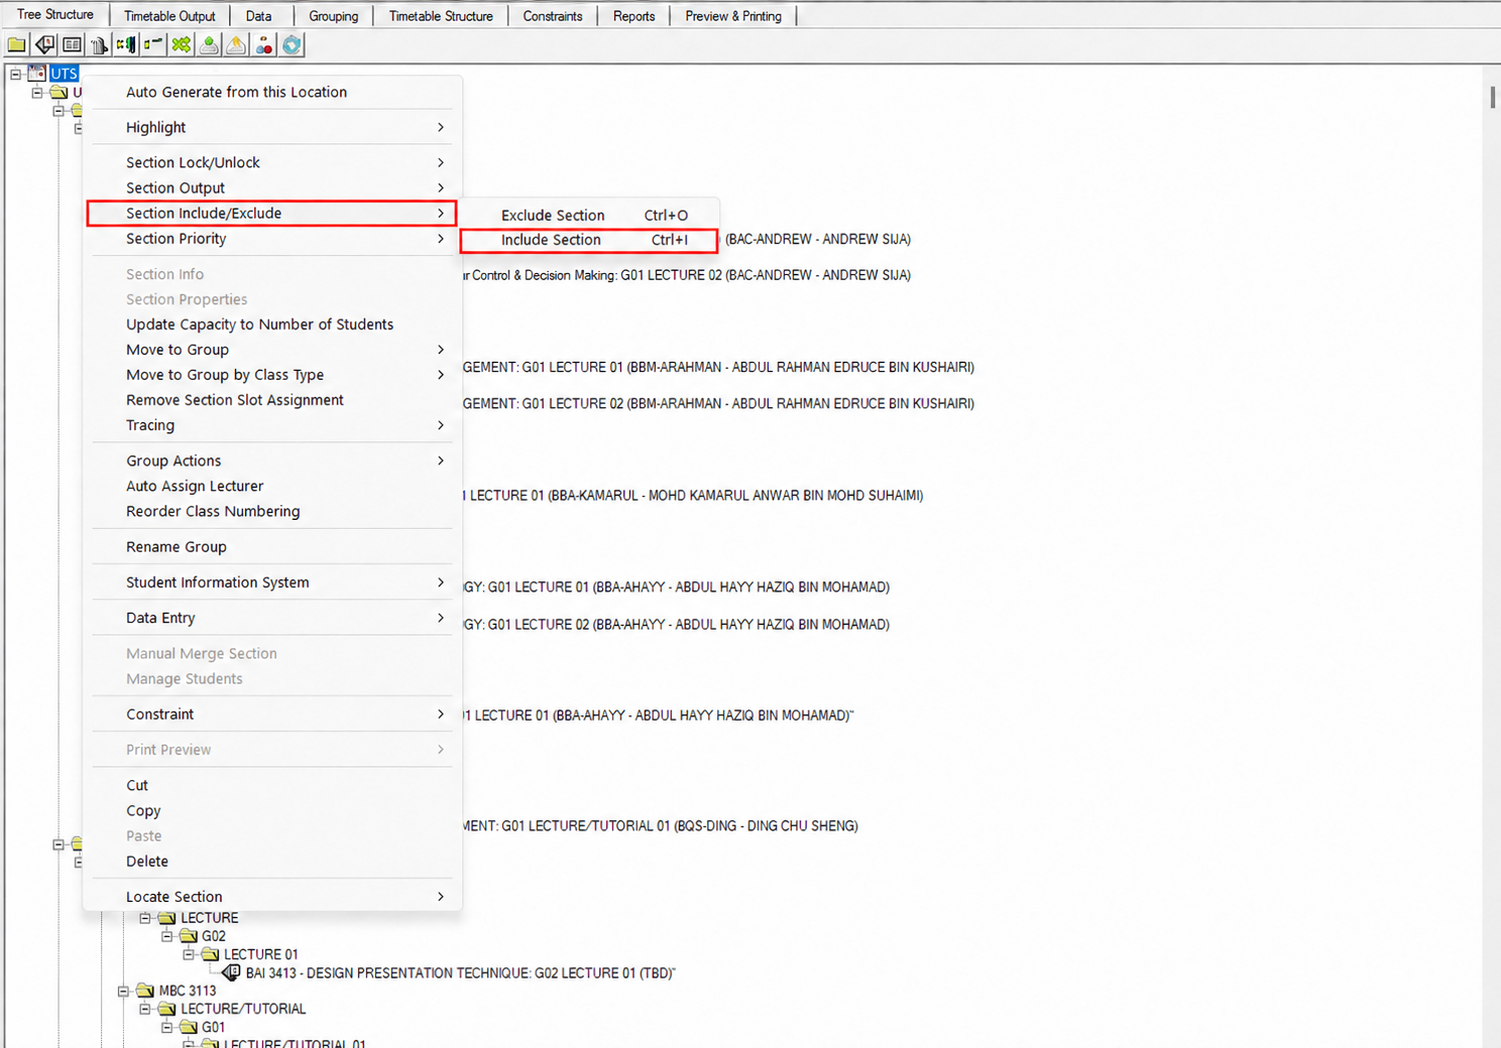
Now bring back only what you want the generator to place first. Right click the course or section in the Tree Structure, choose Section Include/Exclude, then Include Section (Ctrl+I).
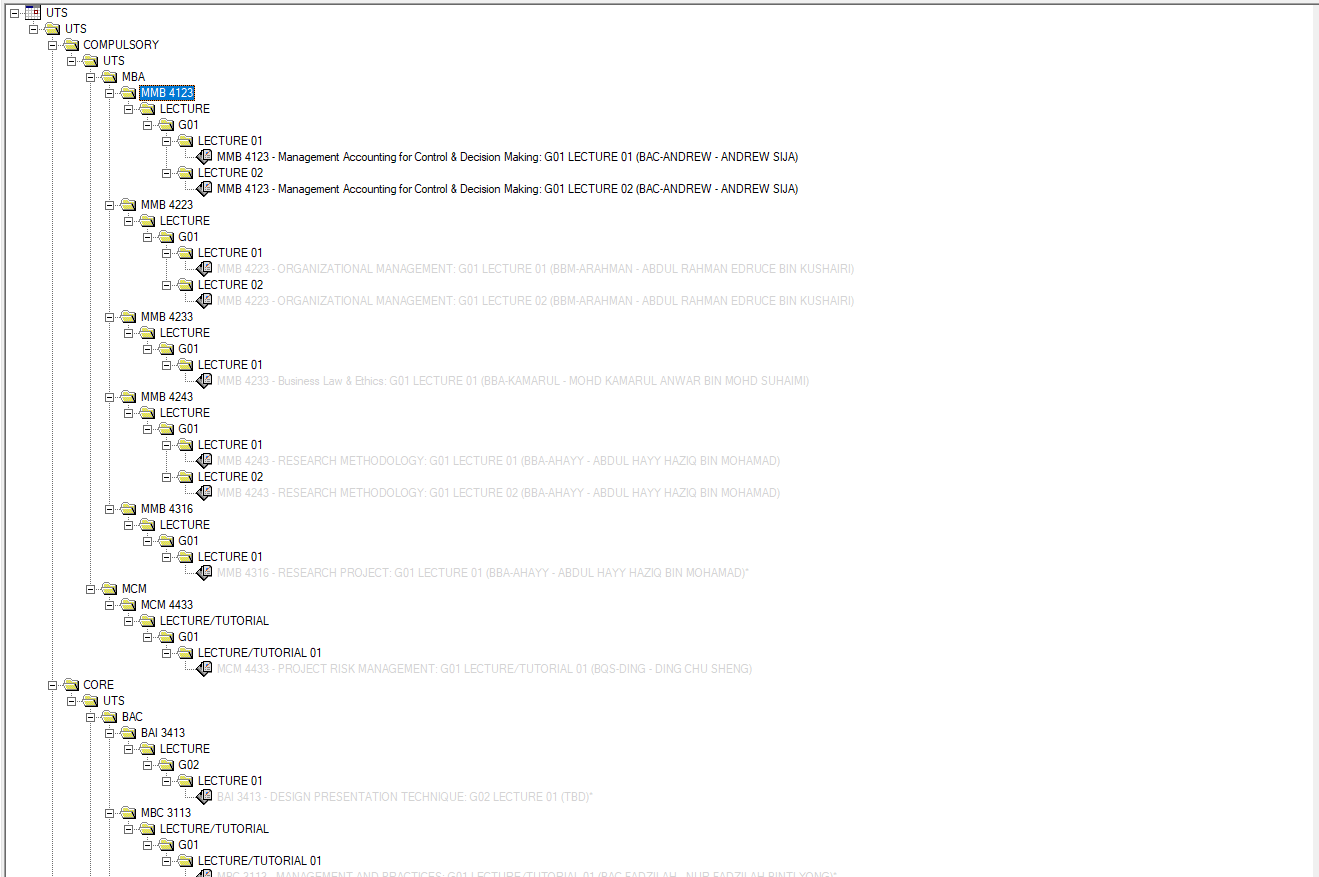
The section you included turns black again while everything else stays grey, so you can see exactly what will take part in the next run.
The hard sections listed above are included from their own lists rather than from the tree.
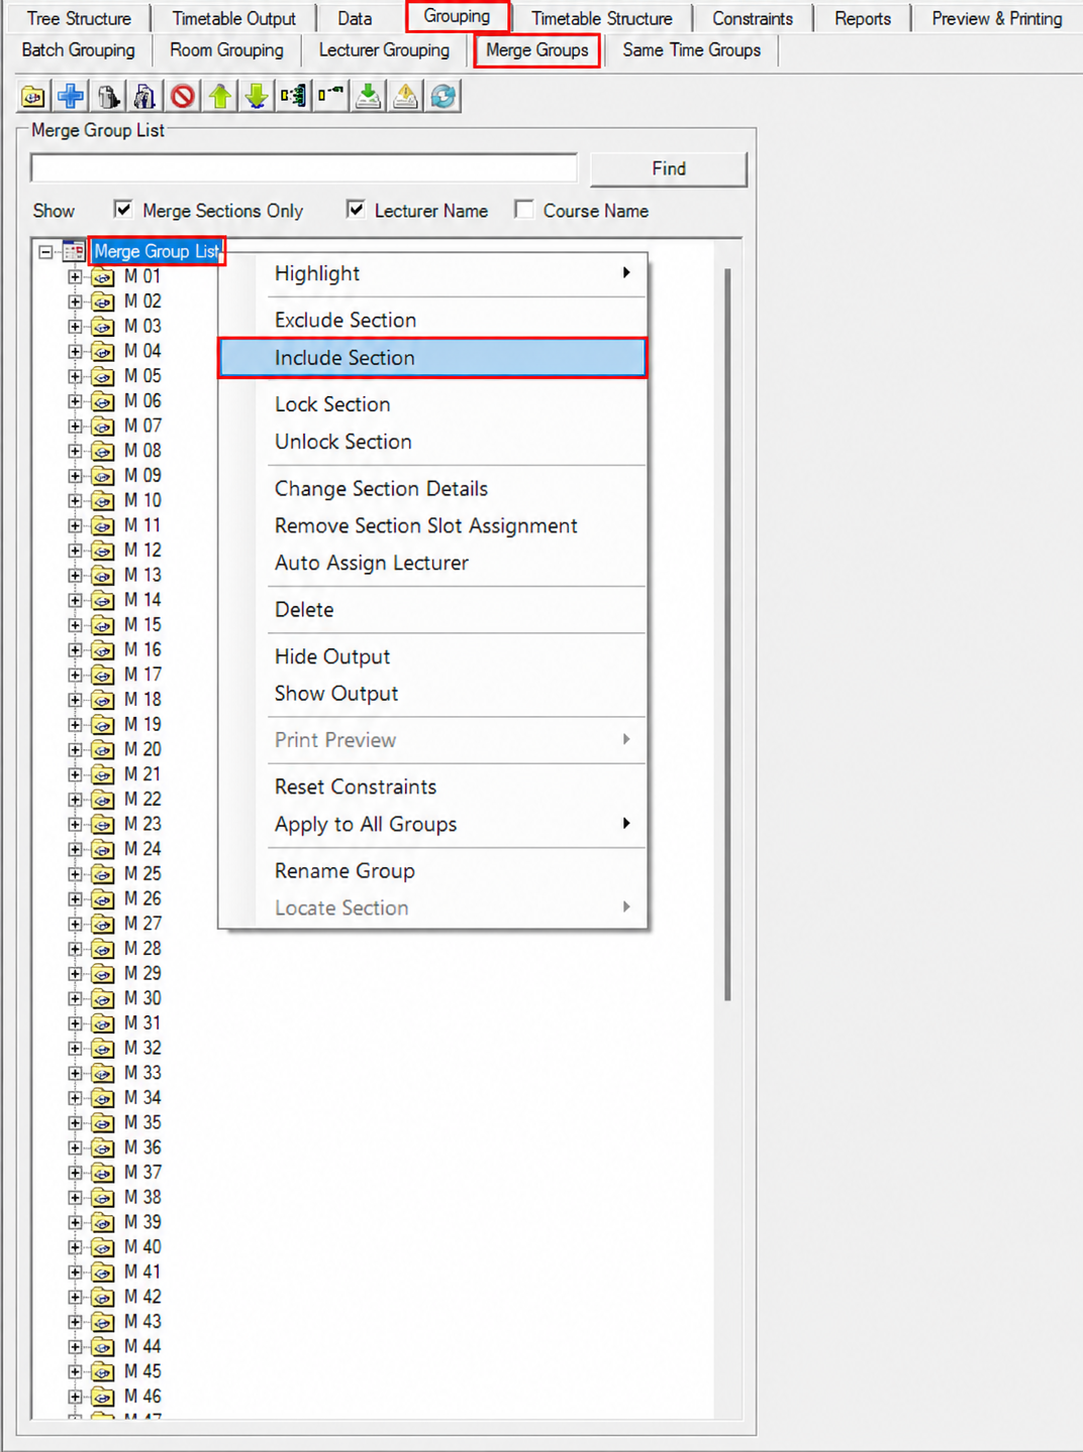
Merge groups. Open the Grouping tab and select the Merge Groups sub-tab. Right click Merge Group List to cover every merge group, or a single group to include just that one, then choose Include Section.
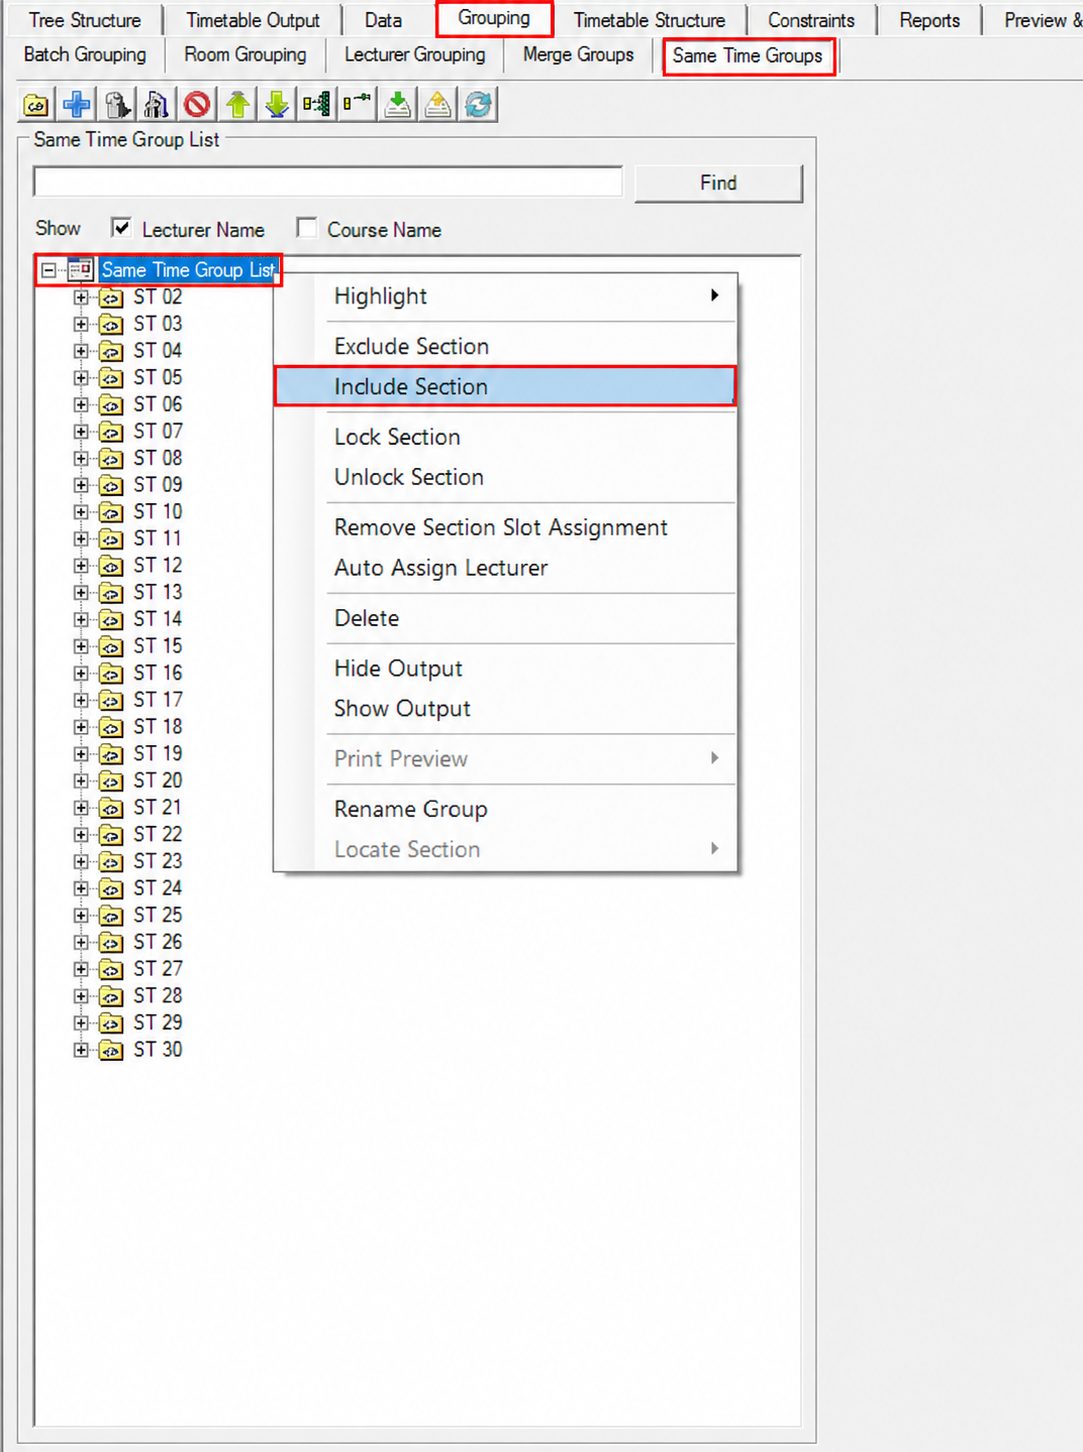
Same time groups. Still under Grouping, select the Same Time Groups sub-tab and do the same on Same Time Group List.
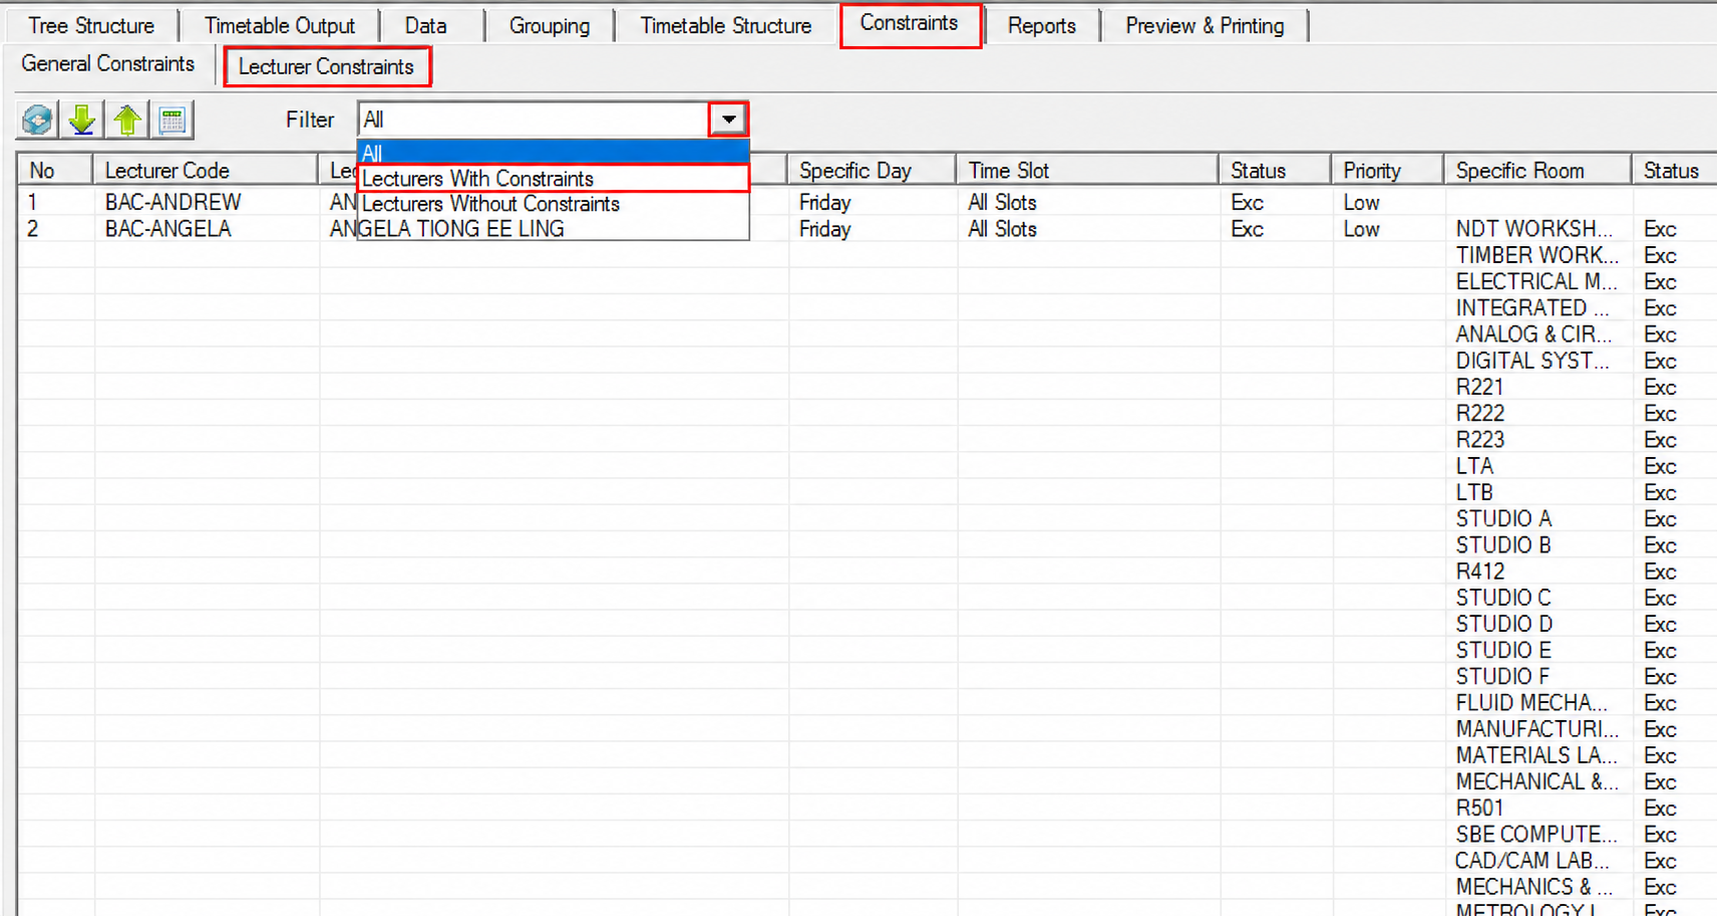
Sections with lecturer constraints. Open the Constraints tab and select the Lecturer Constraints sub-tab. Set Filter to Lecturers With Constraints so only the restricted lecturers are listed.
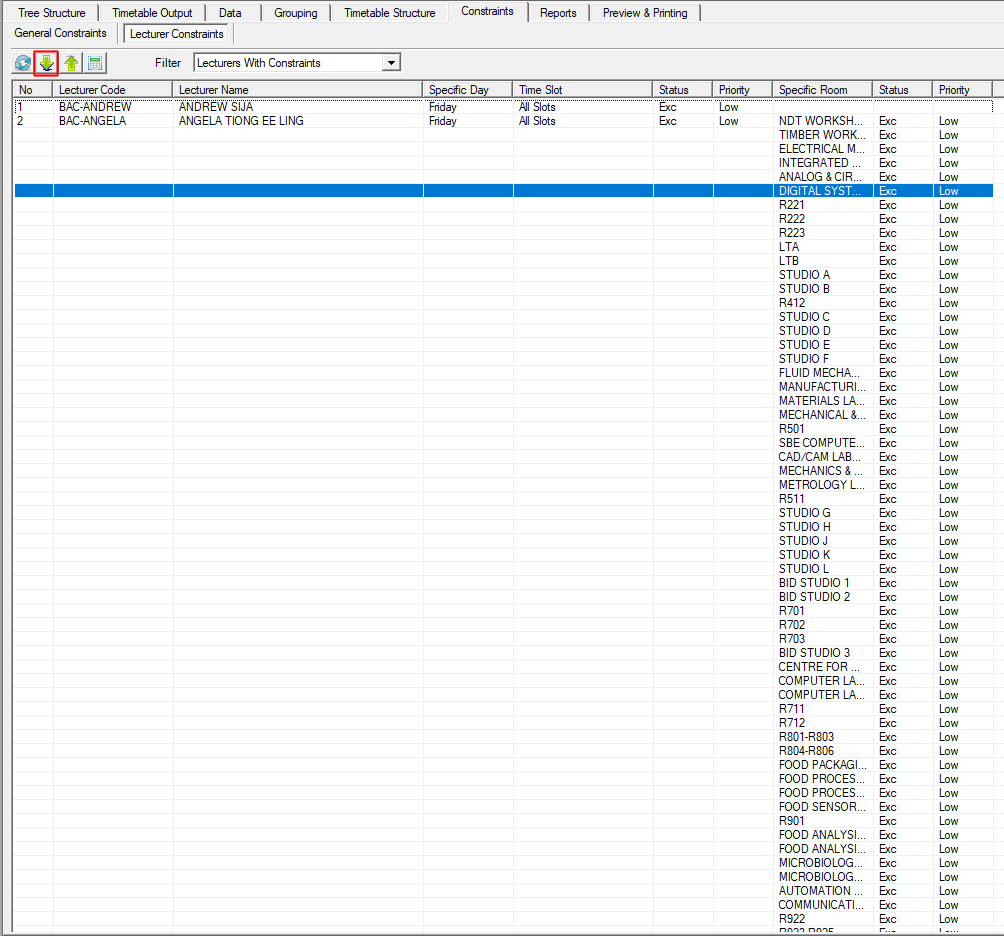
Select the lecturers in the filtered list, then click the include button on the toolbar to bring their sections into generation.
With the hard sections included, run the generator as described in Section 10.1.3 Generate Button. Afterwards, include the remaining sections and generate again; the sections already placed stay where they are.
10.1.2 Include / Exclude (Slot)
Include / Exclude (Slot) controls the slots themselves rather than the sections. An excluded slot is closed off (the generator will not place any section in it) and it is shown in black in the Timetable Output. Use it to keep rooms or times free, for example a room under maintenance or an hour reserved for another activity.
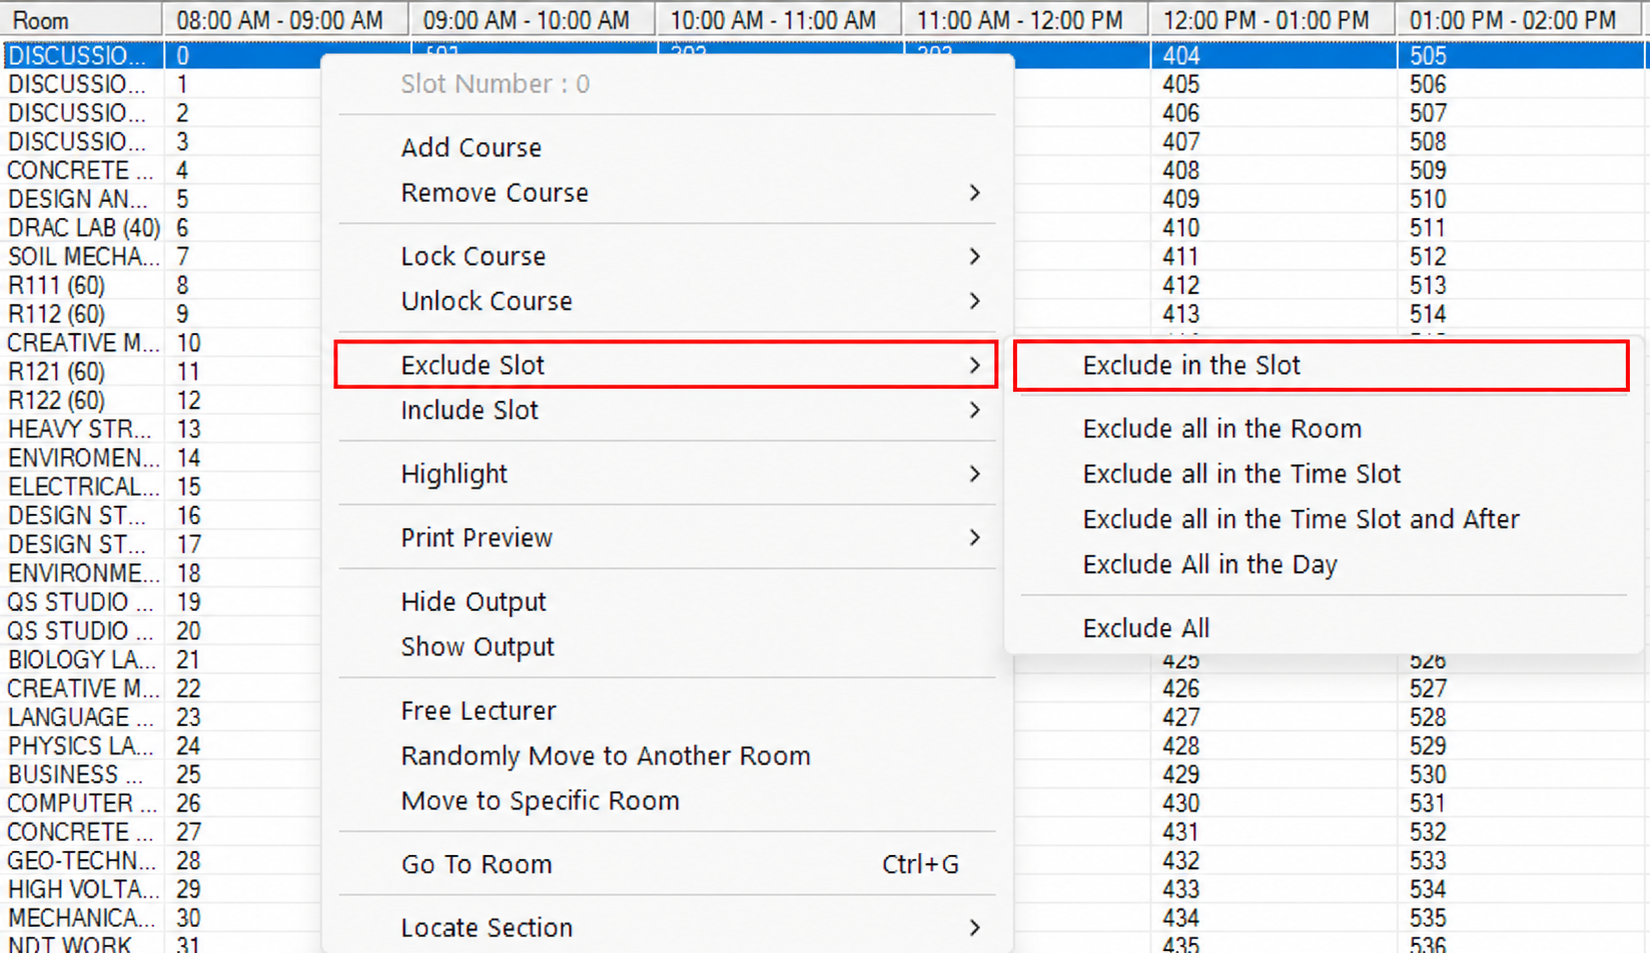
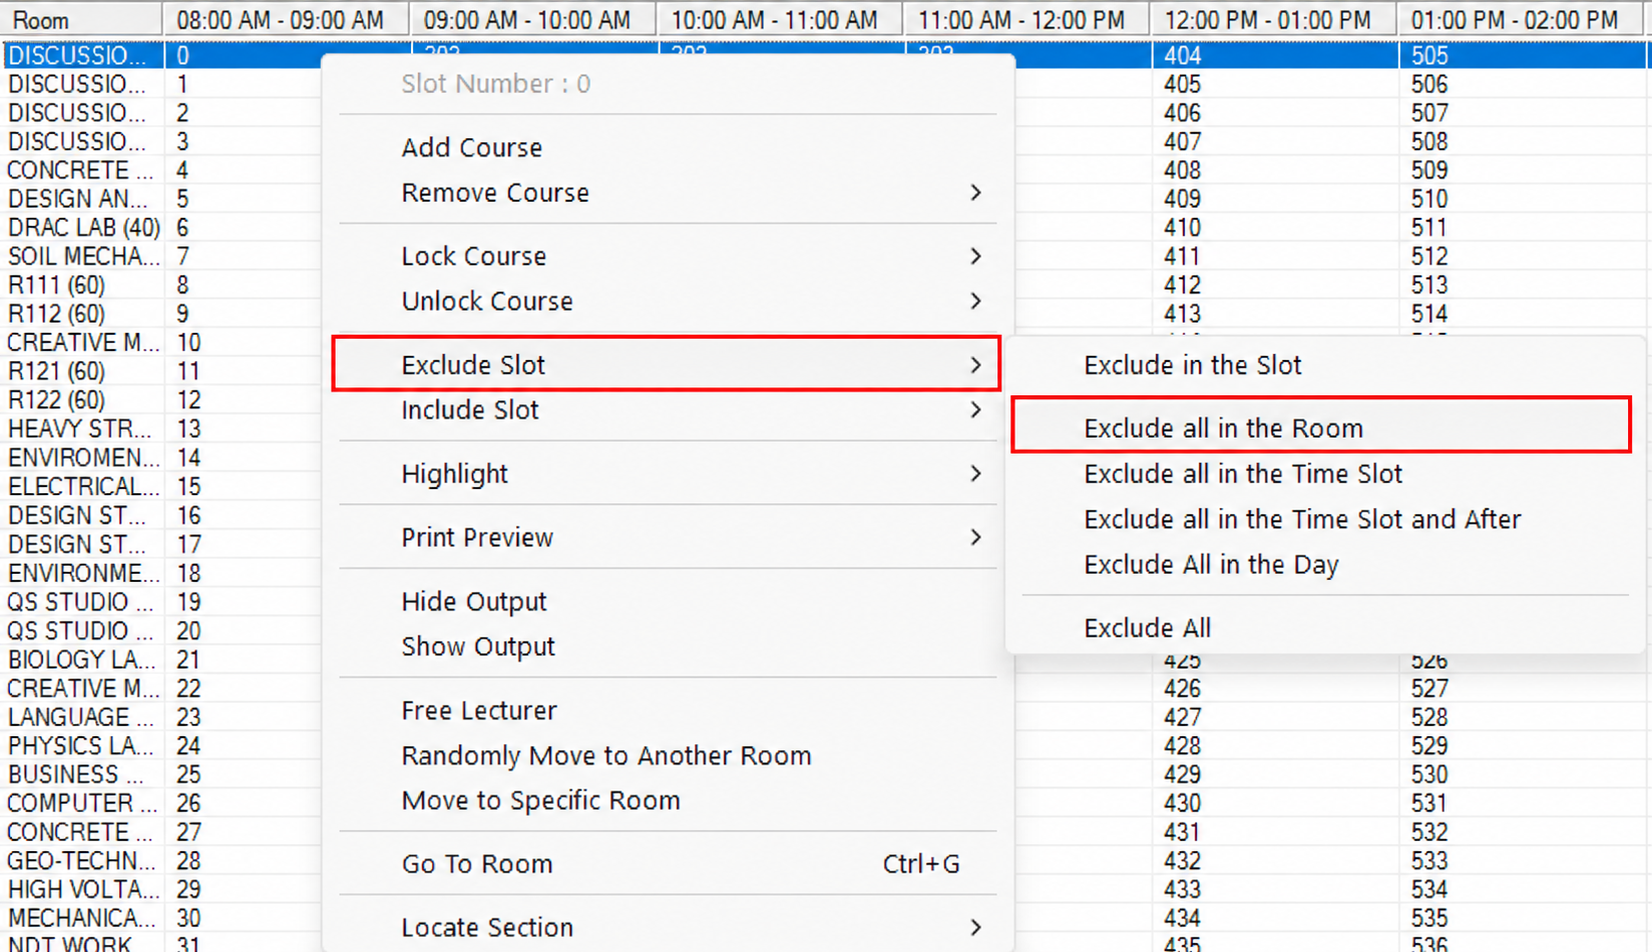
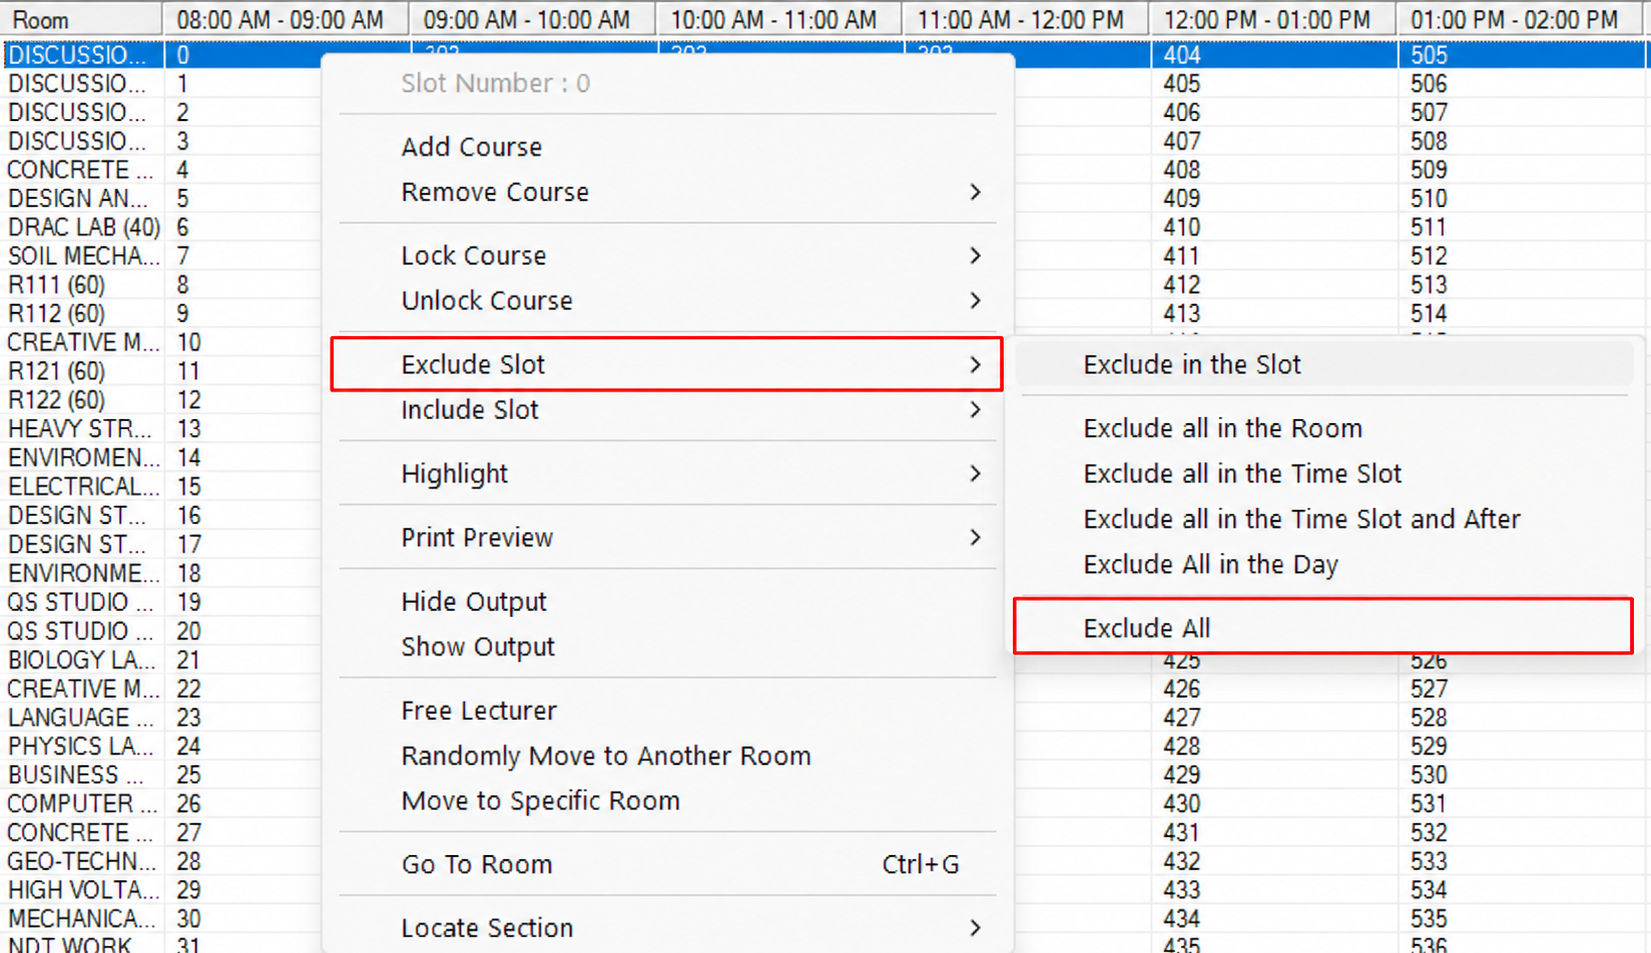
Right click any slot and open Exclude Slot. The submenu offers six options, each covering a wider area than the one before it, all measured from the slot you right clicked.
Exclude
Exclude in the Slot: Closes only the slot you right clicked, that one room at that one time on that day. Every other slot is left untouched.
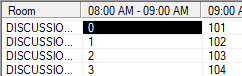
Exclude all in the Room: Closes every time slot of the selected room for that day, so the whole row for that room is closed off.

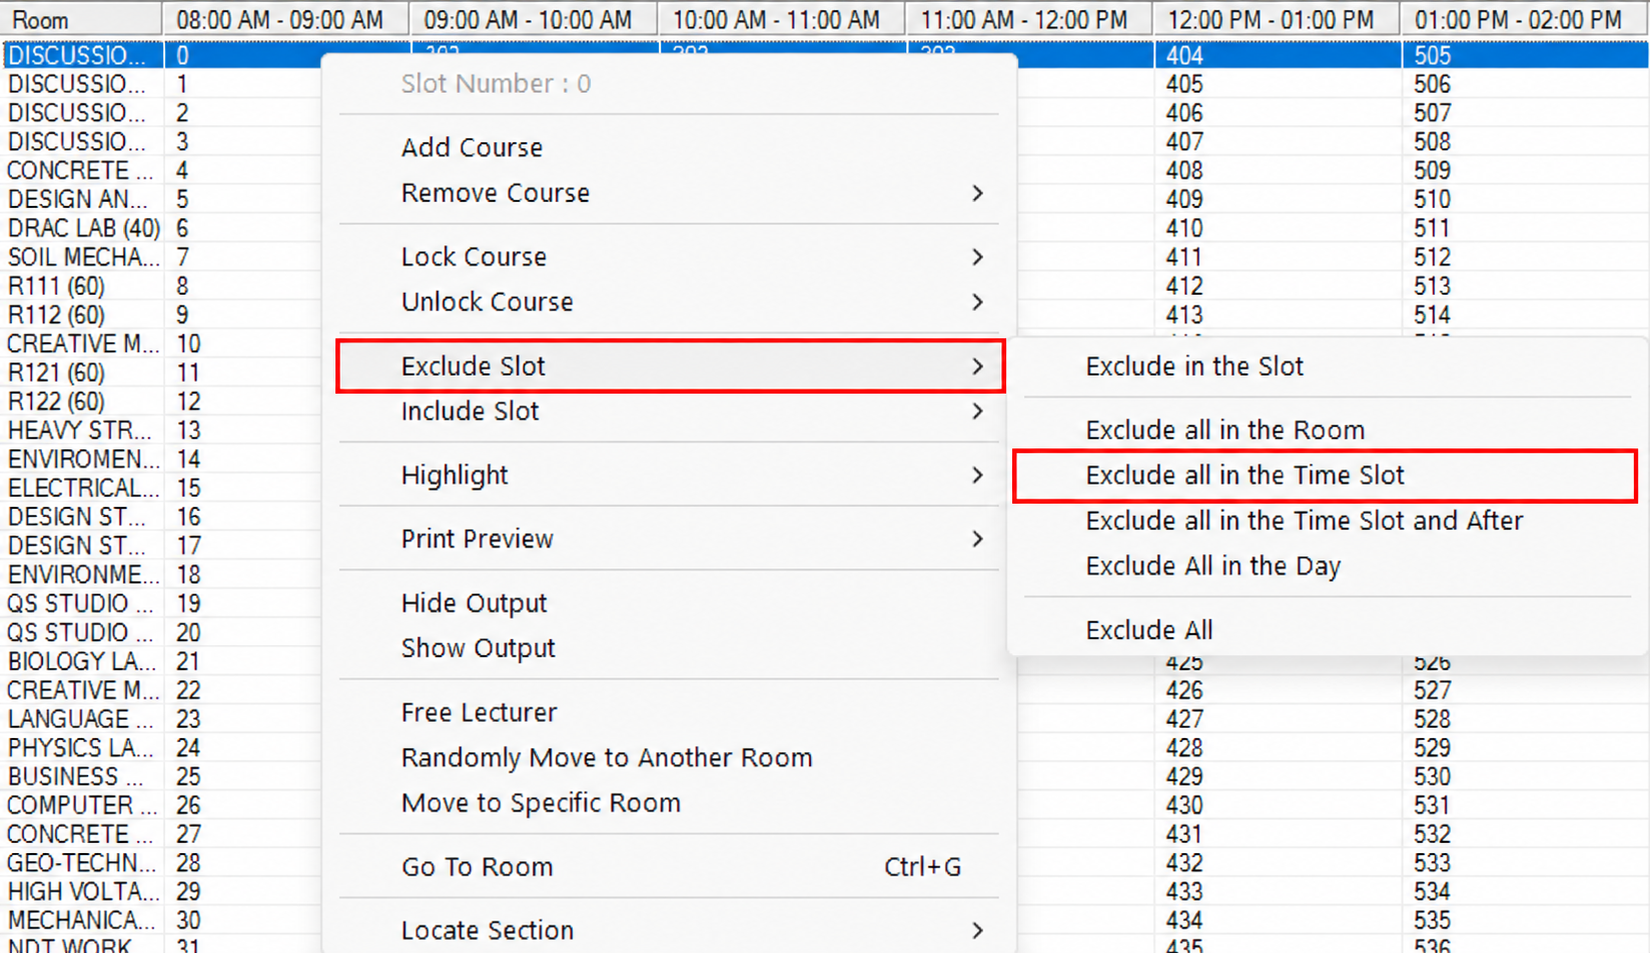
Exclude all in the Time Slot: Closes the selected time slot in every room for that day, so the whole column for that hour is closed off.
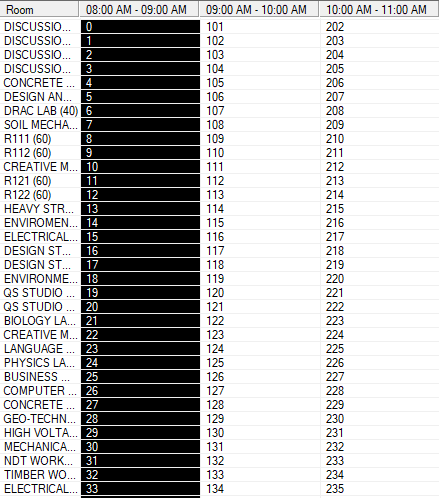
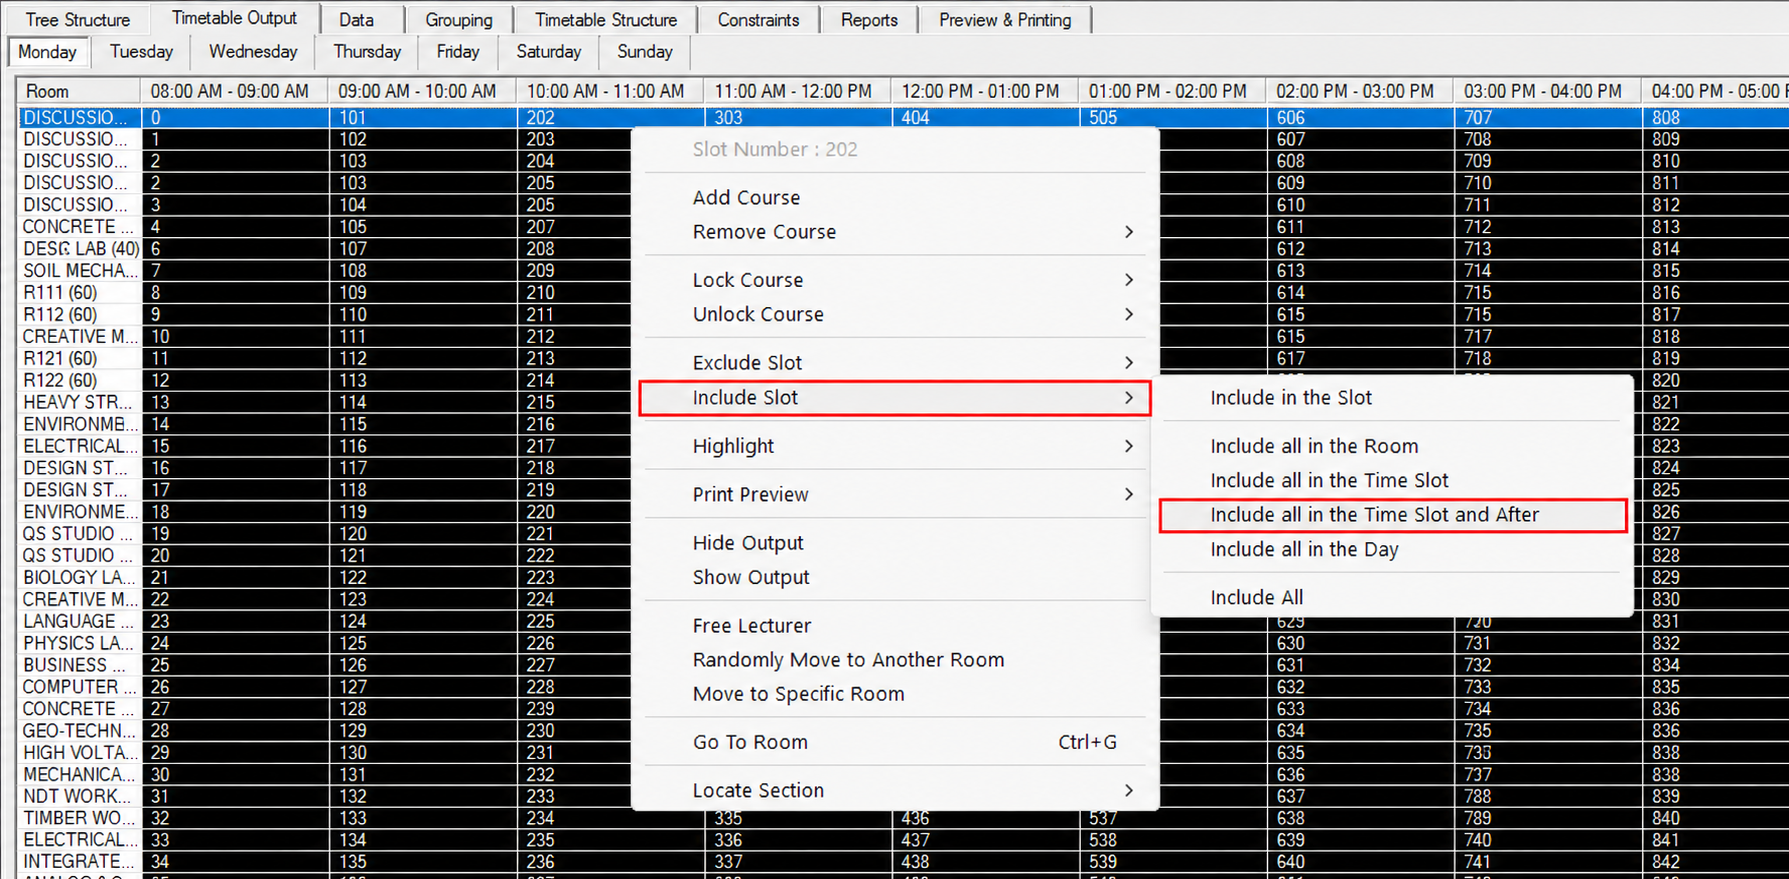
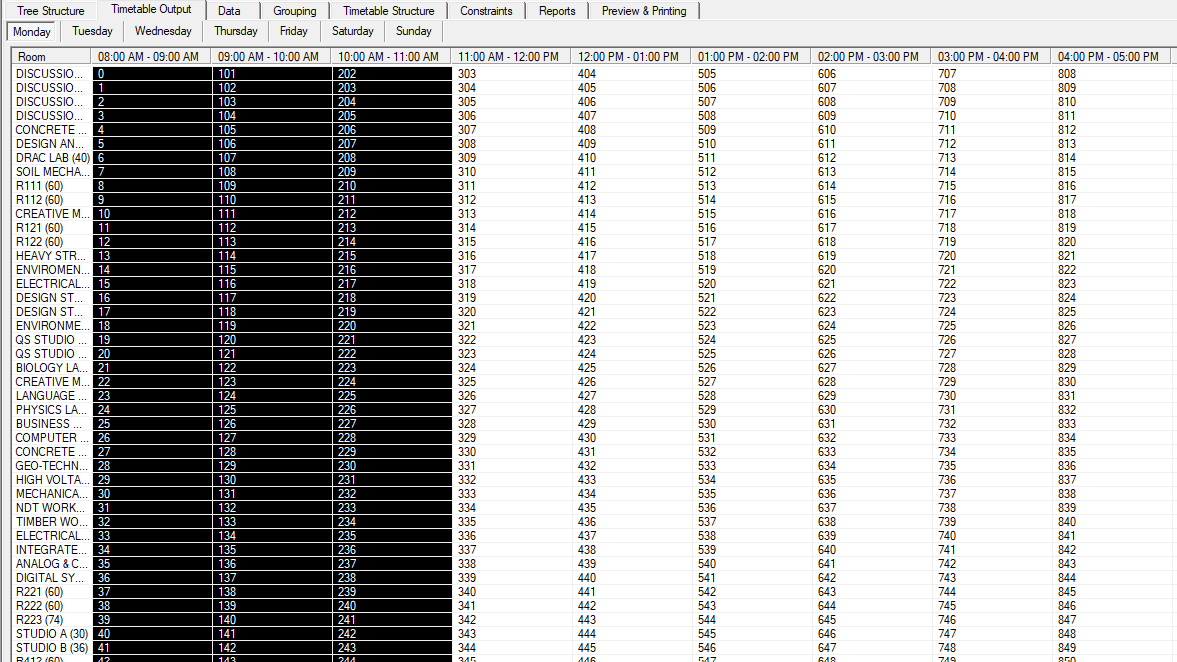
Exclude all in the Time Slot and After: Closes the selected time slot and every later time slot on the same day only, in every room. For example, excluding slot 202 closes that slot and everything after it until the end of that day, while the following days stay available as usual. Use it to stop scheduling from a certain hour onwards, such as after a certain time in the afternoon.
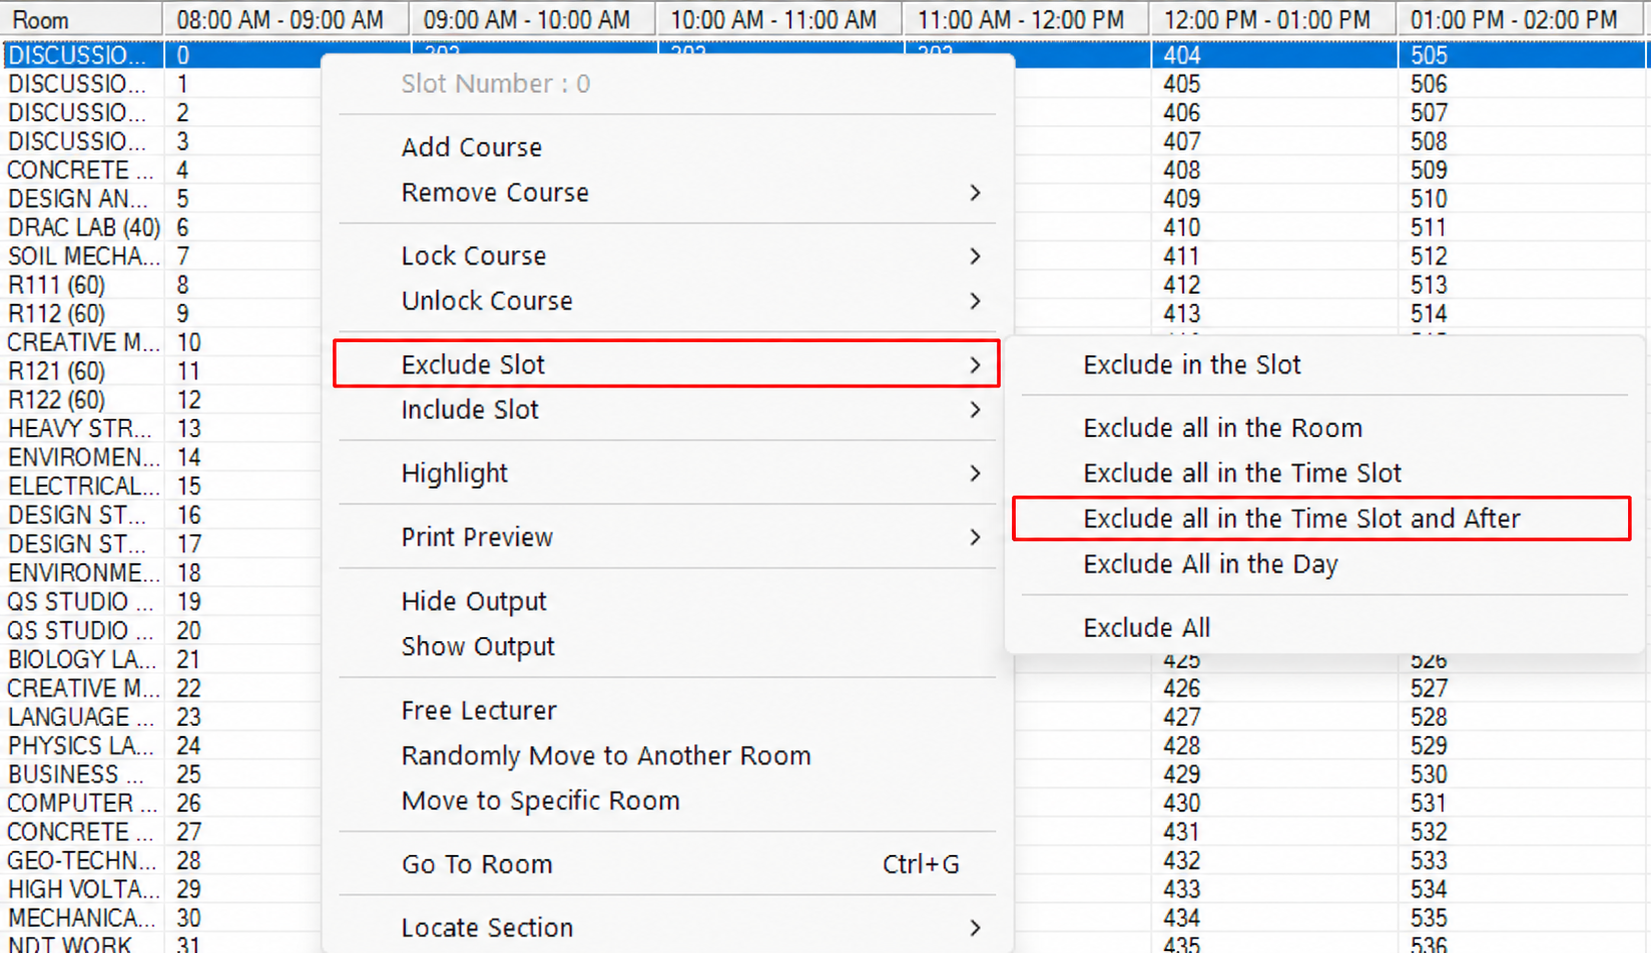
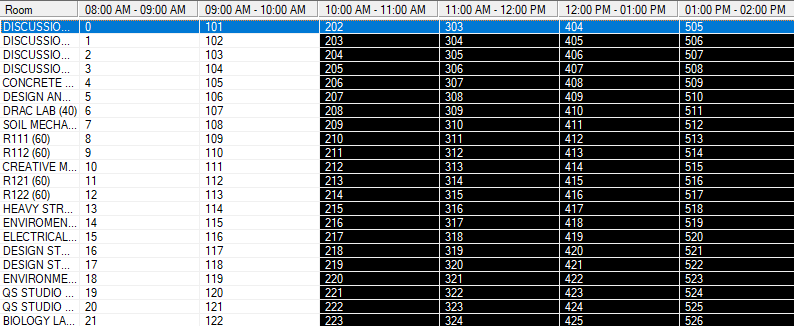
Exclude All in the Day: Closes every slot on the day currently shown, in every room and at every hour. Use it for a day with no classes, such as a public holiday.
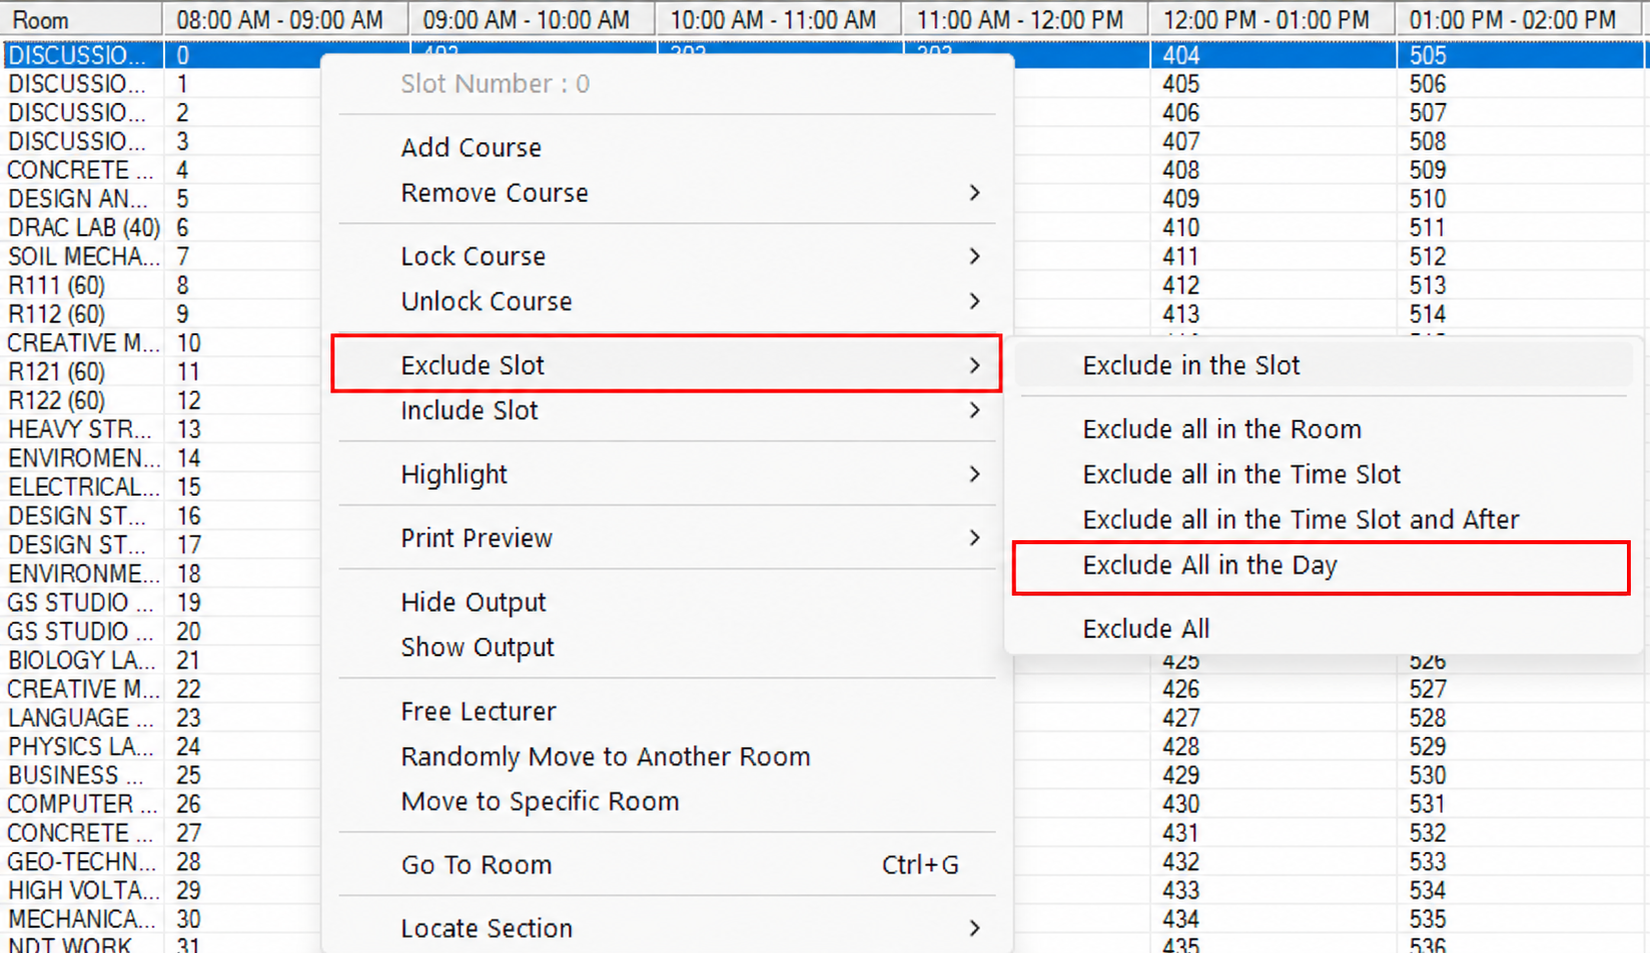
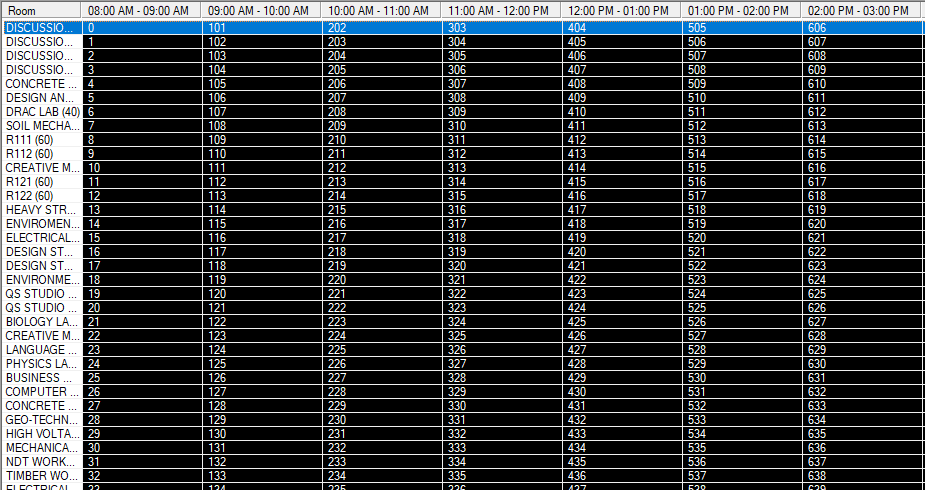
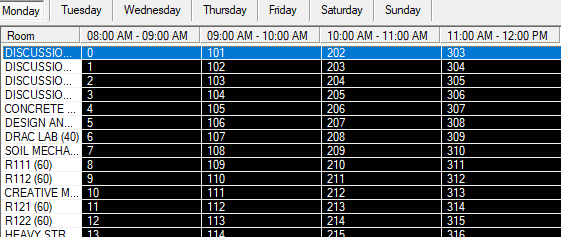
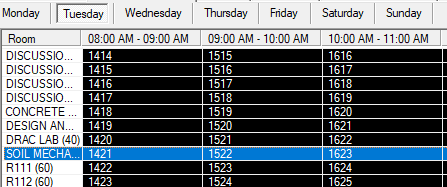
Exclude All: Closes every slot on every day. Switching between the day tabs shows that each one is closed off. This is normally used as a starting point: close everything first, then include back only the slots you want the generator to use.
Include
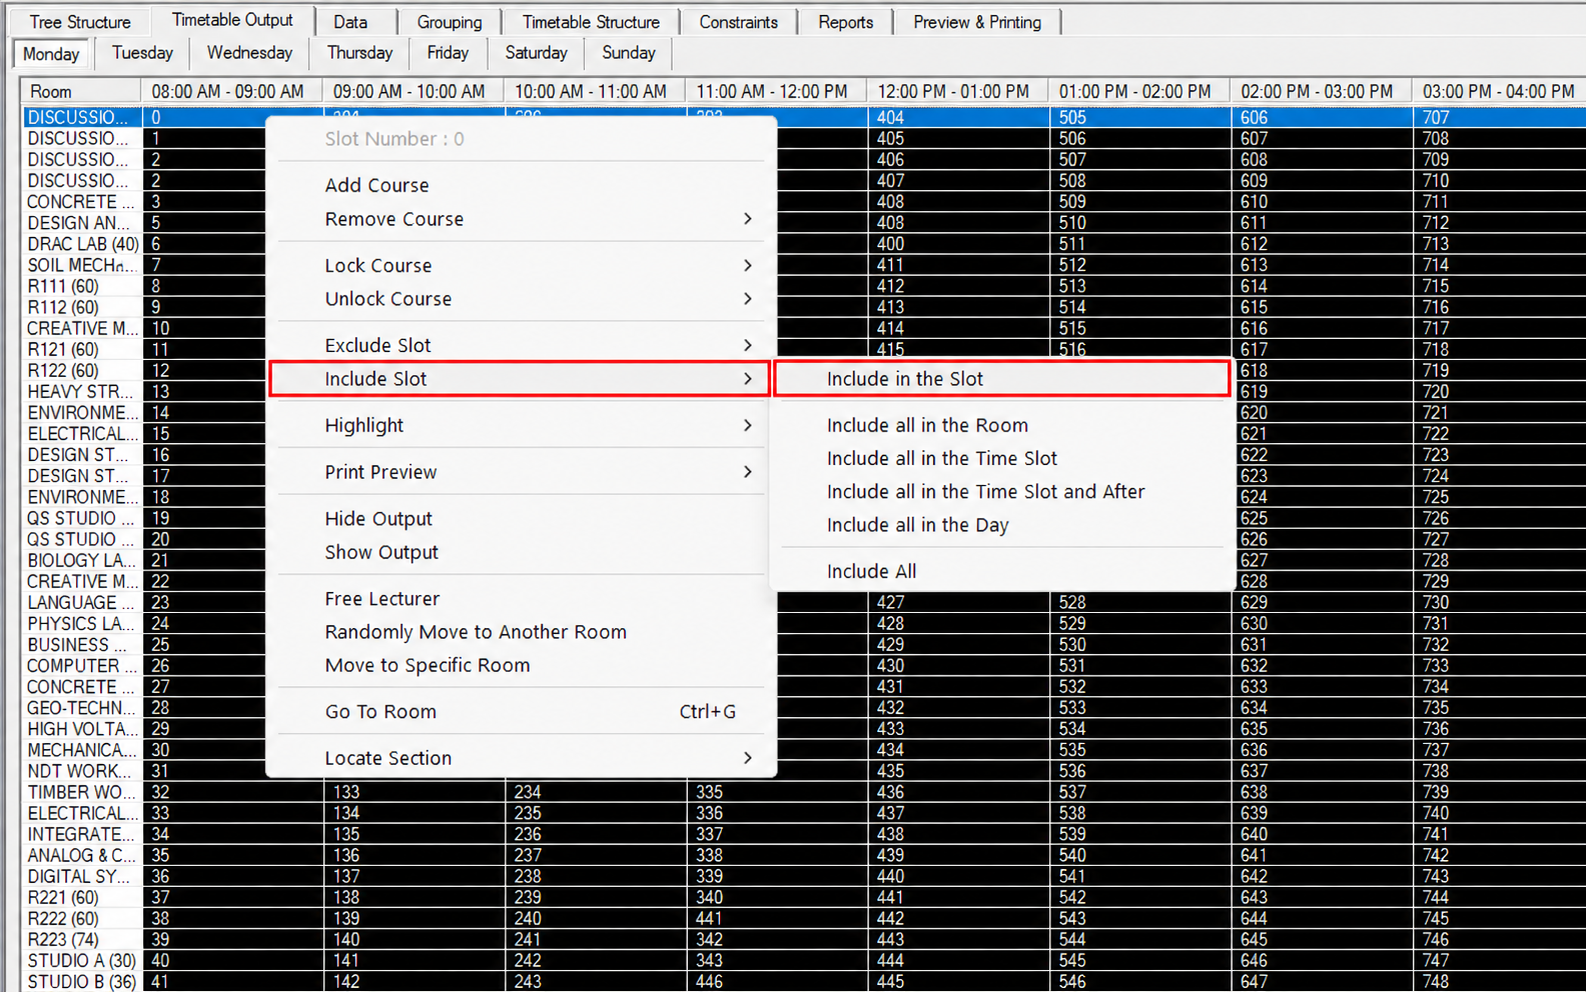
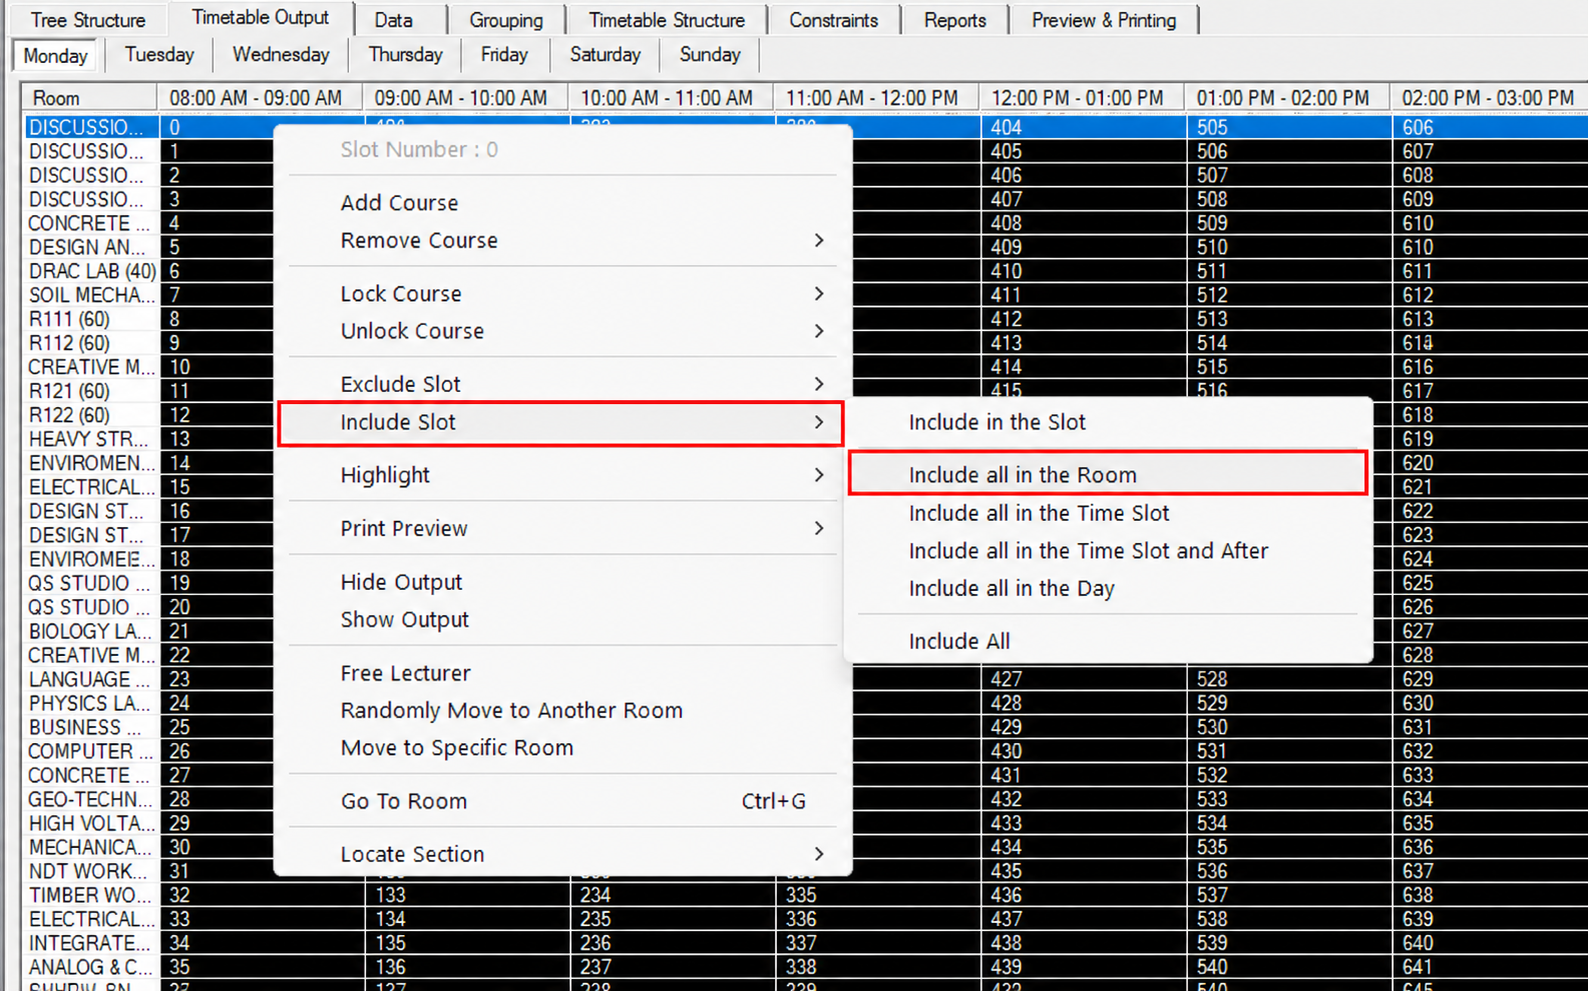
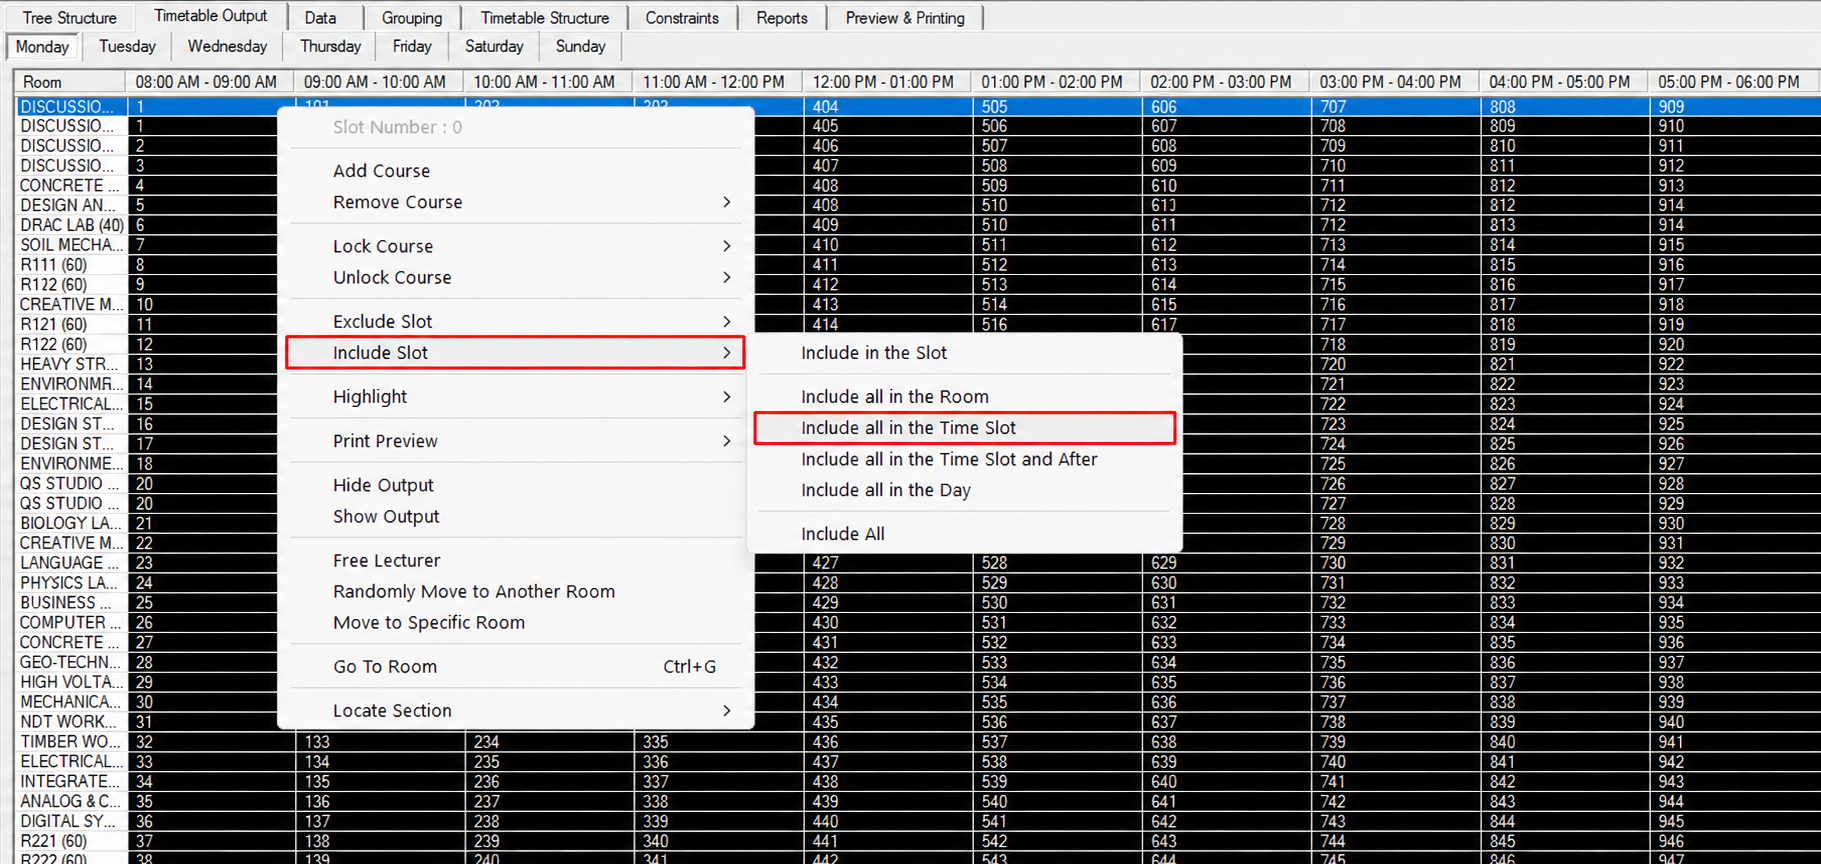
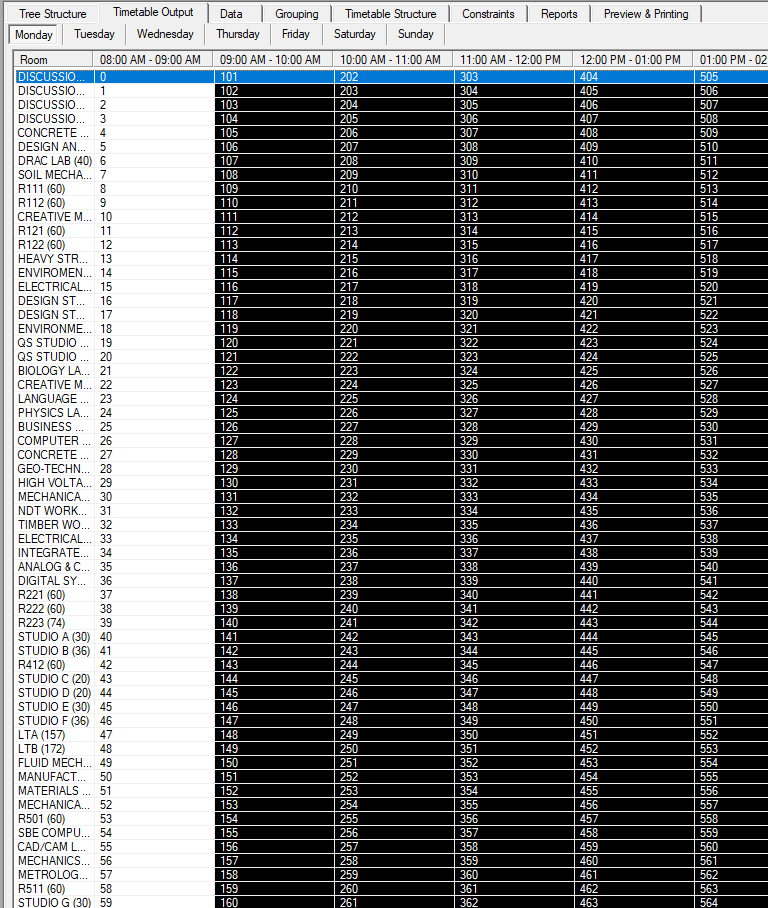
Right click any slot and open Include Slot to open the slots again. The submenu mirrors Exclude Slot and covers the same six areas. An included slot returns to white and the generator can use it again.
Include in the Slot: Opens only the slot you right clicked.
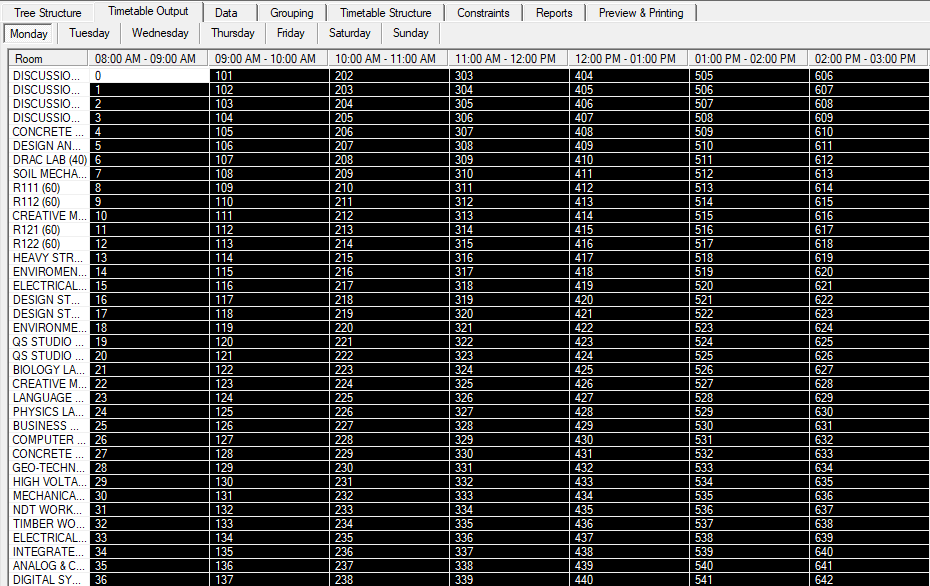
Include all in the Room: Opens every time slot of the selected room for that day.
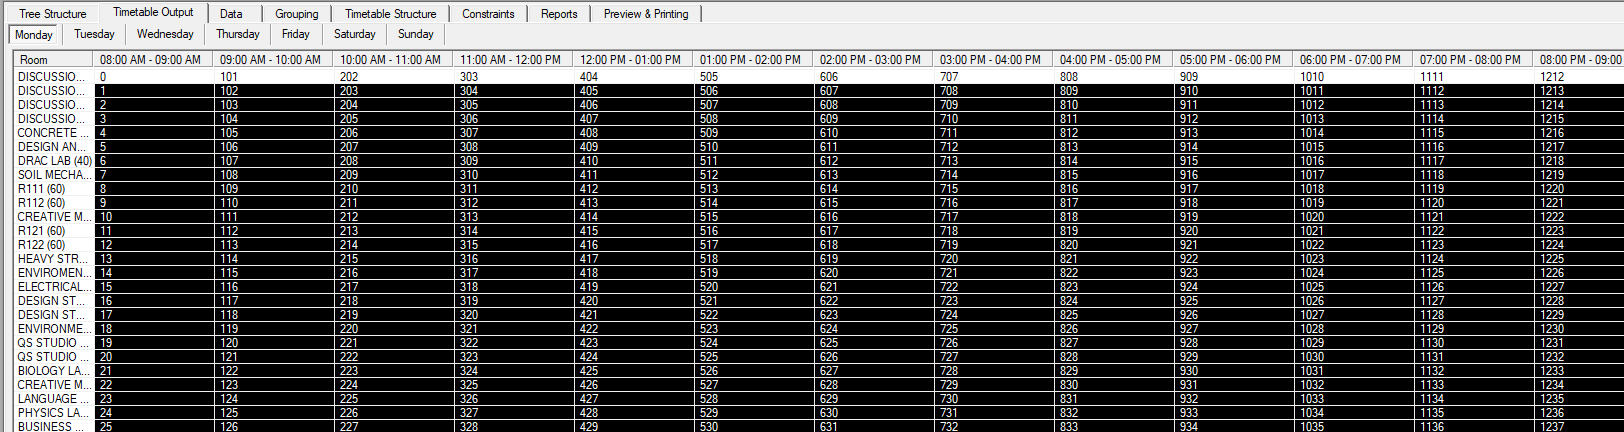
Include all in the Time Slot: Opens the selected time slot in every room for that day.
Include all in the Time Slot and After: Opens the selected time slot and every later time slot on the same day only.
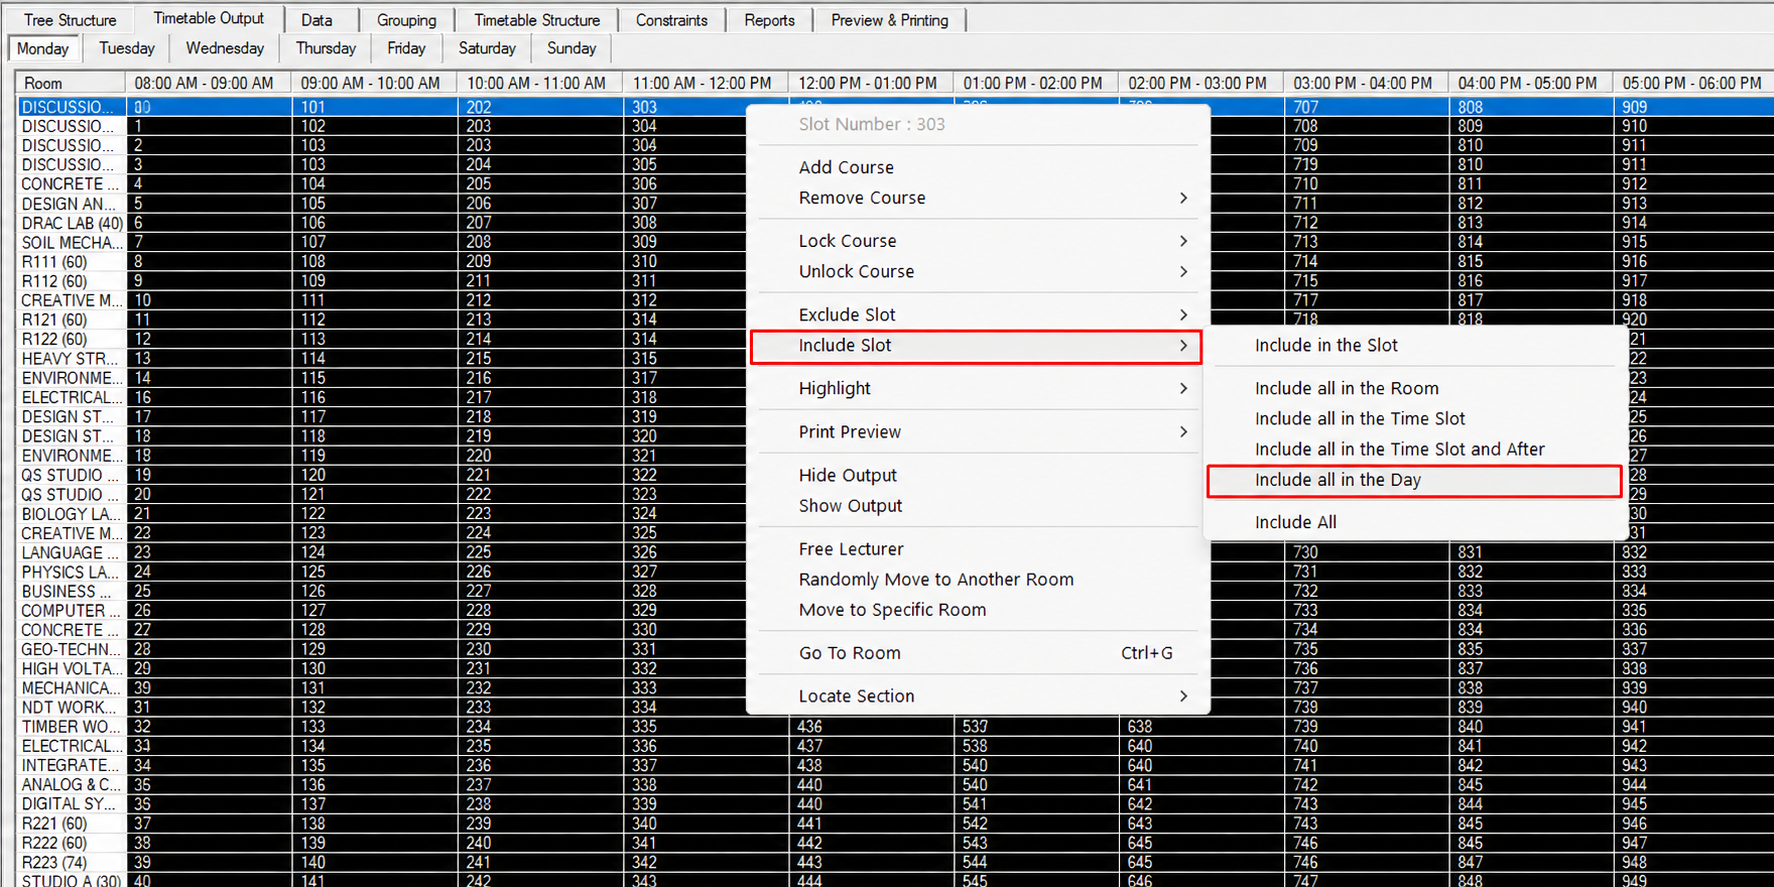
Include all in the Day: Opens every slot on the day currently shown.
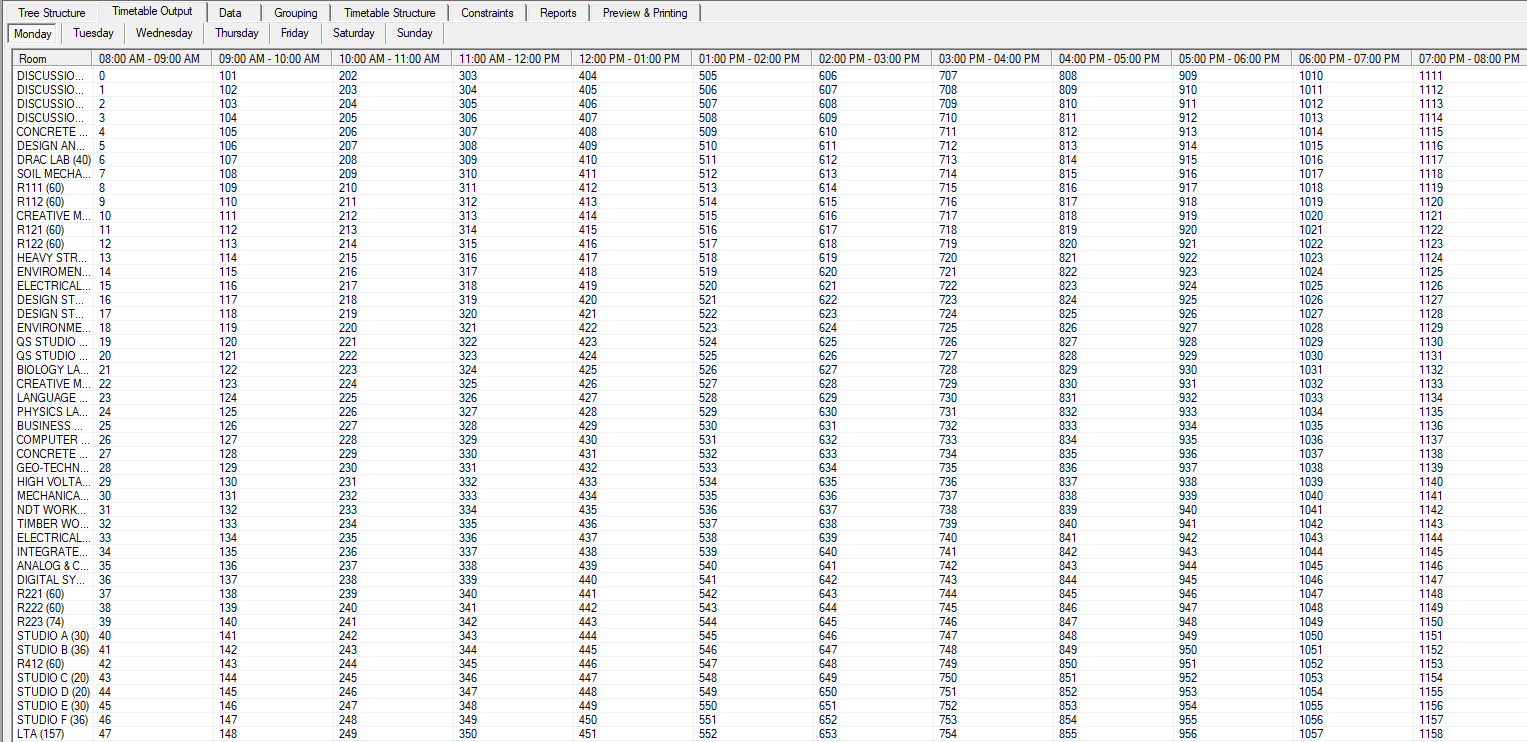
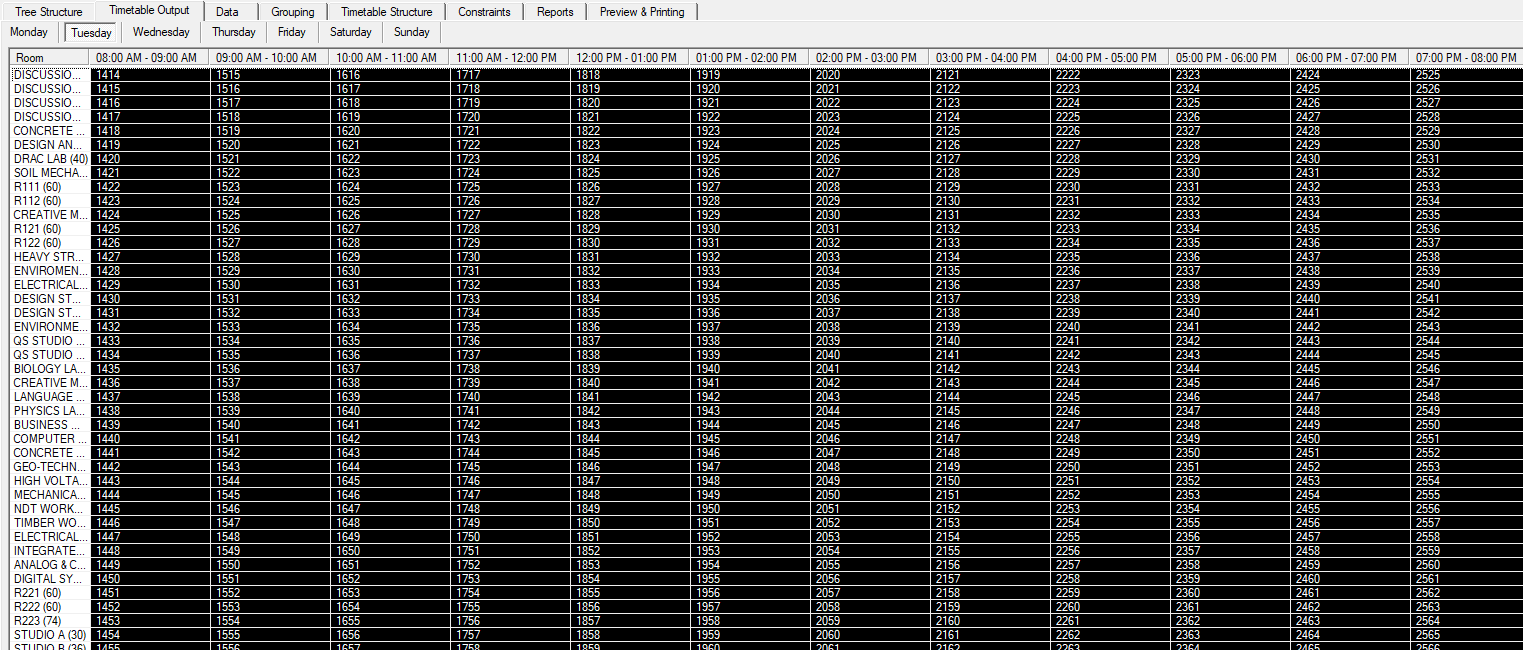
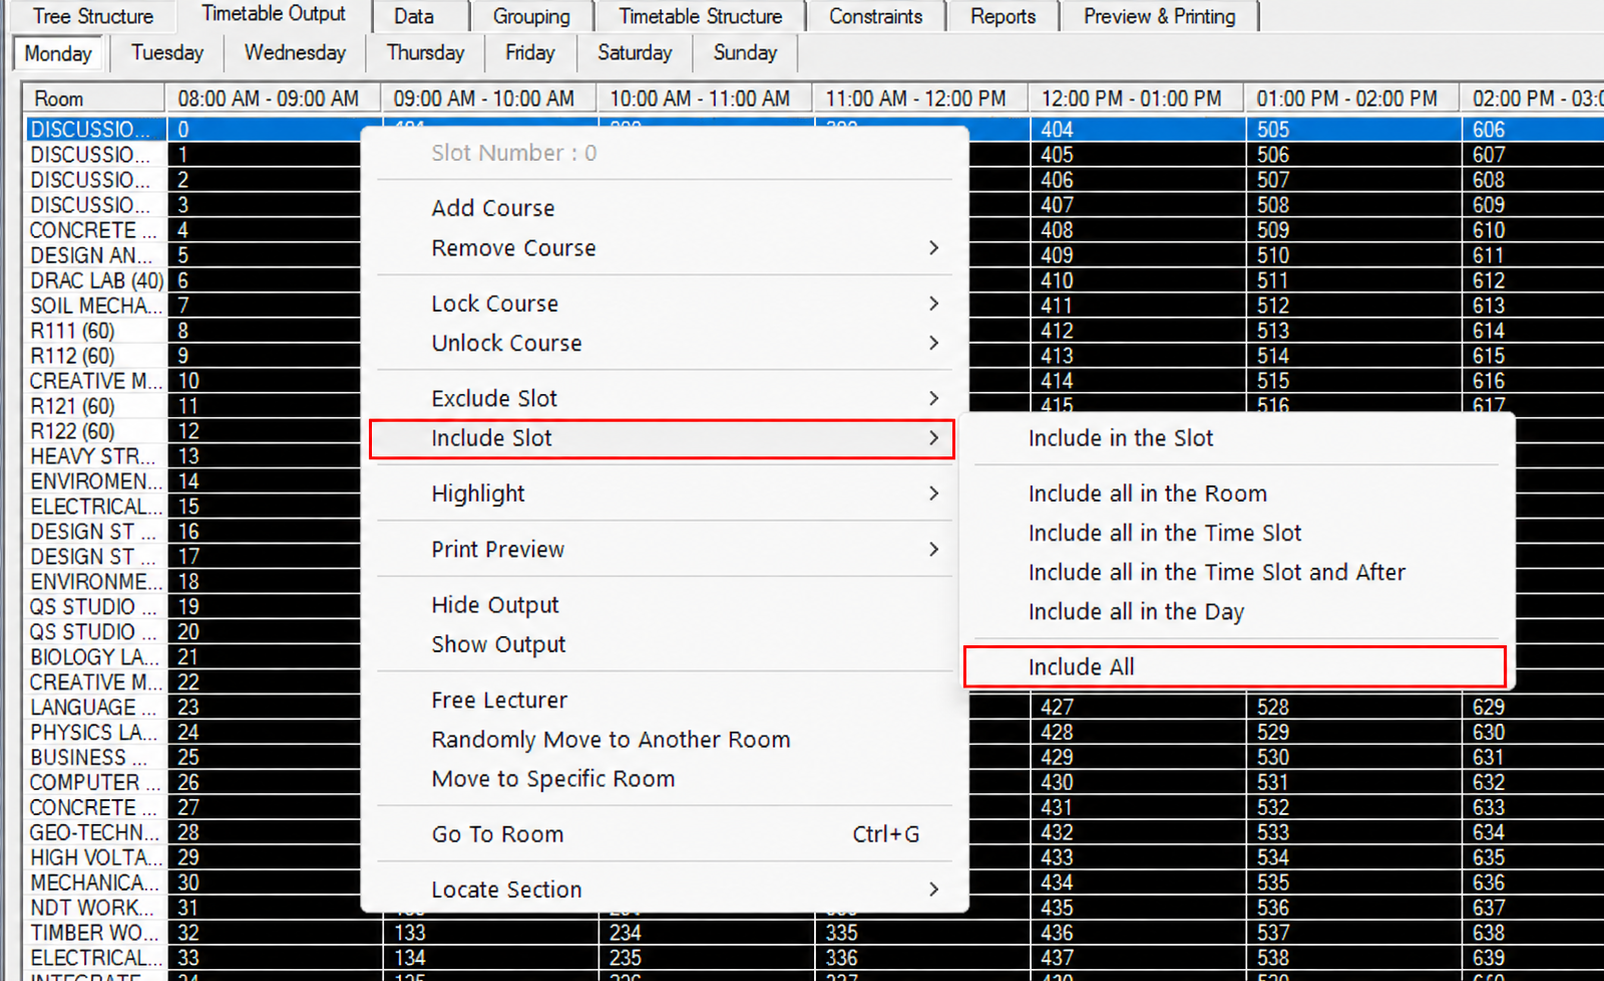
Include All: Opens every slot on every day, returning the whole timetable to normal.
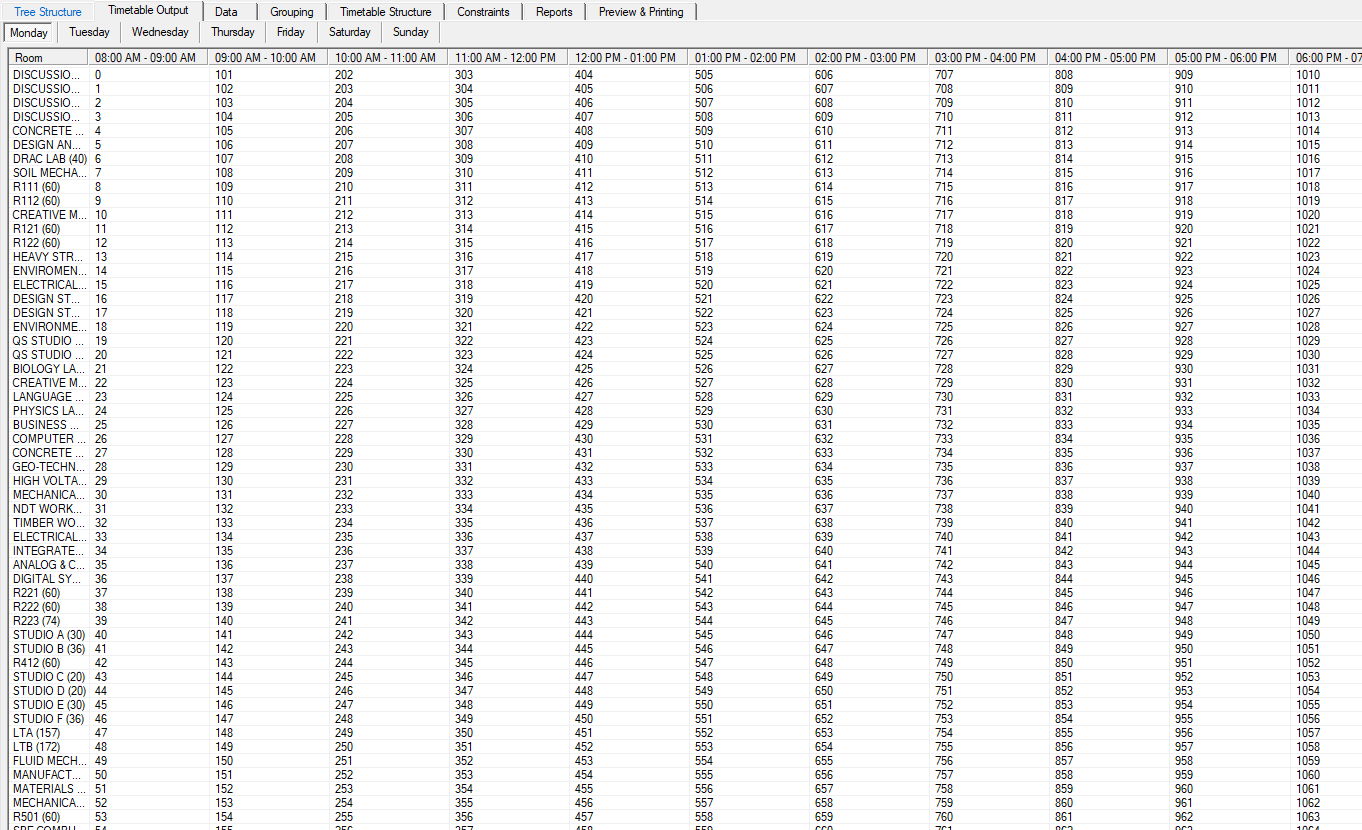
10.1.3 Generate Button
Running the generator takes 5 steps.
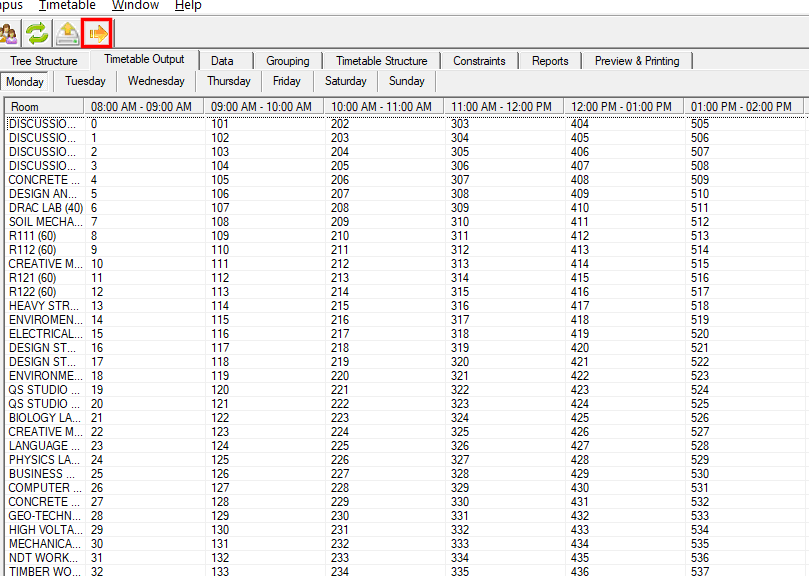
Step 1: Open the Timetable Output tab and click the Generate Schedule icon on the toolbar.
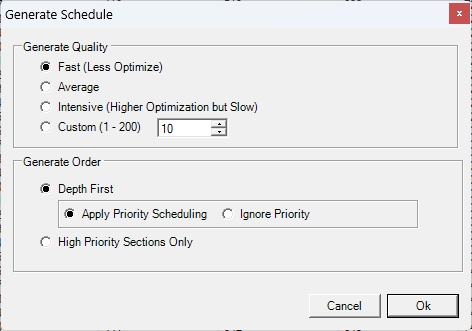
Step 2: The Generate Schedule window appears. Choose a Generate Quality and a Generate Order, then click Ok, or Cancel to close without generating. Each option is explained in Section 10.1.4 Generate Quality or Order.
Step 3: Wait for the Processing... progress bar to finish, or click Cancel to stop the run.

Step 4: When the run finishes, the placed sections appear in the Timetable Output grid. The Section Status Summary panel on the left lists the sections that were left Not Assigned.
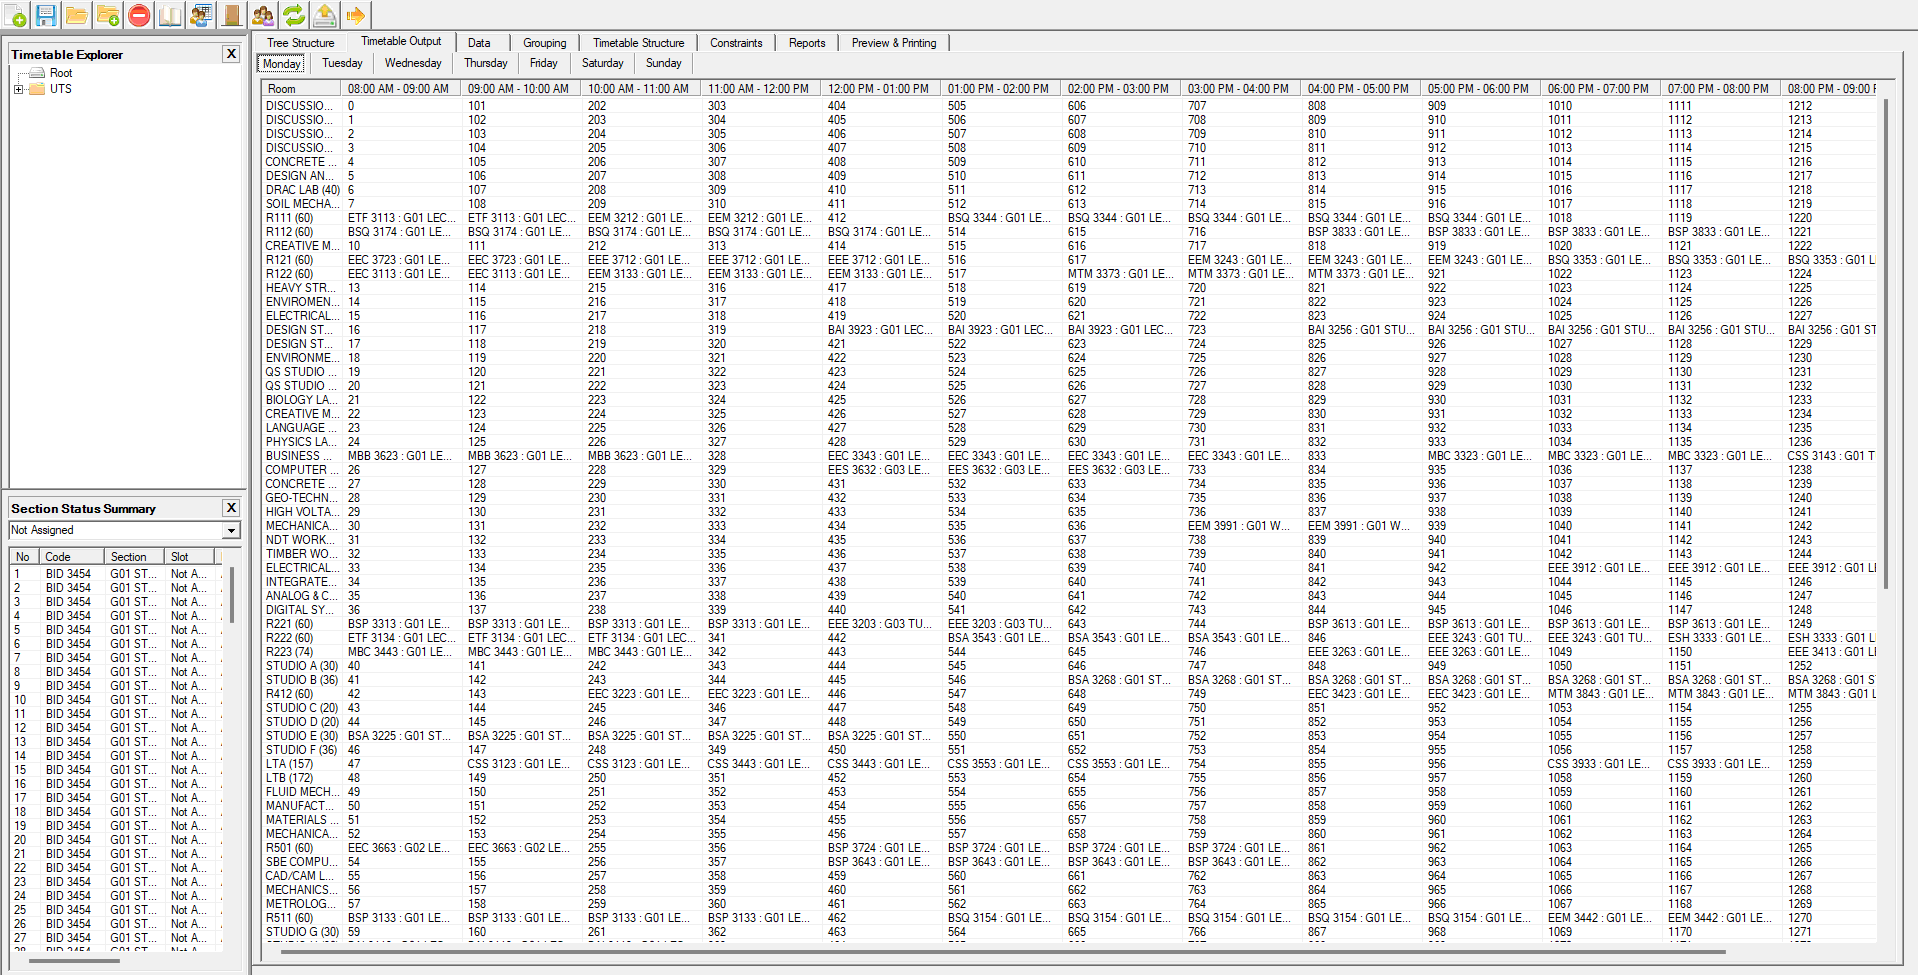
Step 5: If any section was left unassigned, check why in the Failure report, then fix the data or loosen the constraint and run the generator again. See Section 10.1.5 Failure & Report.
10.1.4 Generate Quality or Order
The two groups of options in the Generate Schedule window decide how long the run takes and which sections are placed first.
Generate Quality sets how hard the generator works on the result. A higher setting gives a better timetable but takes longer.
| Option | Description |
|---|---|
| Fast (Less Optimize) | Quickest run. Use it for a first attempt or a quick check. |
| Average | A balance between speed and quality. |
| Intensive (Higher Optimization but Slow) | Best result, but the slowest to finish. Use it for the final run. |
| Custom (1 - 200) | Set the optimisation level yourself in the box next to it. A higher number means more optimisation and a longer run. |
Table 10.1: Generate Quality Options
Generate Order sets which sections the generator places first.
| Option | Description |
|---|---|
| Depth First | Places all sections, working through them one branch at a time. |
| Apply Priority Scheduling | Under Depth First. Follows the priority set on each section, so higher priority sections are placed first. |
| Ignore Priority | Under Depth First. Treats every section the same and ignores the priority setting. |
| High Priority Sections Only | Places only the sections marked as high priority and leaves the rest unassigned. |
Table 10.2: Generate Order Options
10.1.5 Failure & Report
A run does not always place everything. To see why a section was not placed, open the Reports tab and select the Failure sub-tab. Each row shows the Code, Course Name, Section and the Reason of Failure, for example Cannot find room with suitable capacity or All qualified slots are occupied.
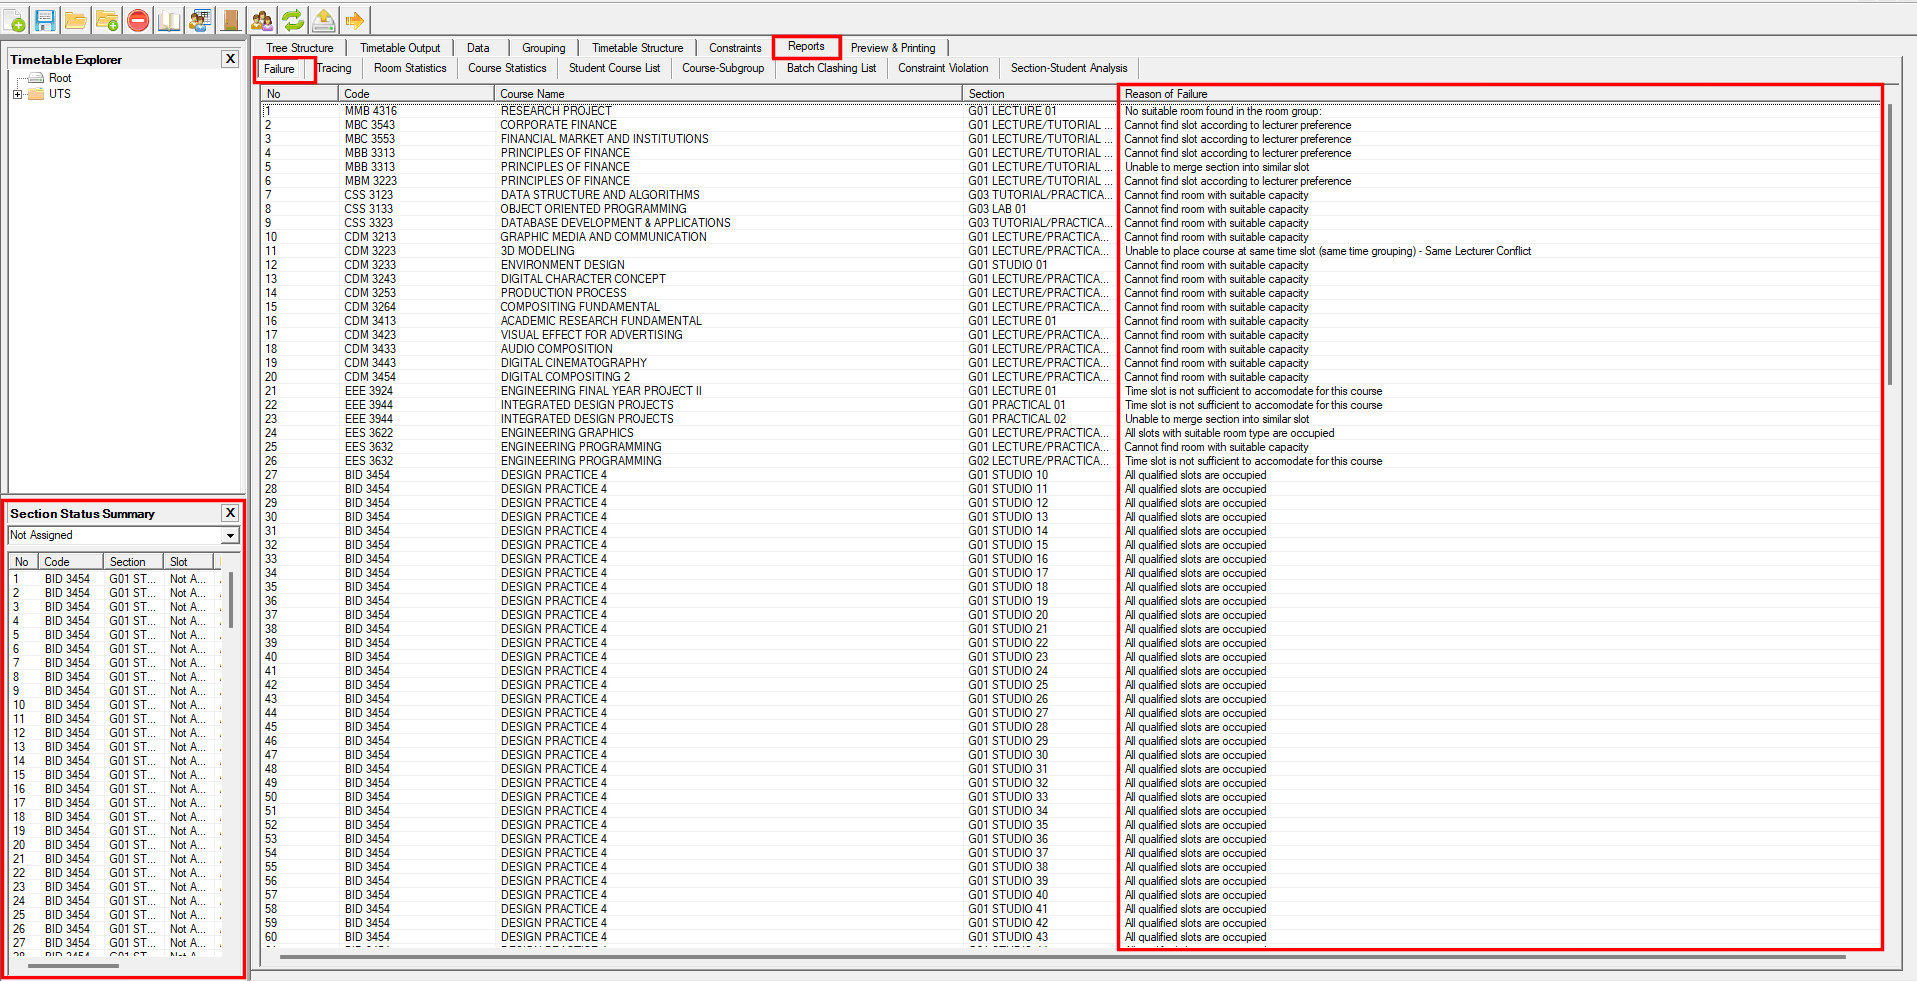
Fix what the report points at, then run the generator again. Sections that still cannot be placed can be put in by hand, as described in Section 10.2 Manually Assign.
10.1.6 Hide / Show Output
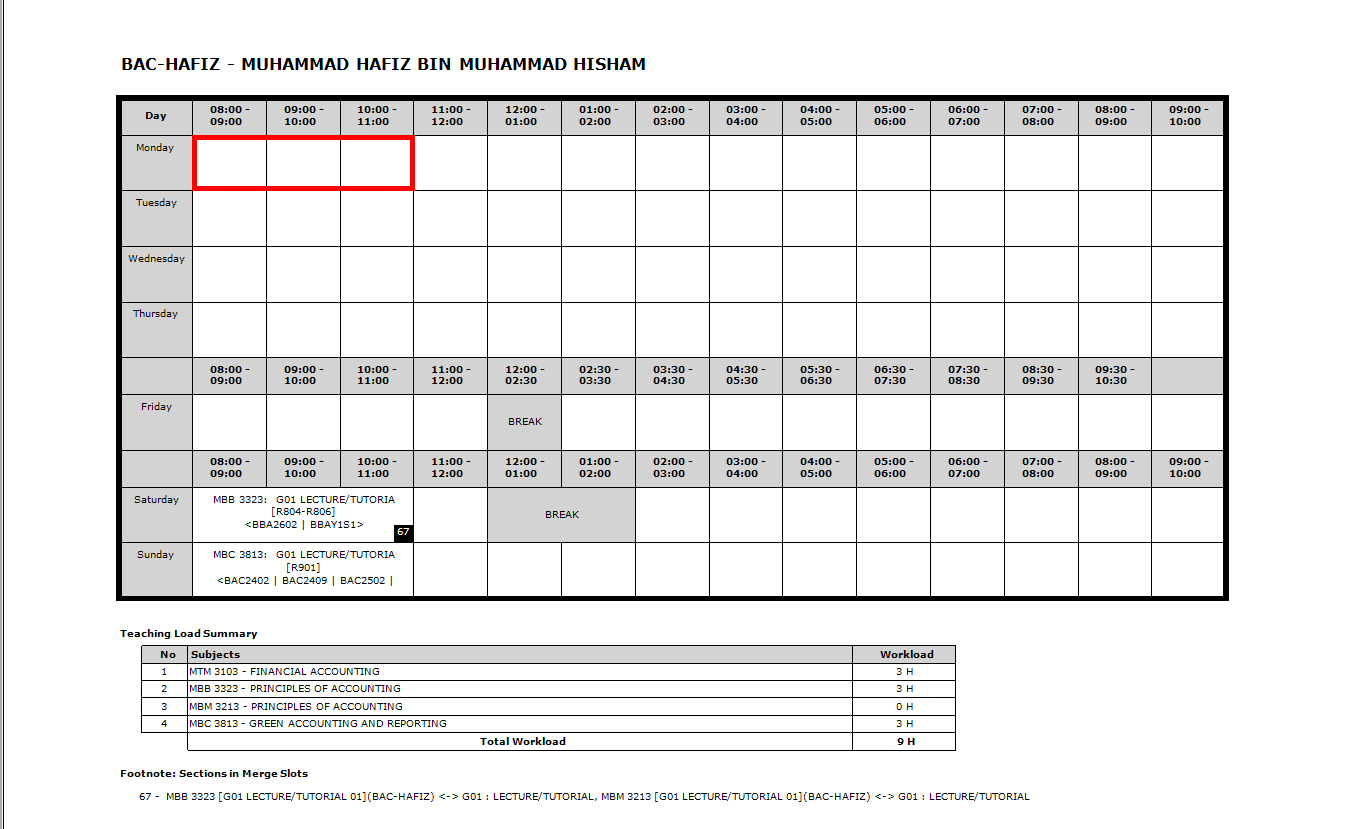
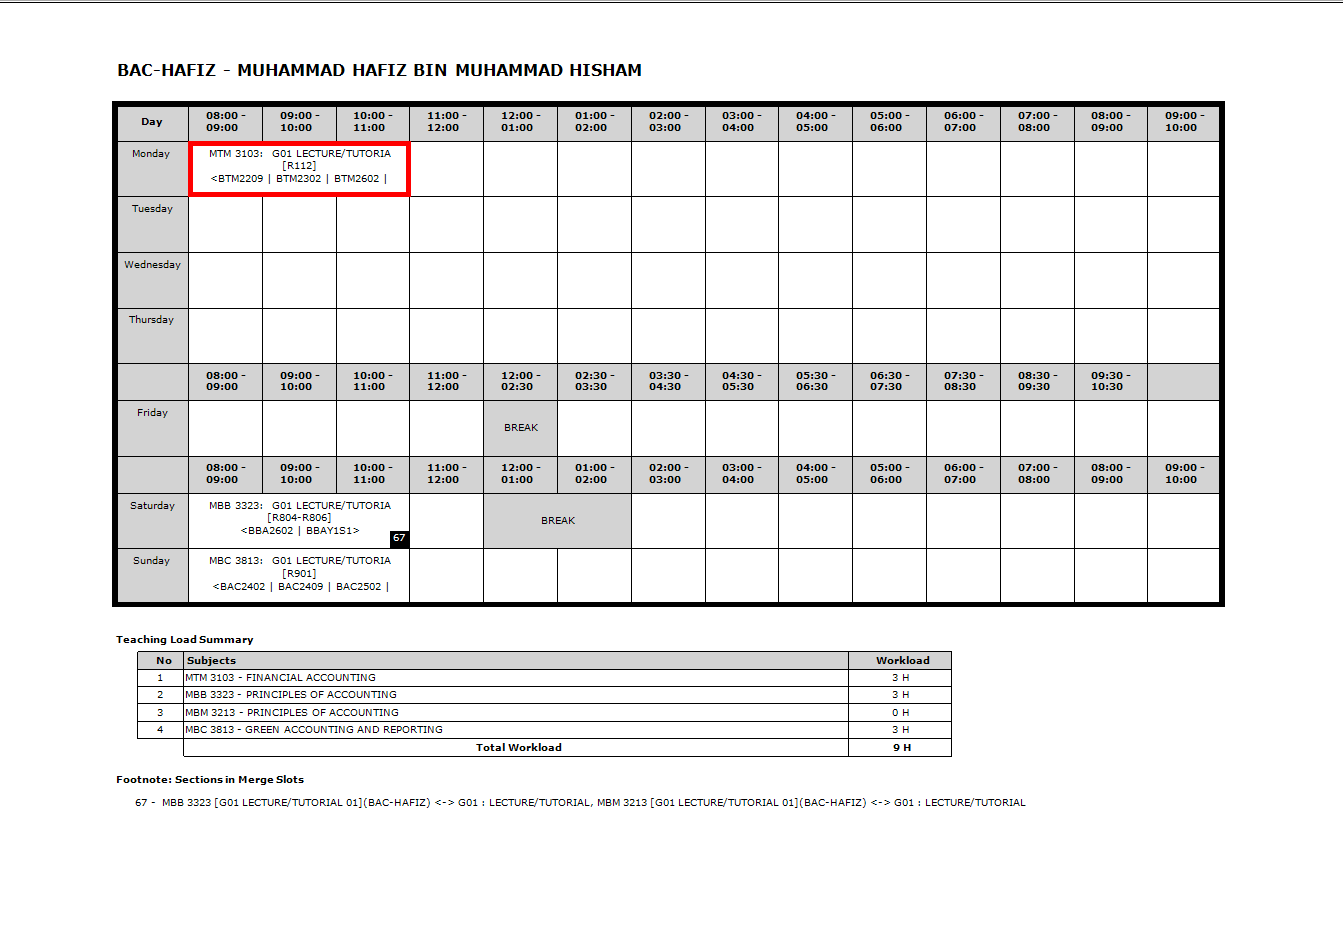
The Hide and Show function allows users to control whether a selected course or lecturer appears in the timetable output. Select Hide Output to temporarily remove it from the output, or Show Output to display it again. This function does not delete or modify any data.
Hide Output leaves the slot empty in the printed timetable, while the section itself stays in place.
Show Output brings it back, and the course appears in the slot again.
10.2 Manually Assign
After Auto Generate has finished, some sections are usually left unassigned. This happens when the generator could not find a slot that satisfies the section, for example because of a room constraint, a lecturer constraint, a merge group, or any of the other reasons listed in the Failure report. See Section 10.1.5 Failure & Report.
Manually Assign lets you place those sections yourself. You choose the slot instead of the generator, so an unassigned section can be put in the best slot still available, or moved to a better one.
10.2.1 Add / Remove Course
This is the action that actually puts a section into the timetable and takes it out again. Both items sit at the top of the right click menu. Only add a section to a slot that has no clash; Section 10.2.4 Highlight shows how to see the clashes before you place it.
Add Course
Right click the empty slot you want to fill and choose Add Course.
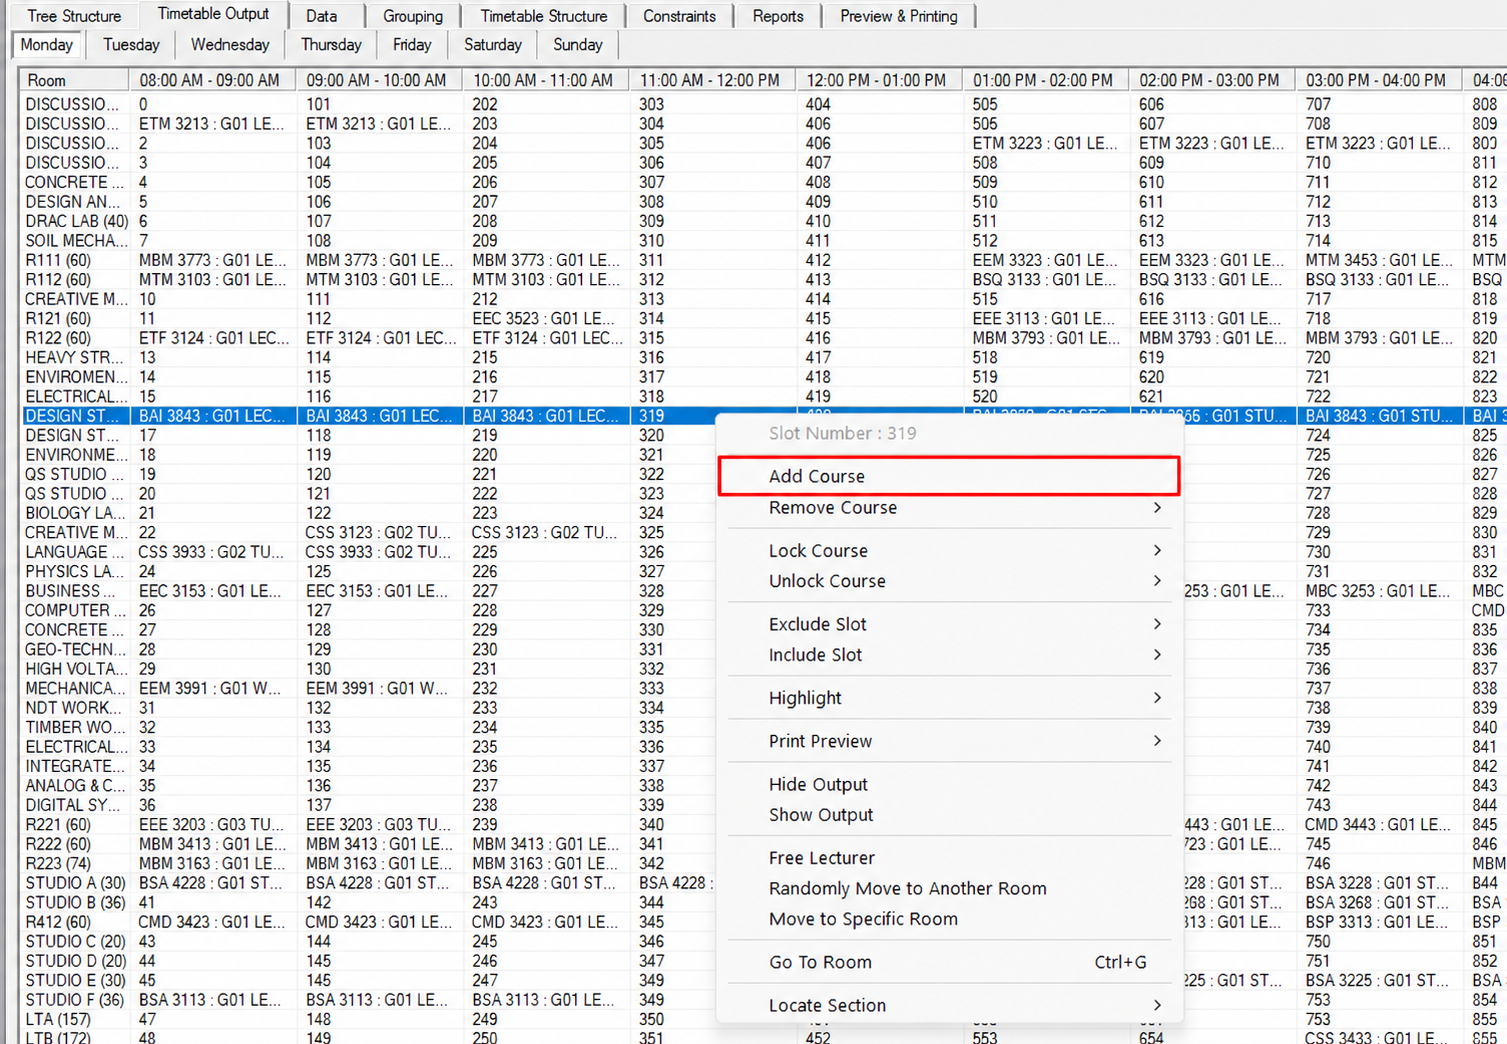
The Add Course to Slot window opens. The Slot ID at the top confirms which slot you are filling, and Course(s) assigned to this slot lists whatever is already there.
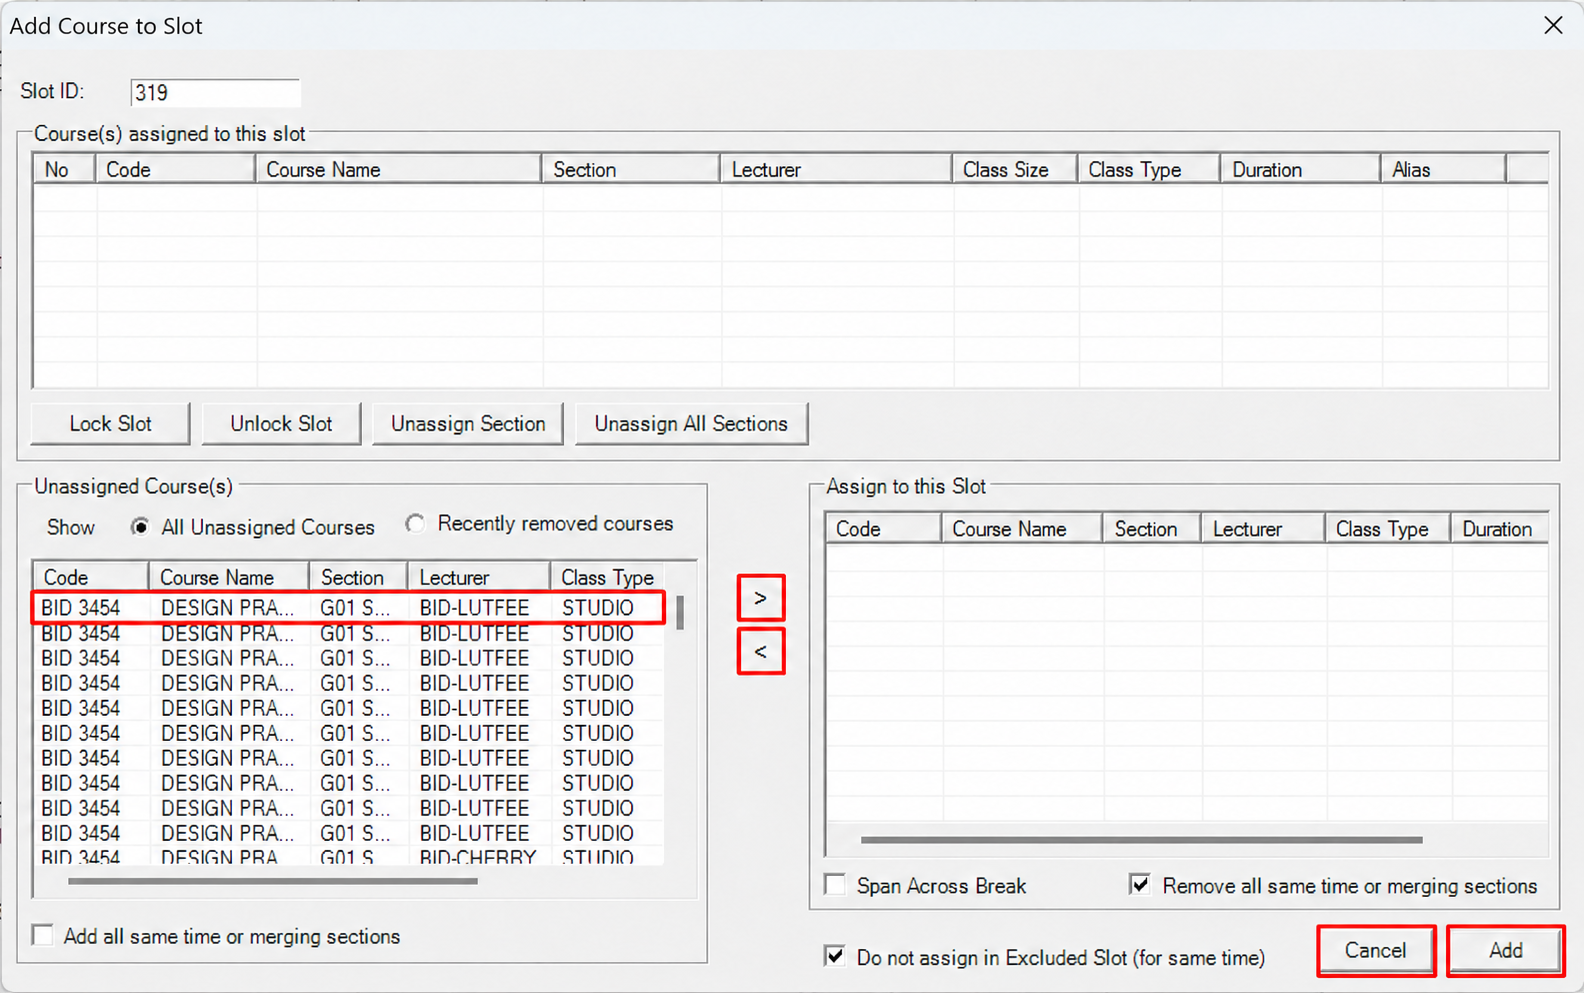
Pick the section from Unassigned Course(s) on the left, click the > button to move it into Assign to this Slot on the right, then click Add. Use < to send a section back, or Cancel to close the window without placing anything.
| Control | Description |
|---|---|
| Lock Slot / Unlock Slot | Locks or unlocks the slot without leaving the window. |
| Unassign Section | Takes the selected section out of the slot. |
| Unassign All Sections | Empties the slot completely. |
| Show: All Unassigned Courses | Lists every section that still has no slot. |
| Show: Recently removed courses | Lists only the sections you have just taken out, which is quicker when you are moving one section to a better slot. |
| Add all same time or merging sections | Brings the whole same time or merge group along with the section, instead of just the one you picked. |
| Span Across Break | Lets the class run through a break instead of stopping at it. |
| Remove all same time or merging sections | Takes the whole same time or merge group out together. |
| Do not assign in Excluded Slot (for same time) | Keeps the same time group out of slots that have been excluded. |
Table 10.3: Add Course to Slot Controls
Remove Course
Right click the section you want to take out and open Remove Course. The section returns to the unassigned list and the slot is free again.
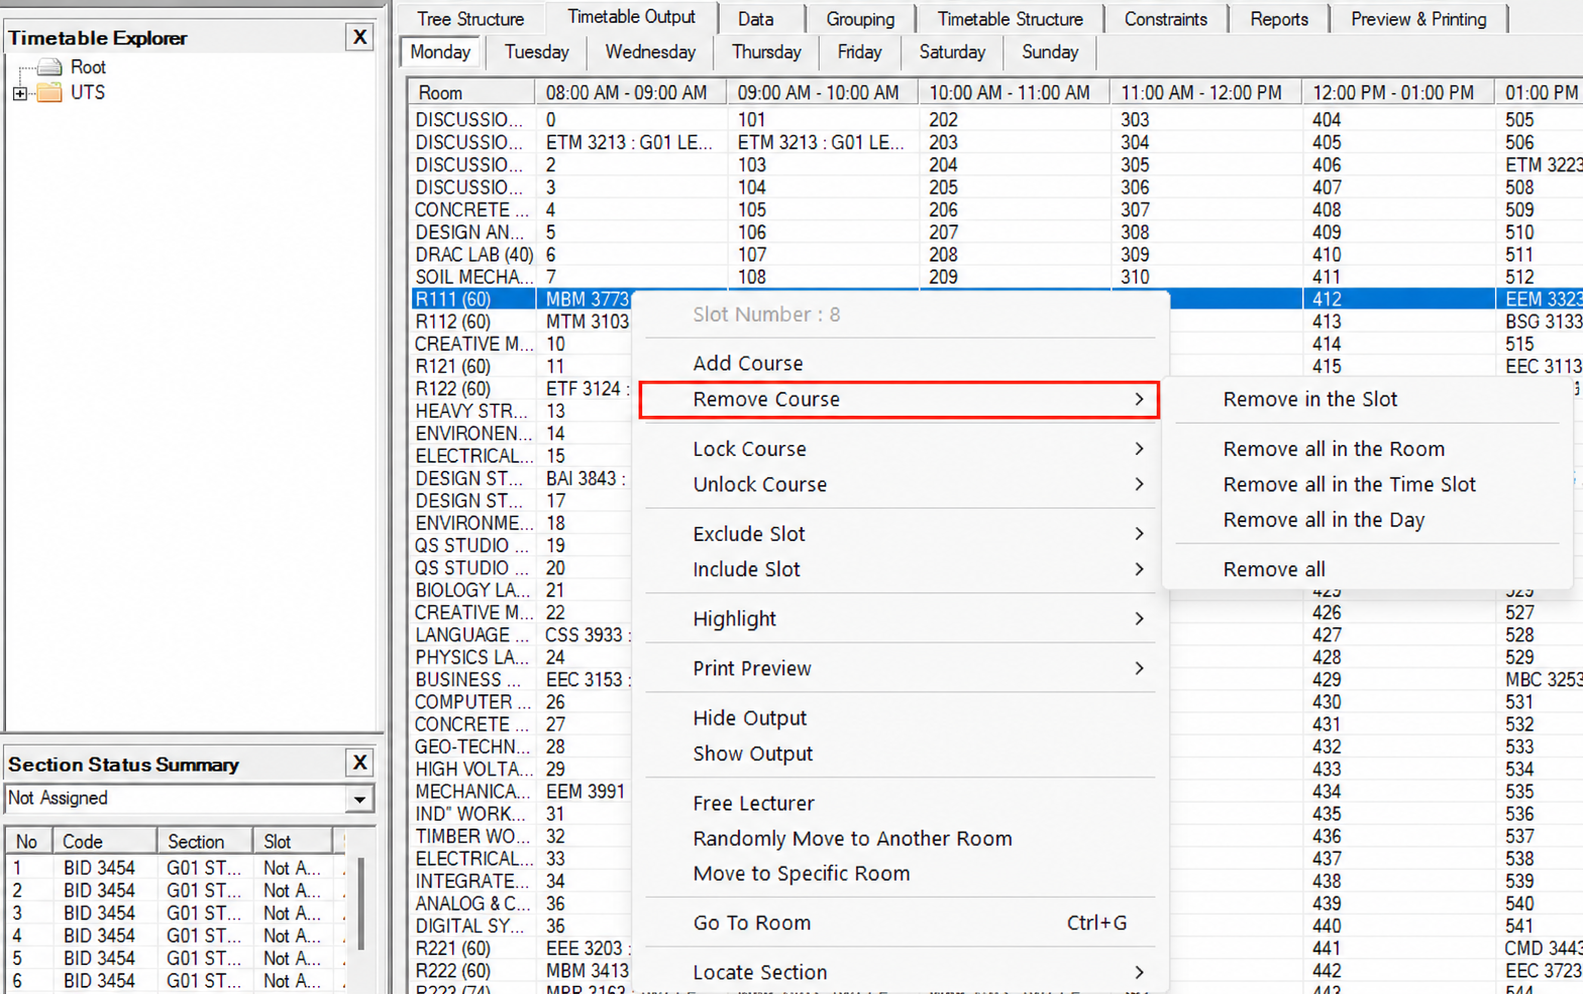
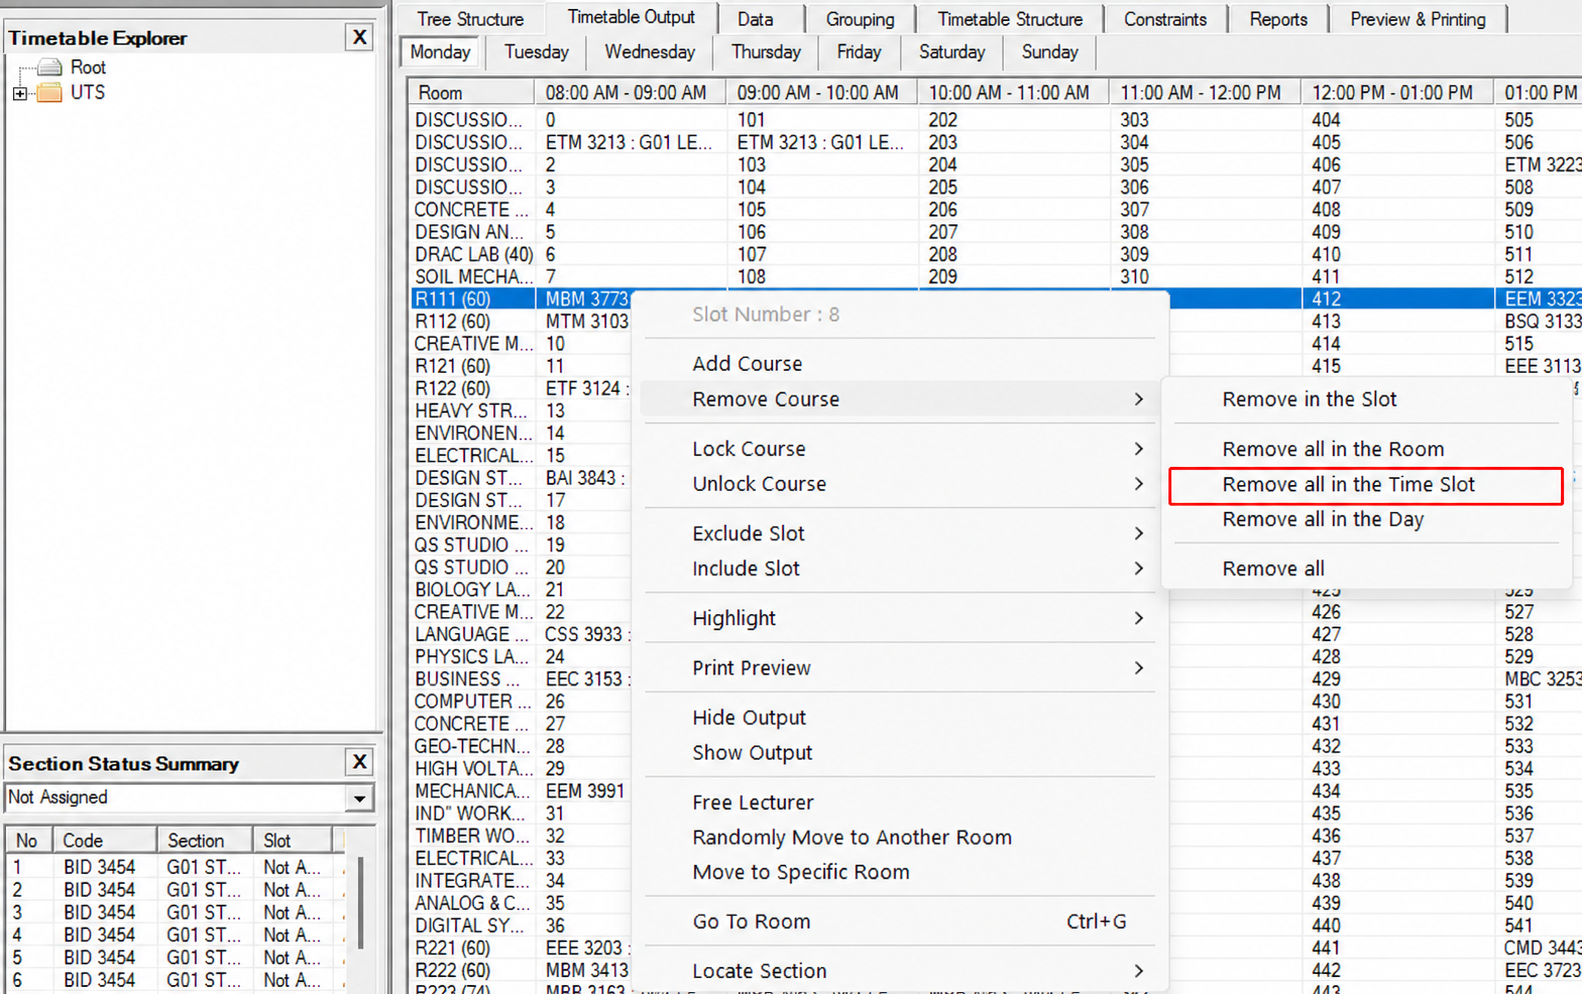
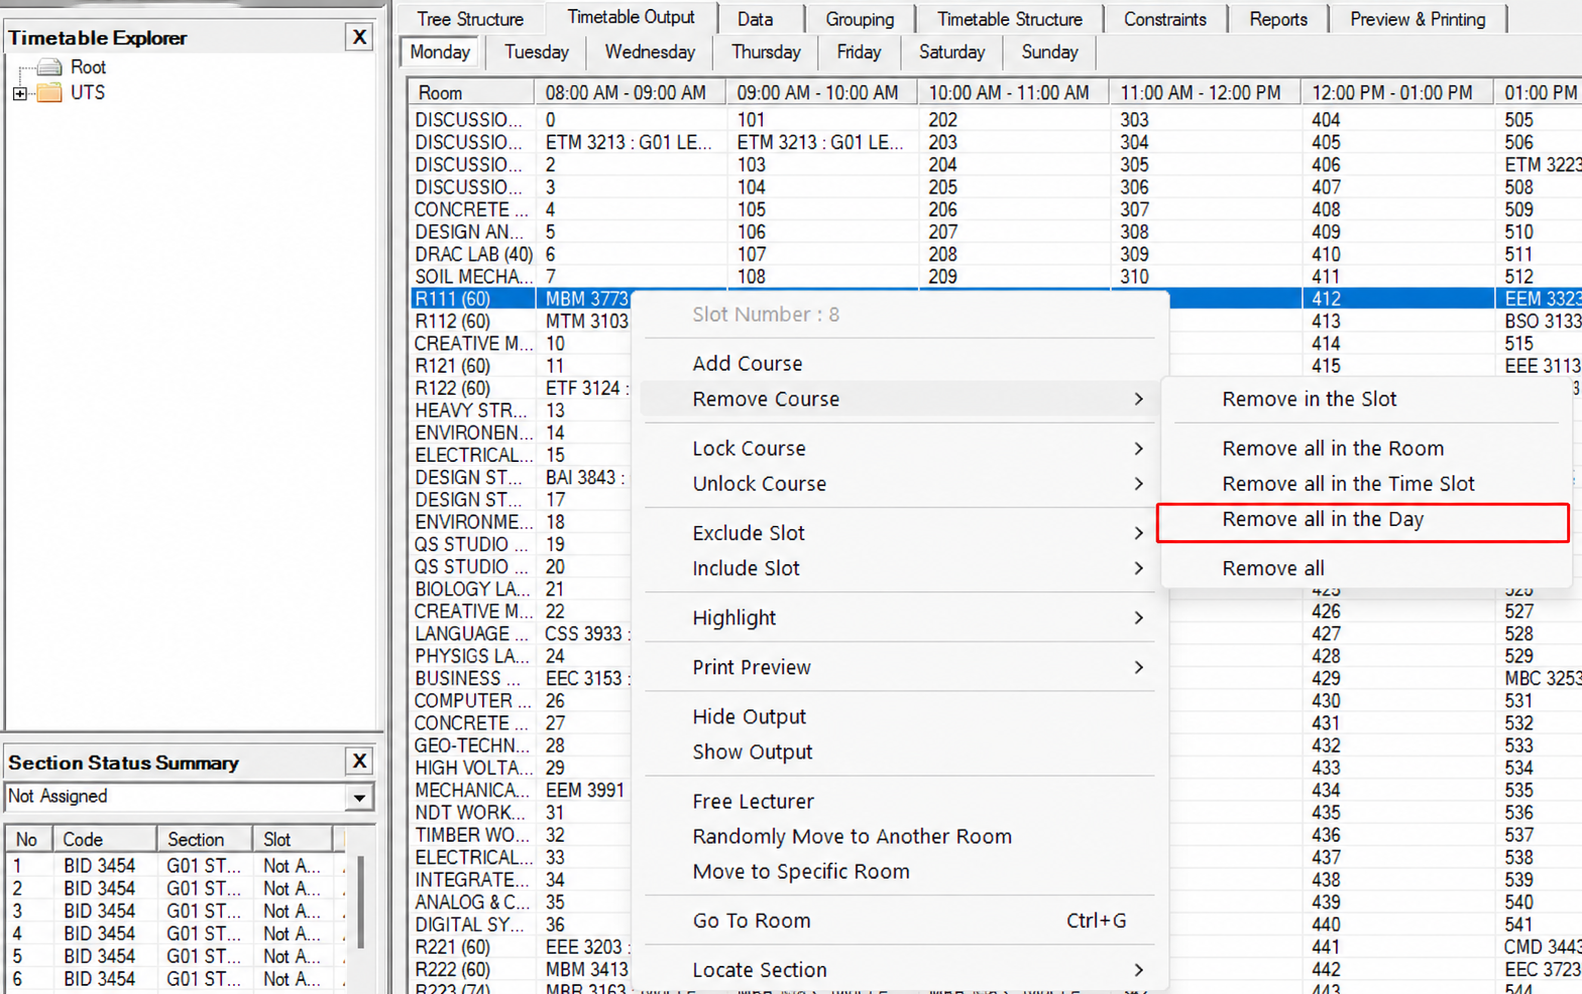
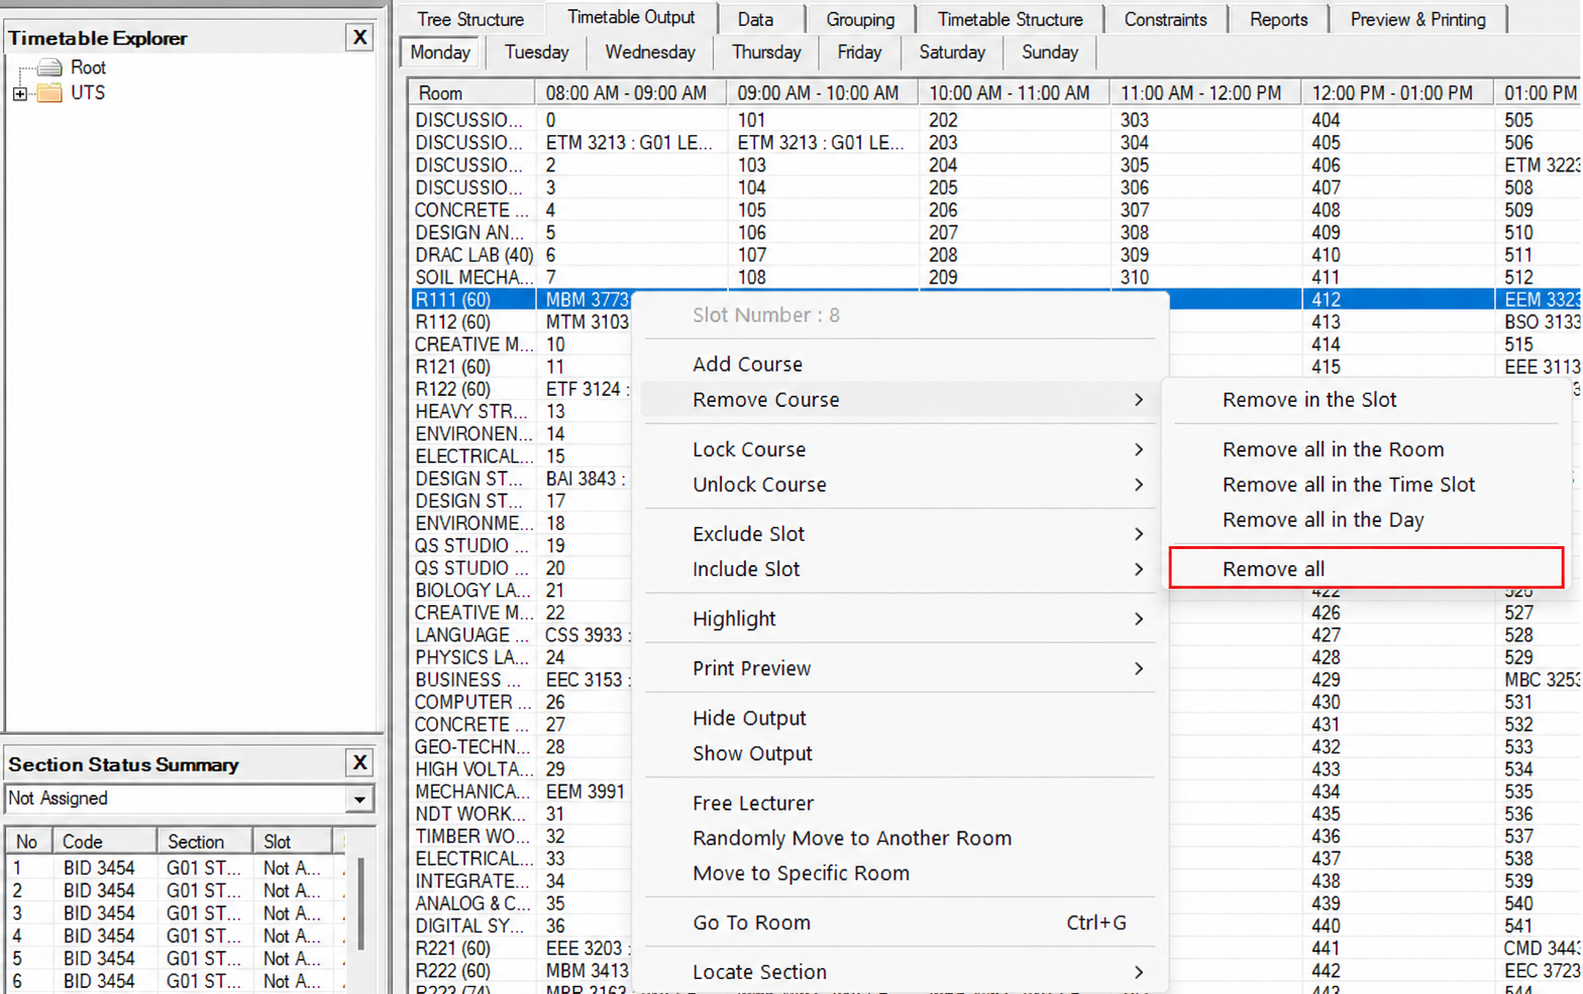
The submenu offers five options, each covering a wider area than the one before it, all measured from the slot you right clicked.
Remove in the Slot: Removes only the section in the slot you right clicked.
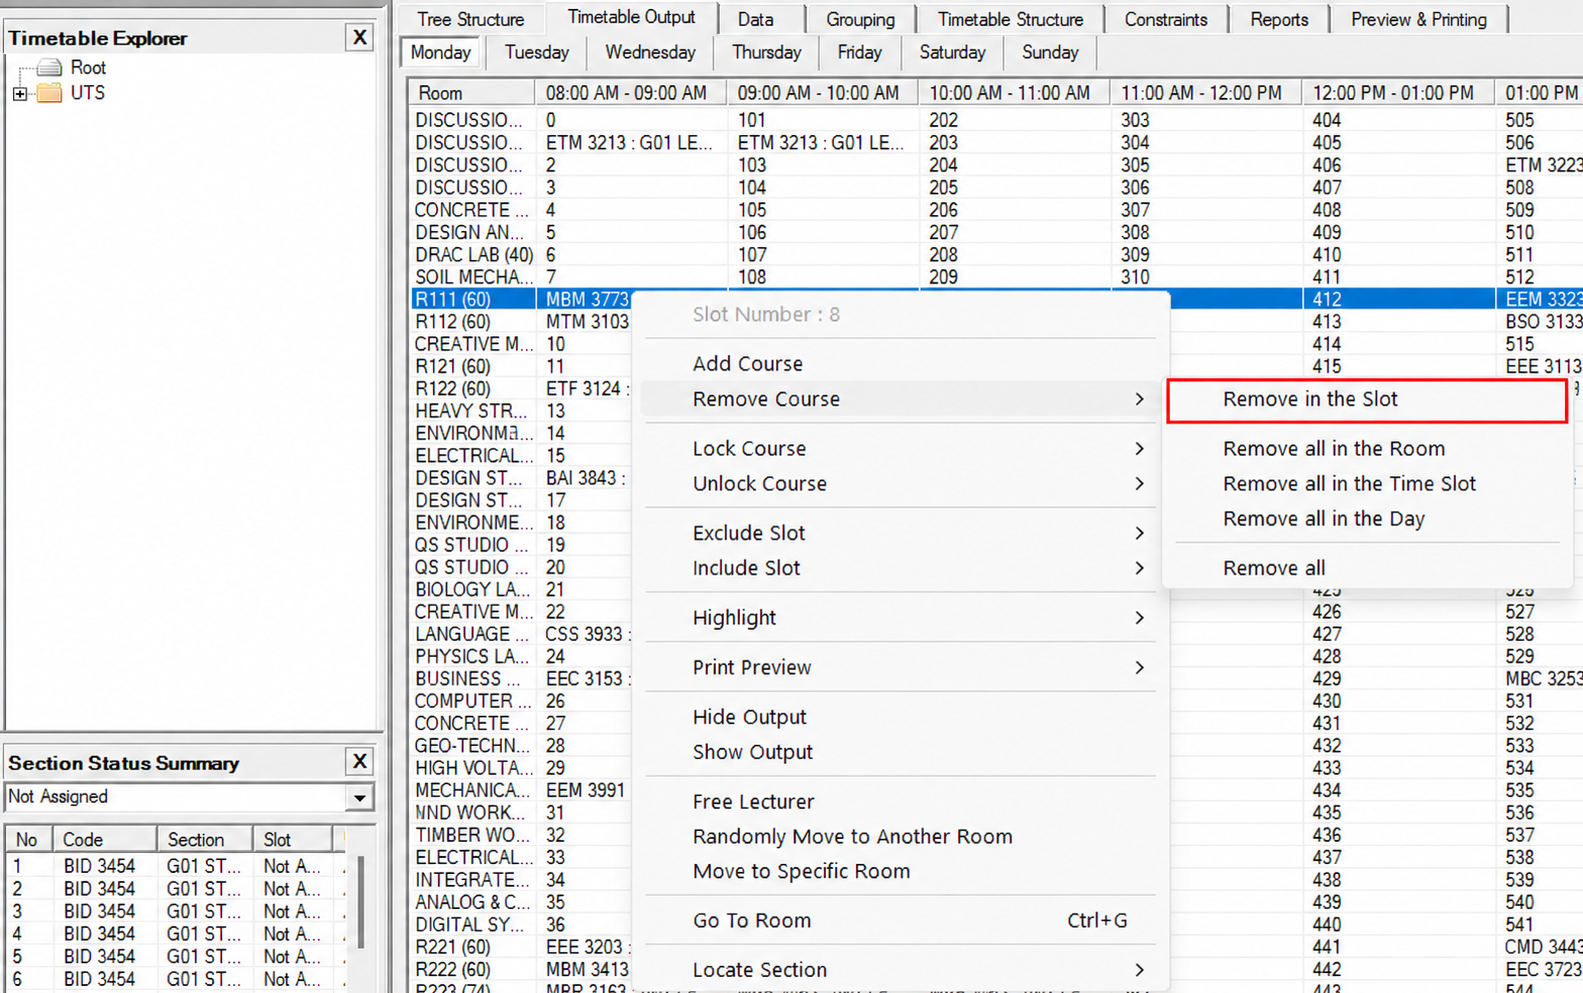
Remove all in the Room: Clears every section from the selected room for that day.
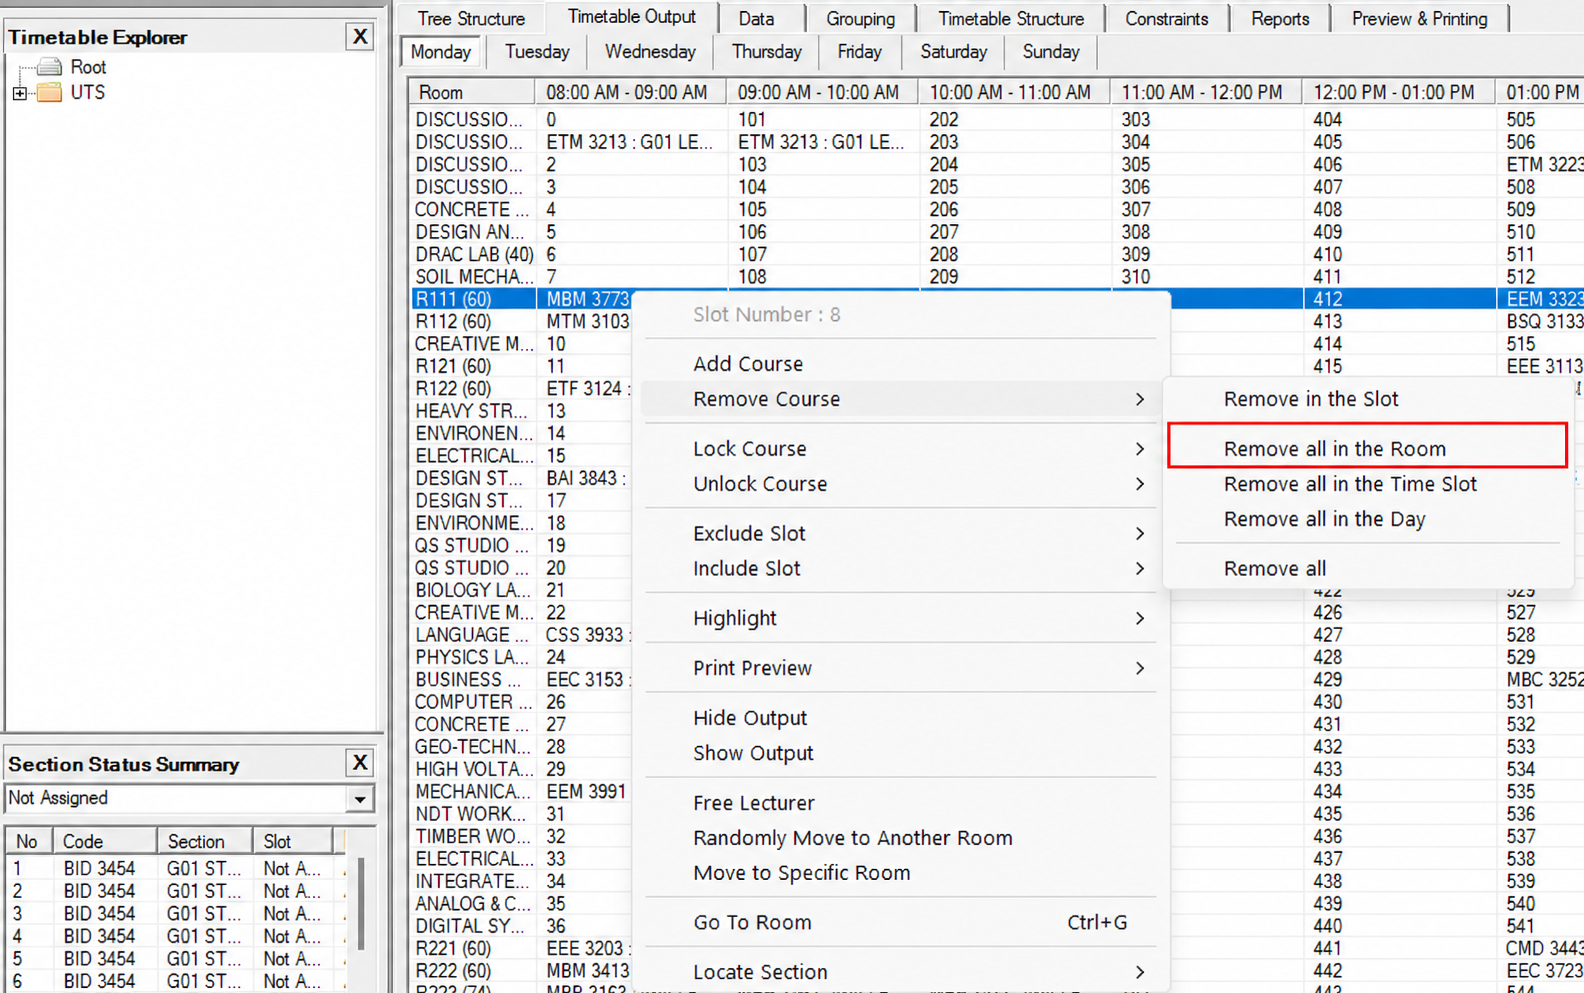
Remove all in the Time Slot: Clears the selected time slot in every room for that day.
Remove all in the Day: Clears every section on the day currently shown.
Remove all: Clears every section on every day, emptying the whole timetable.
To see what you have just taken out, set the drop-down in the Section Status Summary panel to Recently Removed. It lists every section removed in this session, each showing Not Assign in the Slot column, so you can put them back without hunting through the full unassigned list.
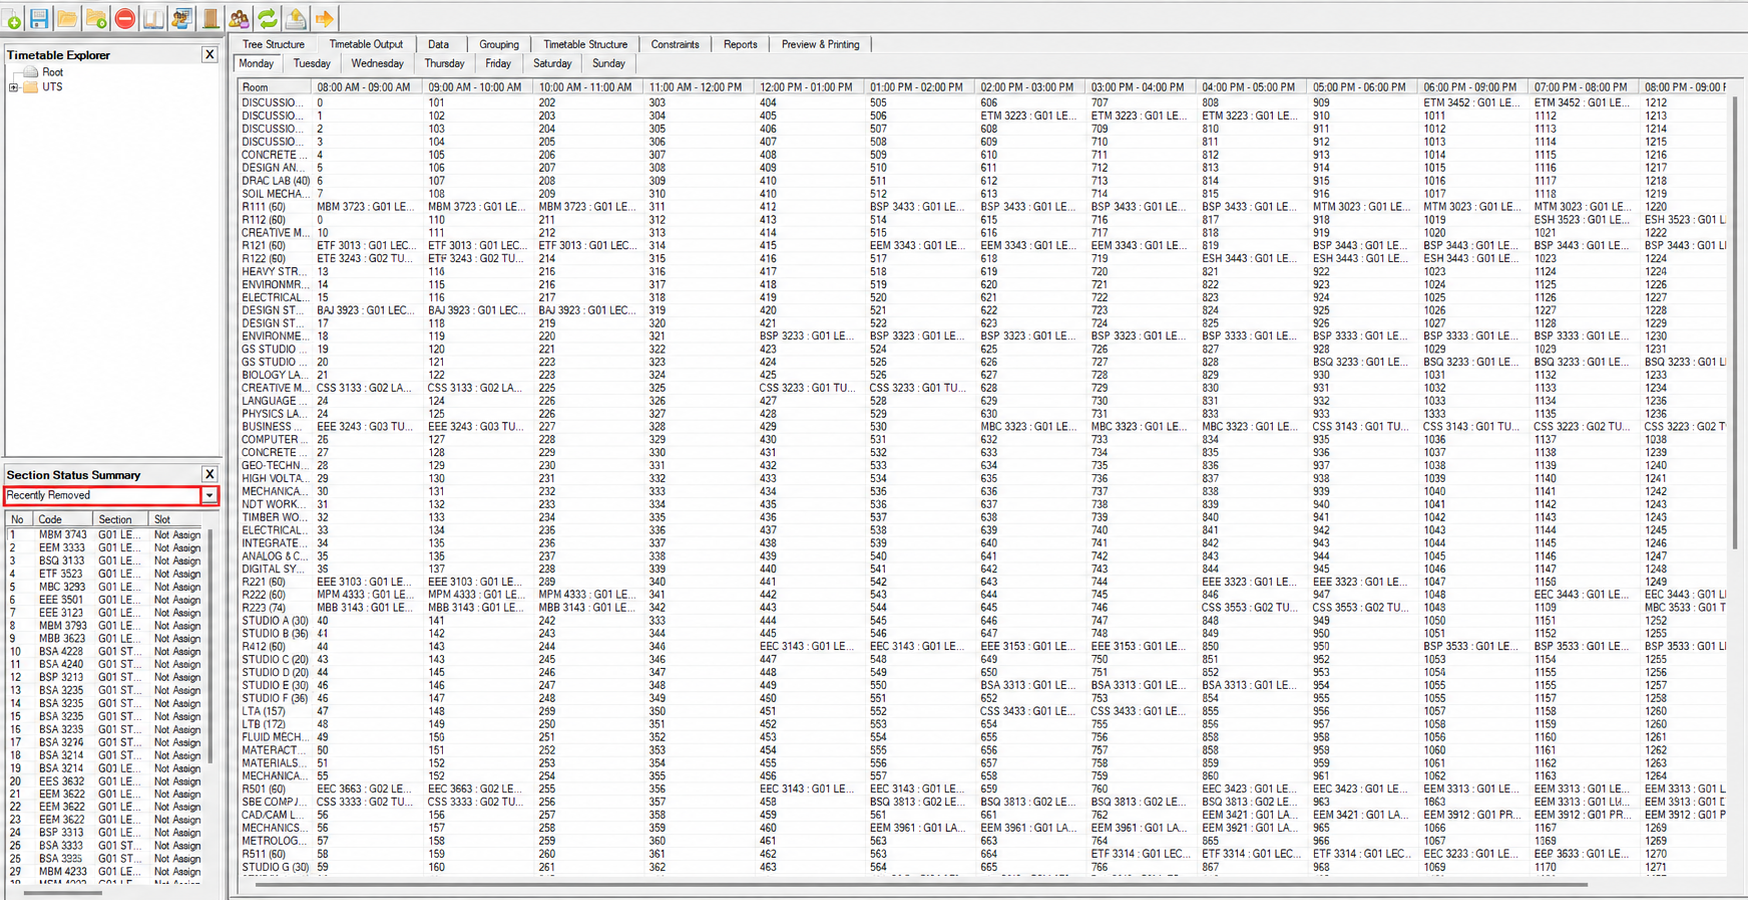
The same list is available inside the Add Course to Slot window through the Show: Recently removed courses option, which is the quicker way to move a section straight into a better slot.
10.2.2 Lock / Unlock
Once a section sits where you want it, lock it. A locked section stays in its slot and will not be moved by a later generation run or by an accidental drag. Lock the placements you are happy with as you go, so each new section you place has to fit around work you have already approved.
Lock Course
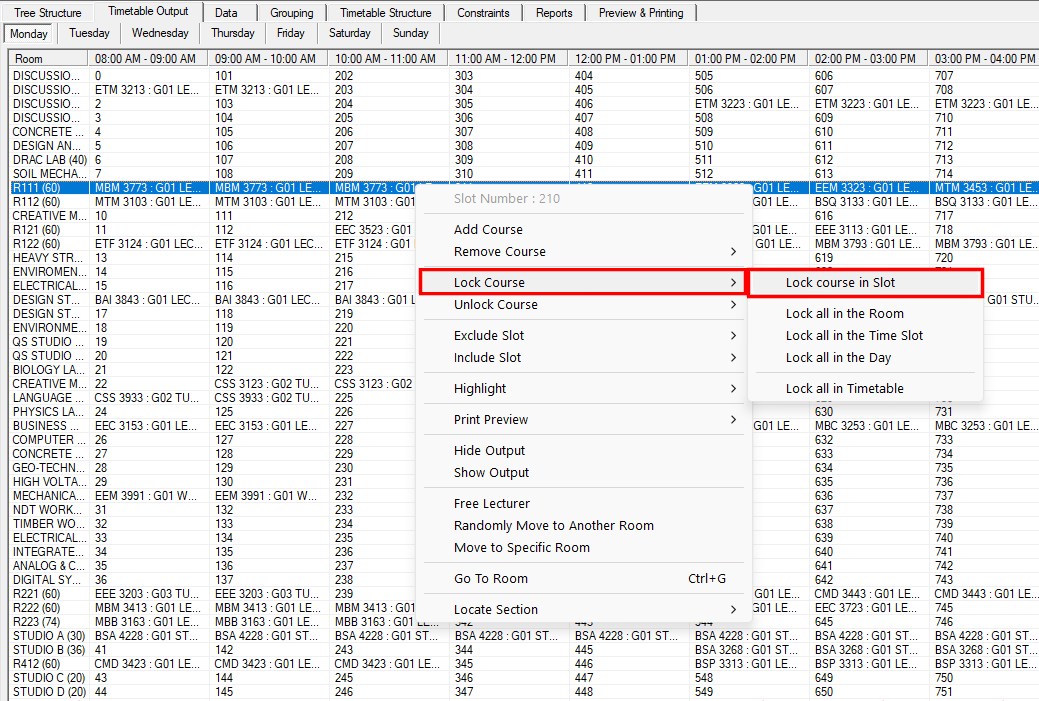
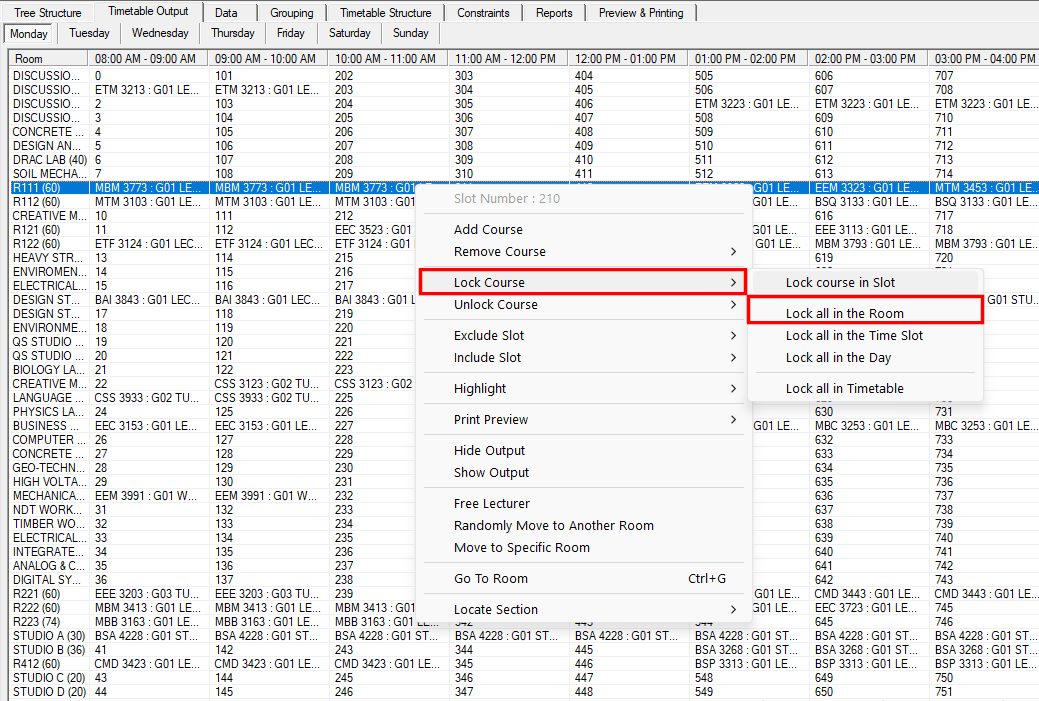
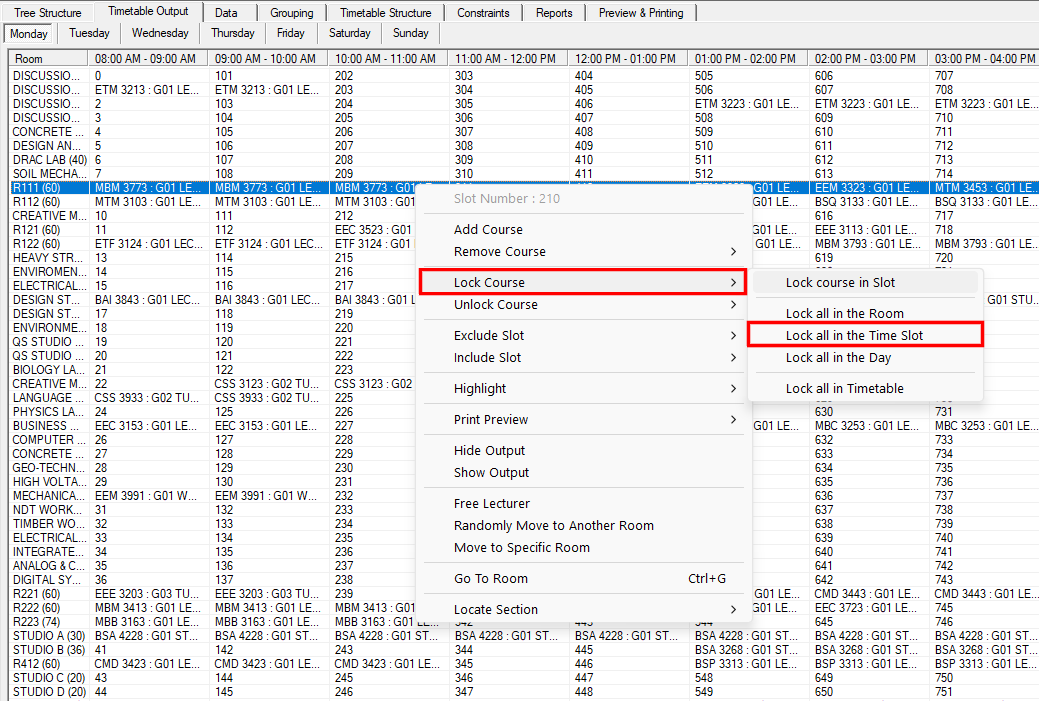
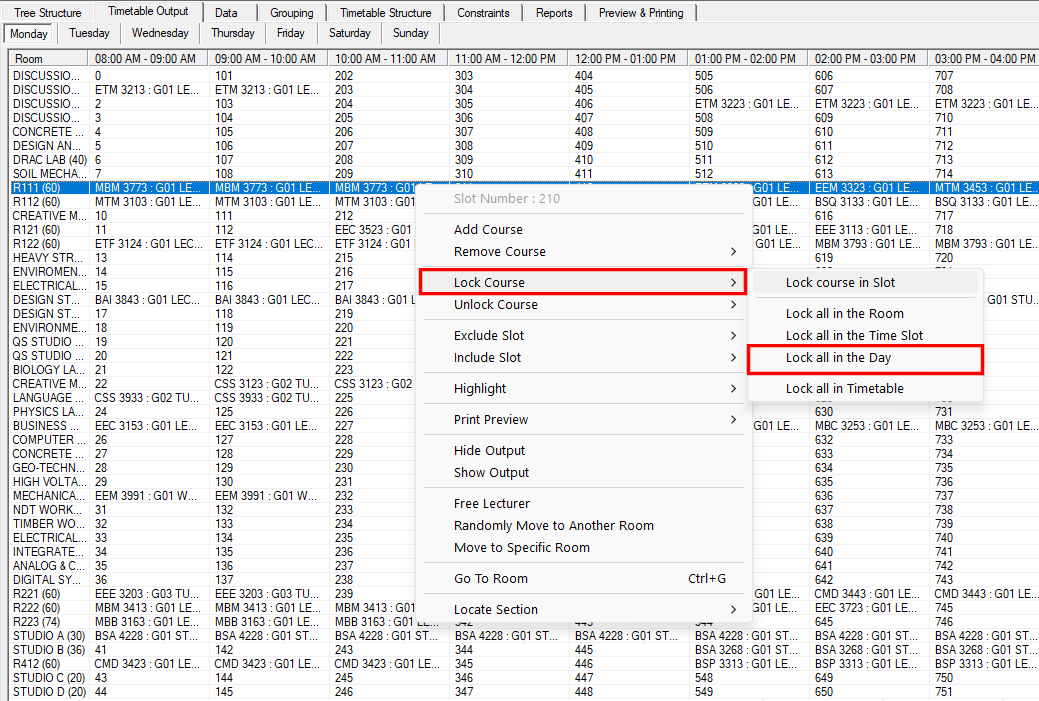
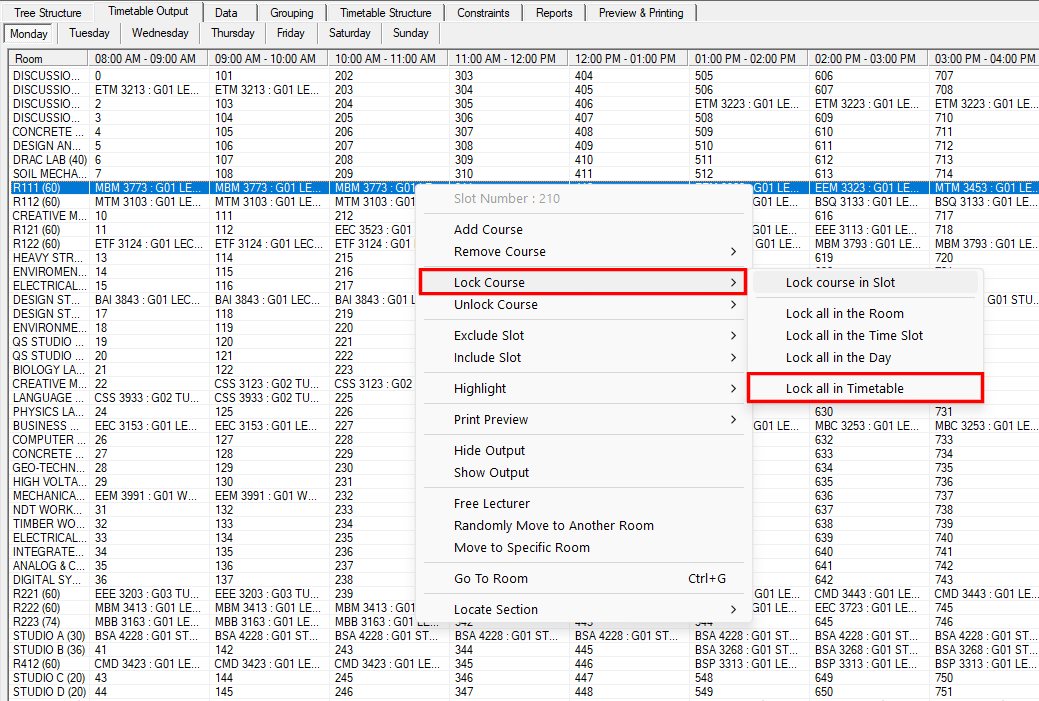
Right click the section and open Lock Course. The submenu offers five options, each covering a wider area than the one before it, all measured from the slot you right clicked.
Lock course in Slot: Locks only the section in the slot you right clicked.
Lock all in the Room: Locks every section in the selected room for that day.
Lock all in the Time Slot: Locks the selected time slot in every room for that day.
Lock all in the Day: Locks every section on the day currently shown.
Lock all in Timetable: Locks every section on every day. Use it once the whole timetable is final.
Whichever option you pick, the Lock & Protect window opens. Choose an action, then click Ok, or Cancel to close without locking.
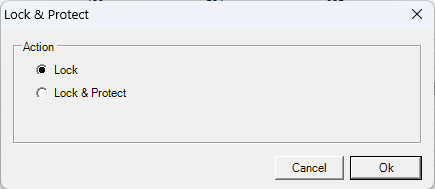
| Action | Description |
|---|---|
| Lock | Locks the section in the slot only. It can be released again with a plain Unlock. |
| Lock & Protect | Locks the section and protects it as well. A protected section is not released by a plain Unlock; it has to be released with Unprotect & Unlock. |
Table 10.4: Lock & Protect Actions
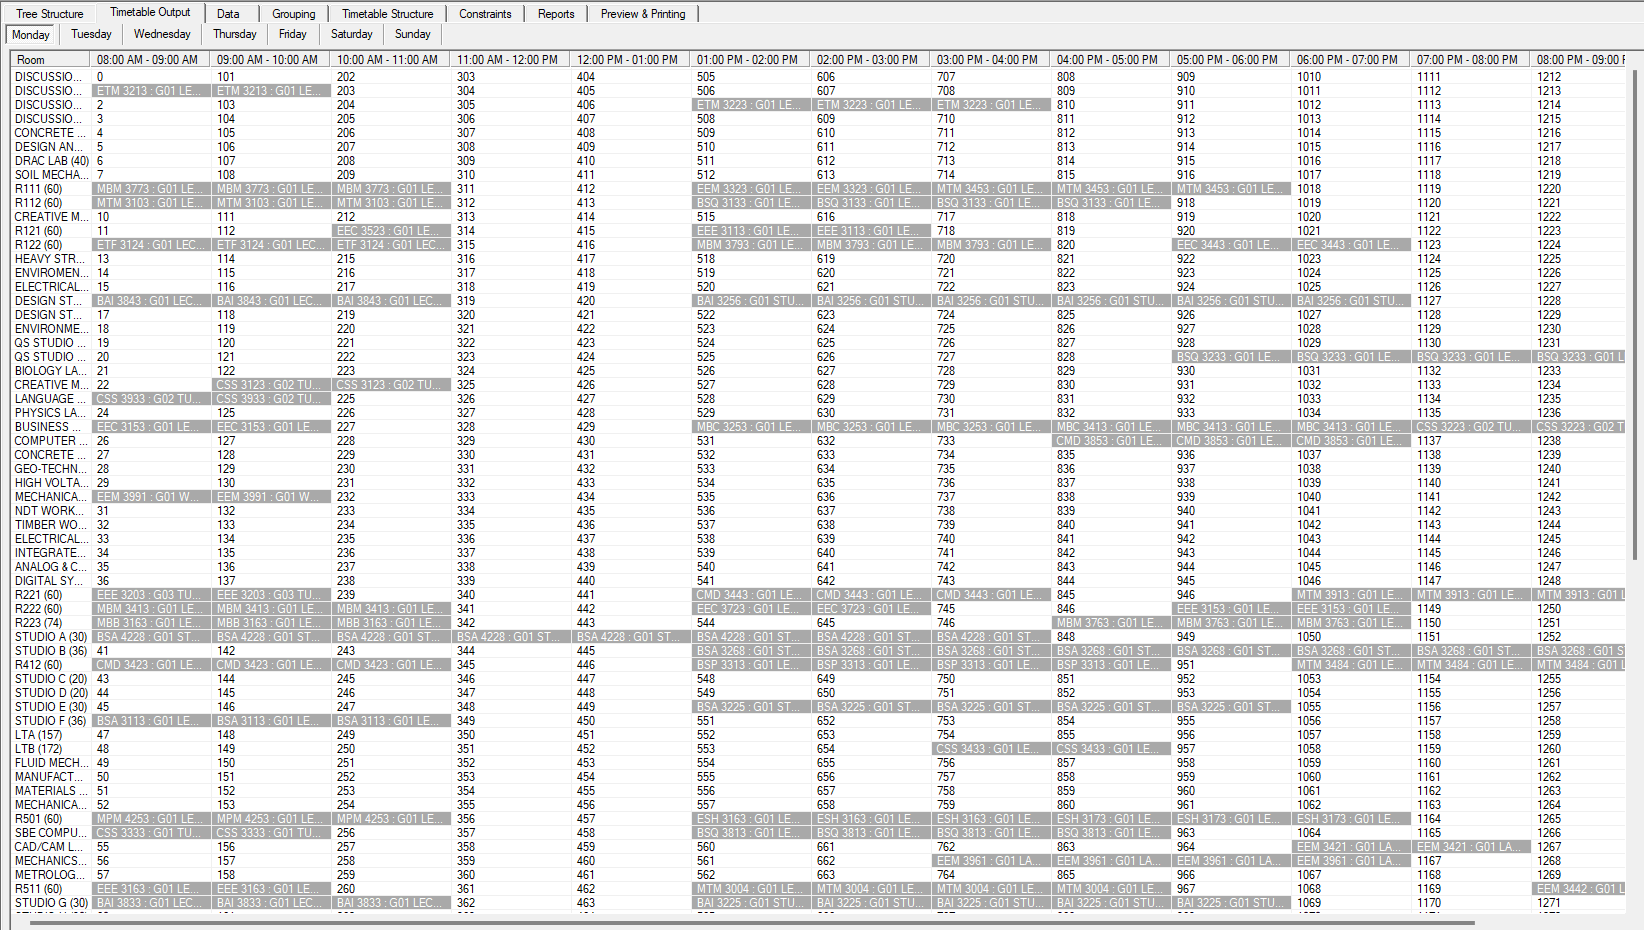
Once the lock is applied, the locked sections turn grey in the Timetable Output, and the same sections turn grey in the Tree Structure as well, so you can see at a glance what is fixed and what can still be moved.
Unlock Course
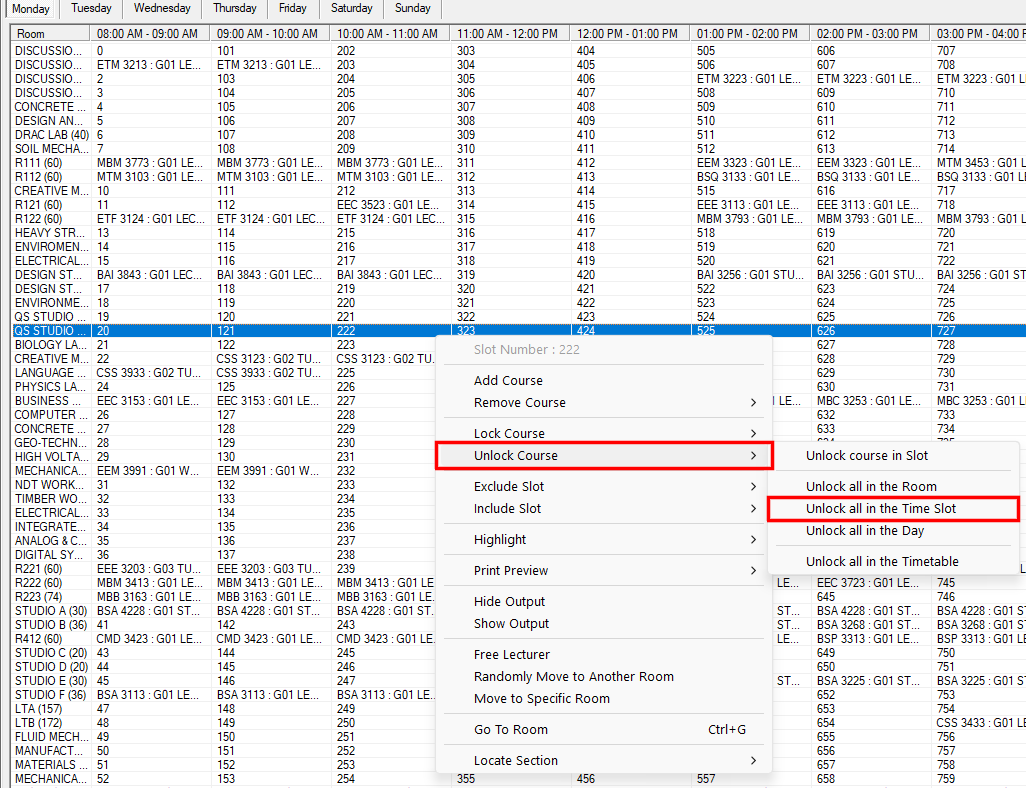
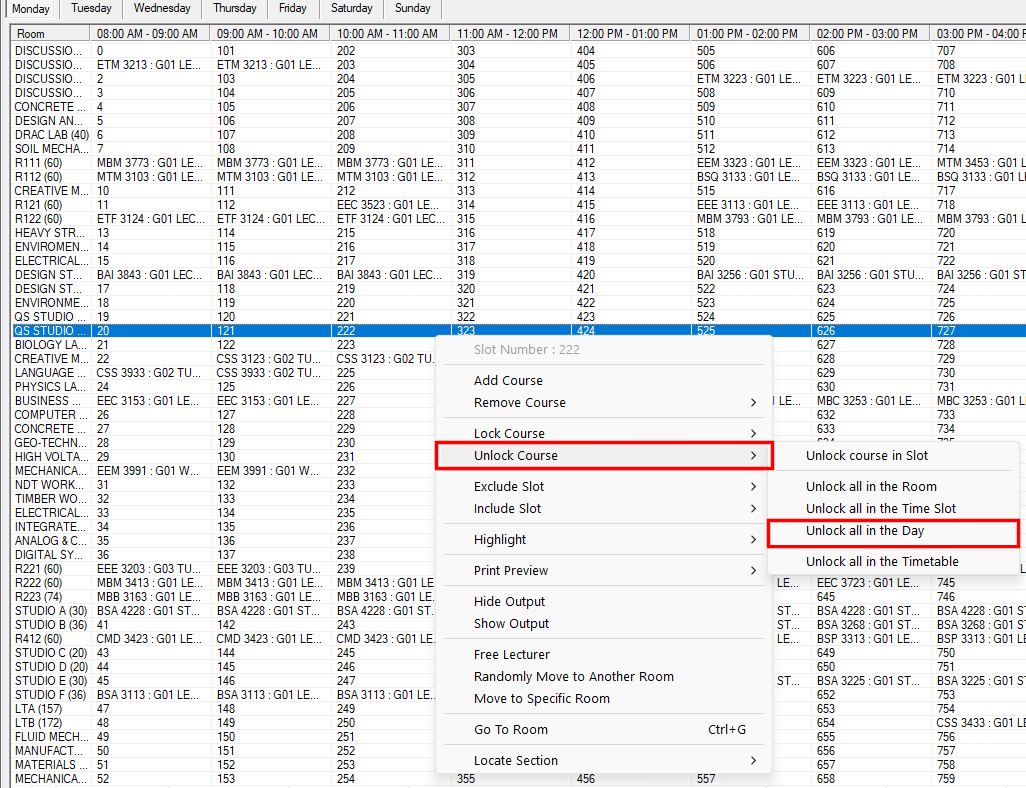
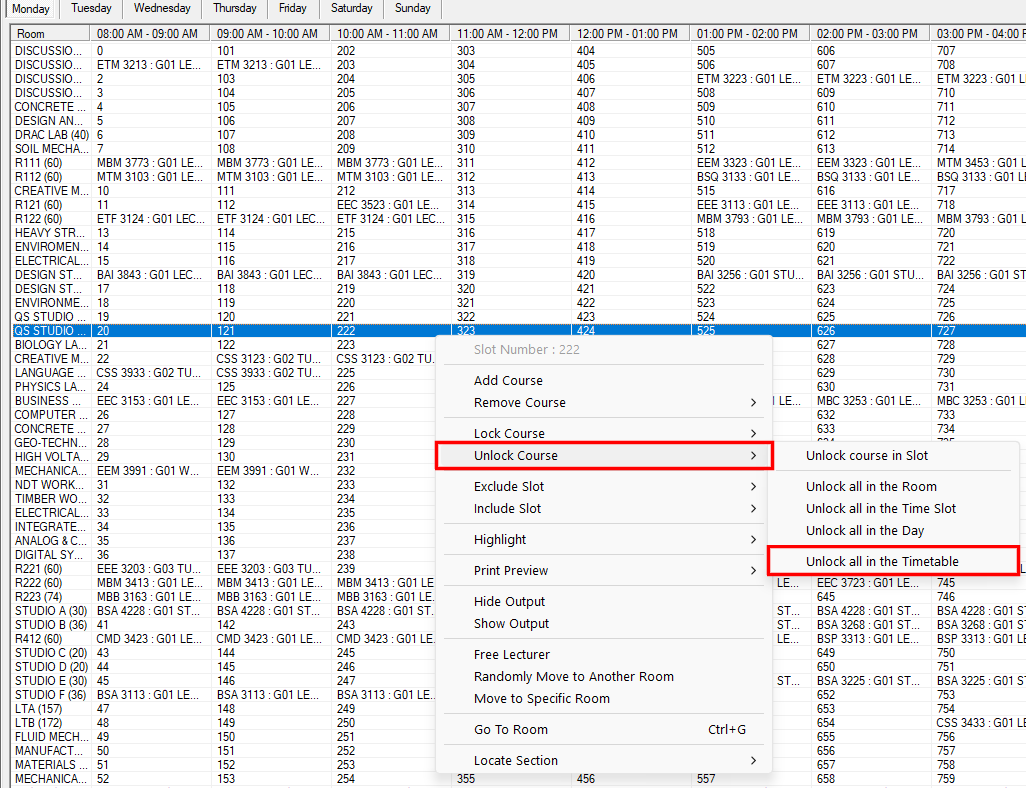
Right click the section and open Unlock Course to release it again. The submenu mirrors Lock Course and covers the same five areas.
Unlock course in Slot: Releases only the section in the slot you right clicked.
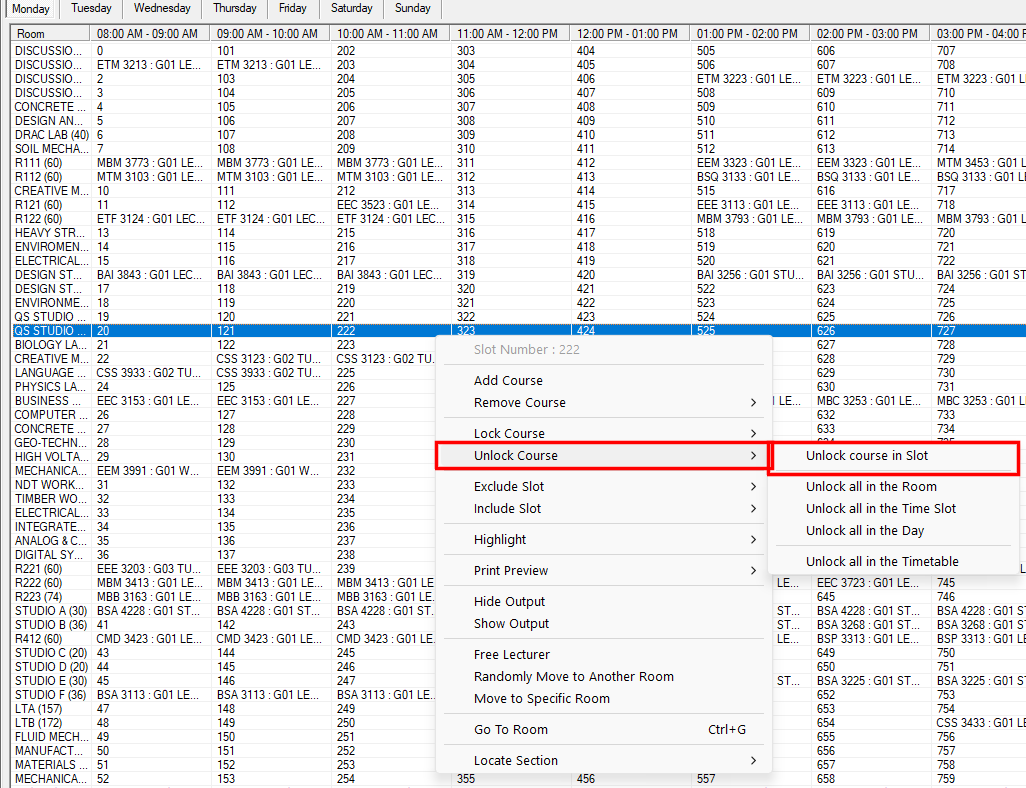
Unlock all in the Room: Releases every section in the selected room for that day.
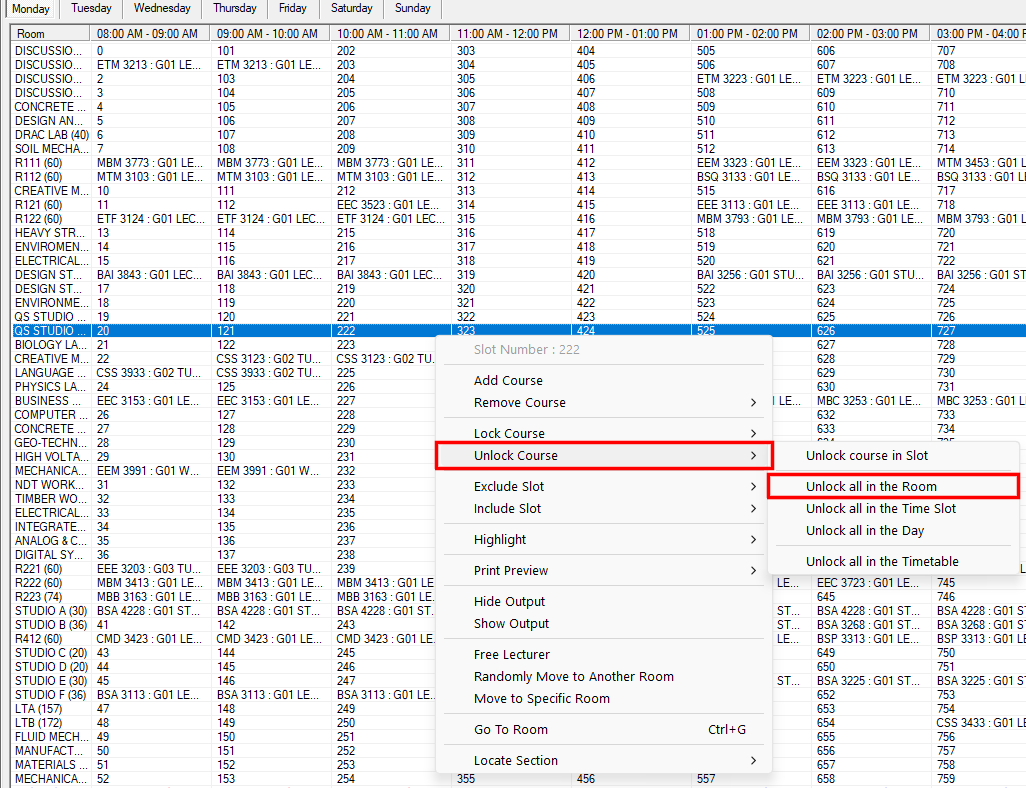
Unlock all in the Time Slot: Releases the selected time slot in every room for that day.
Unlock all in the Day: Releases every section on the day currently shown.
Unlock all in the Timetable: Releases every section on every day.
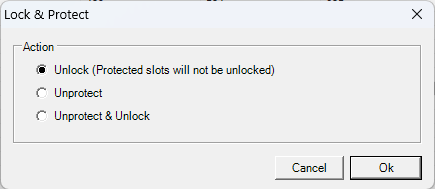
The Lock & Protect window opens again, this time with three actions. Choose one, then click Ok.
| Action | Description |
|---|---|
| Unlock (Protected slots will not be unlocked) | Releases the sections that were only locked. Sections locked with Lock & Protect stay as they are. |
| Unprotect | Removes the protection but leaves the section locked. |
| Unprotect & Unlock | Removes the protection and releases the section in one step. This is the one to use on a section that was locked with Lock & Protect. |
Table 10.5: Unlock & Unprotect Actions
Once released, the sections lose the grey shading in both the Timetable Output and the Tree Structure, and can be moved again.
10.2.3 Locate Section
Before placing the next unassigned section, find it first. Locate Section jumps straight to that section, so you do not have to search for it by hand.
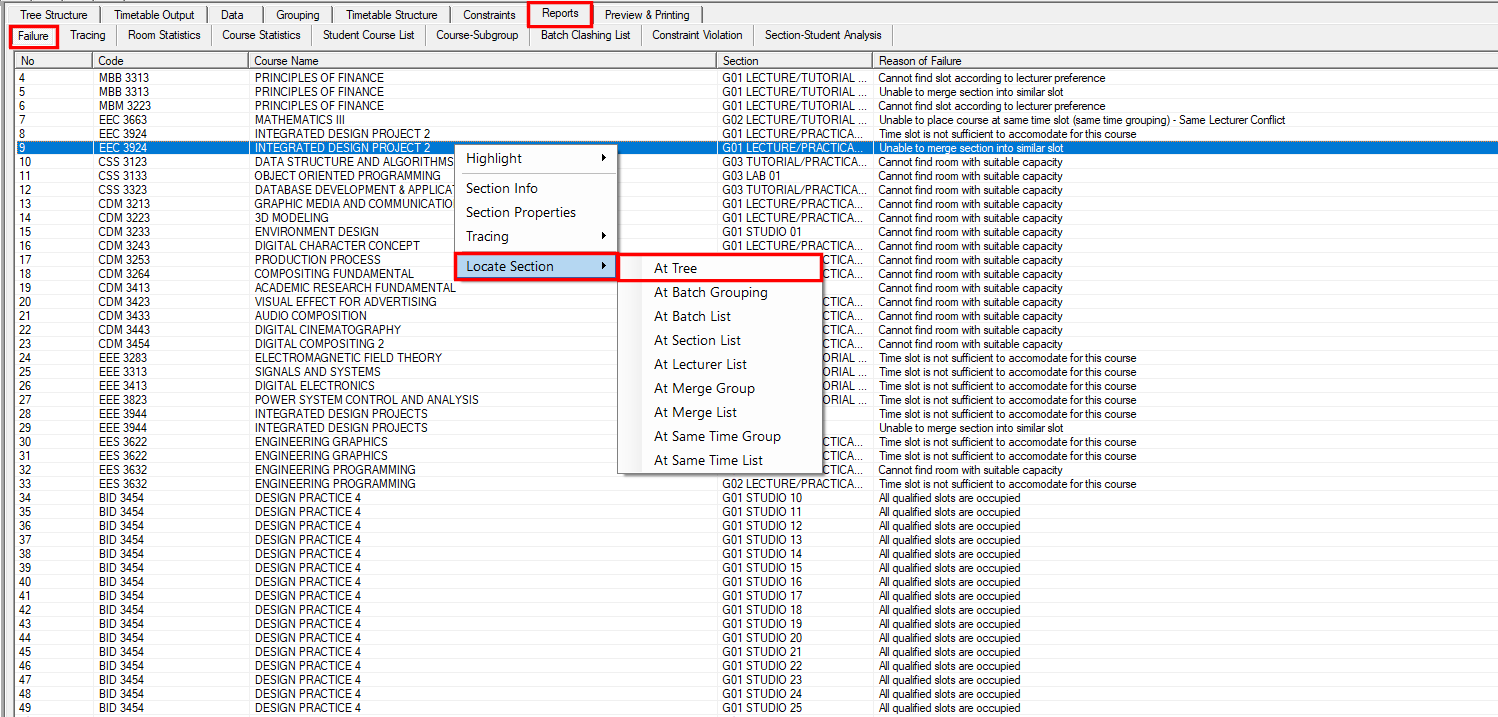
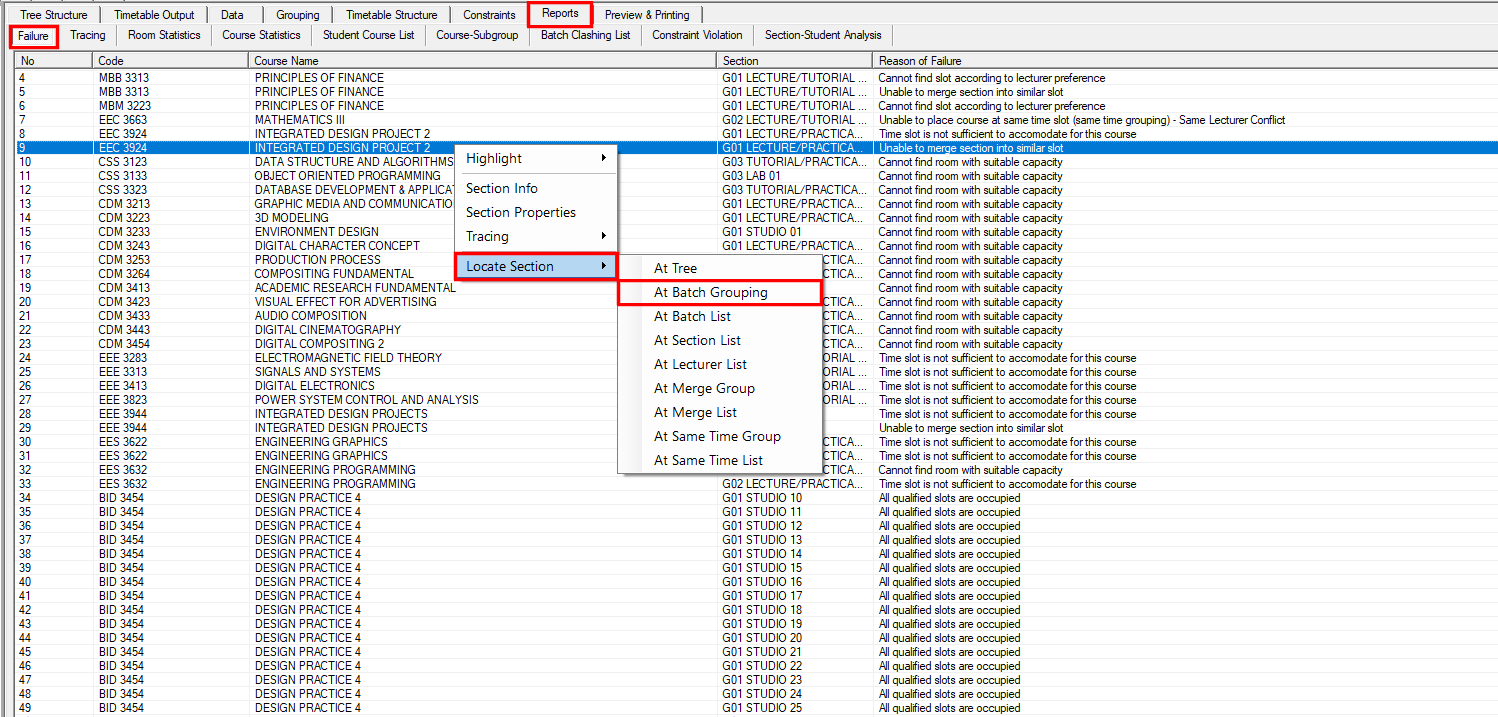
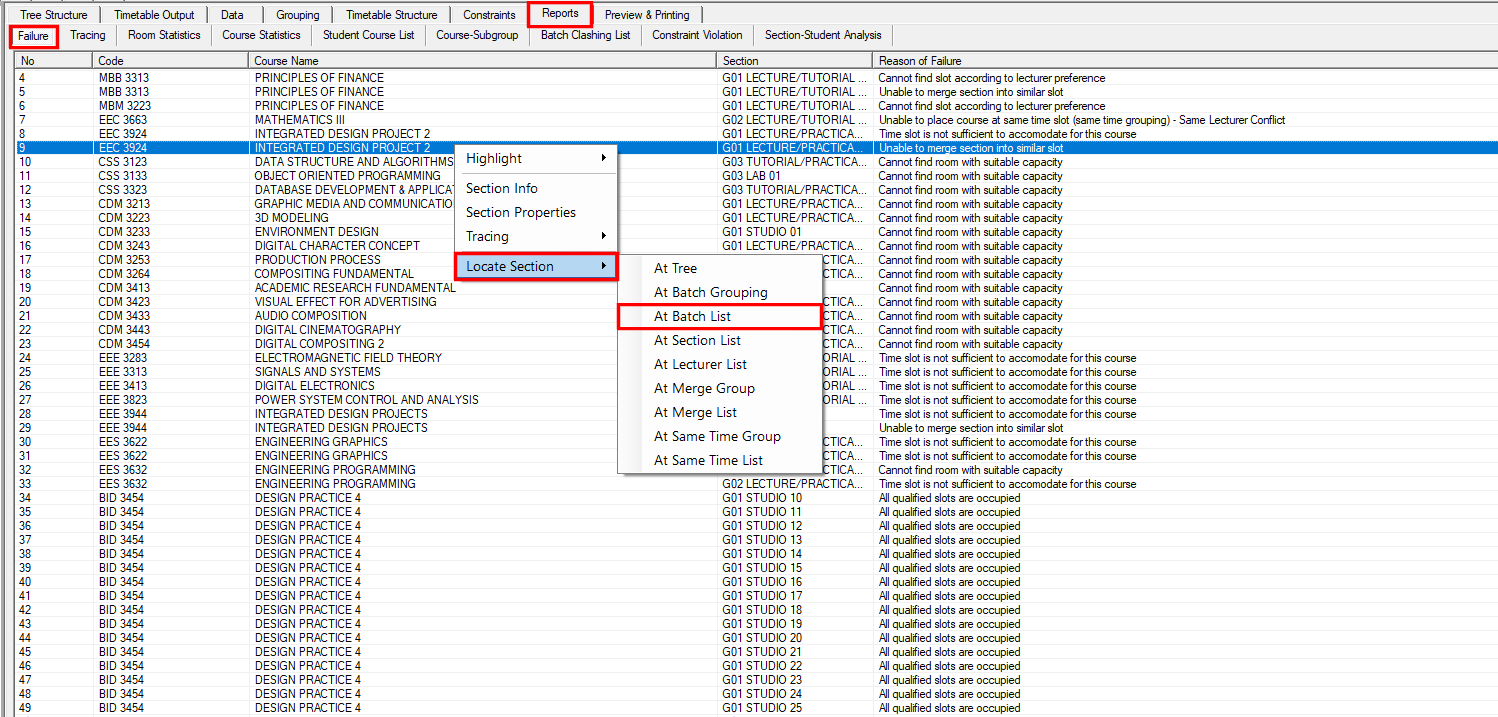
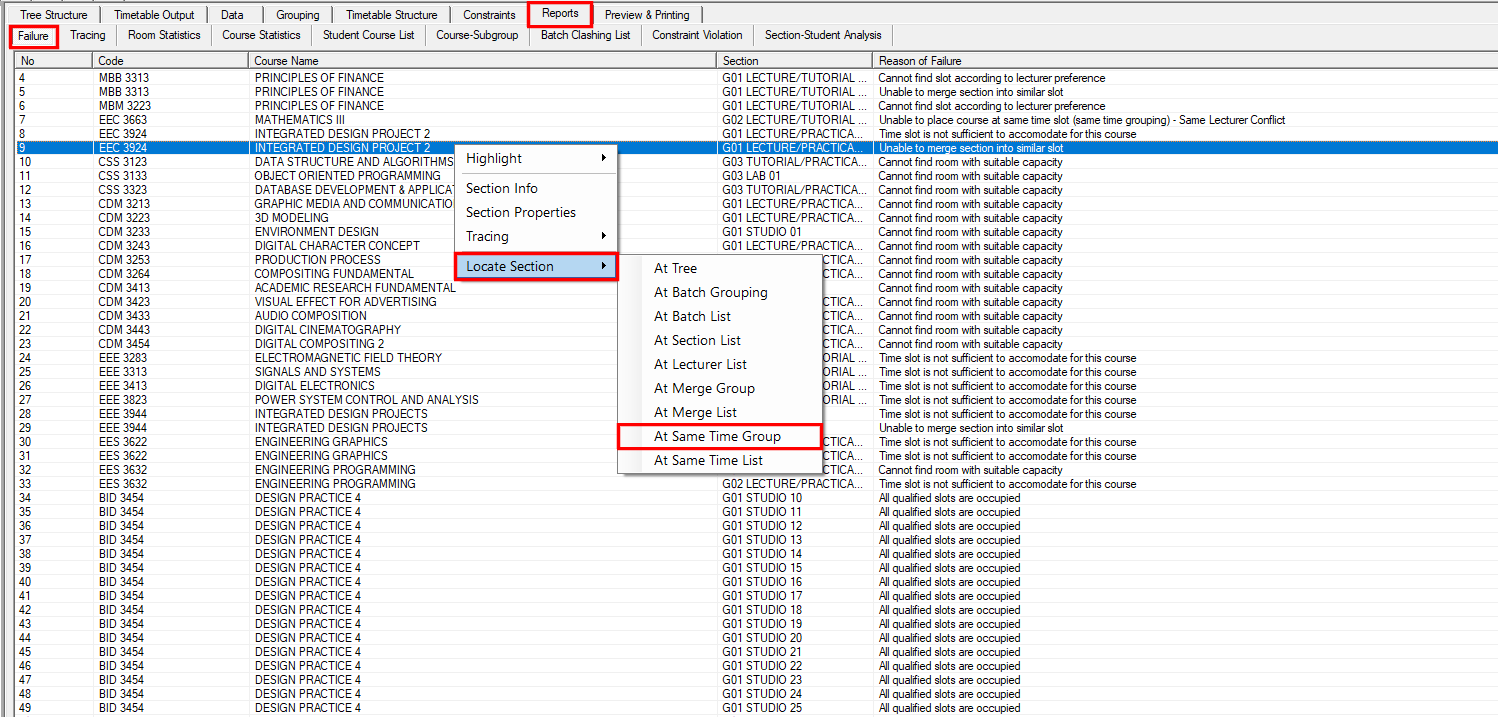
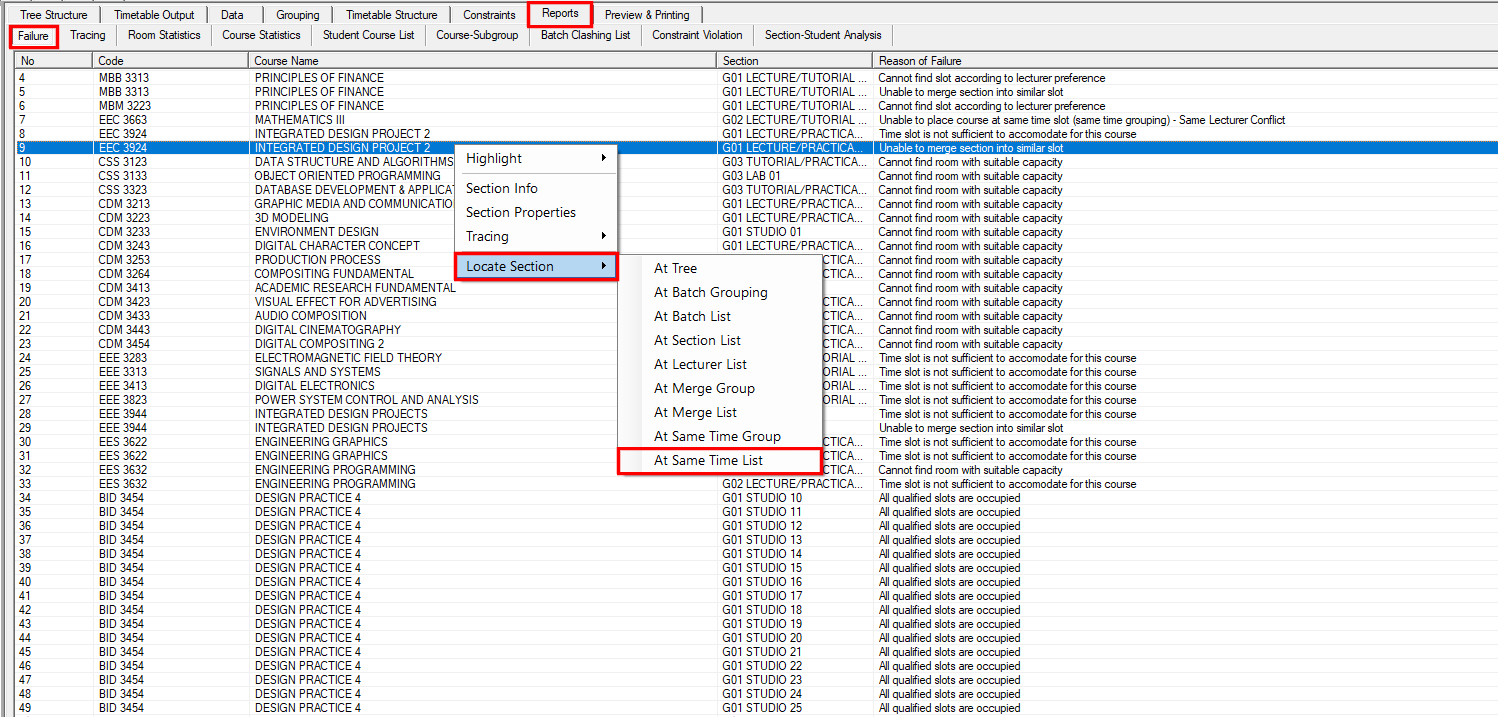
Open the Reports tab and select the Failure sub-tab, which lists the sections the generator could not place. Right click the row you want to work on and open Locate Section. The submenu offers nine destinations.
At Tree: Jumps to the section in the Tree Structure tab.
At Batch Grouping: Jumps to the section in the Batch Grouping view.
At Batch List: Jumps to the section in the Batches List.
At Section List: Jumps to the section in the section list.
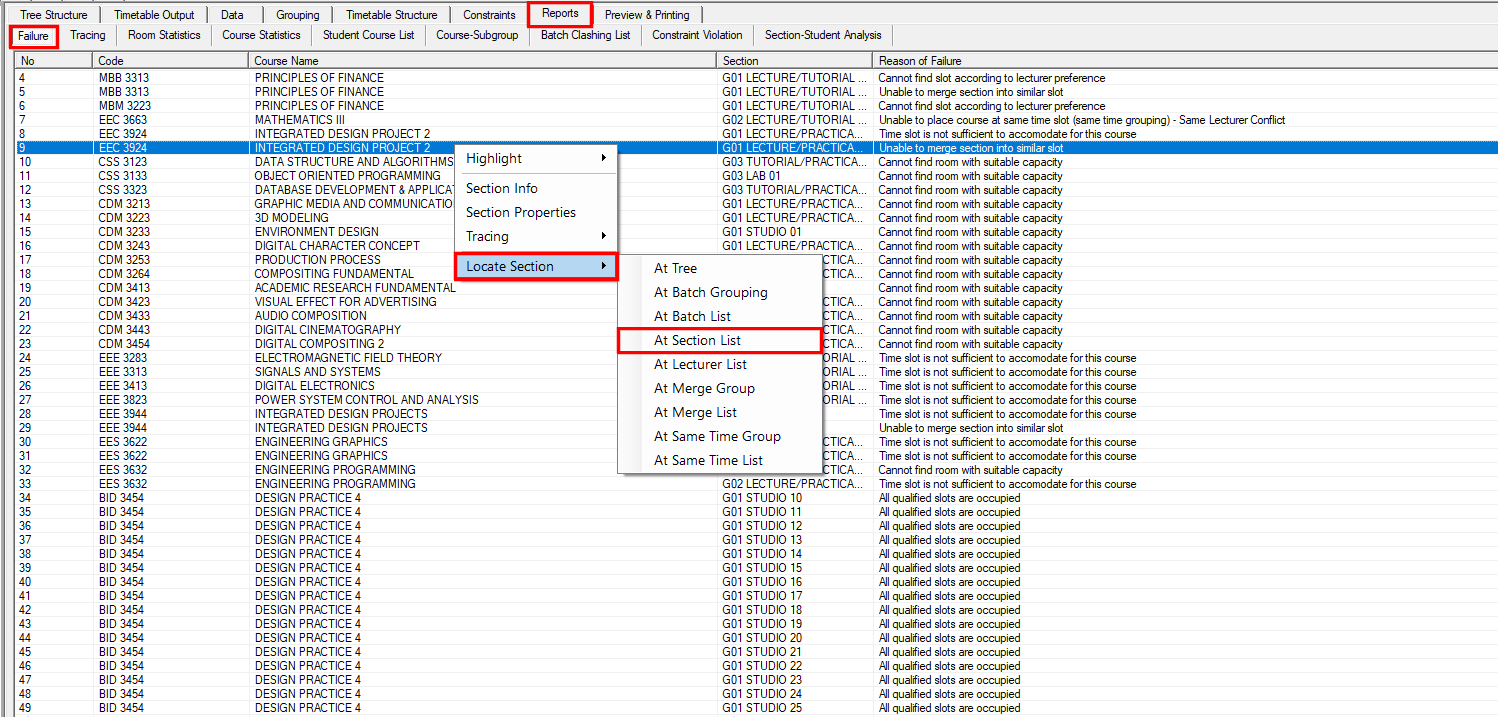
At Lecturer List: Jumps to the section in the Lecturers List.
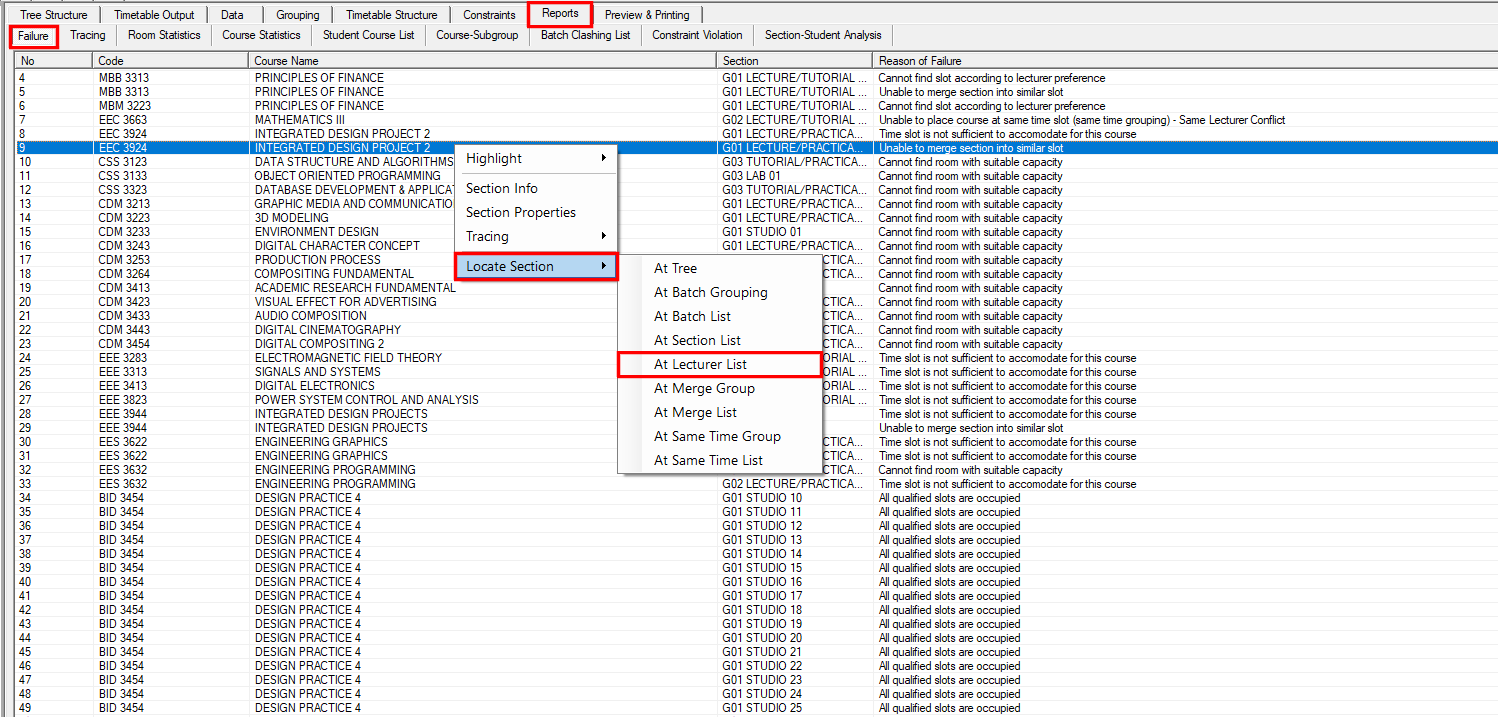
At Merge Group: Jumps to the merge group the section belongs to.
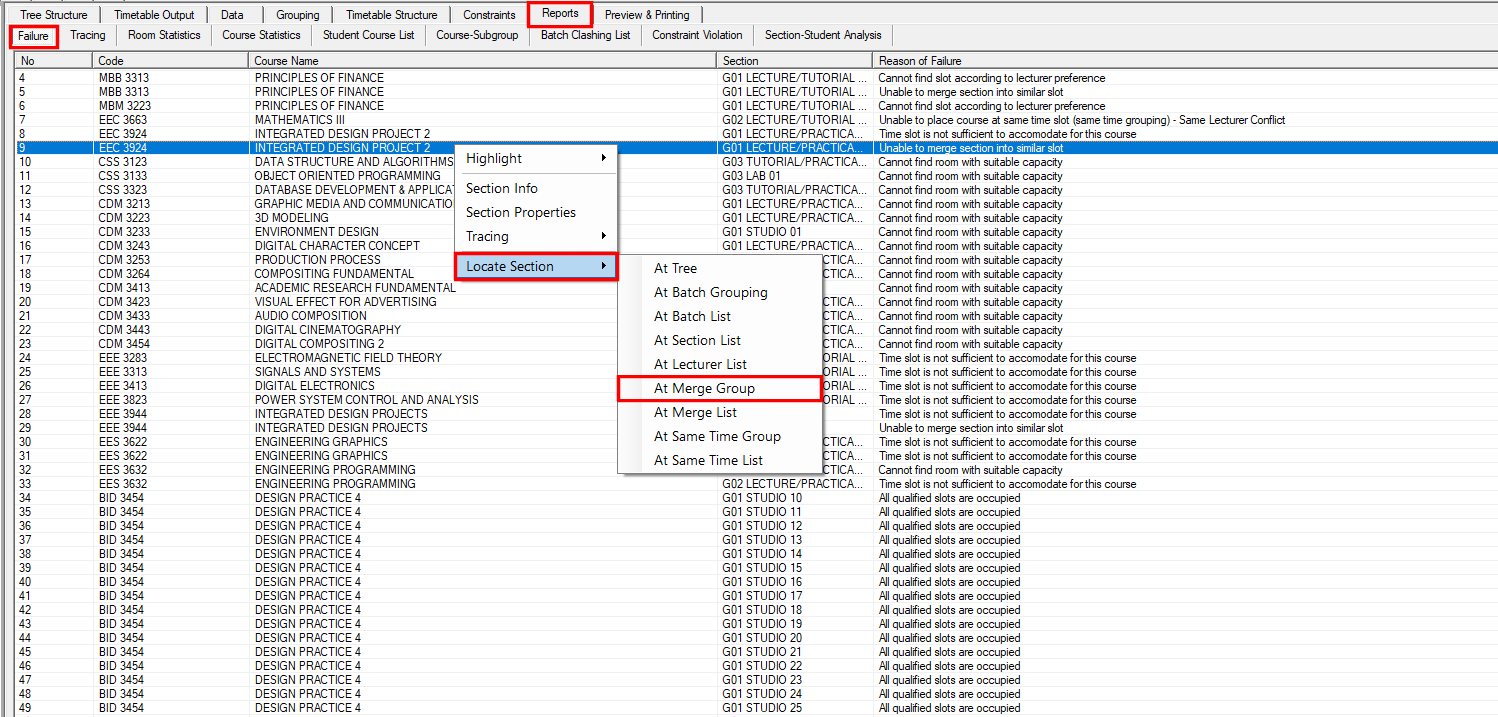
At Merge List: Jumps to the section in the Merge List.
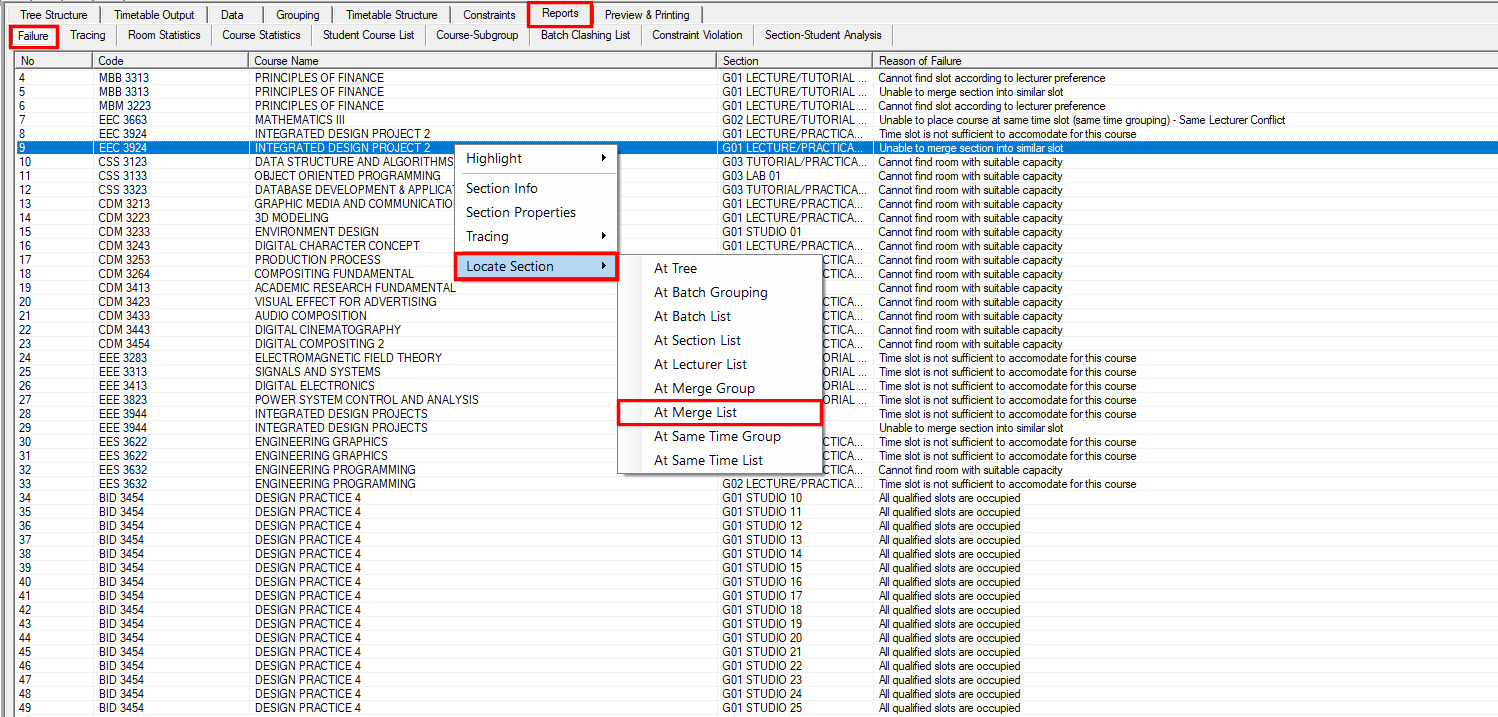
At Same Time Group: Jumps to the same time group the section belongs to.
At Same Time List: Jumps to the section in the Same Time List.
10.2.4 Highlight
First, locate the section in the Tree Structure by using Locate Section → At Tree. Although the section can be highlighted from various views, using the Tree Structure is the preferred and recommended method. Once the section is found, right-click it and select Highlight. This will mark all occupied slots, allowing you to identify an empty, unmarked slot where the section can be placed without causing a clash.
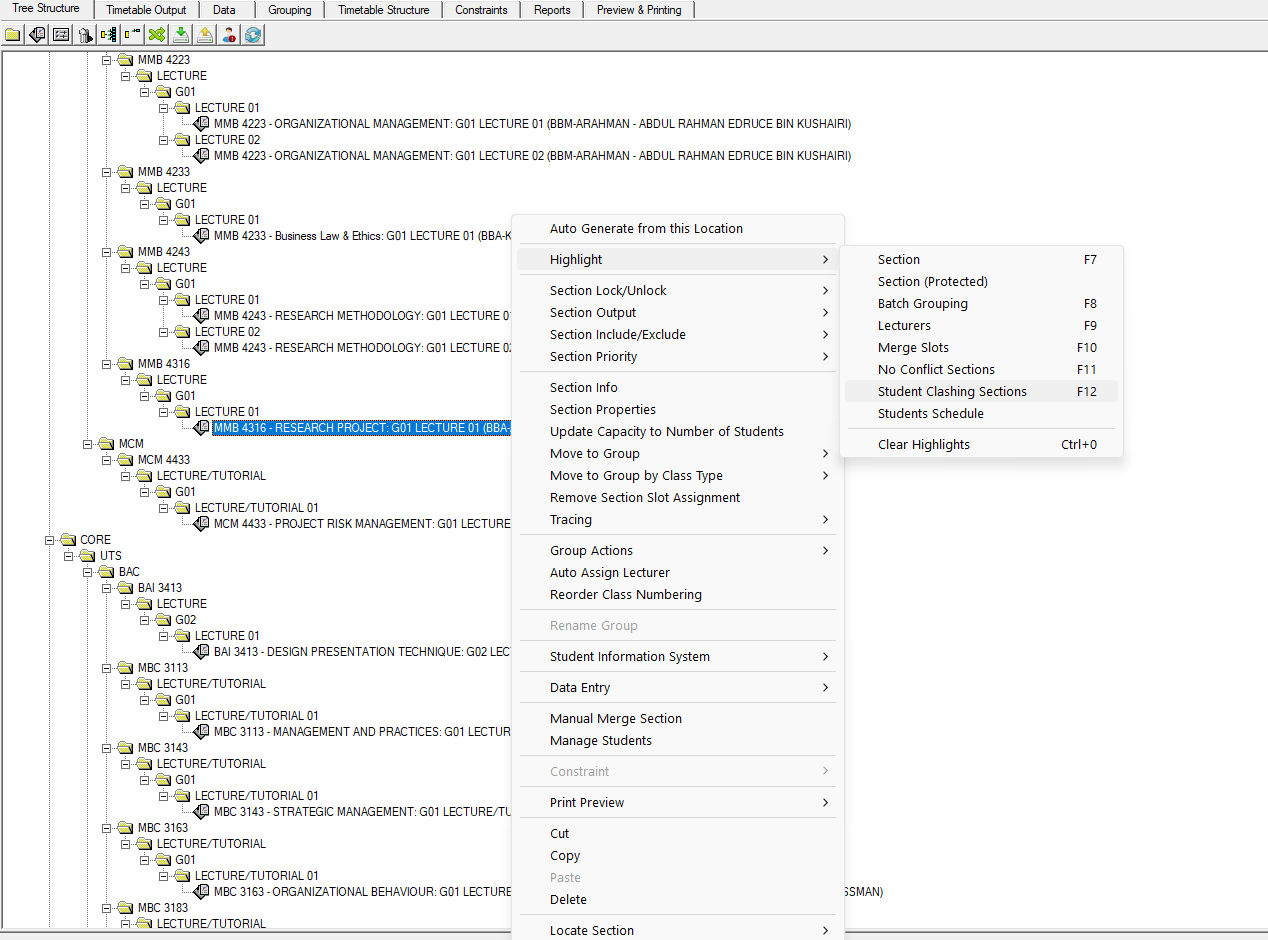
The two used most often are Batch Grouping and Lecturers. Together they show every slot the students and the lecturer are already busy in, which is where most clashes come from.
Batch Grouping marks every slot the batch is already scheduled in.
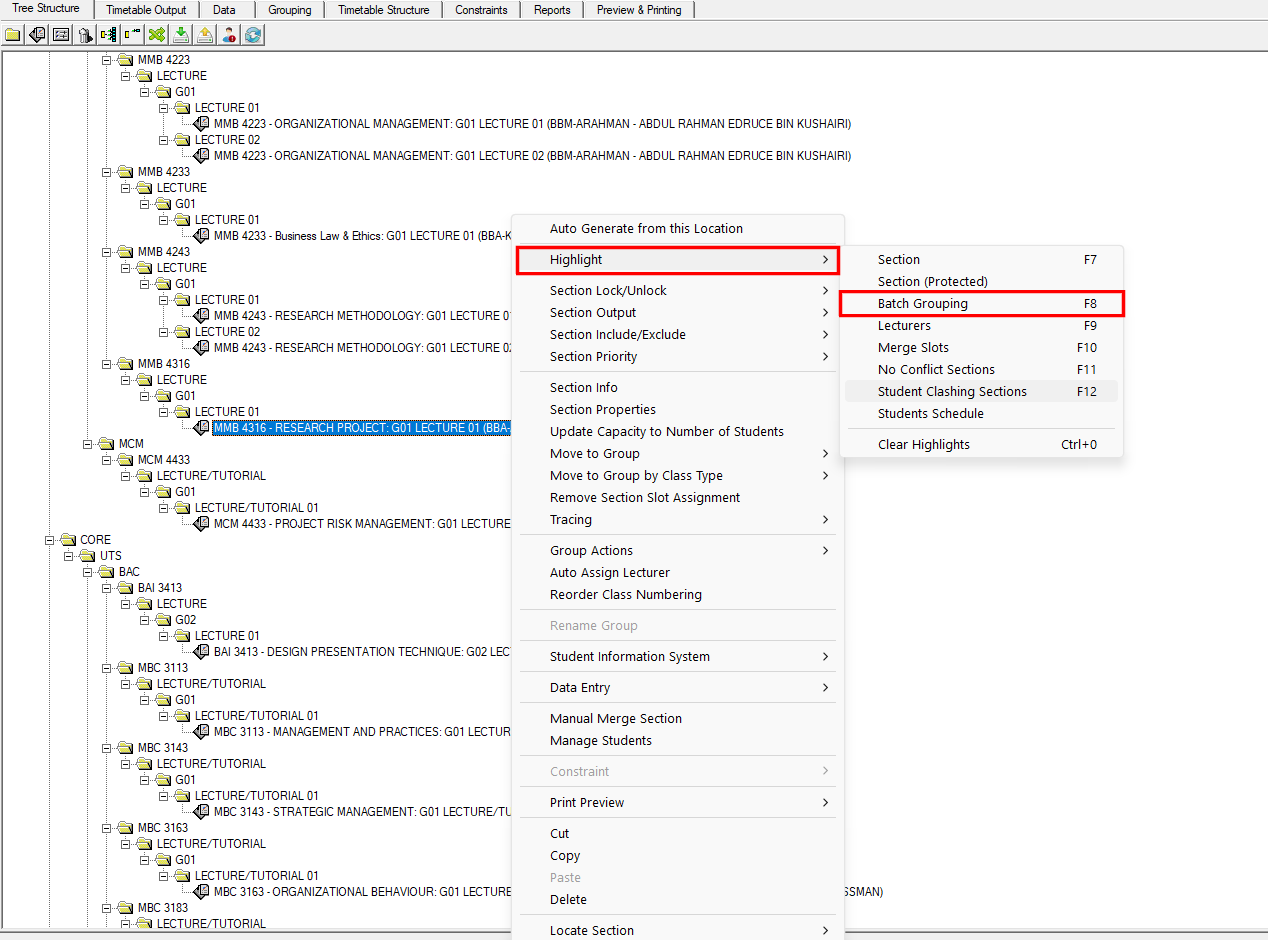
Lecturers marks every slot the lecturer is already teaching in.
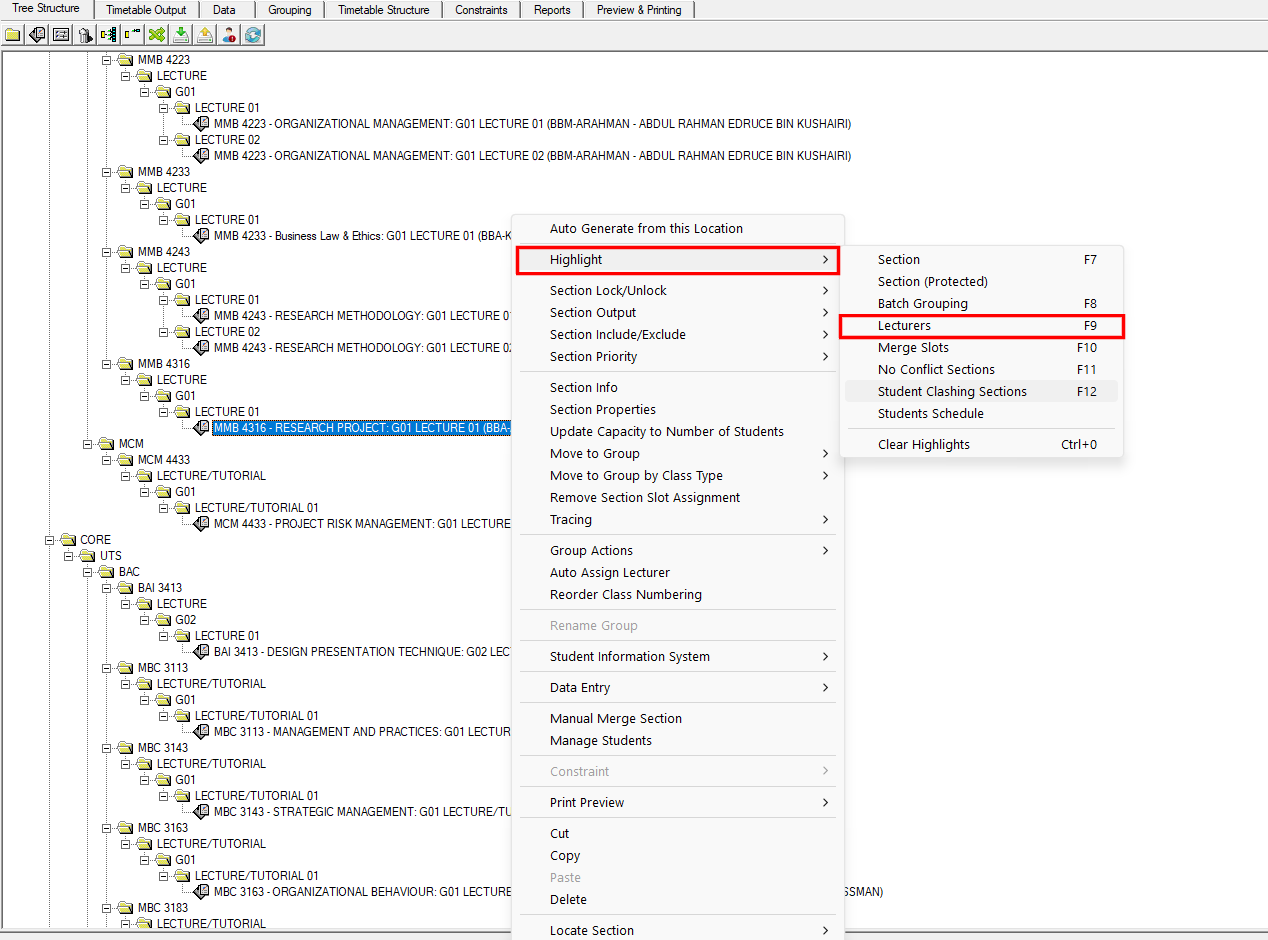
After clicking a highlight option, the Select Color window opens. Pick a colour, then click Ok to apply the highlighting.
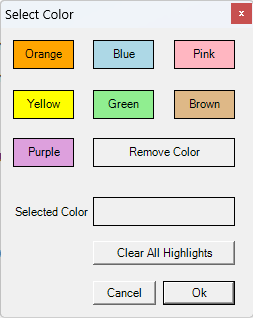
Seven colours are available: Orange, Blue, Pink, Yellow, Green, Brown and Purple. The one you pick is shown in Selected Color. Using a different colour for each highlight lets you tell the batch slots from the lecturer slots at a glance. Remove Color clears the colour from the selection, and Clear All Highlights removes every highlight at once.
The highlighting appears straight away in the Tree Structure. Every section belonging to that batch is marked in the colour you picked, so you can see at a glance which classes the students already have.
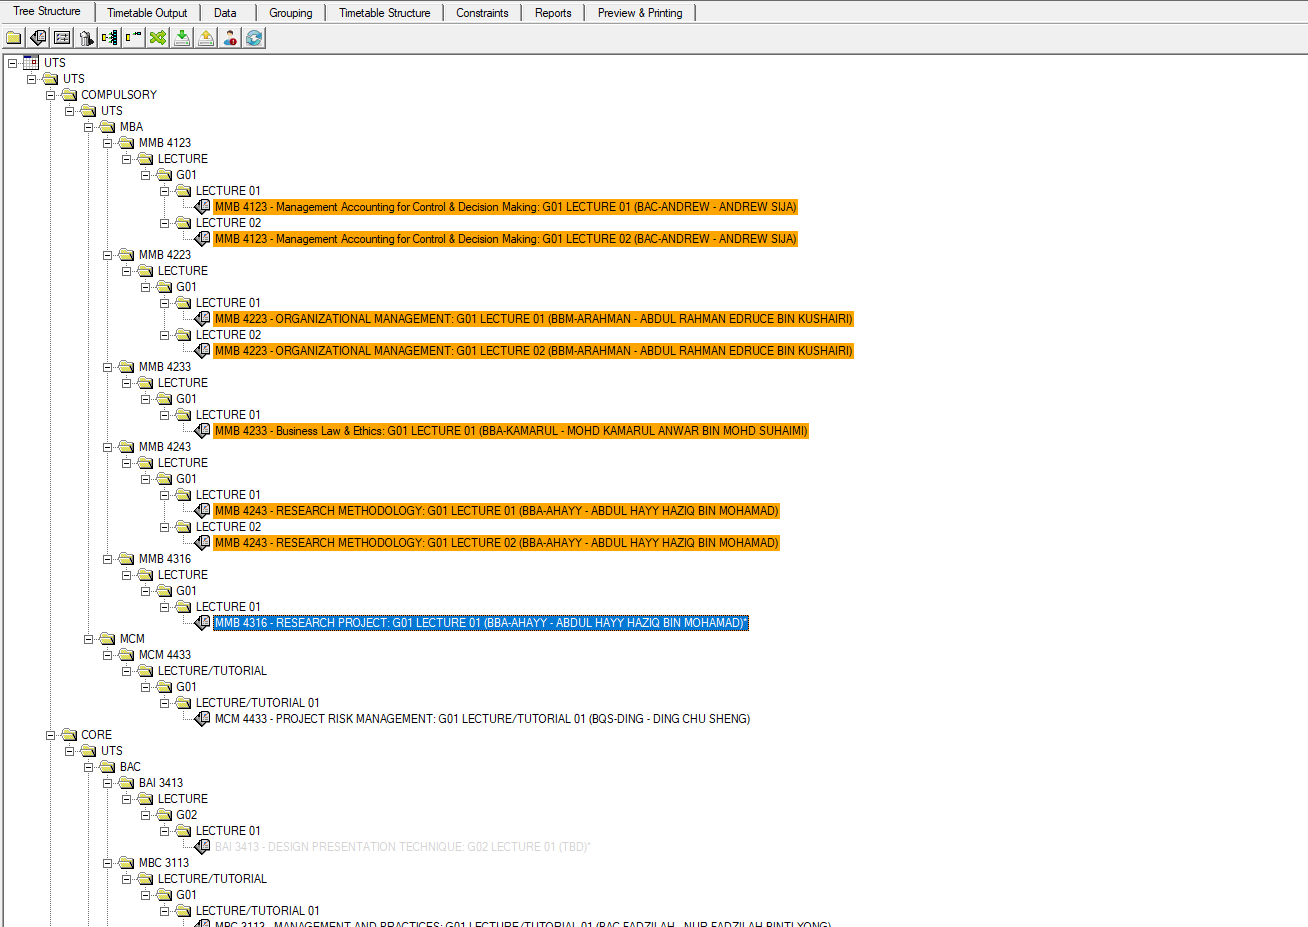
Repeat the same steps for Lecturers and pick a different colour. Both highlights sit in the tree together, so a section marked in one colour belongs to the batch, a section marked in the other belongs to the lecturer, and a slot free of both is where the section can safely go.
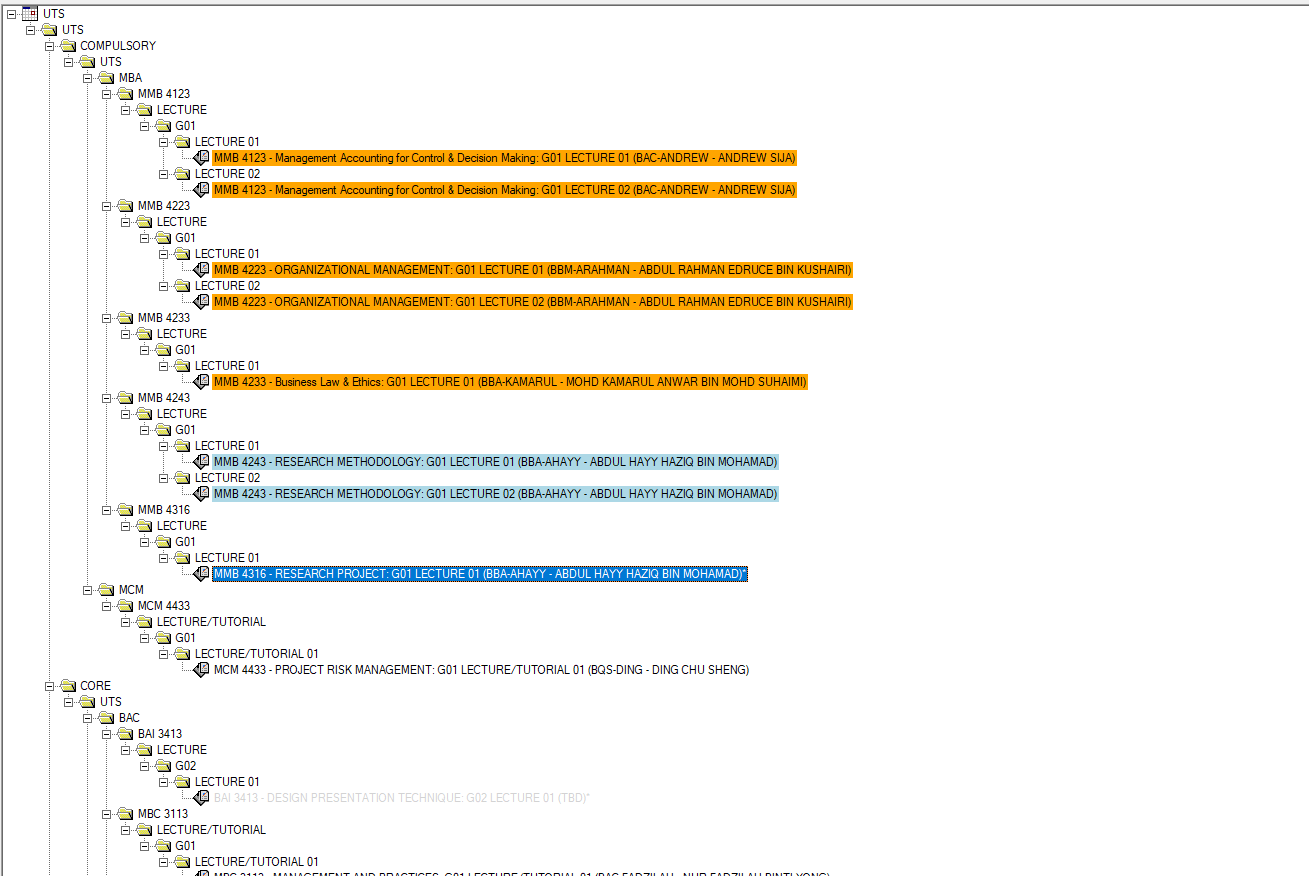
The same colours are carried into the Timetable Output, marking the slots those sections already occupy. Any slot without a colour is free of both the batch and the lecturer.
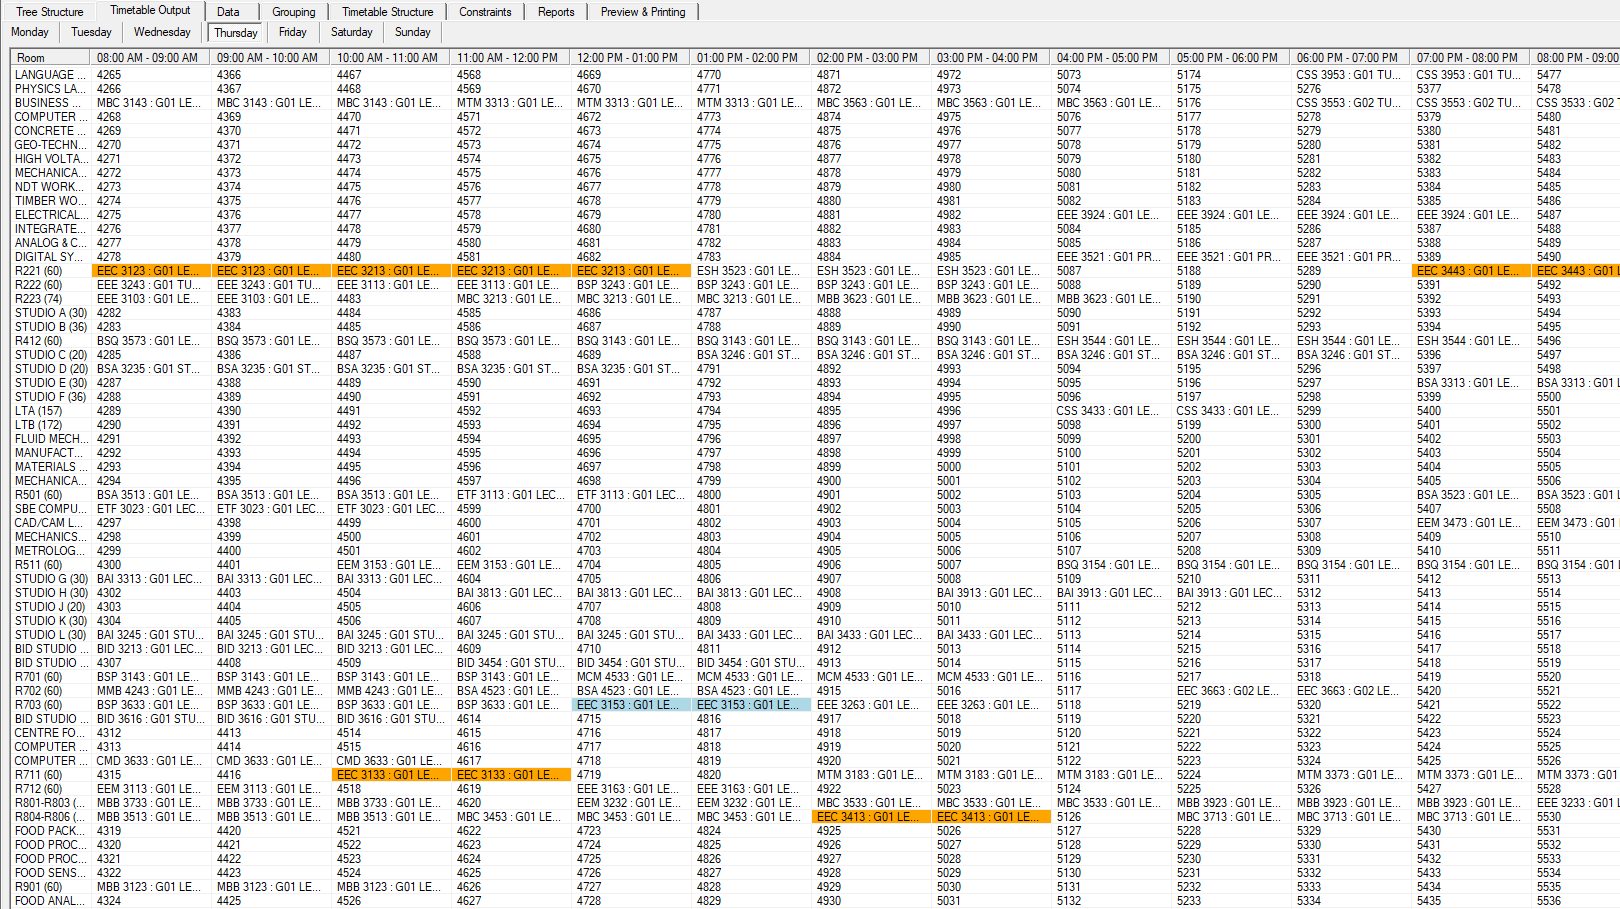
With the batch and lecturer highlighted, add the section to a slot that is not marked, as described in Section 10.2.1 Add / Remove Course. Clear the highlighting before moving on to the next section.
10.3 Right Click Function
Right clicking a section in the Timetable Output opens a context menu holding most of the actions used while generating and editing the timetable. Items shown in grey are unavailable for the section currently selected, and items with an arrow open a further submenu.
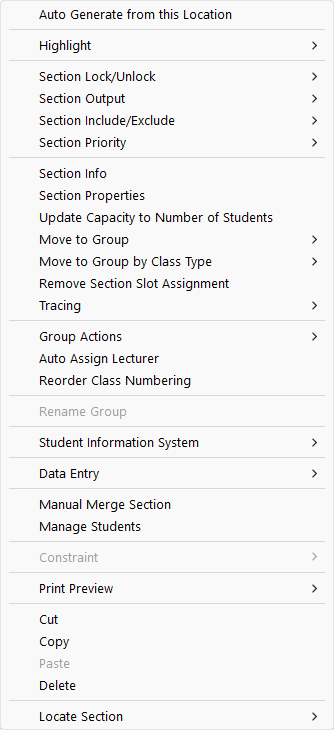
| Menu Item | Description |
|---|---|
| Auto Generate from this Location | Starts automatic generation beginning from the selected slot. |
| Highlight | Highlights related sections. See Section 10.2.4. |
| Section Lock/Unlock | Locks or unlocks the selected section. See Section 10.2.2. |
| Section Output | Controls how the section appears in the Timetable Output. |
| Section Include/Exclude | Includes or excludes the section from generation. See Section 10.1.1. |
| Section Priority | Sets the generation priority of the section. |
| Section Info | Displays information about the selected section. |
| Section Properties | Opens the Section Properties window for the section. See Section 7.2.2. |
| Update Capacity to Number of Students | Sets the section capacity to match its enrolled student count. |
| Move to Group | Moves the section into another group. |
| Move to Group by Class Type | Moves the section into a group according to its class type. |
| Remove Section Slot Assignment | Removes the section from the slot it currently occupies. |
| Tracing | Traces why the section was placed as it was. |
| Group Actions | Performs an action on the whole group rather than one section. |
| Auto Assign Lecturer | Assigns a lecturer to the section automatically. |
| Reorder Class Numbering | Renumbers the classes in the group. |
| Rename Group | Changes the name of the group. |
| Student Information System | Opens the Student Information System for the section. |
| Data Entry | Opens the data entry options for the section. See Chapter 7. |
| Manual Merge Section | Merges the selected sections manually. |
| Manage Students | Opens the student assignment window for the section. |
| Constraint | Opens the constraint settings for the section. See Chapter 8. |
| Print Preview | Previews the section before printing. See Section 10.4. |
| Cut | Removes the section, ready to be pasted elsewhere. |
| Copy | Copies the selected section. |
| Paste | Pastes the cut or copied section into the selected slot. |
| Delete | Deletes the selected section. |
| Locate Section | Locates the section in the tree or course list. See Section 10.2.3. |
Table 10.6: Right Click Function Menu Items
10.4 Print and Preview
Once the timetable is complete, open the Preview & Printing tab to check it on screen, send it to a printer, or publish it as a web page. The Actions row at the top holds four buttons: Print Preview, Page Setup, Print and Print to Web. Everything below that row sets what the printout contains.
Print Preview
Set the options in the Print Formats panel first, then click Print Preview to see the result before printing.
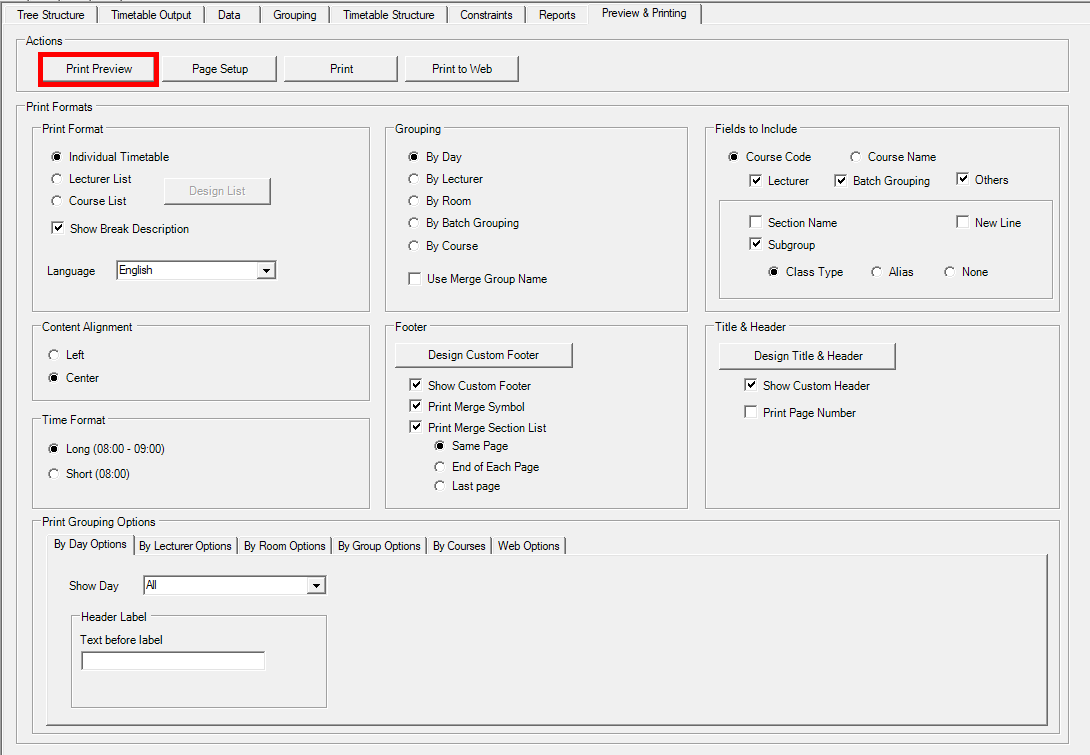
| Panel | What it sets |
|---|---|
| Print Format | Which timetable to print: Individual Timetable, Lecturer List or Course List. Show Break Description prints the break labels, and Language sets the language of the printout. |
| Grouping | How the pages are grouped: By Day, By Lecturer, By Room, By Batch Grouping or By Course. |
| Fields to Include | What appears inside each slot, such as Course Code or Course Name, plus Lecturer, Batch Grouping, Section Name and Subgroup. |
| Content Alignment | Aligns the slot content Left or Center. |
| Time Format | Long (08:00 - 09:00) or Short (08:00). |
| Footer | Turns the custom footer, the merge symbol and the merge section list on or off, and sets where the merge list is printed. |
| Title & Header | Turns the custom header and the page number on or off. Design Title & Header opens the editor for them. |
| Print Grouping Options | Extra settings for the grouping you chose, on a tab of its own for day, lecturer, room, group, courses and web. |
Table 10.7: Print Formats Panels
A Generating Previews progress window appears while the pages are built. Wait for it to finish, or click Cancel to stop.
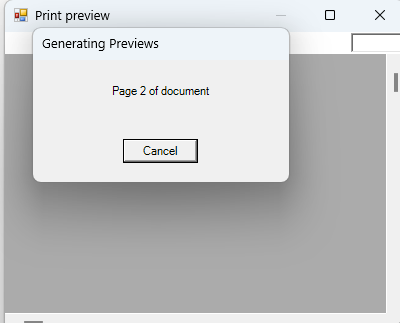
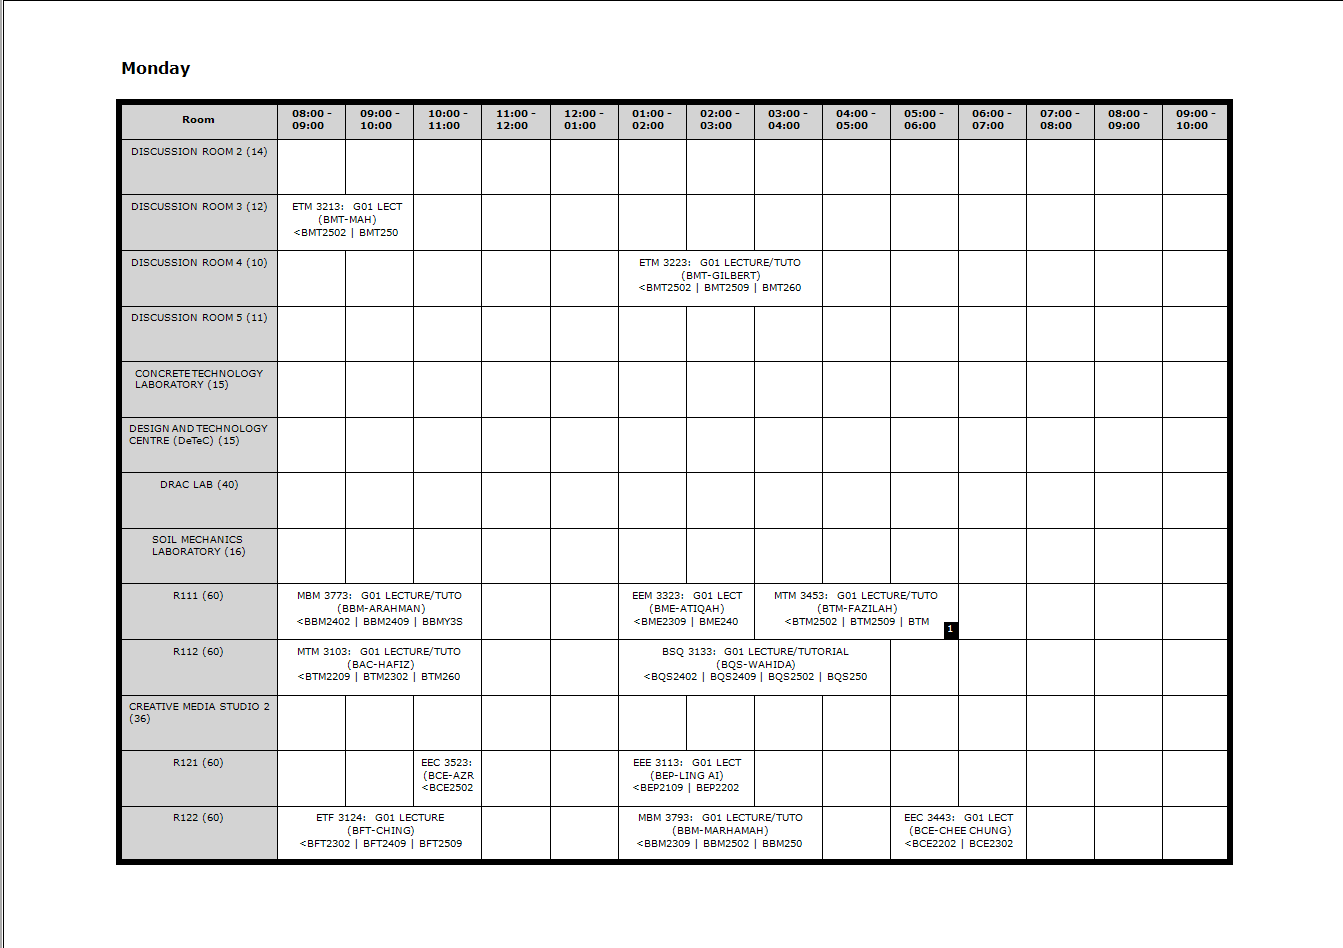
The preview then opens, one page per group. Check the layout here before sending anything to the printer.
Click Print to send the timetable to a printer. The standard Print window opens.
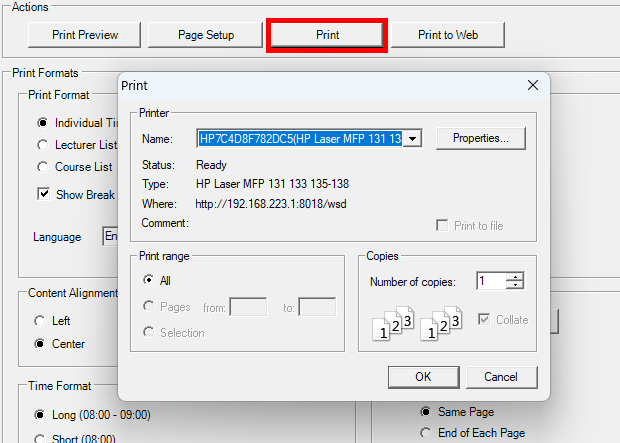
Choose the printer under Name, set the Print range and the Number of copies, then click OK to print or Cancel to close without printing.
Print to Web
Click Print to Web to publish the timetable as a set of web pages instead of printing it. A Browse For Folder window opens.
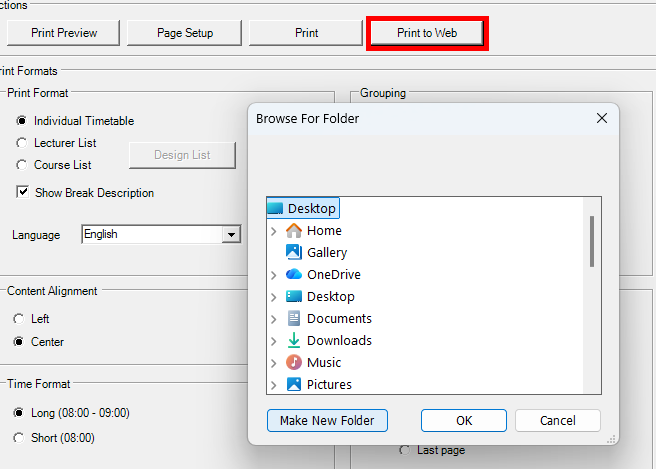
Choose where the pages should be saved. Pick an existing folder, or click Make New Folder to create one, then click OK.
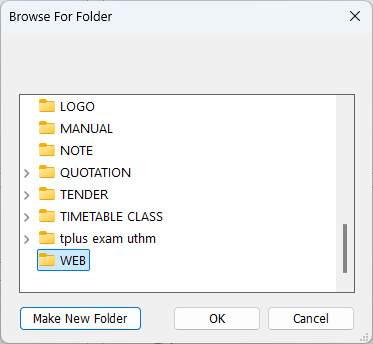
The folder now holds the generated web pages and can be opened from where you saved it, or copied to a web server so others can view the timetable.