Timeline
Administrators and authorised users can access this module
Dashboard > Administration > Timeline
Timeline configures the daily schedule structure used for timetable generation. It defines the timeslots and the individual periods within each day, including their start and end times and break designations.
Overview
The Timeline page is where you set up the time structure that the timetable engine uses when scheduling classes. You first configure a Timeslot (the named time configuration, e.g. Diploma or Default), then add Periods within that timeslot defining each teaching block or break by day and time.
Timeslot
A Timeslot is a named configuration that groups a set of periods. Each semester can be linked to a specific timeslot, or use the default system timeslot.
Create New Timeslot
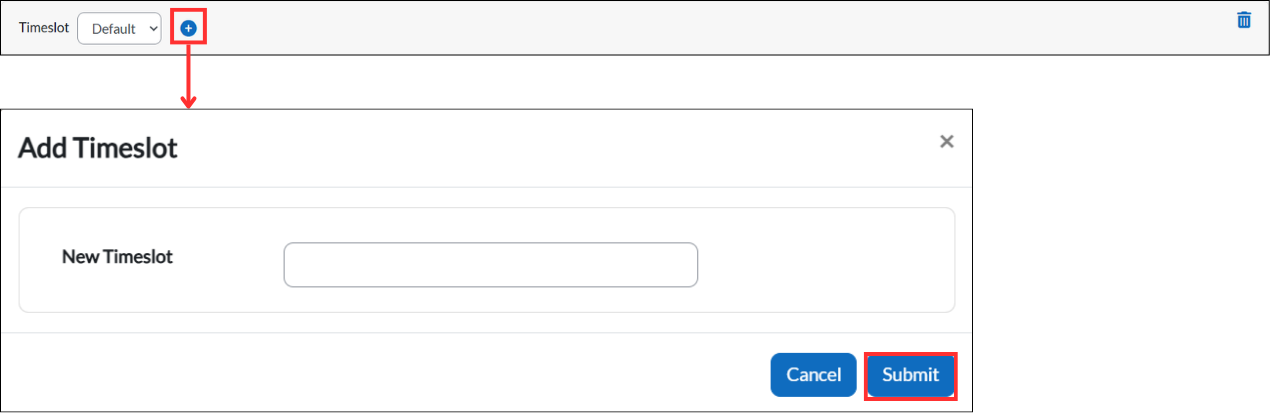
- Click the + icon to add a new timeslot.
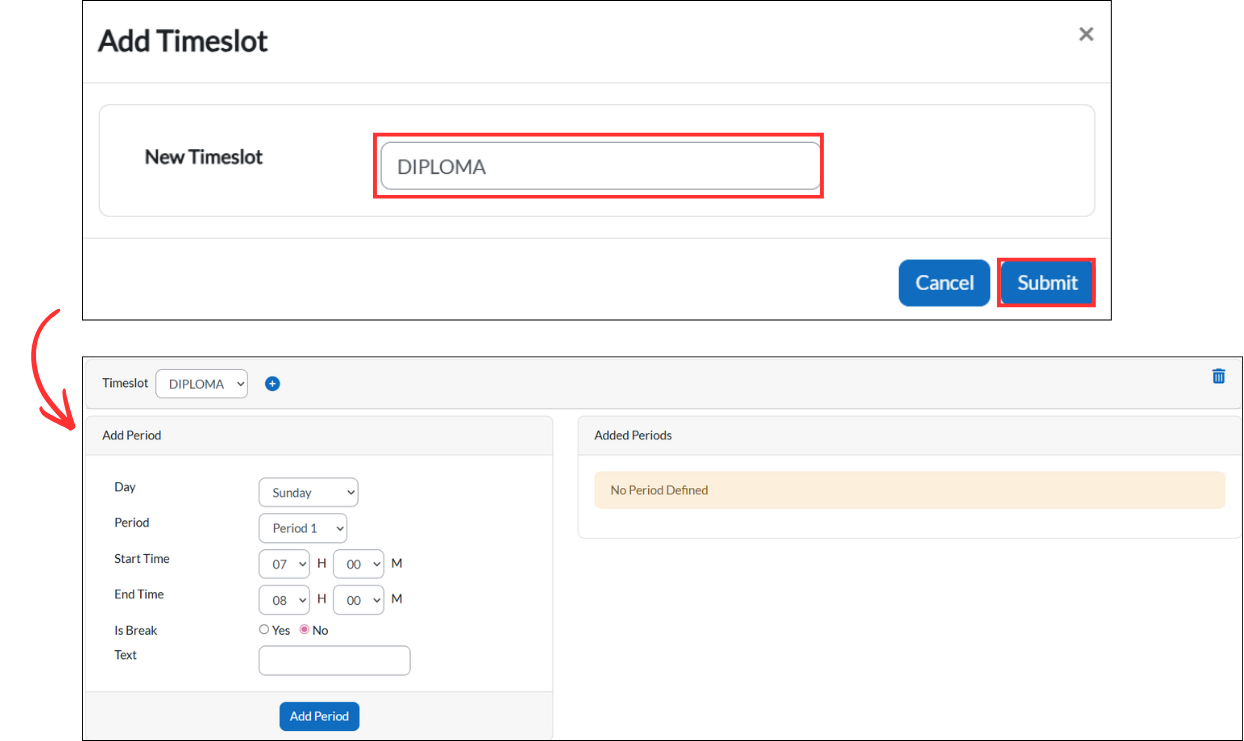
- Enter the Timeslot Name and click Submit.
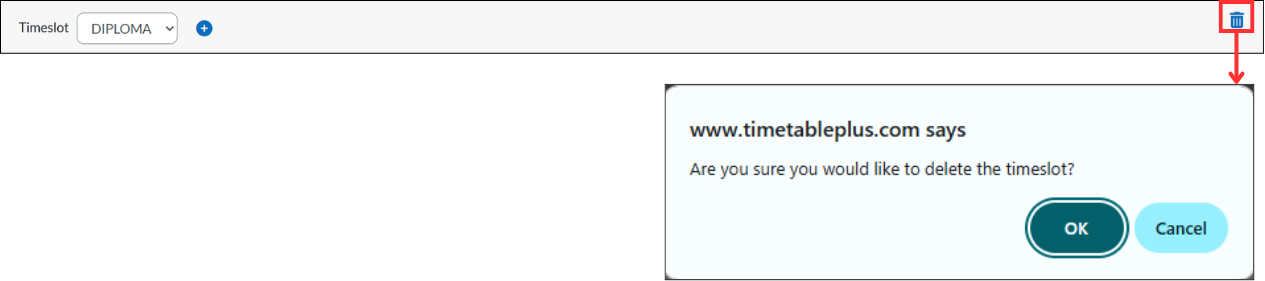
Delete Timeslot
- Click the trash icon to remove an existing timeslot.
- Ensure the timeslot is no longer in use before deleting.
- Click OK to confirm, or Cancel to abort.

Add Period
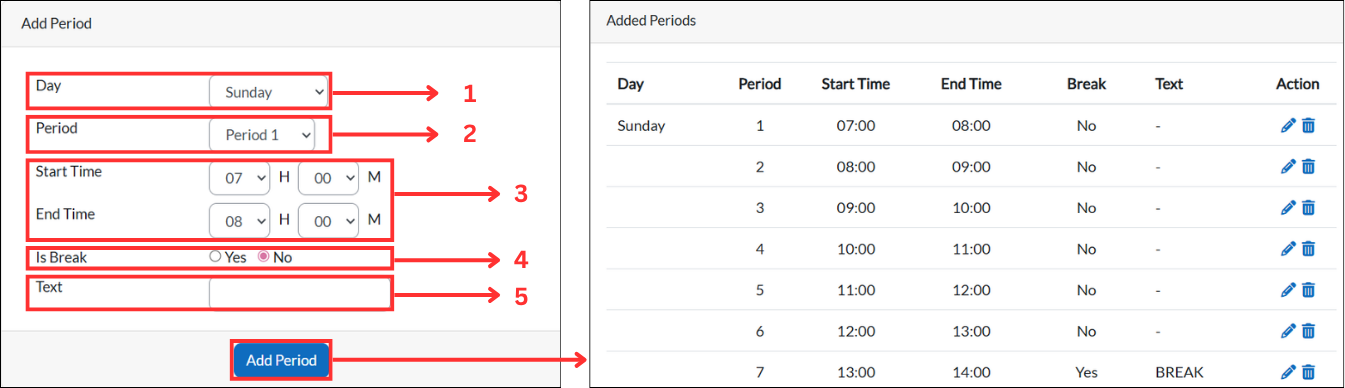
A period defines one time block within a day, either a teaching slot or a break.
Steps
- Select the Day from the dropdown list.
- Choose the Period number.
- Enter the Start Time and End Time.
- Set Break Period to Yes or No.
- Optionally enter a Text Label to display on the timetable.
- Click the Add Period button.
Edit Period
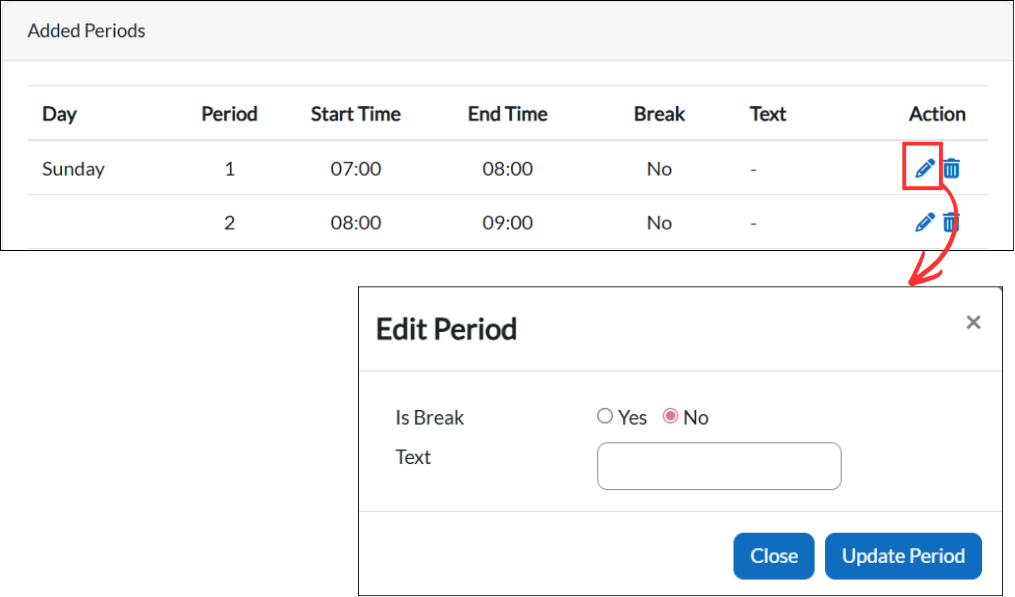
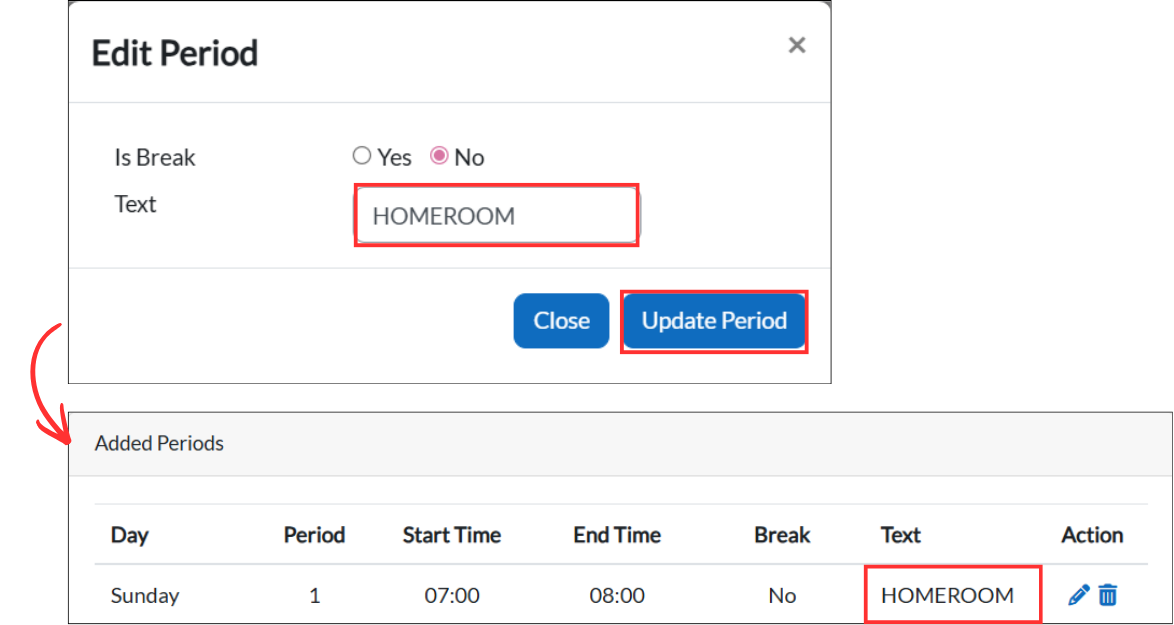
Update an existing period's break designation or text label.
Steps
- Click the edit icon beside the period.
- Update the Is Break and Text fields as needed.
- Click Update Period to save.
Delete Period
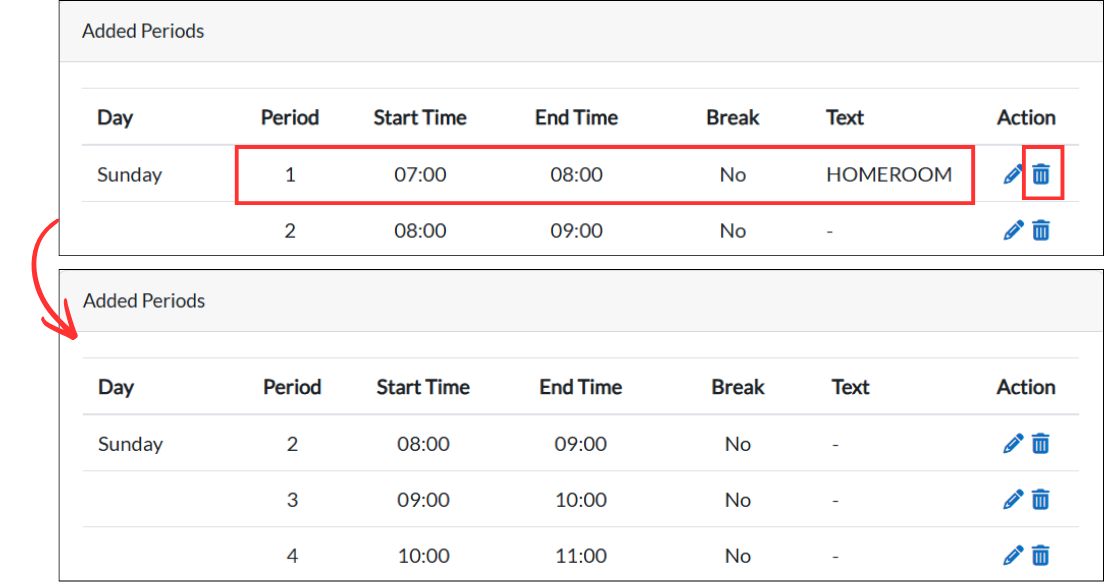
Remove a period from the timeslot.
Steps
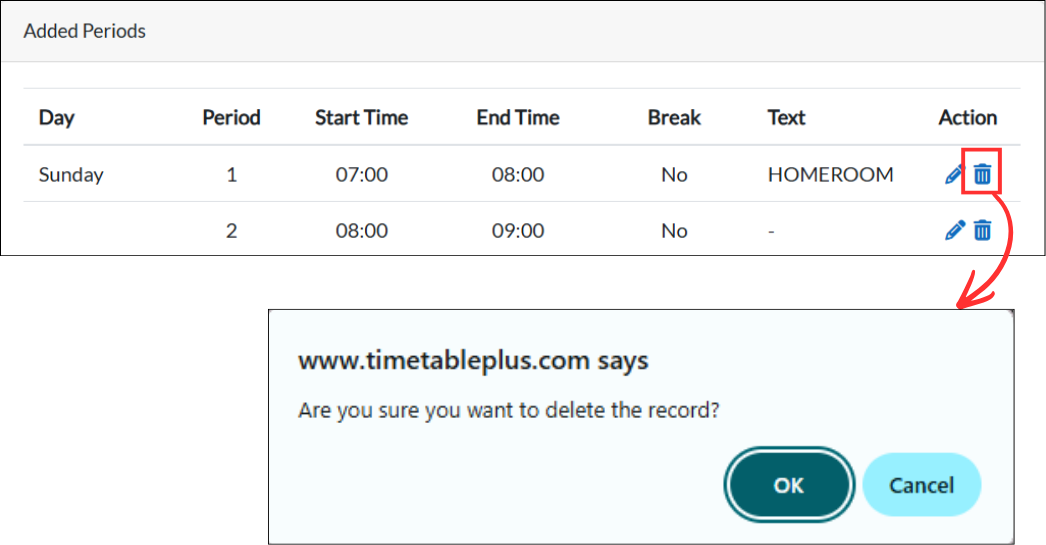
- Click the trash icon beside the period.
- Click OK to confirm, or Cancel to abort.