Timetable Structure
Set up the timetable structure including time settings, room assignments, and time slot adjustments before processing data.
Before processing raw data, you need to set up the timetable structure. This includes configuring the time structure, room list, and time slot adjustments.
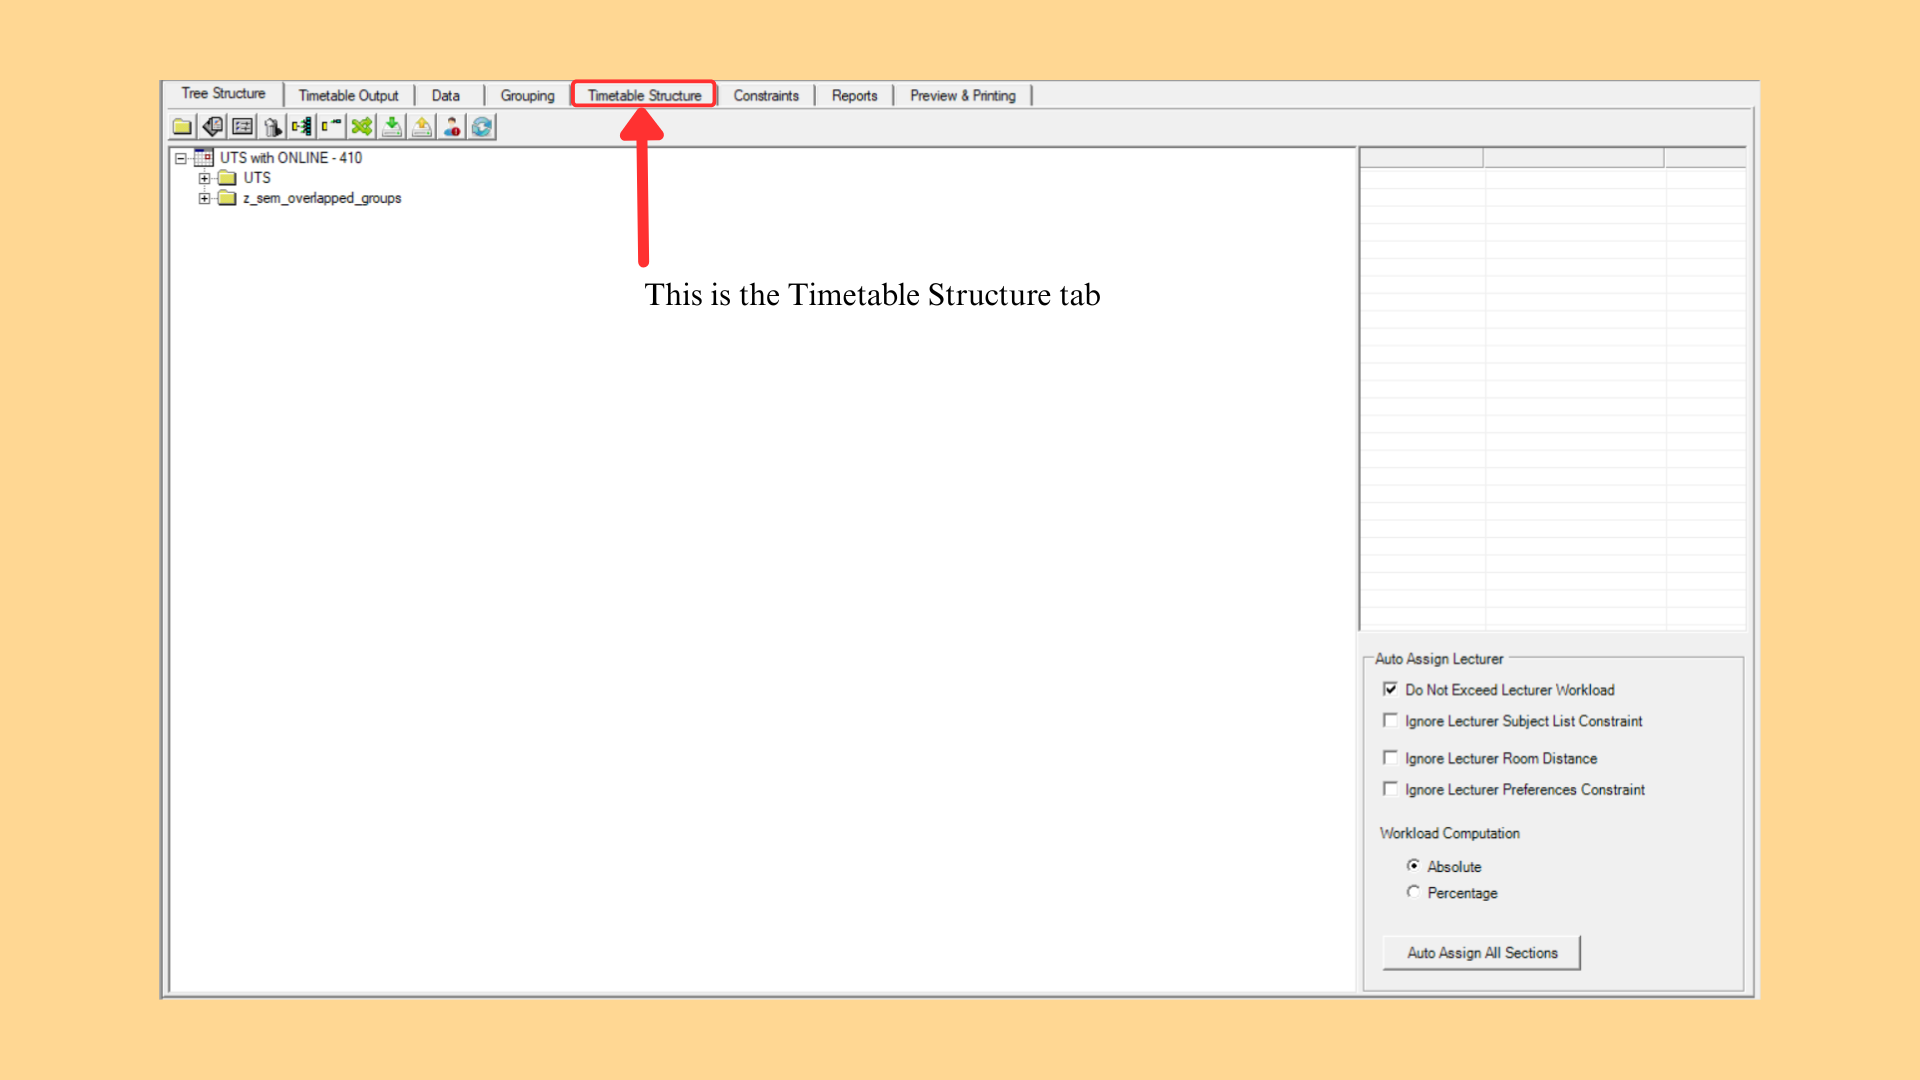
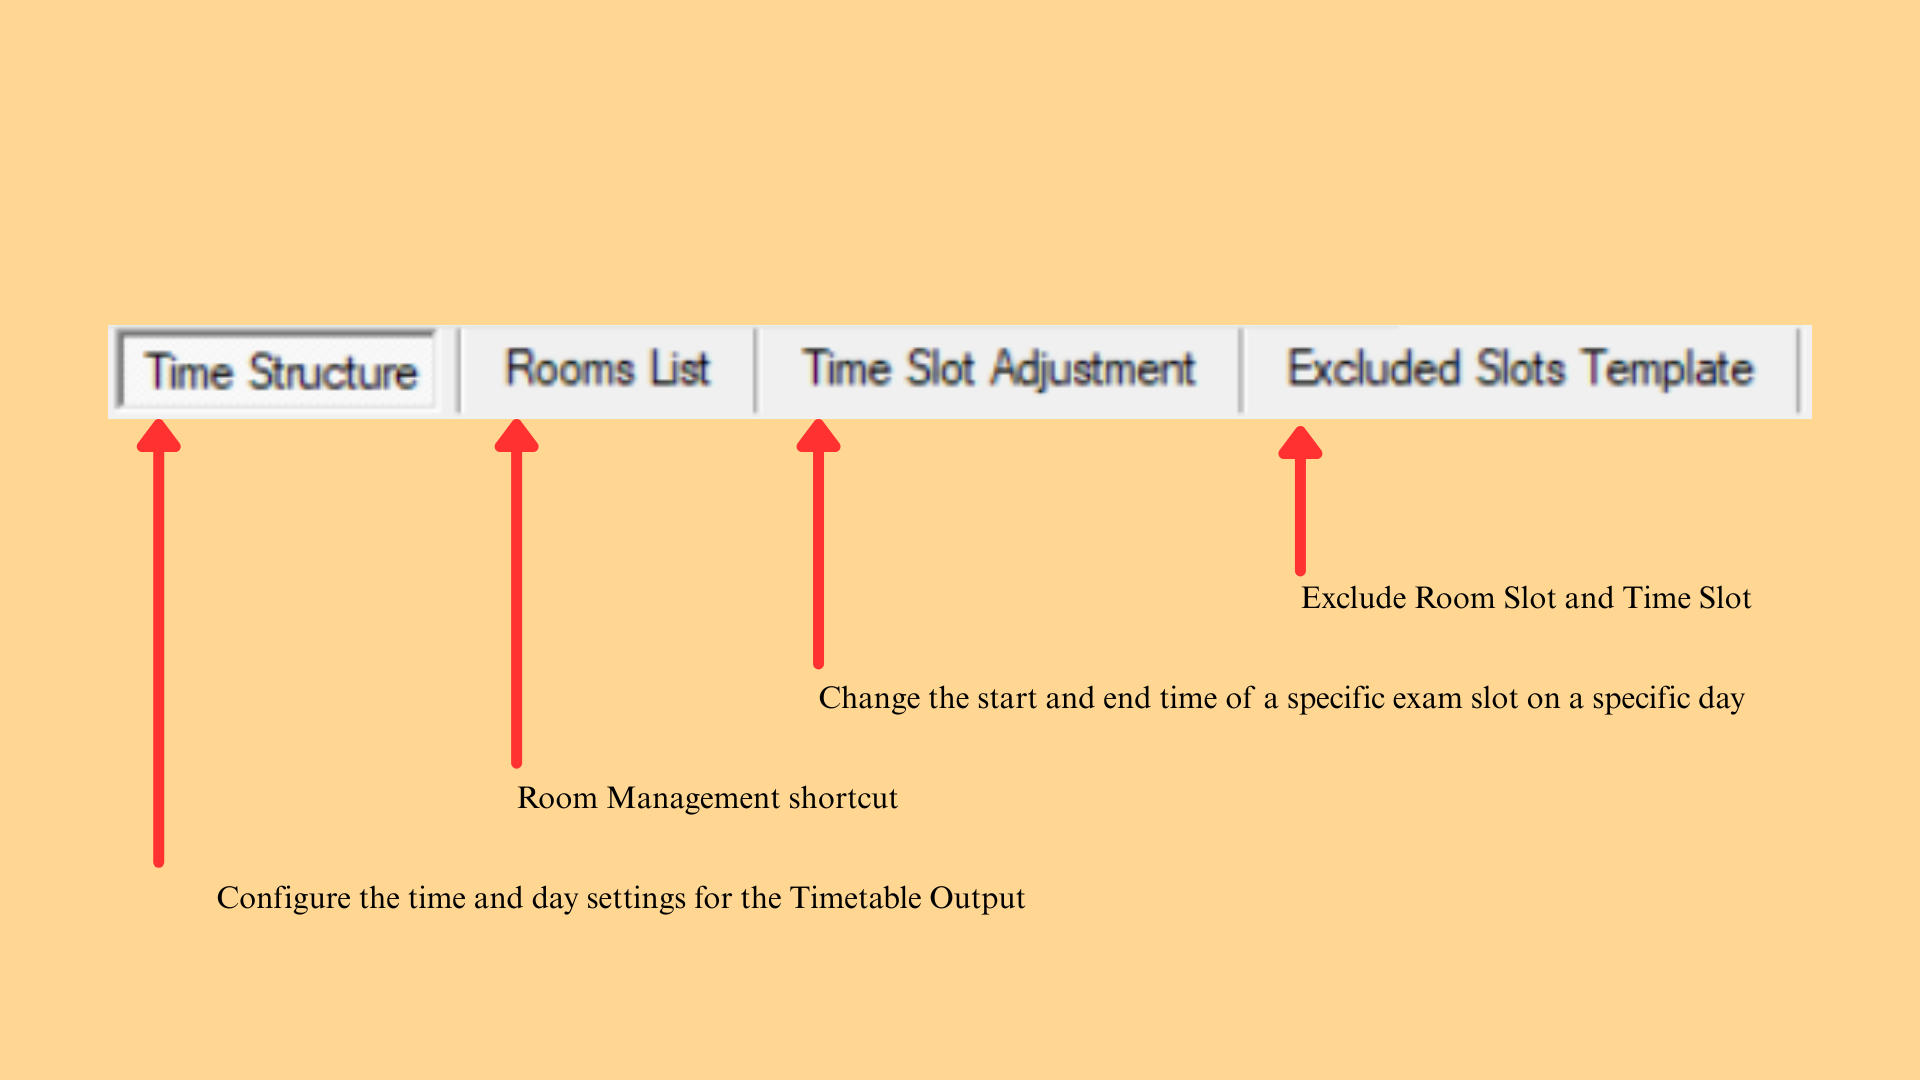
6.1 Time Structure
Time Structure is where you configure the time and day settings for the Timetable Output. It is located under the Timetable Structure tab and consists of the following main areas: Time Slot, Day to Include, Timetable Output Display, Room Sorting Options, General Break, Get Timeslot from E-Campus, and Lock Time Structure.
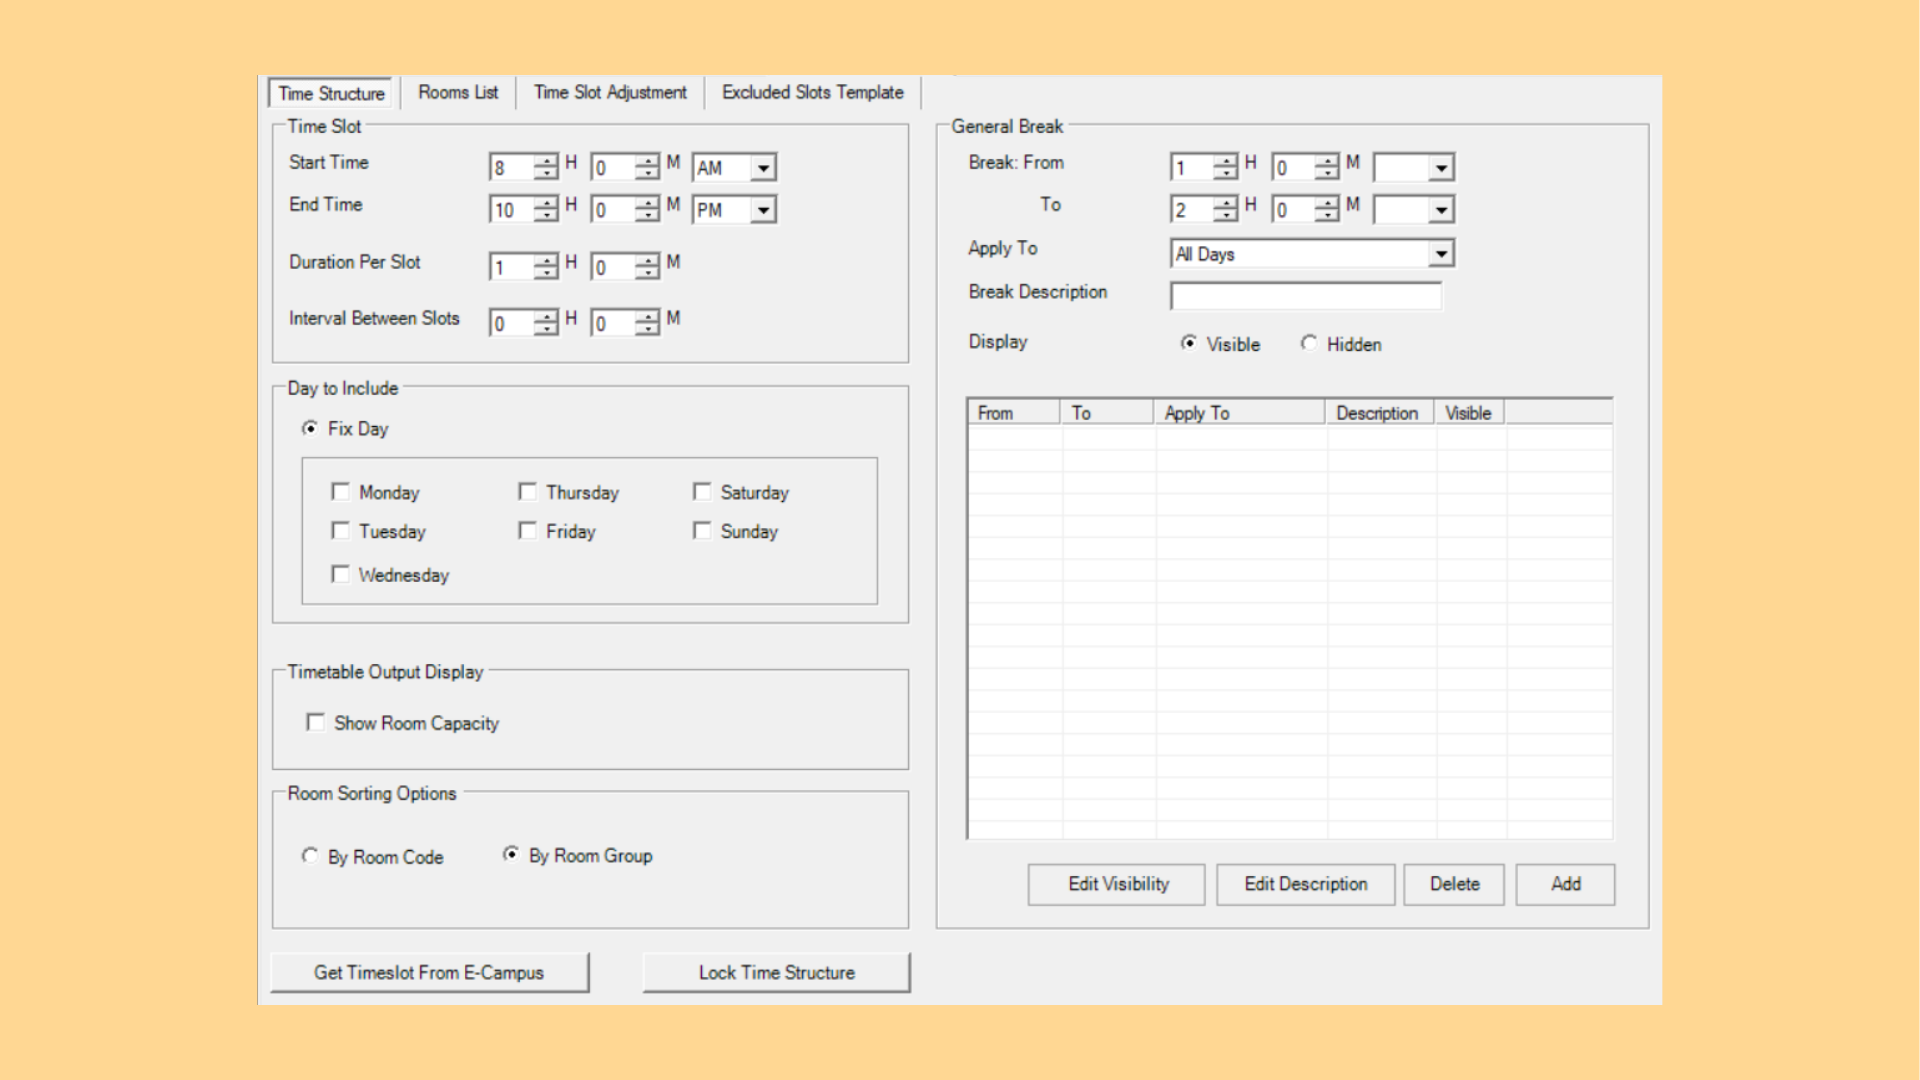
6.1.1 Time Slot
Define the start time, end time, duration per slot, and interval between slots. Each time is set with separate hour and minute spinners; Start Time and End Time also carry an AM/PM dropdown.
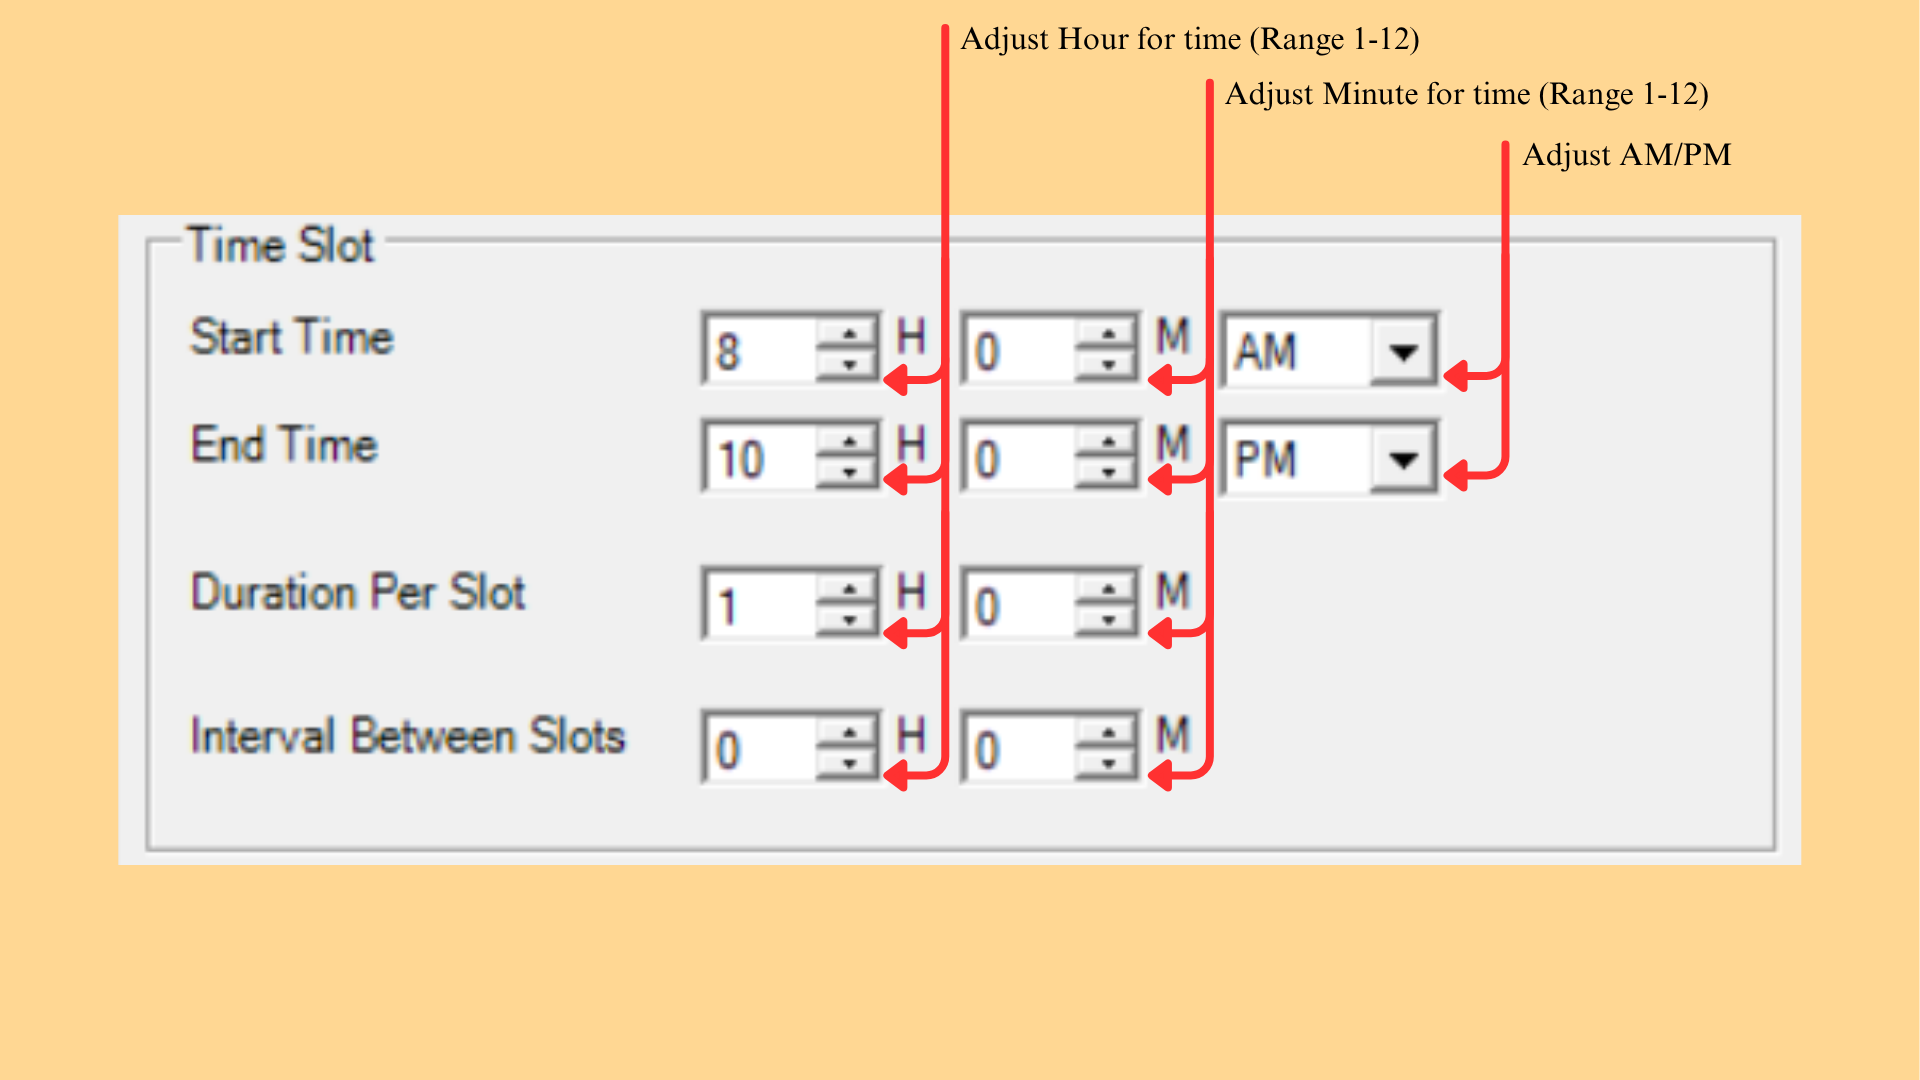
| Field | Description |
|---|---|
| Start Time | The time the teaching day begins. Set the hour (range 1–12), the minutes, and AM or PM. Default: 8:00 AM |
| End Time | The time the teaching day ends. Set the hour (range 1–12), the minutes, and AM or PM. Default: 10:00 PM |
| Duration Per Slot | How long each slot lasts, in hours and minutes. Default: 1 H 0 M |
| Interval Between Slots | The gap left between one slot and the next, in hours and minutes. Default: 0 H 0 M |
Table 6.1: Time Slot Settings
6.1.2 Day to Include
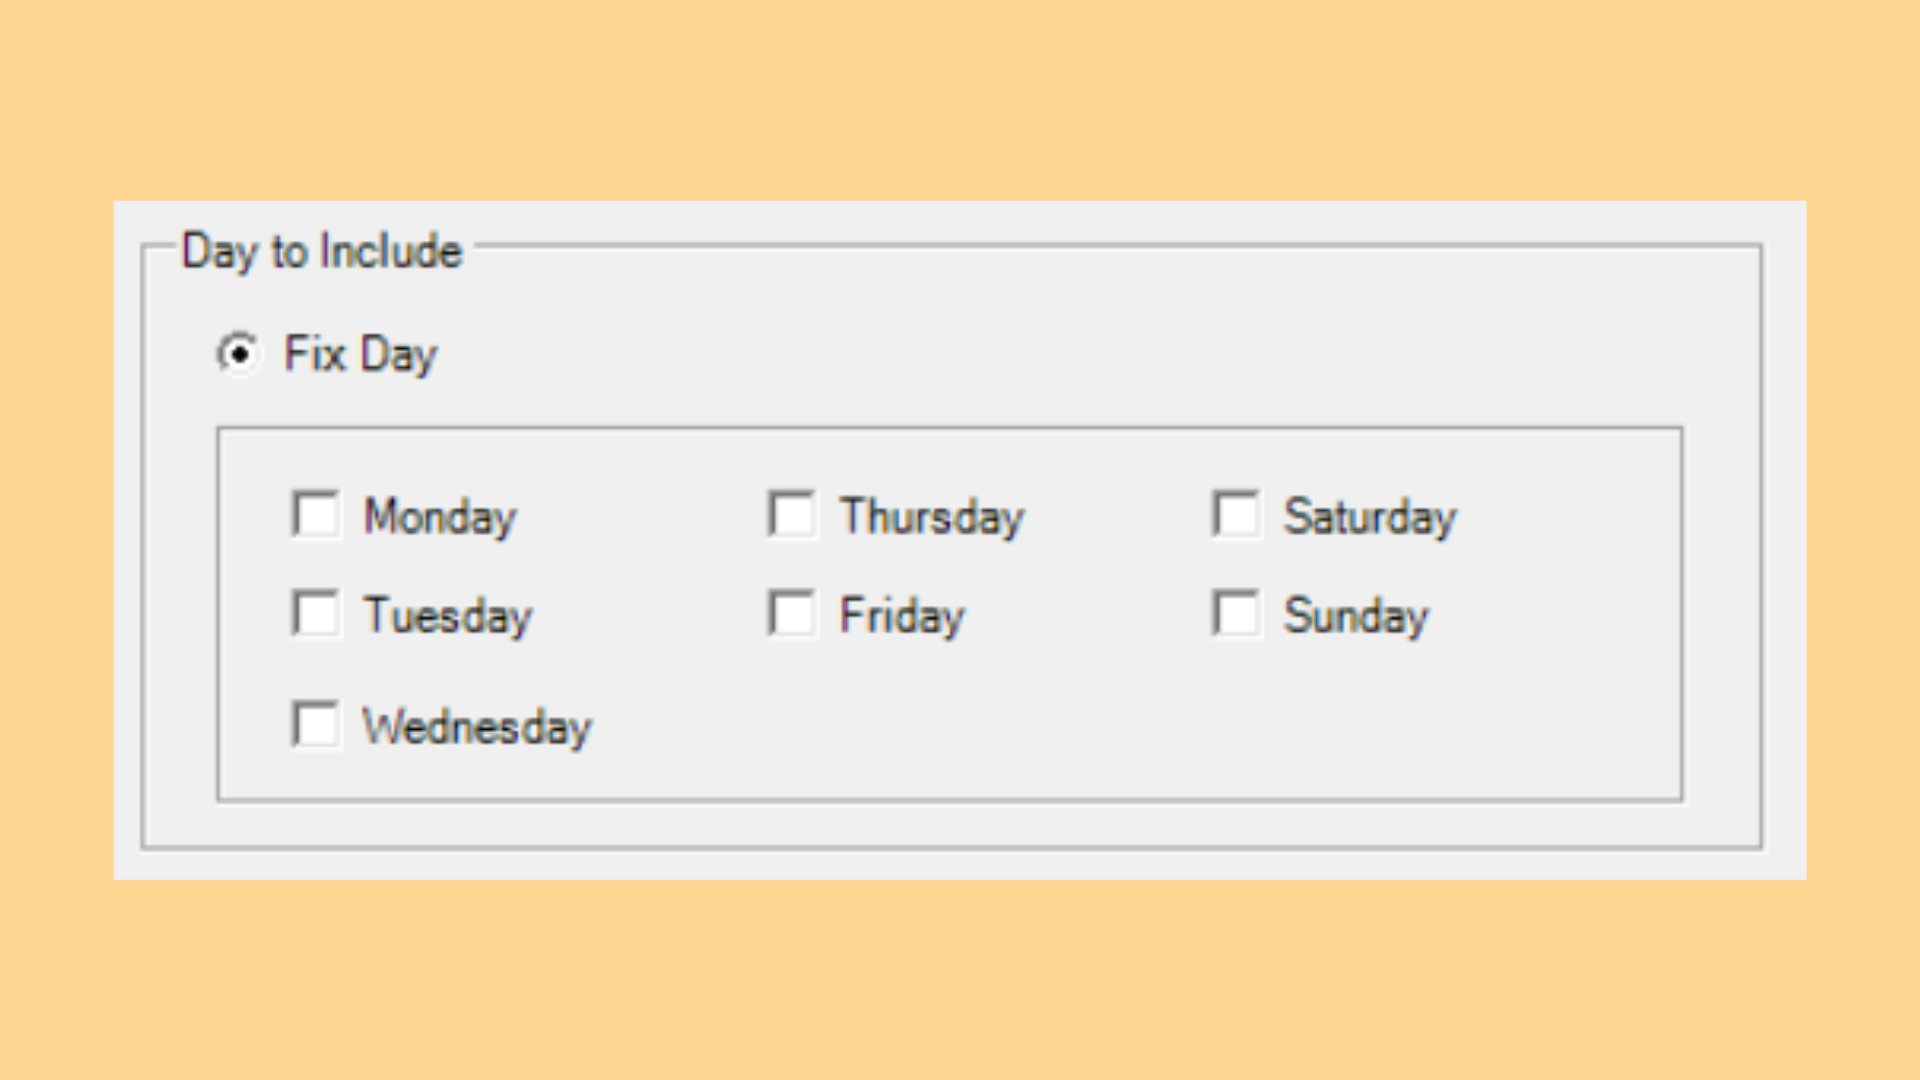
Select the specific days to include in the timetable. Choose Fix Day, then tick each day the timetable should cover.
| Setting | Description |
|---|---|
| Fix Day | Enables the day checkboxes below it. |
| Monday to Sunday | Tick each day to include in the timetable. Leave a day unticked to exclude it, for example, untick Saturday and Sunday if classes run on weekdays only. |
Table 6.2: Day to Include Settings
6.1.3 Timetable Output Display
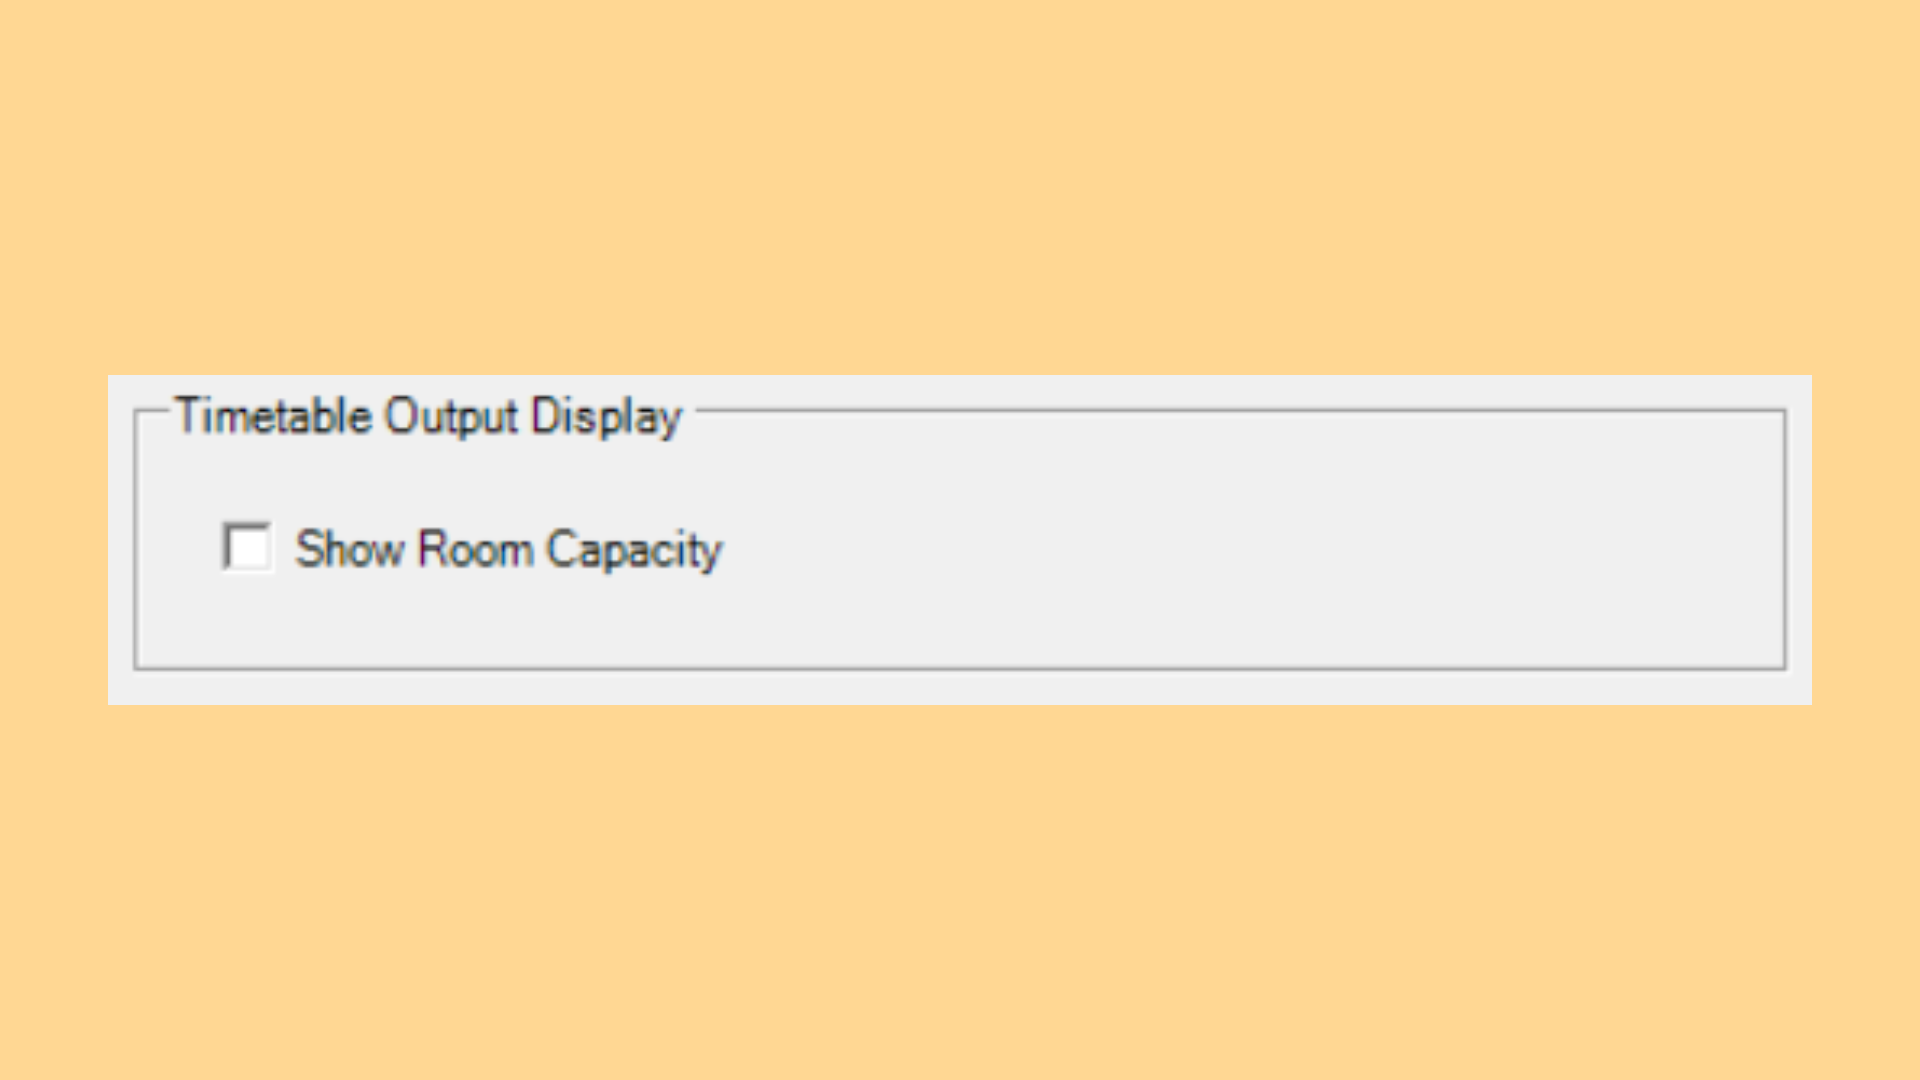
Set whether to display room capacity in Timetable Output grid or not.
| Setting | Description |
|---|---|
| Show Room Capacity | Displays each room’s capacity in the Timetable Output grid. |
Table 6.3: Timetable Output Display Settings
6.1.4 Room Sorting Options
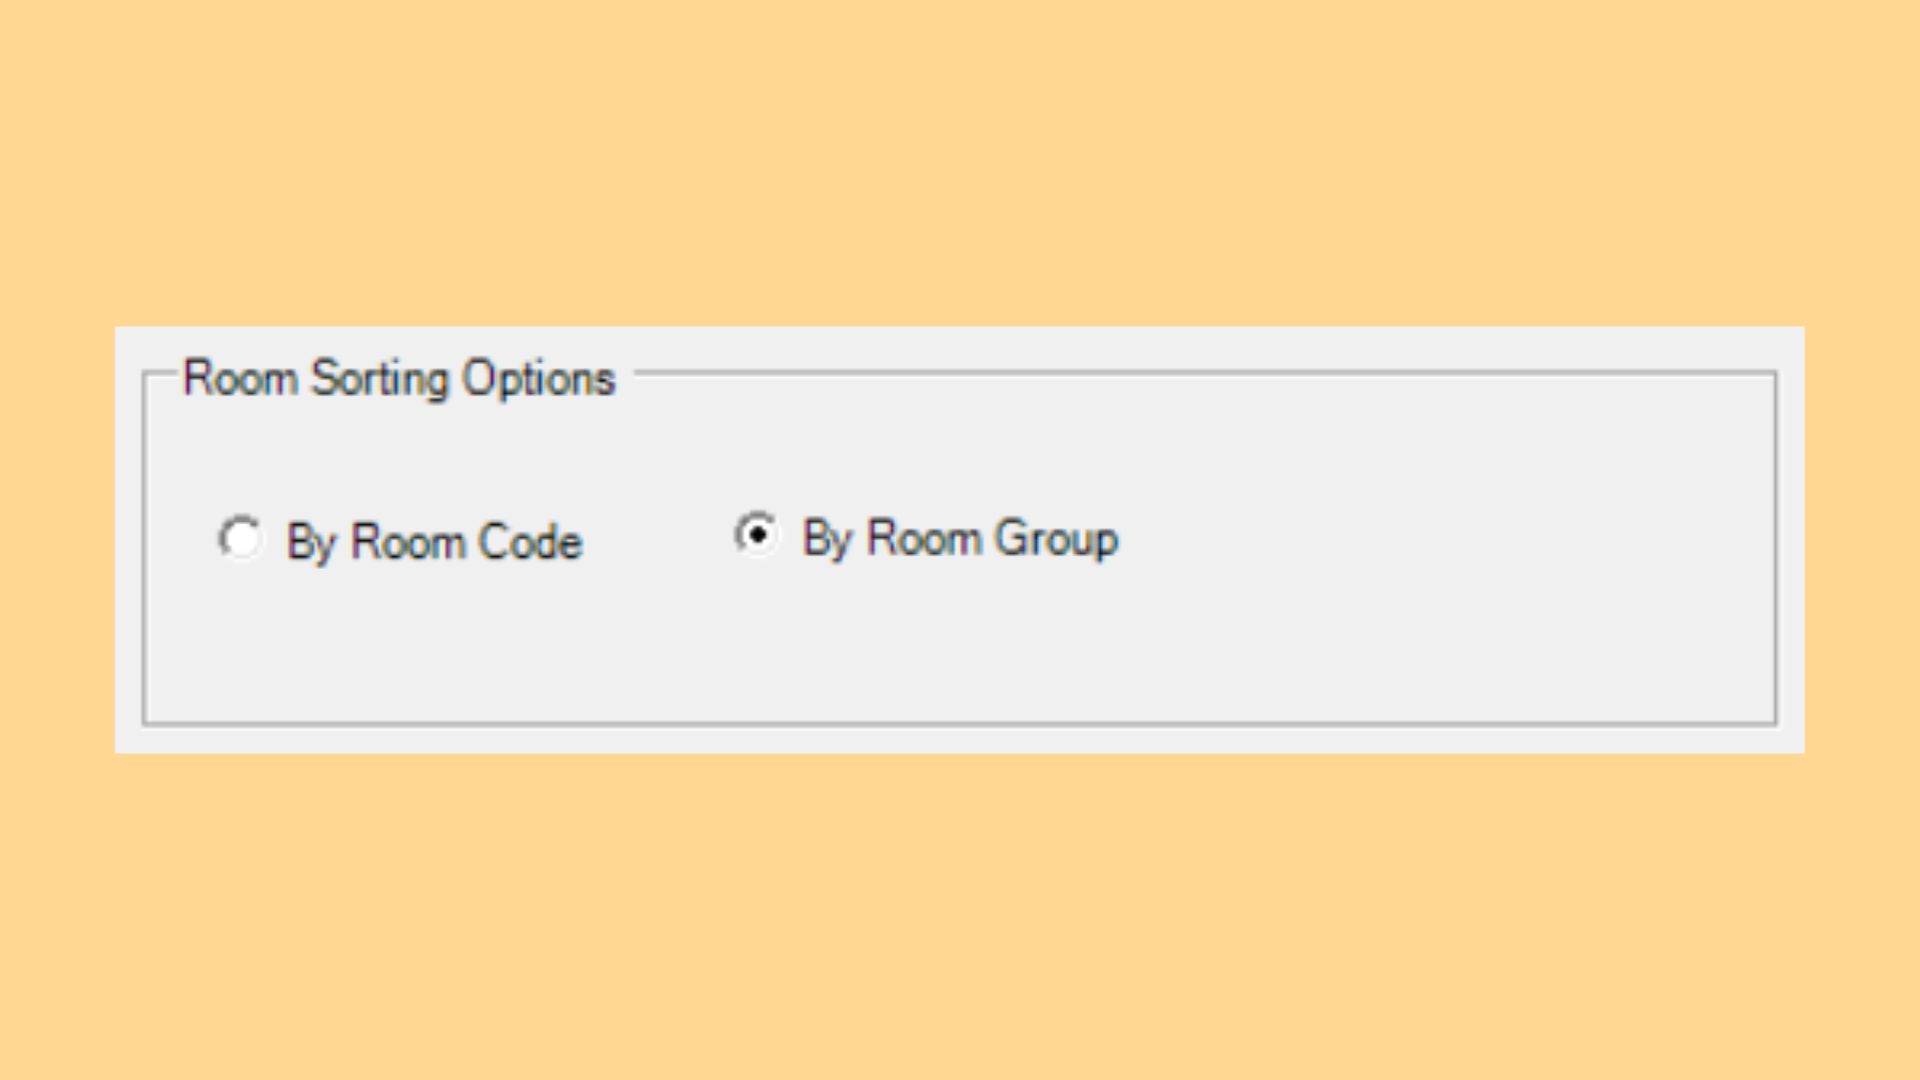
Set the order in how rooms are listed in the Timetable Output.
| Setting | Description |
|---|---|
| By Room Code | Lists the rooms in room code order. |
| By Room Group | Lists the rooms grouped by their room group. |
Table 6.4: Room Sorting Options
6.1.5 General Break
Set break by adjusting break hour, which day to apply, break description and whether to display the time slot in the schedule or not. Breaks already added are listed at the bottom of the panel with their From, To, Apply To, Description and Visible values.
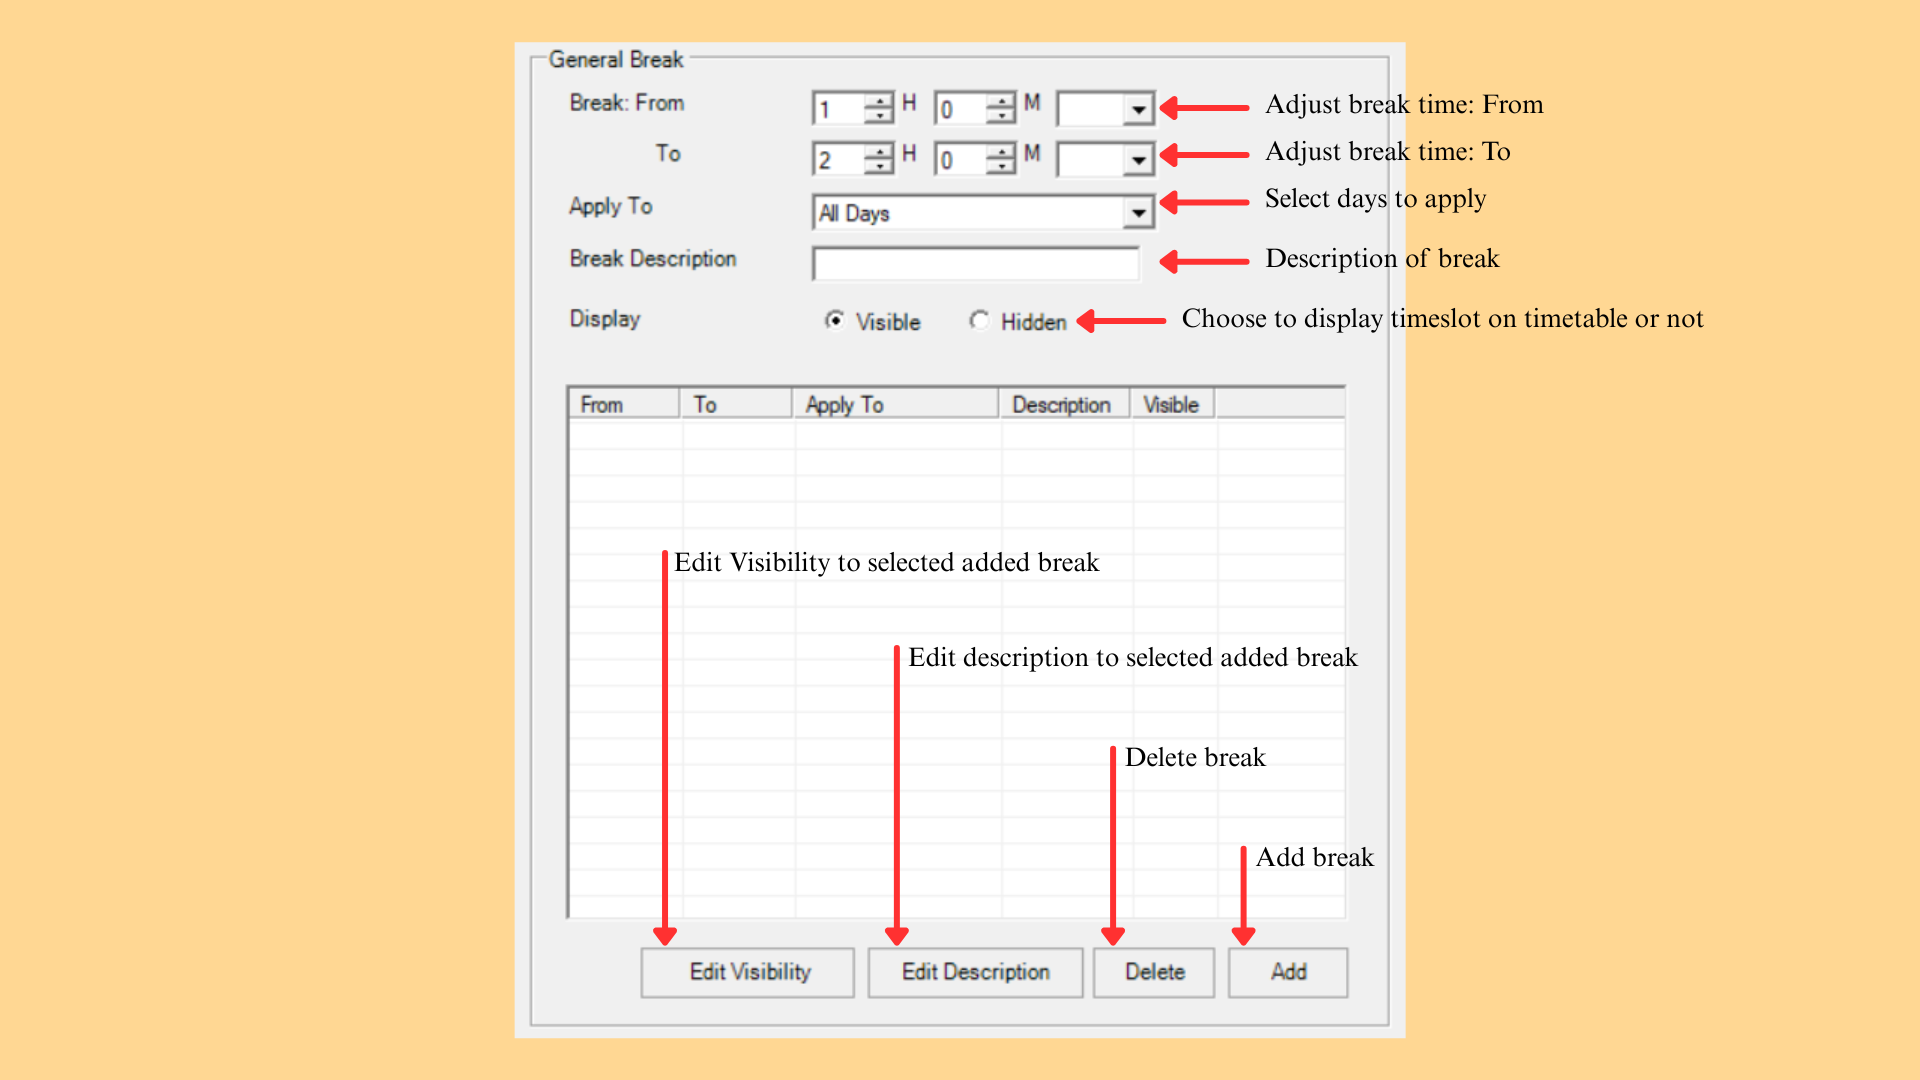
To add a break, there are 5 simple steps to do so.
Step 1: Set Break: From to the time the break begins, in hours and minutes.
Step 2: Set To to the time the break ends.
Step 3: Select the days in Apply To, either All Days or a specific day.
Step 4: Enter a Break Description to label the break.
Step 5: Set Display to Visible or Hidden, then click Add.
Use the buttons below the list to manage the breaks already added:
| Function | Description |
|---|---|
| Edit Visibility | Changes the visibility of the selected break. |
| Edit Description | Changes the description of the selected break. |
| Delete | Removes the selected break. |
| Add | Adds the break to the list. |
Table 6.5: General Break Buttons
6.1.6 Get Timeslot from E-Campus
Pull an existing timeslot configuration from TPlus E-Campus instead of building the time structure manually. Click Get Timeslot From E-Campus to retrieve it.
6.1.7 Lock Time Structure
Lock the time structure to prevent further changes once it has been finalised. Click Lock Time Structure to apply the lock.
6.2 Room List
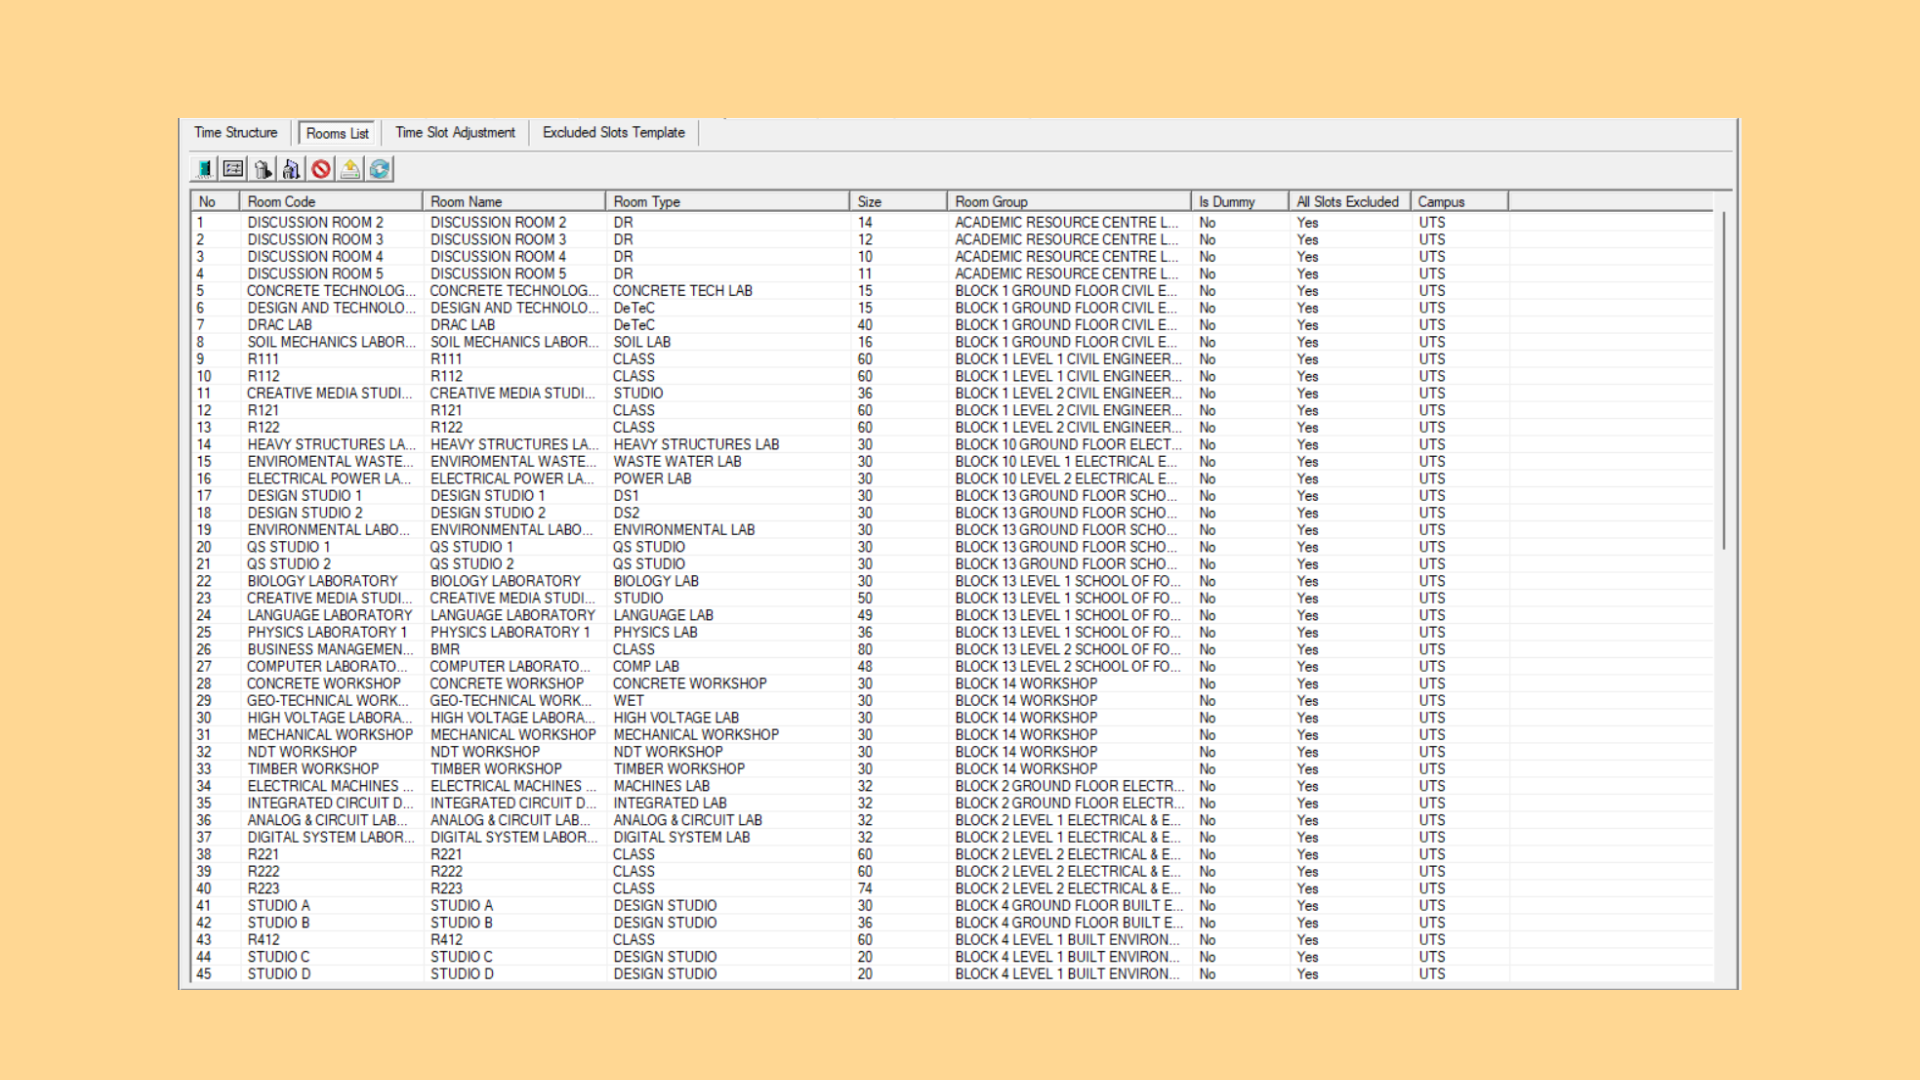
Rooms are the venues where classes will be held. Each room must have the correct seating capacity; the system uses this to decide how many students fit in each room when generating the timetable. This room list displays number of room, room code, room name, room type, room size, room group, is Dummy, all slots excluded and campus.
6.2.1 Room List Shortcuts
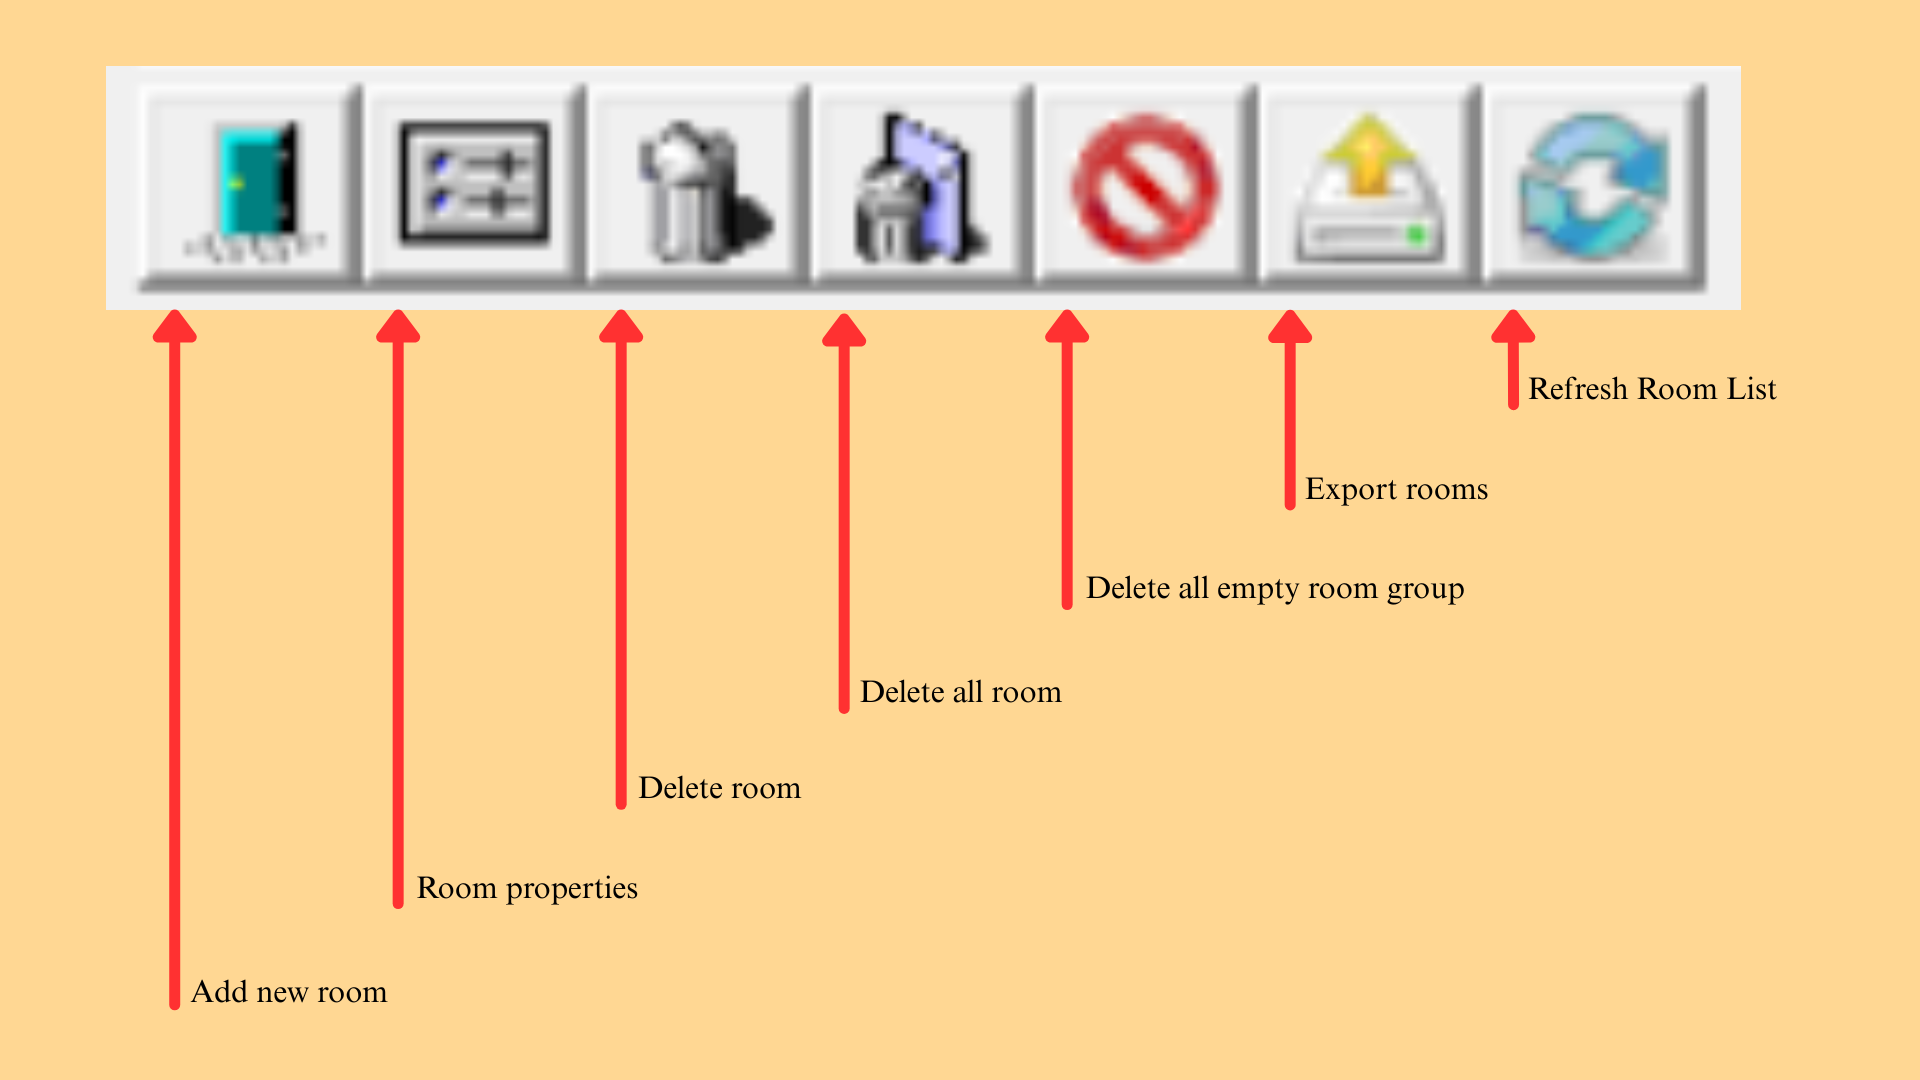
The shortcut bar at the top of the Room List provides quick access to the functions available for this list.
| Function | Description |
|---|---|
| Add New Room | Adds a new room to the list. |
| Room Properties | Opens the properties window for the selected room. |
| Delete Room | Removes the selected room from the list. |
| Delete All Room | Removes every room from the list. |
| Delete All Empty Room Group | Removes room groups that no longer contain any rooms. |
| Export Rooms | Exports the room list to a file. |
| Refresh Room List | Reloads the list to show the latest data. |
Table 6.6: Room List Shortcut Functions
6.2.2 Room List Columns
Each row in the Room List represents one room. The columns are as follows.
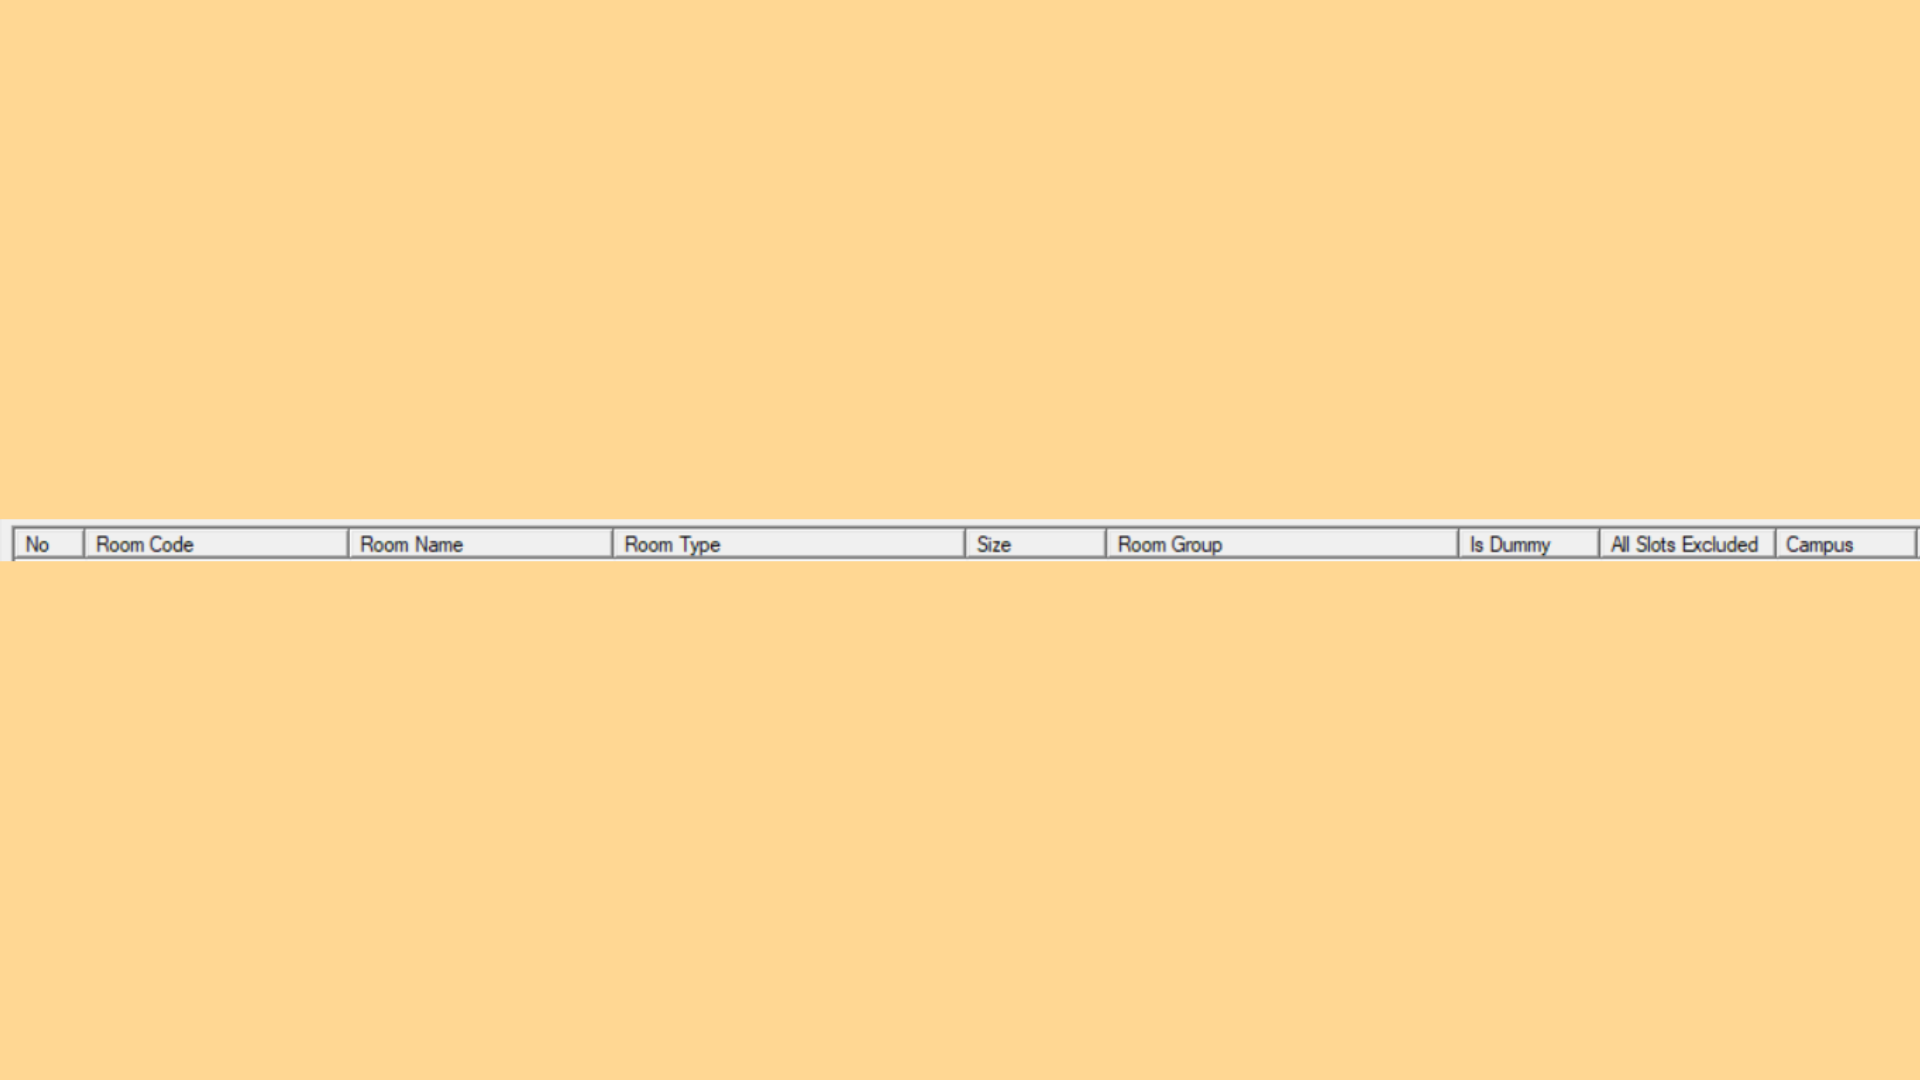
| Column | Description |
|---|---|
| No | Row number of the room in the list. |
| Room Code | The unique code identifying the room. |
| Room Name | The full name of the room. |
| Room Type | The type of room, for example Studio or Lab. |
| Size | The seating capacity of the room. |
| Room Group | The room group or building the room belongs to. |
| Is Dummy | Marks the room as a dummy room rather than a real venue. |
| All Slots Excluded | Shows whether every slot for this room has been excluded. |
| Campus | The campus the room is located at. |
Table 6.7: Room List Columns
6.3 Time Slot Adjustment
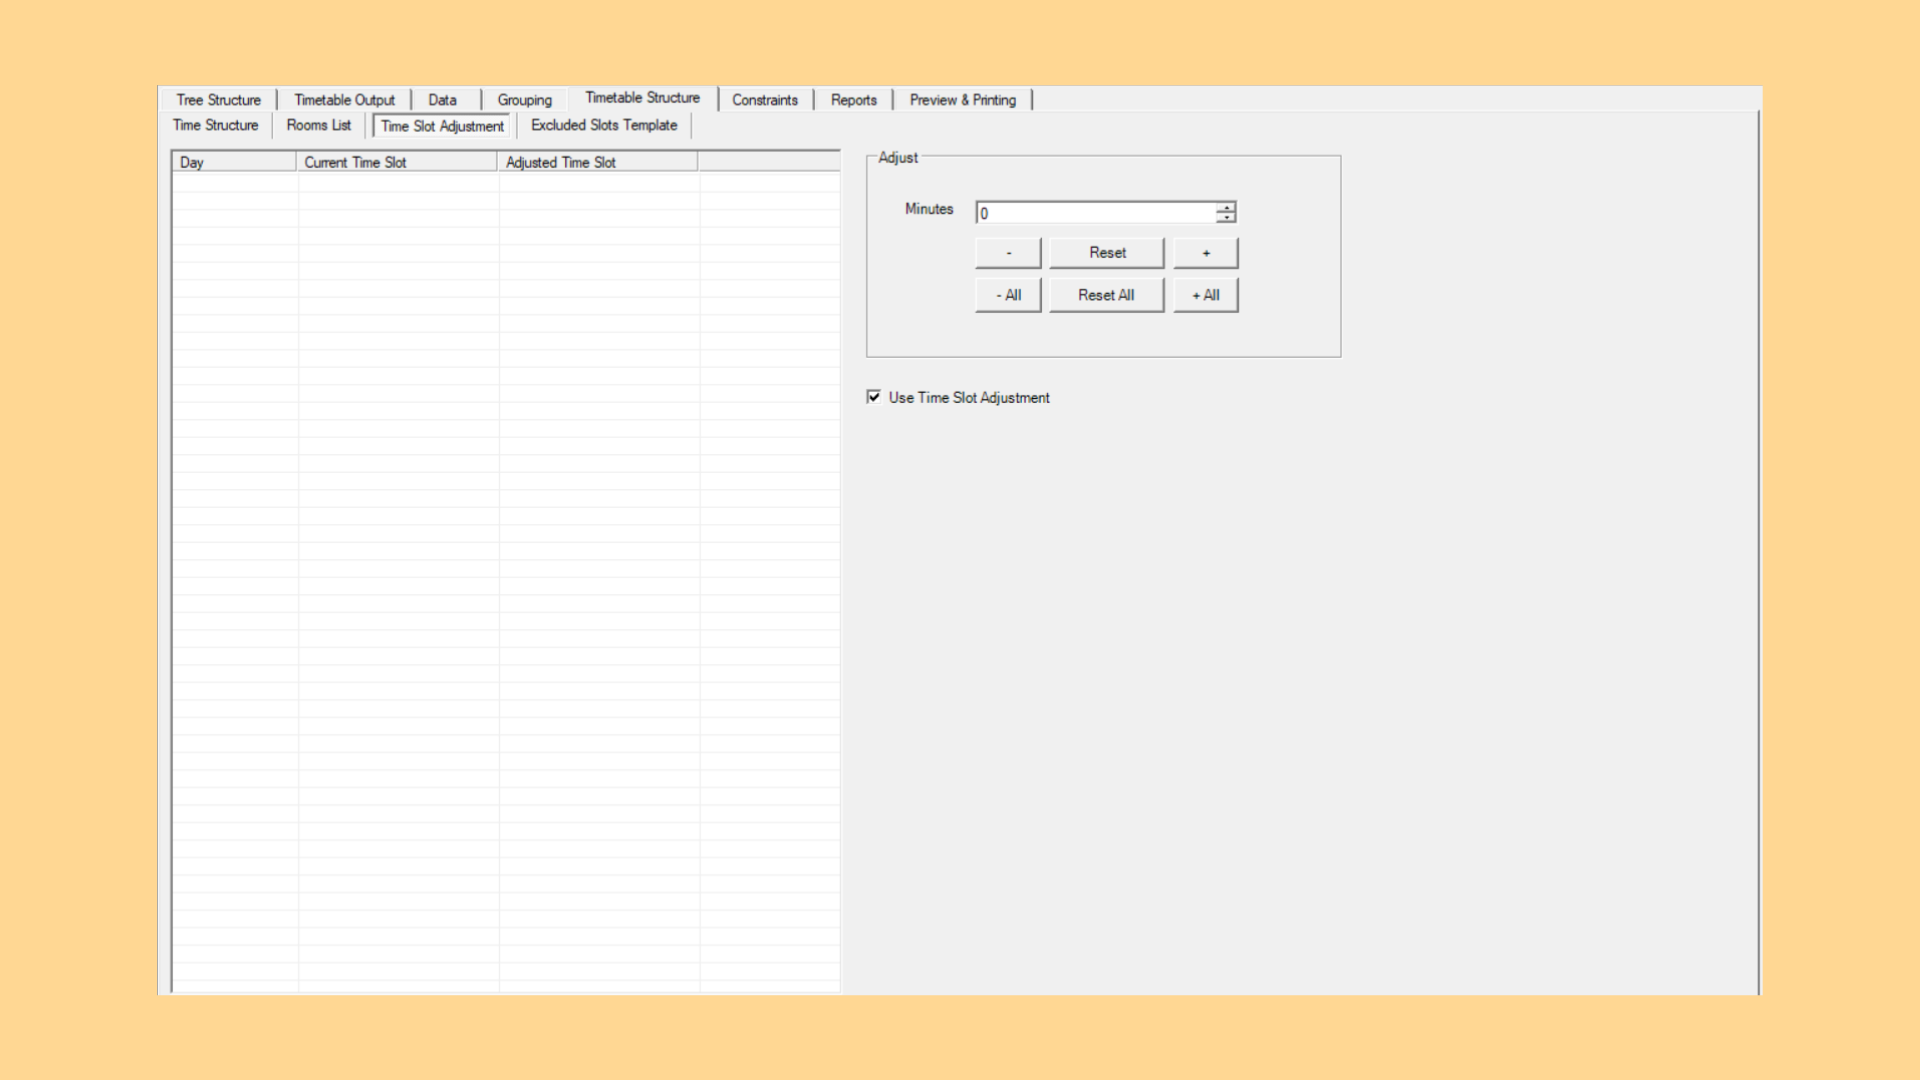
Add more time for selected timeslot or remove some time from existing timeslot. Able to choose whether to apply or not even when the time slot adjustment has been set. User also able to cancel certain adjustment or cancel all the adjustment depending on their choice.
6.3.1 Adjust
The Adjust panel is where the minutes are added to or removed from a time slot. The adjustment can be applied to the selected slot only, or to every slot at once.
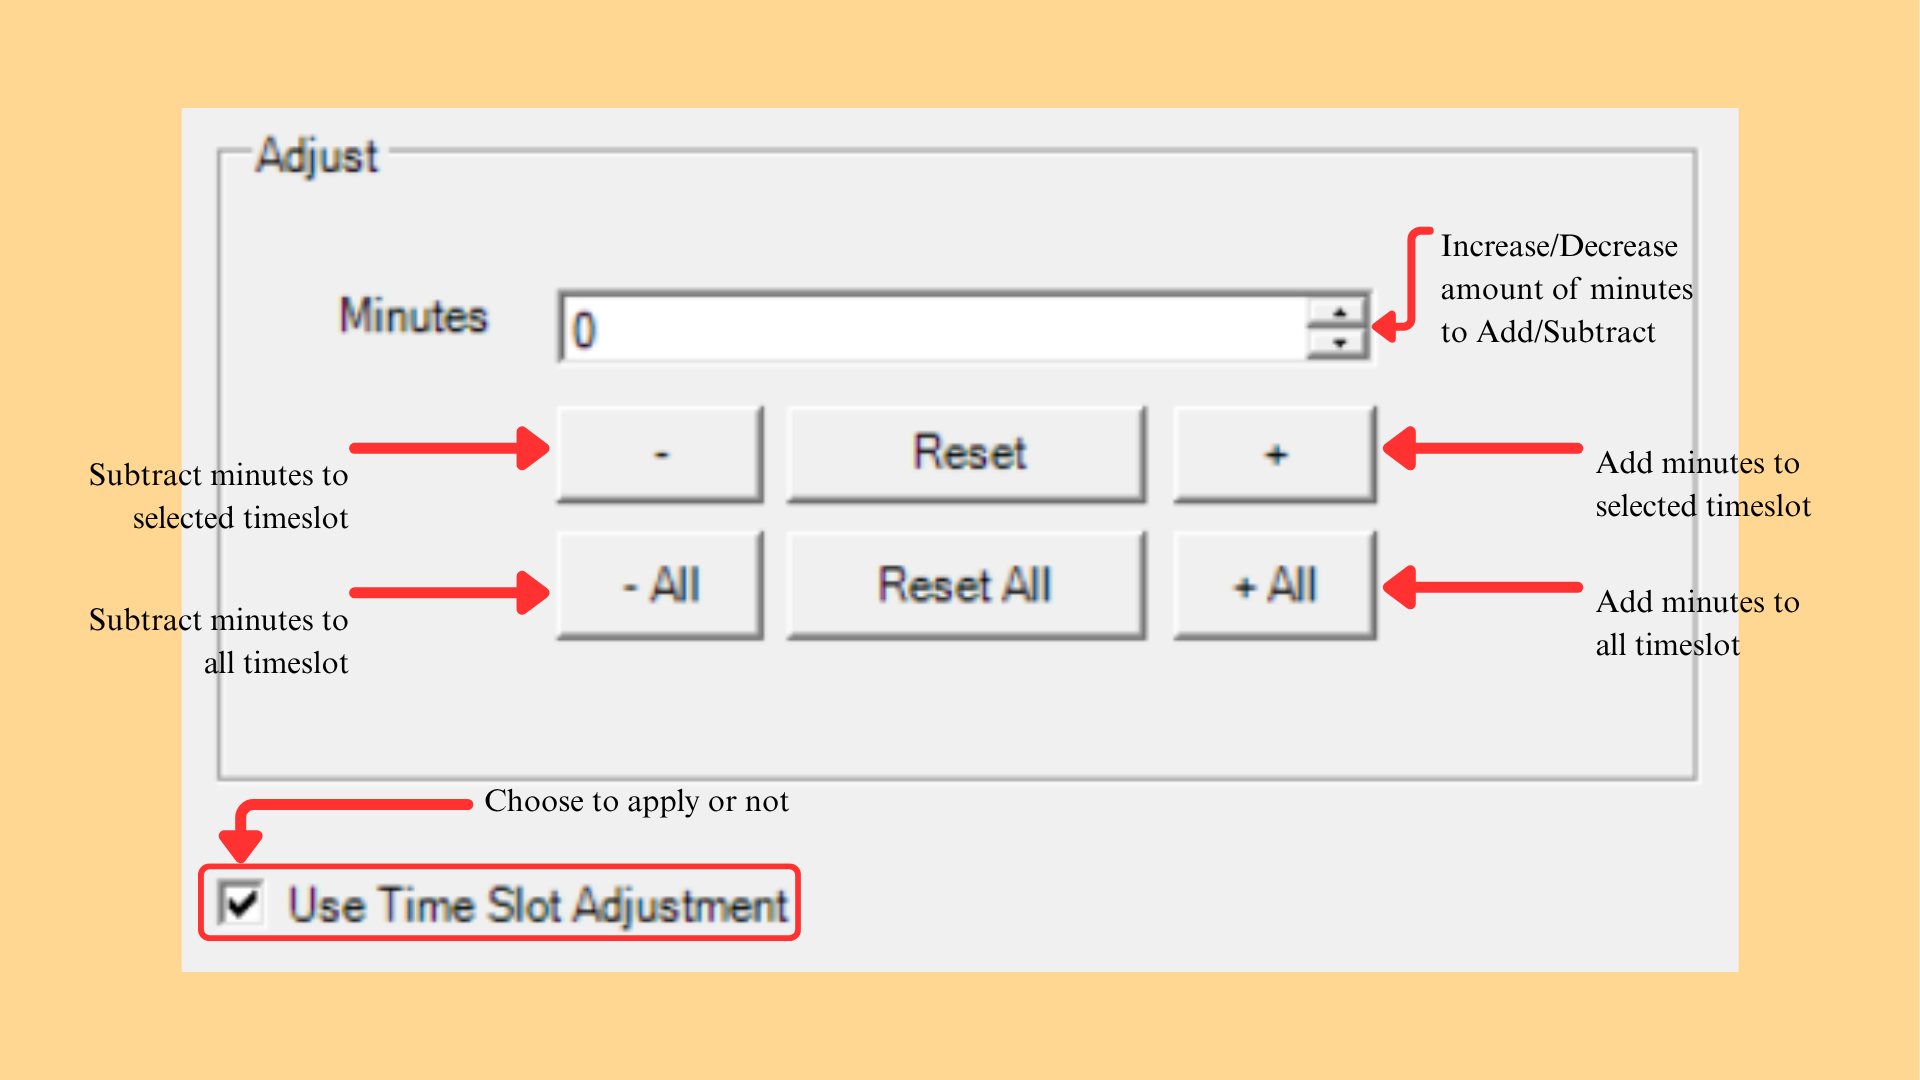
To adjust a time slot, there are 3 simple steps to do so.
Step 1: Select the time slot to adjust from the list.
Step 2: Enter the number of Minutes to add or subtract.
Step 3: Click + to add the minutes, or − to subtract them.
The buttons in the panel are as follows:
| Function | Description |
|---|---|
| Minutes | Increases or decreases the amount of minutes to add or subtract. |
| − | Subtracts the minutes from the selected time slot. |
| + | Adds the minutes to the selected time slot. |
| Reset | Cancels the adjustment on the selected time slot. |
| − All | Subtracts the minutes from every time slot. |
| + All | Adds the minutes to every time slot. |
| Reset All | Cancels the adjustment on every time slot. |
| Use Time Slot Adjustment | Chooses whether the adjustment is applied or not, even once it has been set. |
Table 6.8: Adjust Panel Functions
6.4 Excluded Slots Template
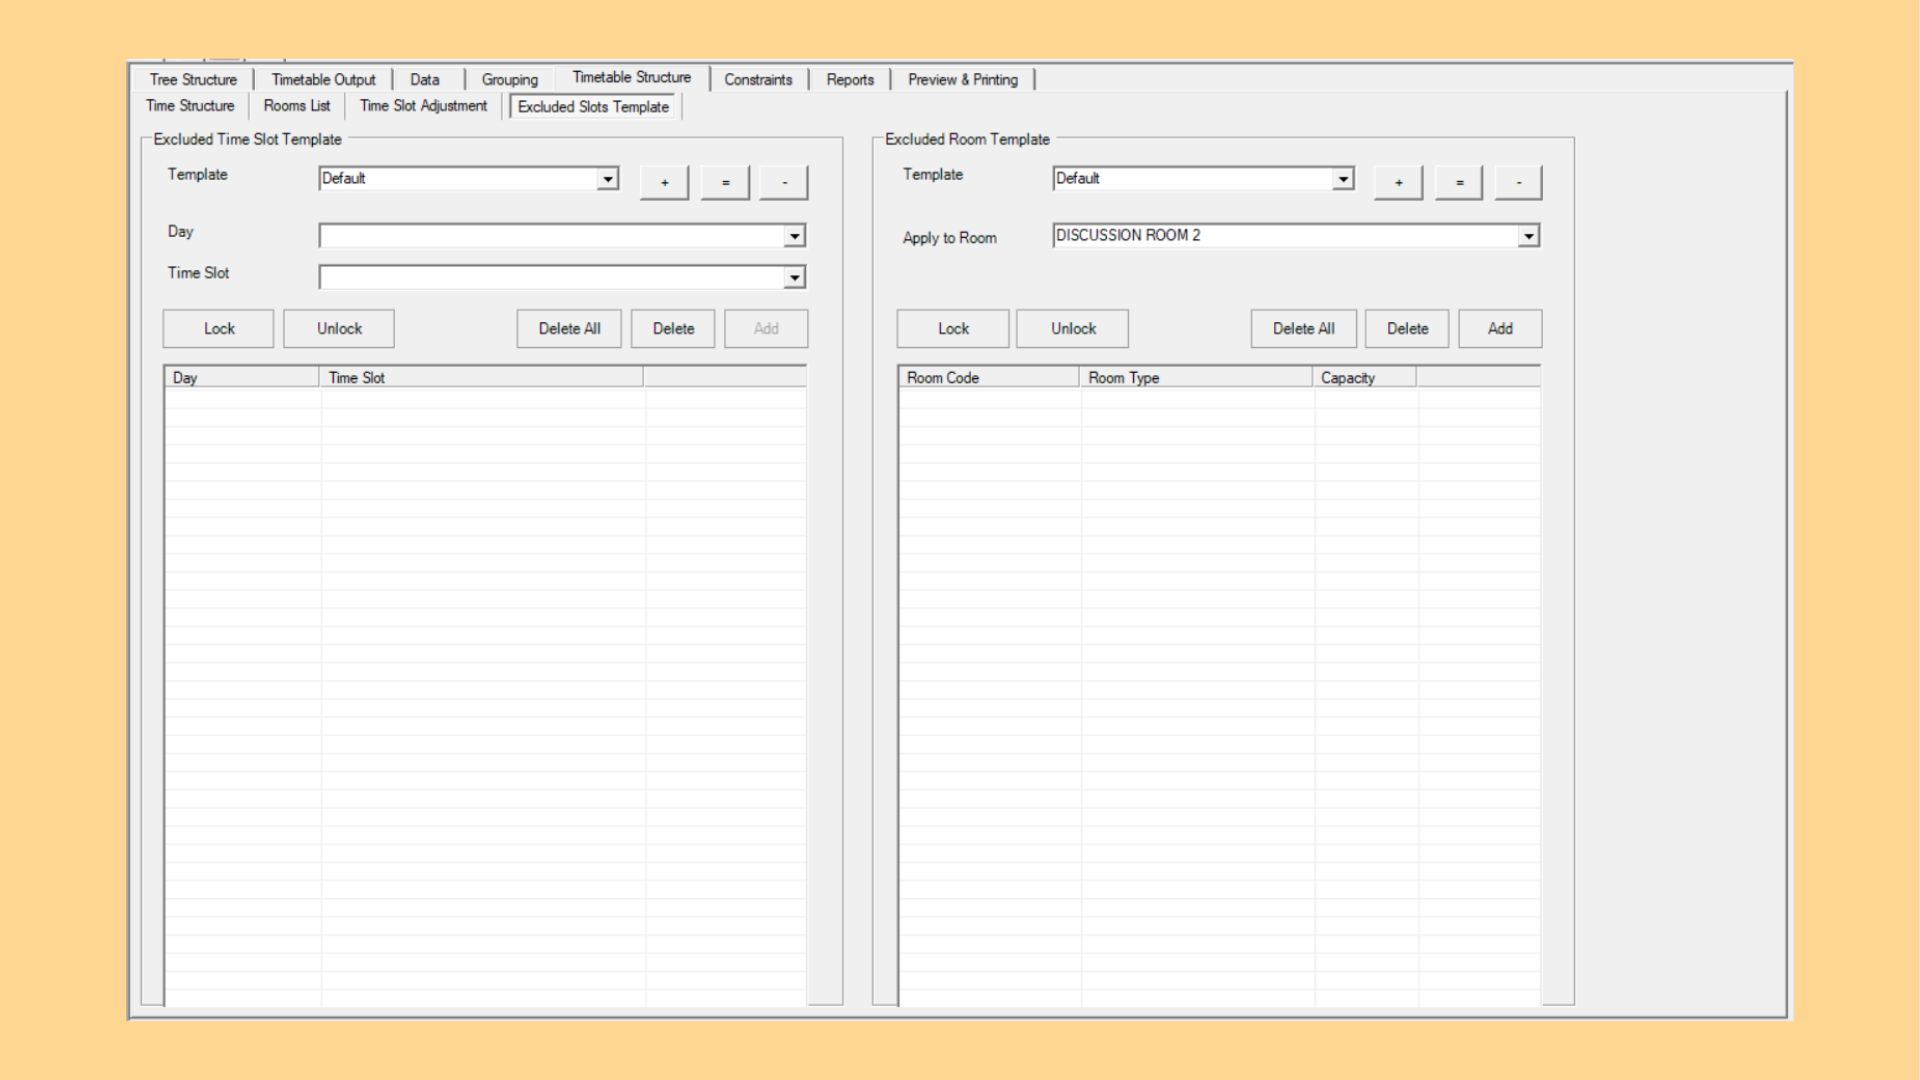
Users able to create a template for excluded slots to be apply in bulk whether for Time Slot or Room.
6.4.1 Excluded Time Slot Template
User can choose to customise their time slot template from name, day and time slot. Slots already added to the template are listed at the bottom of the panel with their Day and Time Slot.
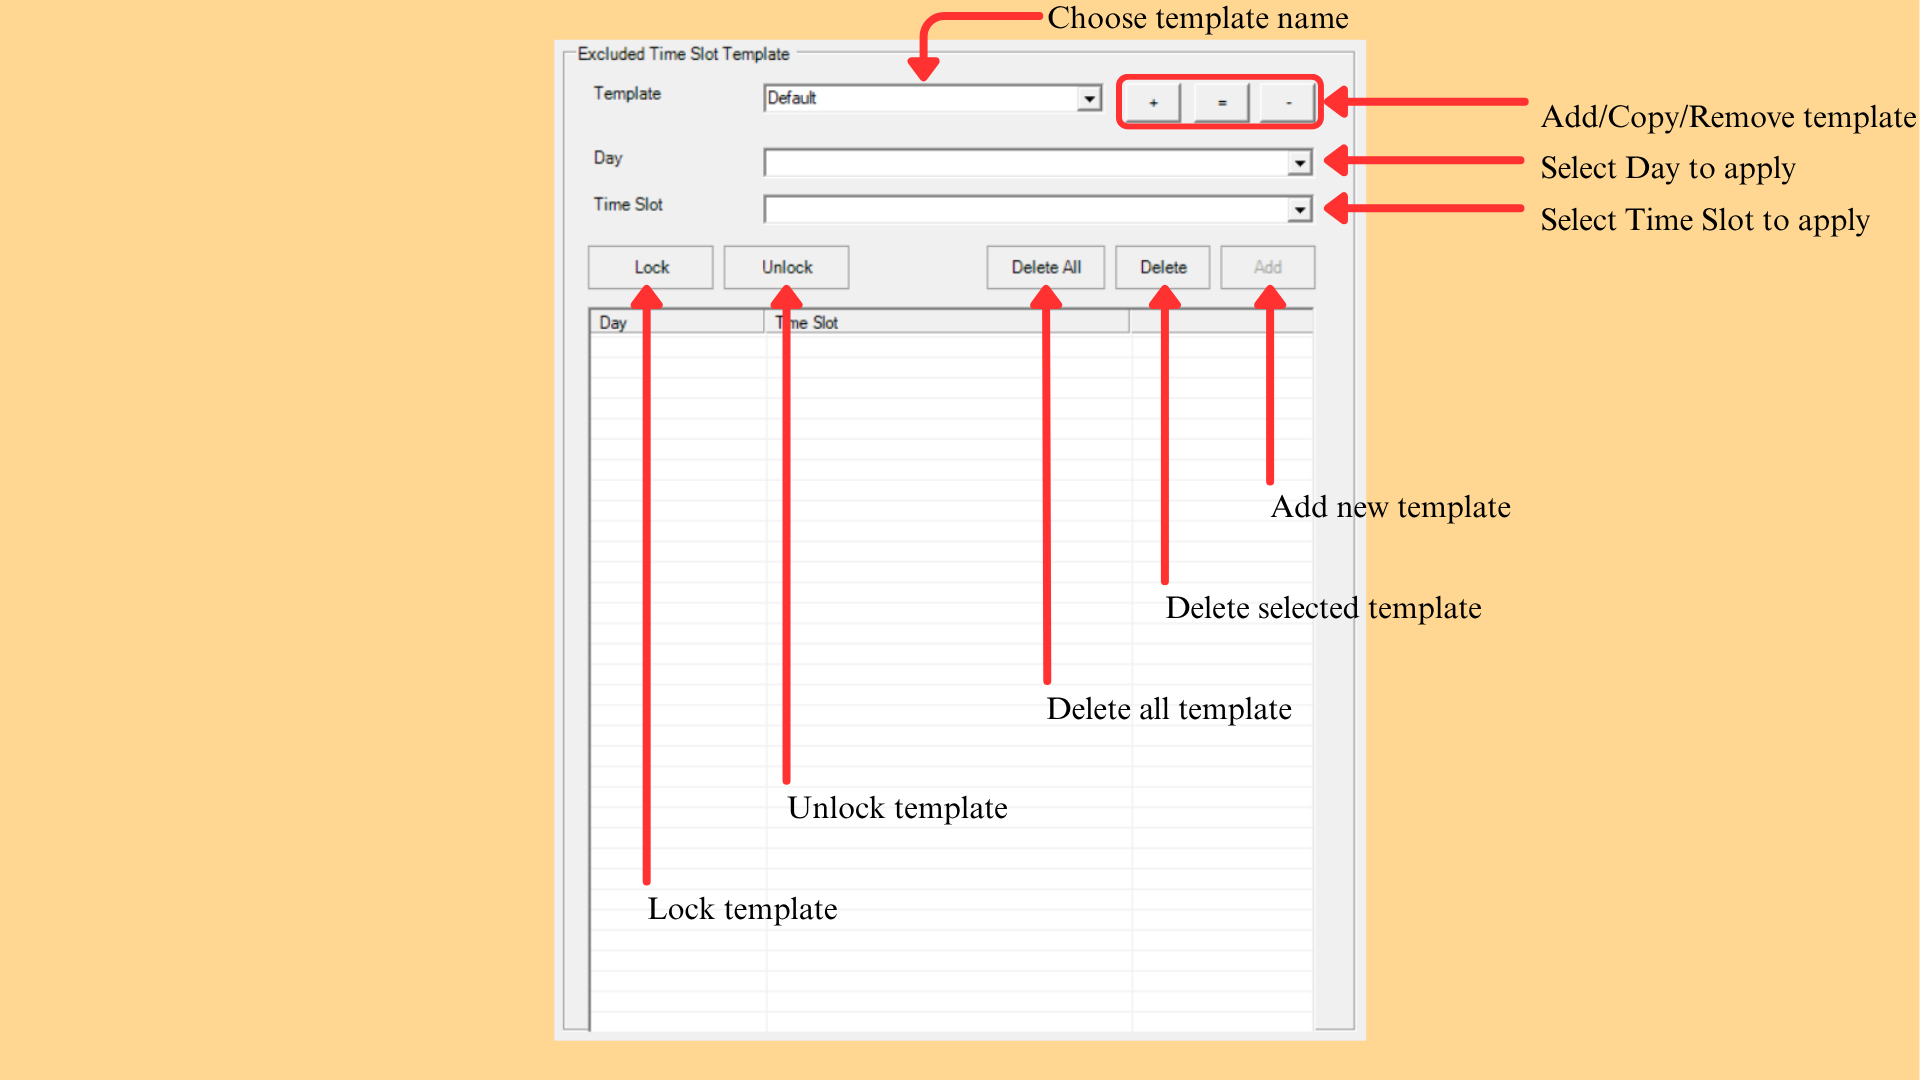
To exclude a time slot, there are 4 simple steps to do so.
Step 1: Choose the template name from the Template dropdown list.
Step 2: Select the Day to apply.
Step 3: Select the Time Slot to apply.
Step 4: Click Add. The entry appears in the list with its Day and Time Slot.
The functions in this panel are as follows:
| Function | Description |
|---|---|
| Template | Chooses the template name to work on. Default: Default |
| + | Adds a new template. |
| = | Copies the selected template. |
| − | Removes the selected template. |
| Day | Selects the day to apply the exclusion to. |
| Time Slot | Selects the time slot to apply the exclusion to. |
| Lock | Locks the template so that it cannot be changed. |
| Unlock | Unlocks the template so that it can be changed again. |
| Delete All | Deletes every template. |
| Delete | Deletes the selected template. |
| Add | Adds a new template entry. |
Table 6.9: Excluded Time Slot Template Functions
6.4.2 Excluded Room Template
User can choose to customise their time slot template from name and which room to apply. Rooms already added to the template are listed at the bottom of the panel with their Room Code, Room Type and Capacity.
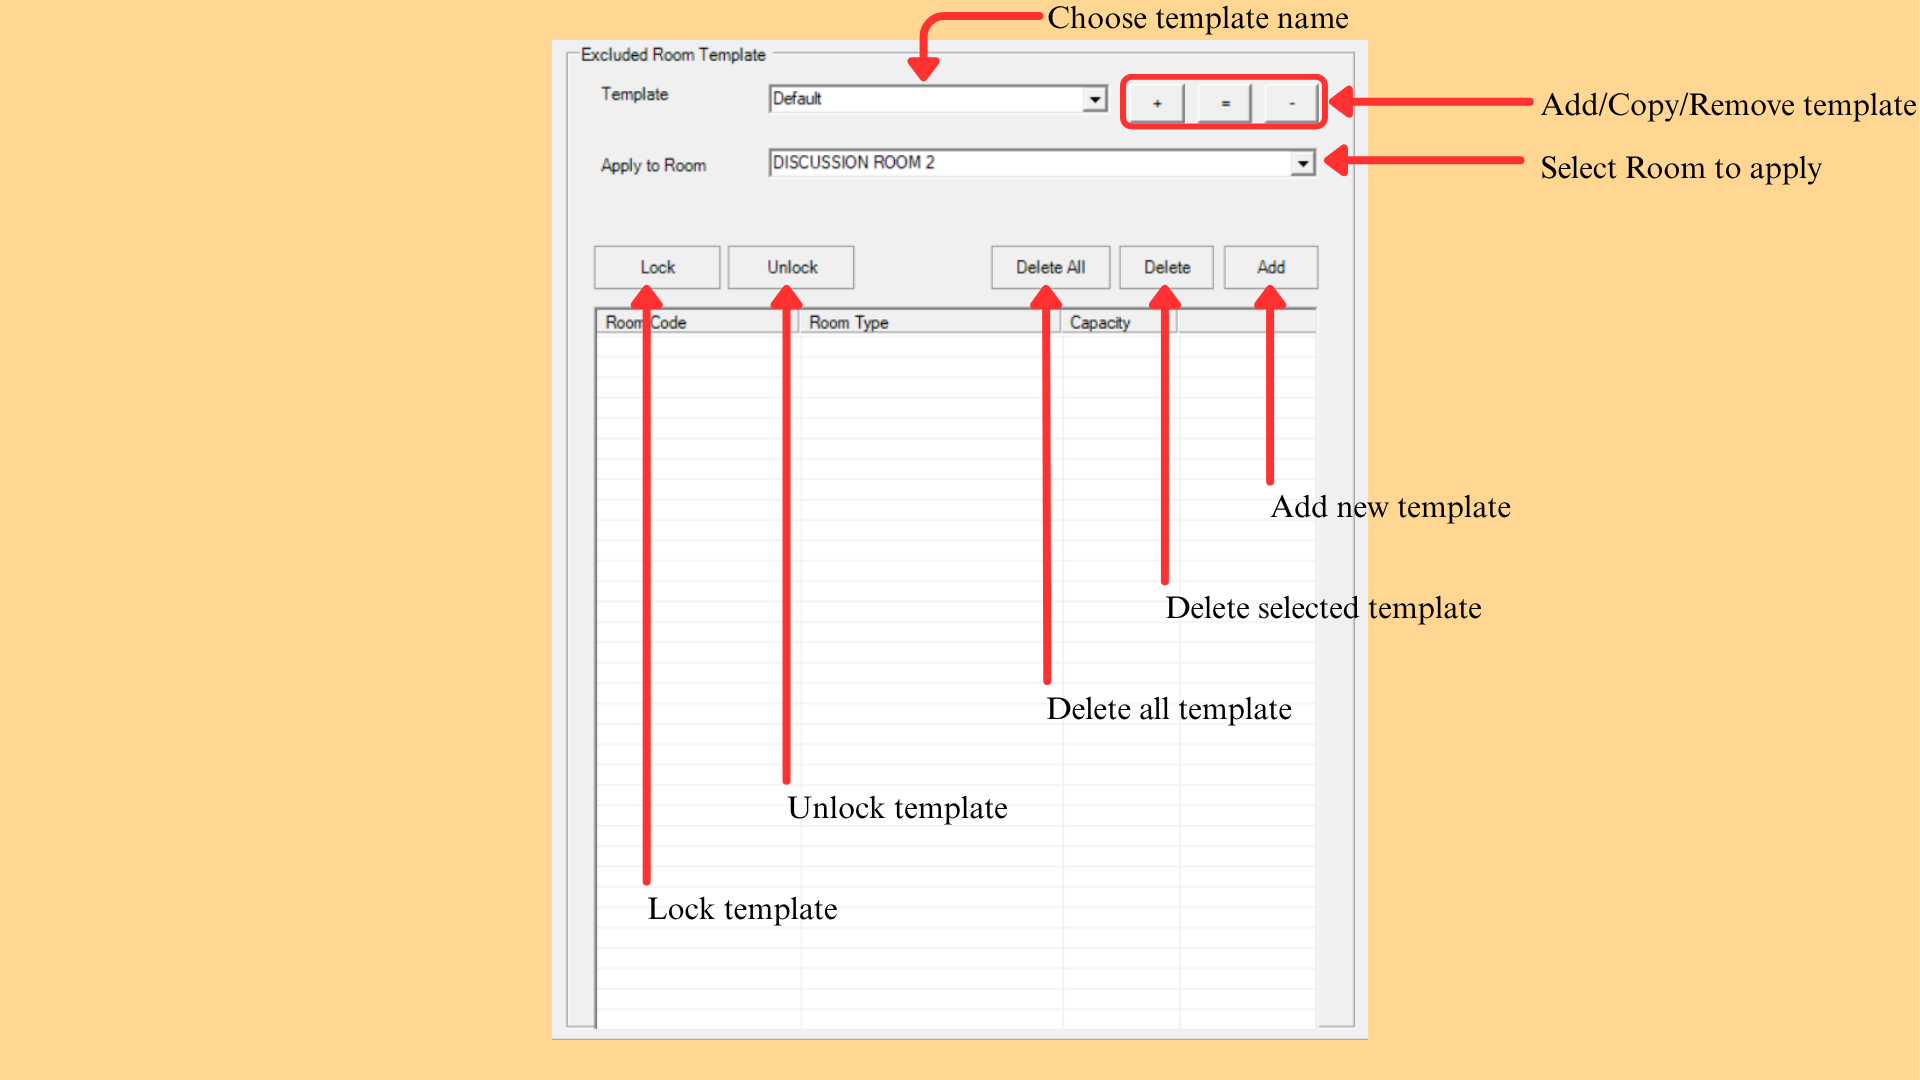
To exclude a room, there are 3 simple steps to do so.
Step 1: Choose the template name from the Template dropdown list.
Step 2: Select the room in Apply to Room.
Step 3: Click Add. The entry appears in the list with its Room Code, Room Type and Capacity.
The functions in this panel are as follows:
| Function | Description |
|---|---|
| Template | Chooses the template name to work on. Default: Default |
| + | Adds a new template. |
| = | Copies the selected template. |
| − | Removes the selected template. |
| Apply to Room | Selects the room to apply the exclusion to. |
| Lock | Locks the template so that it cannot be changed. |
| Unlock | Unlocks the template so that it can be changed again. |
| Delete All | Deletes every template. |
| Delete | Deletes the selected template. |
| Add | Adds a new template entry. |
Table 6.10: Excluded Room Template Functions