System Setup
This chapter covers the general setup that should be completed once, right after installation and before working with the database: configuring the E-Campus connection, and adding and switching between connection profiles.
4.1 System Setup Overview
Before moving on to Database Management, the system should be configured so that it matches how your institution wants to use TPlus Class. This chapter covers:
- Settings and Setup (Import Database): Connecting TPlus Class to TPlus E-Campus.
- Adding a New E-Campus Profile: Creating and switching between E-Campus connection profiles.
4.2 Settings and Setup (Import Database)
Before importing data from E-Campus, ensure that the E-Campus Settings have been configured correctly. These settings allow the TPlus Class system to establish a connection with the E-Campus portal for data synchronization.
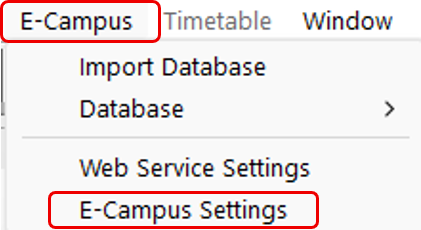
E-Campus Settings window will pop-up. The window will consist of two sections.
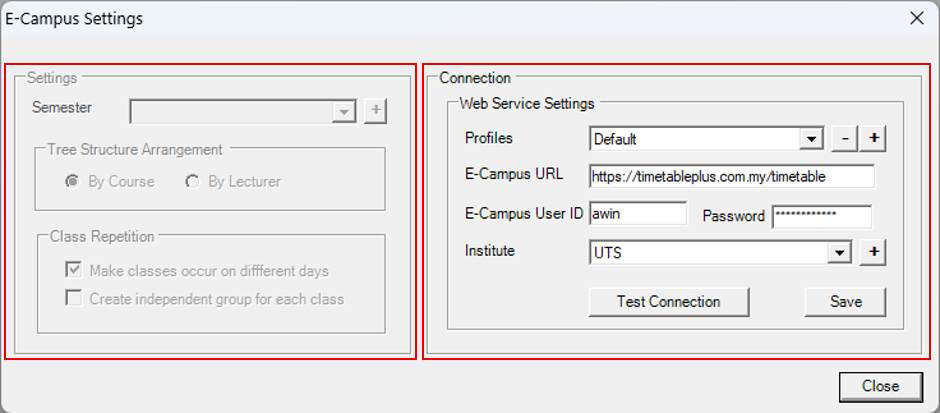
- Settings
-
Connection
Before importing data, you must first connect TPlus Class to your E-Campus Student Information System (SIS). Once connected, complete the required fields using the information provided by your E-Campus administrator. The descriptions of each field and the required values are provided below.
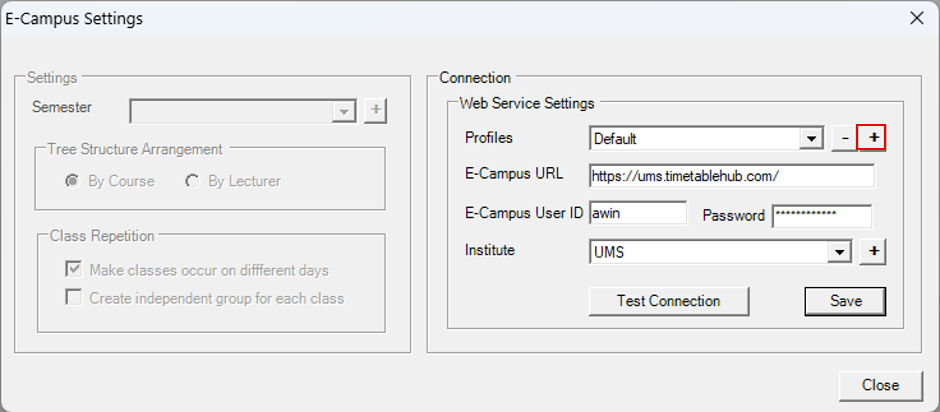
- Profiles: Acts as a toggle for switching between saved E-Campus connections. Default is set up here; if your institution needs to connect to a different E-Campus URL (for example, a separate campus or environment), create a new profile for it instead of overwriting this connection. See 4.3 Adding a New E-Campus Profile below.
-
E-Campus URL:
This field is left blank by default and must be filled in with the web address of your institution's E-Campus portal.
UTS example : https://uts.timetablehub.com/
- E-Campus User ID: Enter the User ID and Password that you use to log in to the TPlus E-Campus system.
- Institute: Select your institution from the drop-down list. If your institution is not available, click the Add (+) button to create a new institution before proceeding.
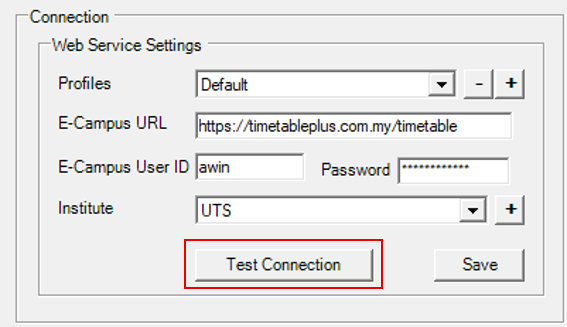
After finished fill in the slots, click Test Connection button.
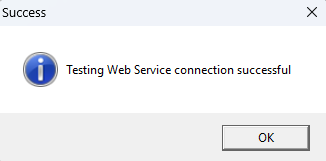
A confirmation message will appear, indicating that the operation was completed successfully.
Once all the required information has been entered and the connection has been successfully verified, click Save to store the configuration settings.
After the settings have been saved, TPlus E-Campus will establish the connection and begin synchronizing data, allowing all available information to be fetched seamlessly for use within the system.
4.3 Adding a New E-Campus Profile
If your institution needs to connect to more than one E-Campus environment — for example, a different URL for a separate campus or system — create a new profile instead of changing the Default connection set up in 4.2 Settings and Setup (Import Database). Once created, a profile can be selected from the Profiles drop-down at any time, letting you toggle between E-Campus connections without re-entering their details.
Step 1: In the E-Campus Settings window, click the + button next to the Profiles drop-down.
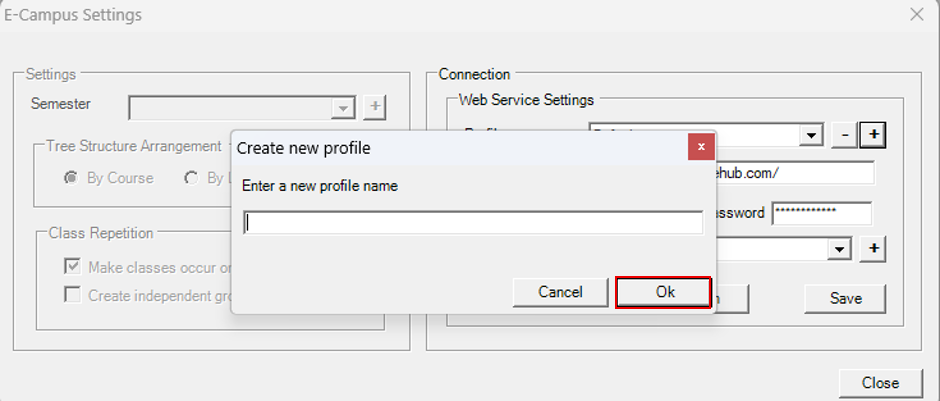
Step 2: The Create new profile dialog appears. Enter a name for the new profile and click Ok.
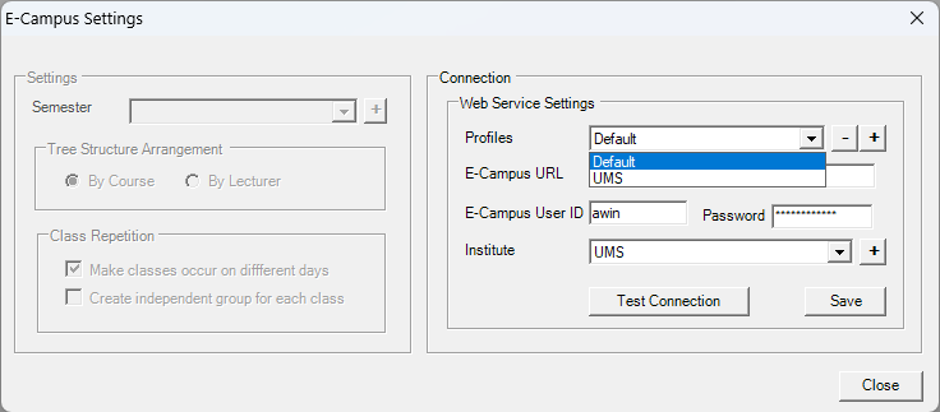
Step 3: The new profile now appears in the Profiles drop-down alongside Default. Select it to toggle to that profile's connection.
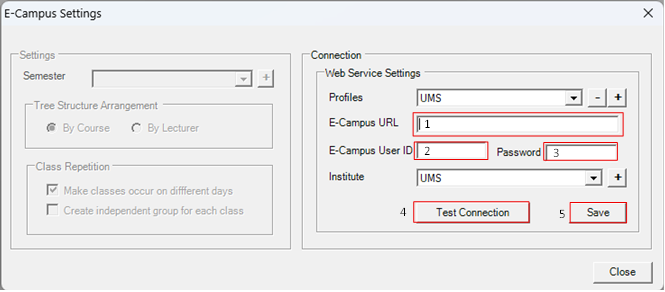
Step 4: With the new profile selected, fill in its connection details — this profile keeps its own E-Campus URL, separate from Default — then click Test Connection and Save.
- E-Campus URL: enter the URL for this profile's E-Campus environment.
- E-Campus User ID and Password: enter the login credentials for this environment.
- Test Connection: verify the details before saving.
- Save: store the profile so it can be selected again later.
Once saved, switching between profiles from the Profiles drop-down instantly toggles TPlus Class between each saved E-Campus connection.