Post-Generate Report
Verify the generated timetable using the built-in analysis reports before publishing it.
11.1 Overview
This chapter covers checking the generated timetable before it is published. After the timetable has been generated and the remaining sections placed by hand in the previous chapter, you can proceed with the following steps:
- Workload Lecturer: Check that no lecturer is overloaded and no teaching hours are left unassigned
- Student Course List: Check that no student has two classes at the same time
- Course-Subgroup: Check the number of students in each subgroup against the room they were given
- Batch Clashing List: Check that no batch has two classes at the same time
- Constraint Violation: Check that no room or lecturer rule has ended up broken
11.2 Workload Lecturer
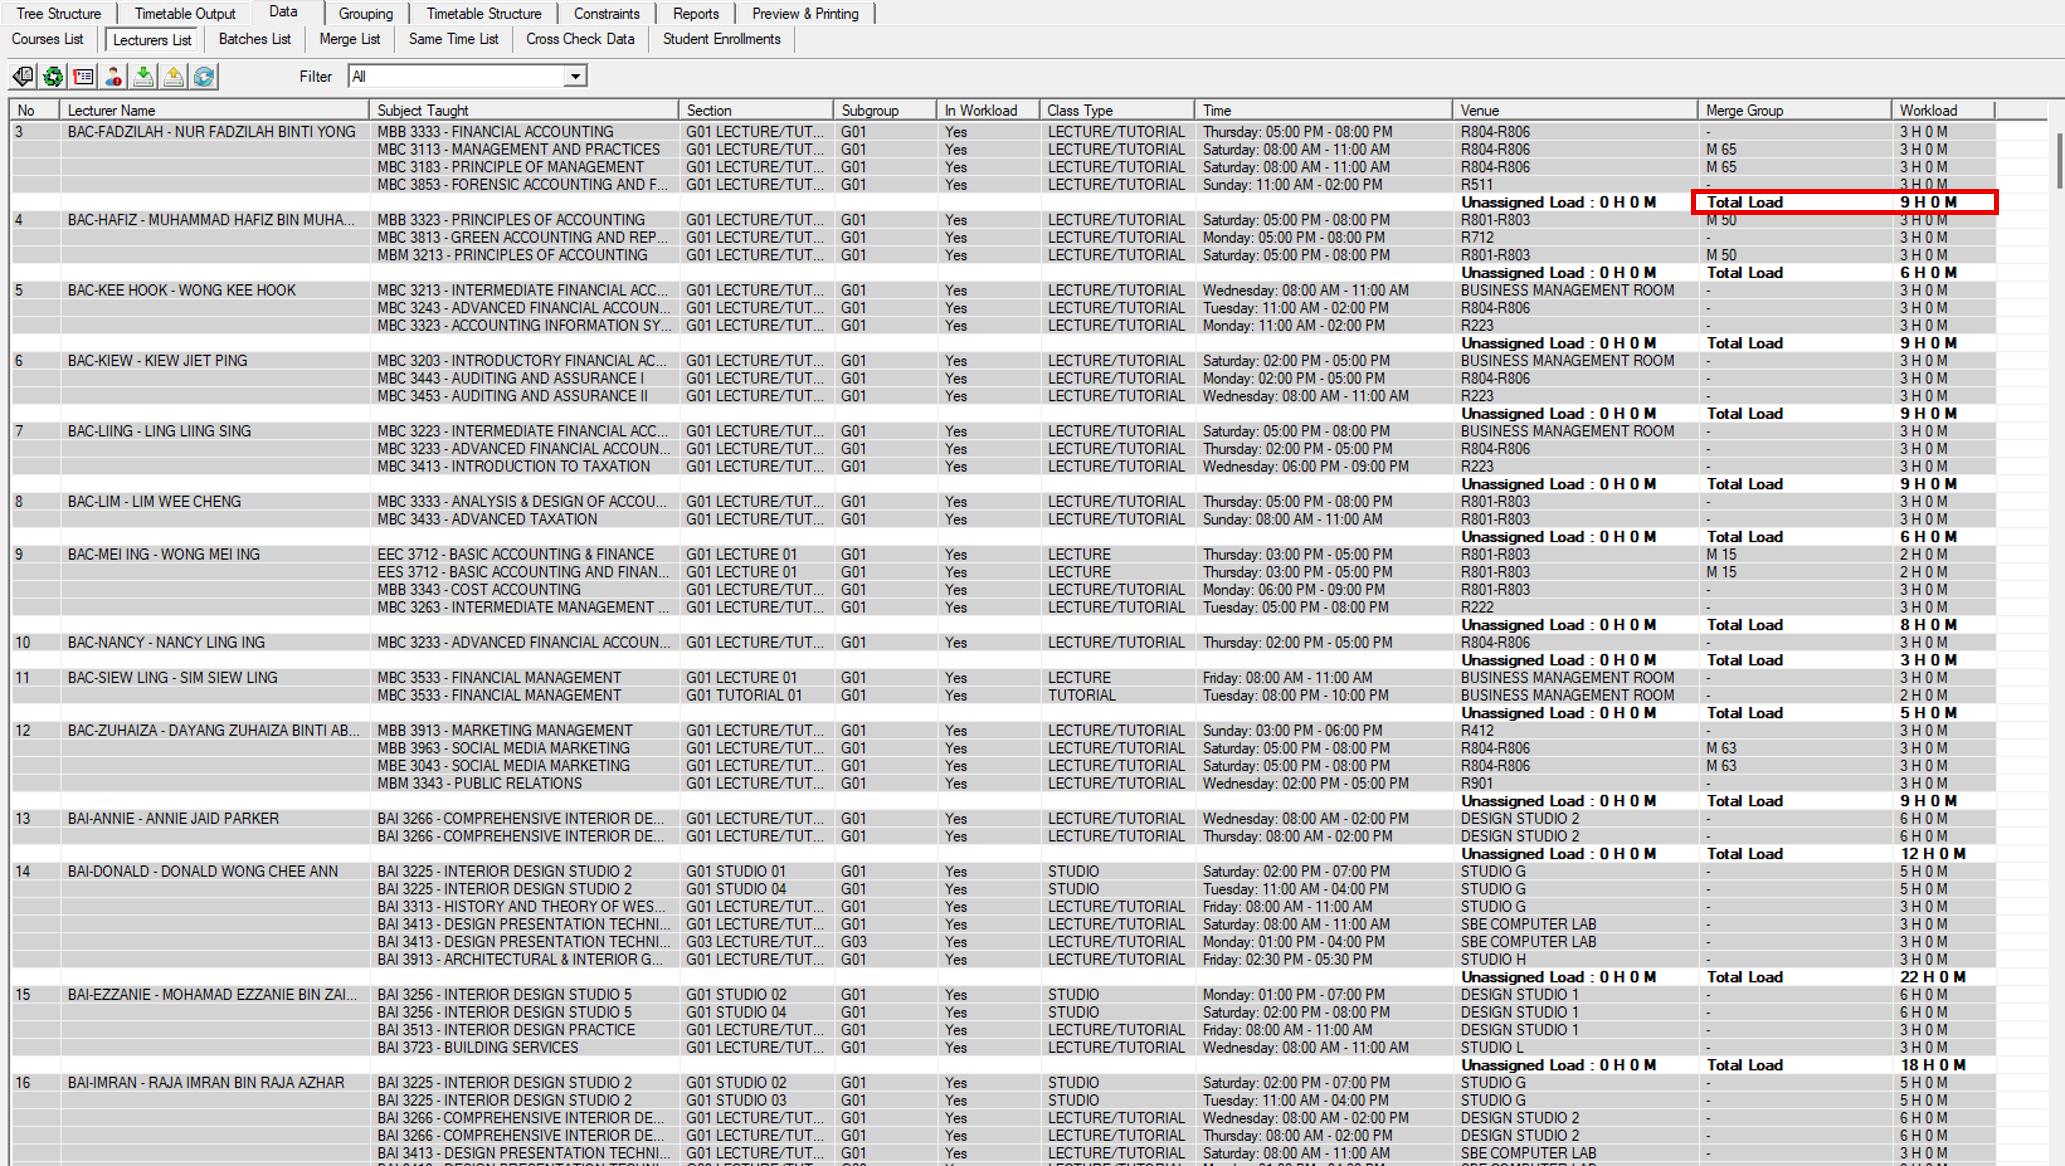
Open the Data tab and select the Lecturers List sub-tab. It shows what every lecturer teaches: the Subject Taught, Section, Subgroup, Class Type, Time, Venue, Merge Group and the Workload hours of each class.
Under each lecturer are two totals. Total Load is the sum of their teaching hours, and Unassigned Load is the part not yet scheduled. In the example, BAC-FADZILAH has a Total Load of 9 H 0 M and an Unassigned Load of 0 H 0 M, which means every class has been placed. Classes sharing a Merge Group run at the same time and are counted once, so the total is not inflated.
Use this report to check that no lecturer is overloaded and that nothing is left unassigned.
11.3 Student Course List
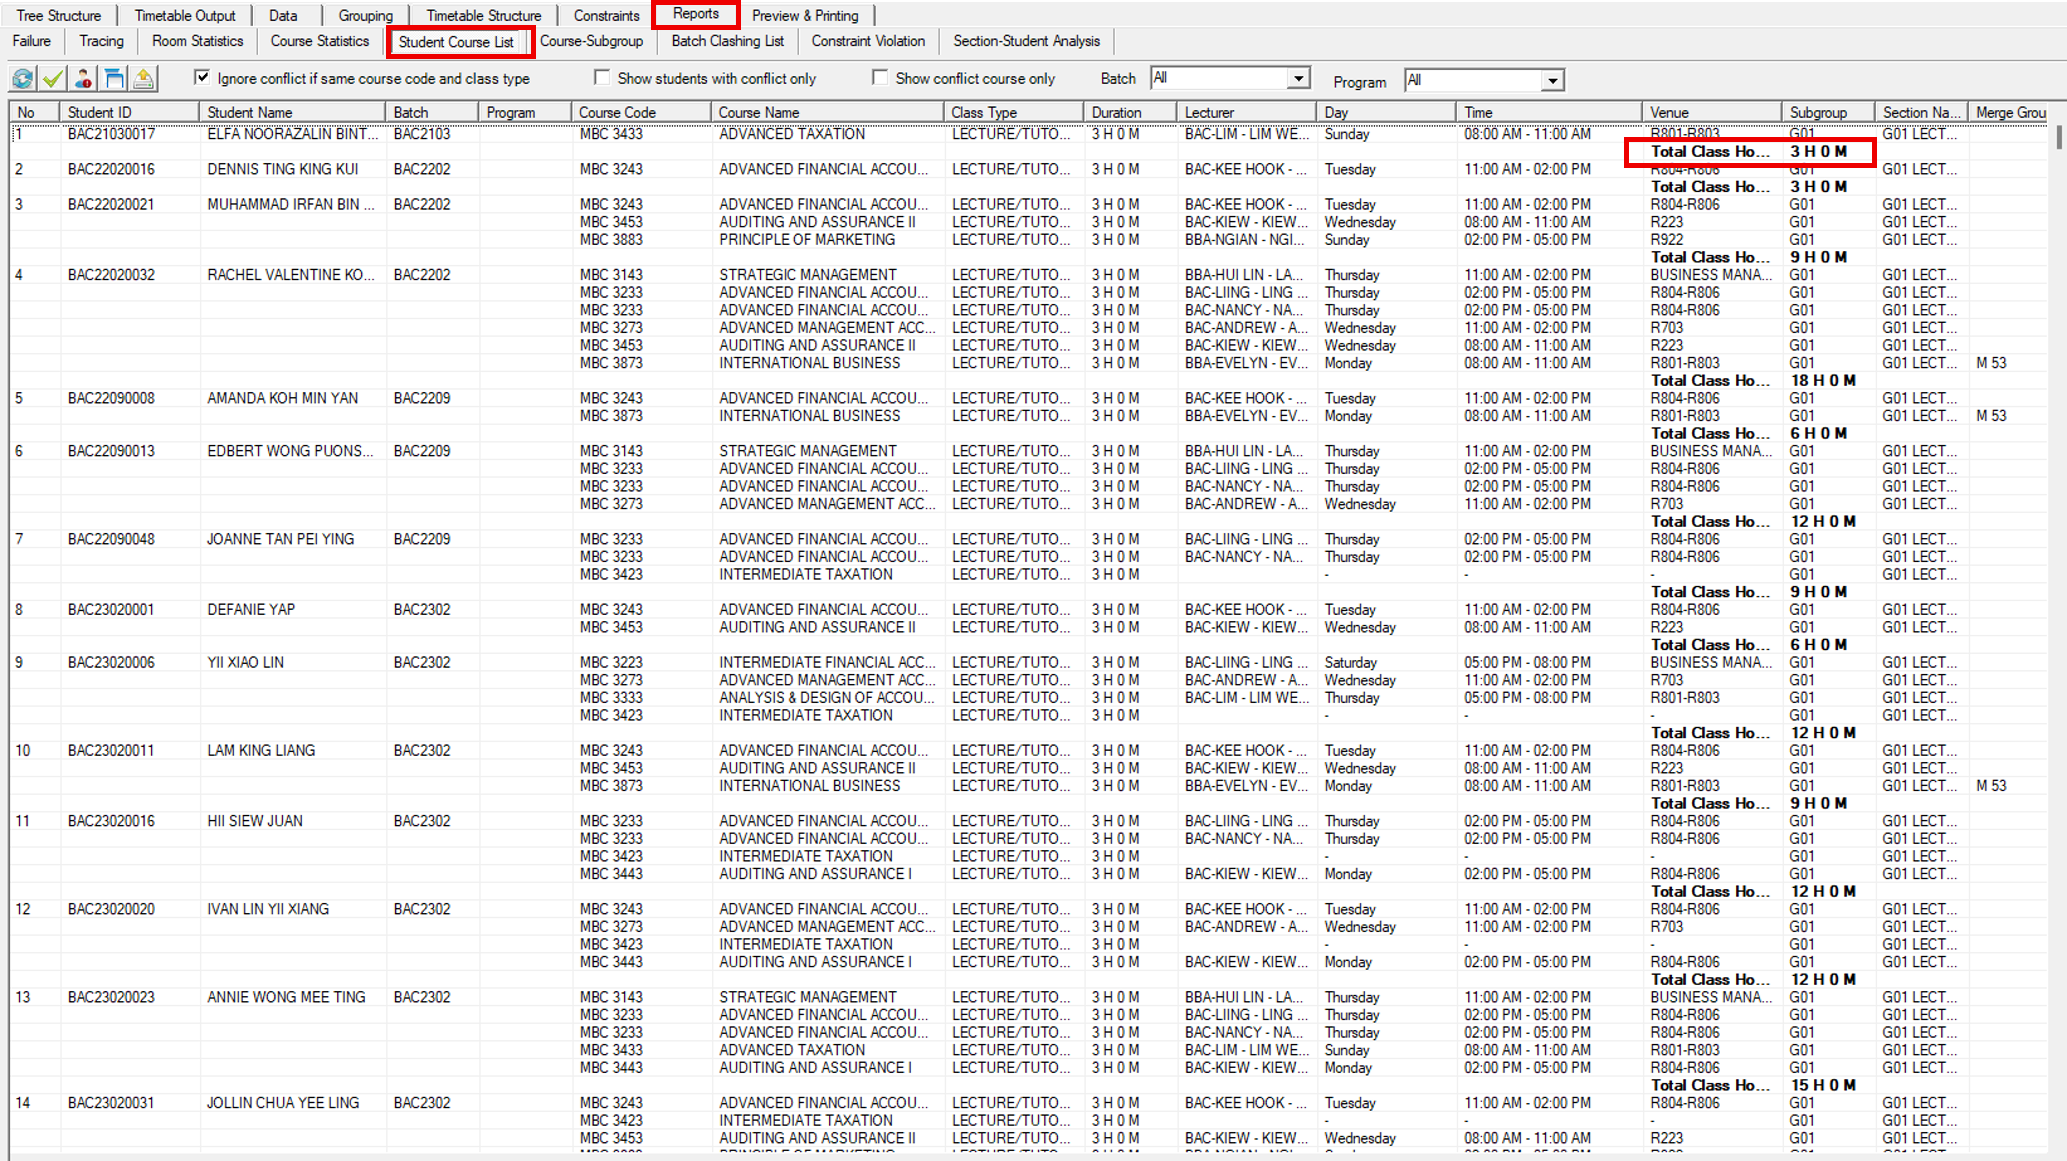
Open the Reports tab and select the Student Course List sub-tab. It lists every student with the courses they are taking, showing the Course Code, Course Name, Class Type, Duration, Lecturer, Day, Time, Venue and Subgroup of each one. Total Class Hours under each student is the sum of their scheduled hours.
This is the report that proves the timetable works from the student's side. A student with two classes at the same time has a clash, and the tick boxes at the top narrow the list down to exactly those cases:
- Ignore conflict if same course code and class type: does not treat repeated sessions of the same course as a clash.
- Show students with conflict only: hides every student whose timetable is clash free.
- Show conflict course only: shows just the courses that clash, rather than the student's full list.
The Batch and Program drop-downs narrow the list further. A row with no Day or Time is a course the student is enrolled in that has not been placed yet.
11.4 Course-Subgroup
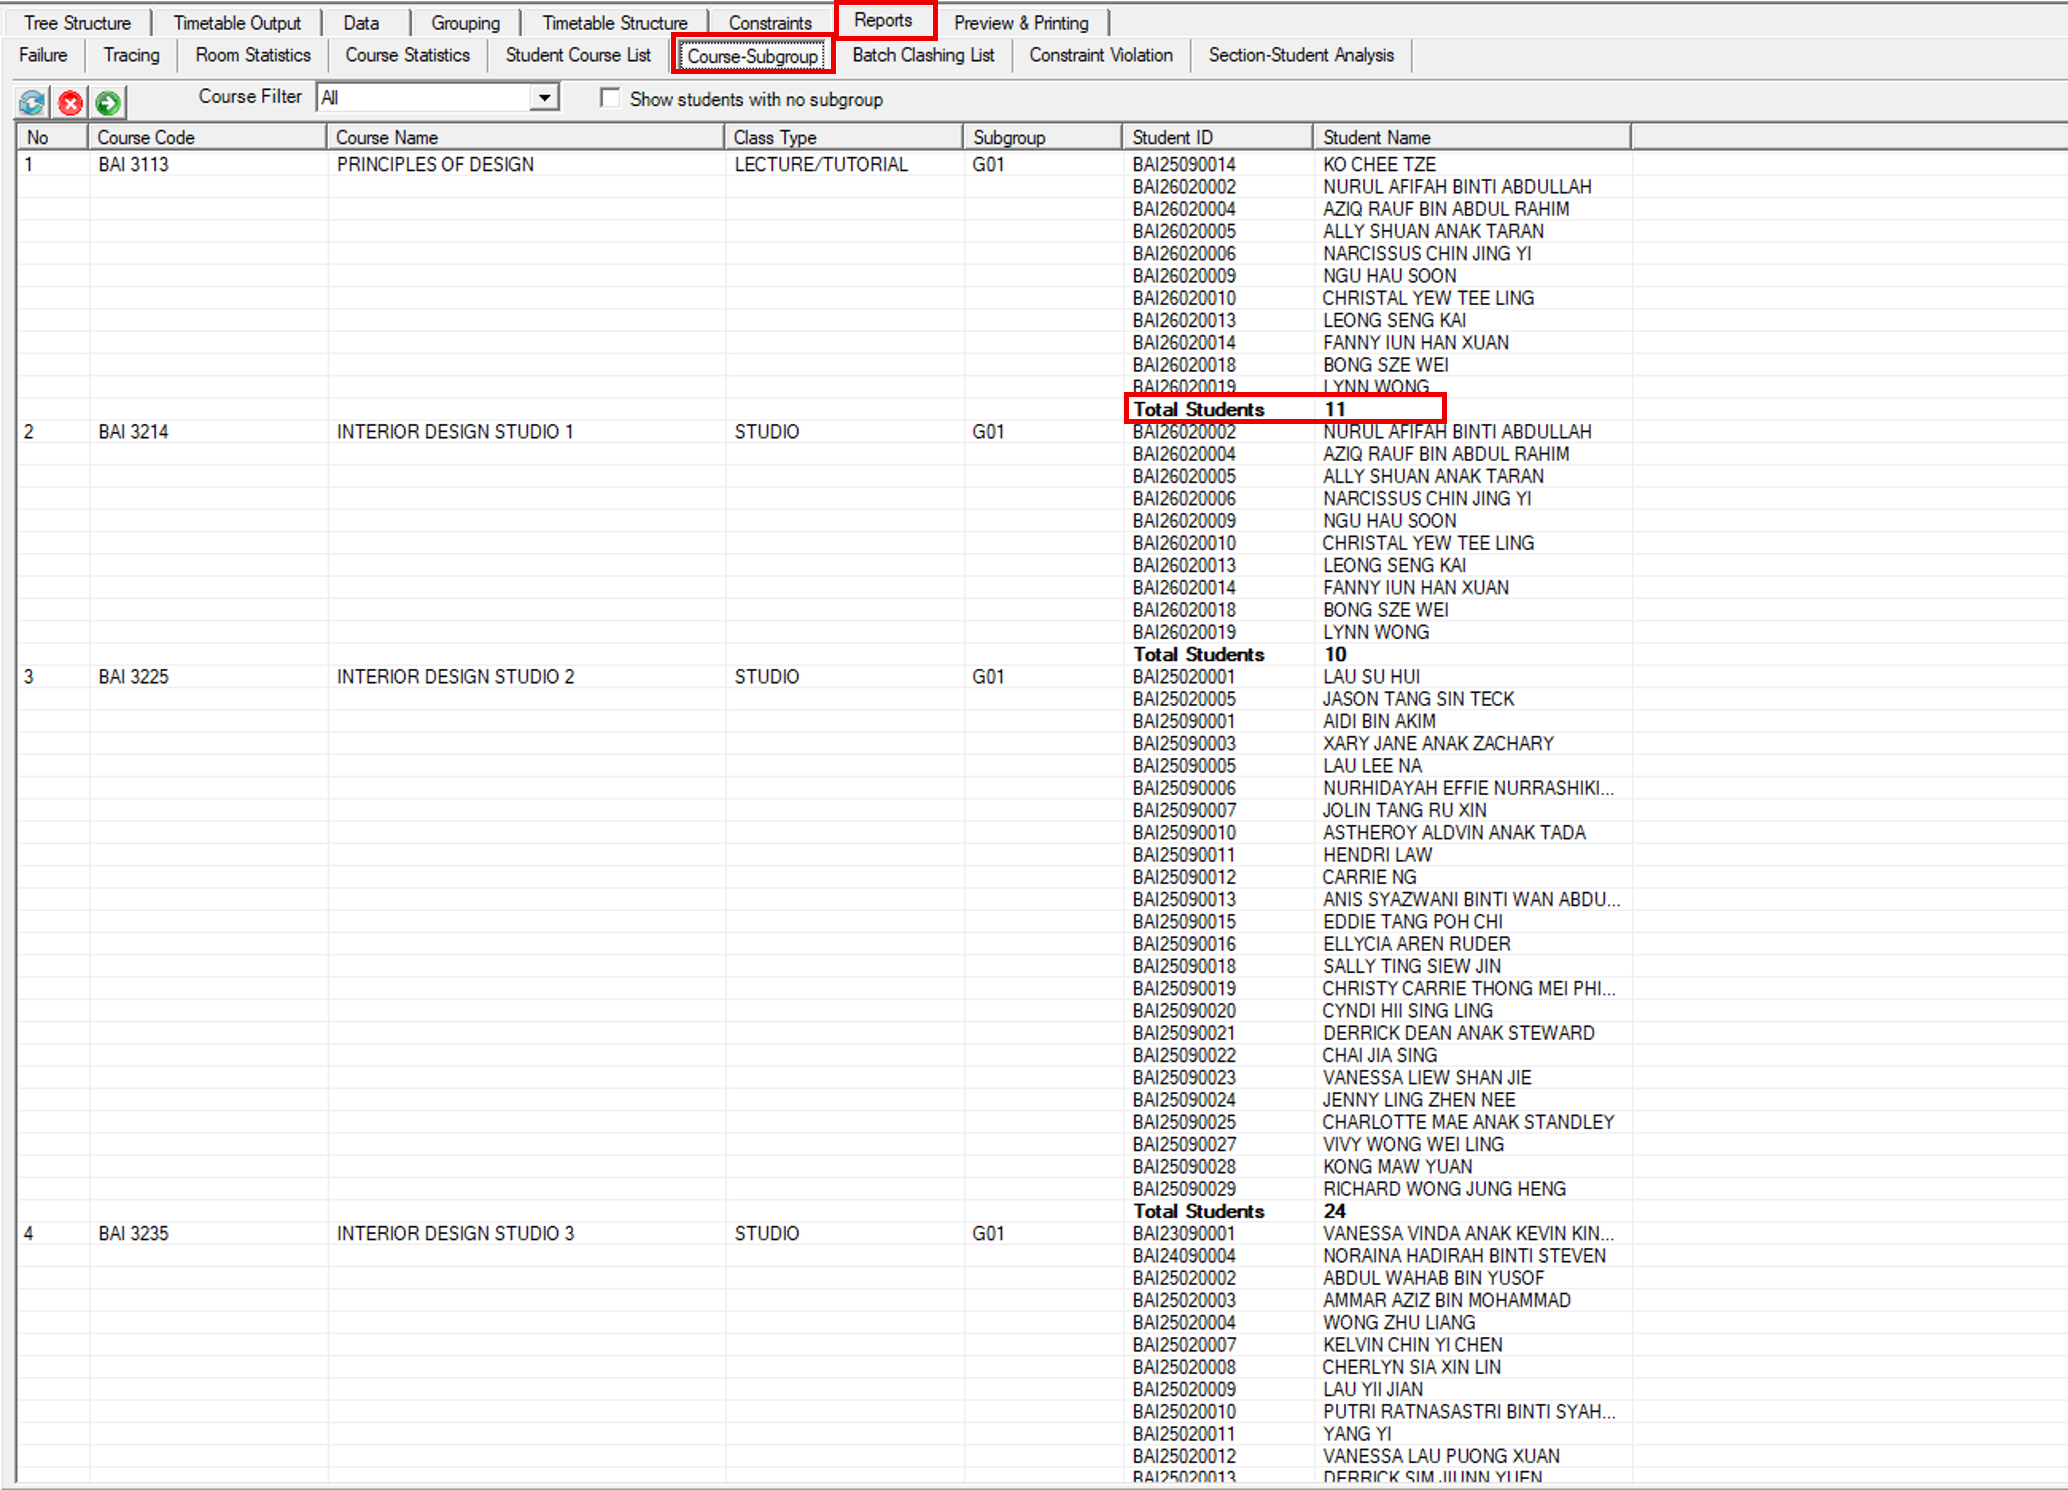
Open the Reports tab and select the Course-Subgroup sub-tab. It works the other way round from the Student Course List: instead of listing the courses a student takes, it lists the students in each subgroup, grouped by Course Code, Course Name, Class Type and Subgroup.
Total Students at the end of each subgroup is the head count for that class. Check it against the room the subgroup was given: if the count is larger than the room, the class will not fit. Tick Show students with no subgroup to find students who are enrolled in a course but have not been placed in any subgroup, and use Course Filter to look at one course at a time.
11.5 Batch Clashing List
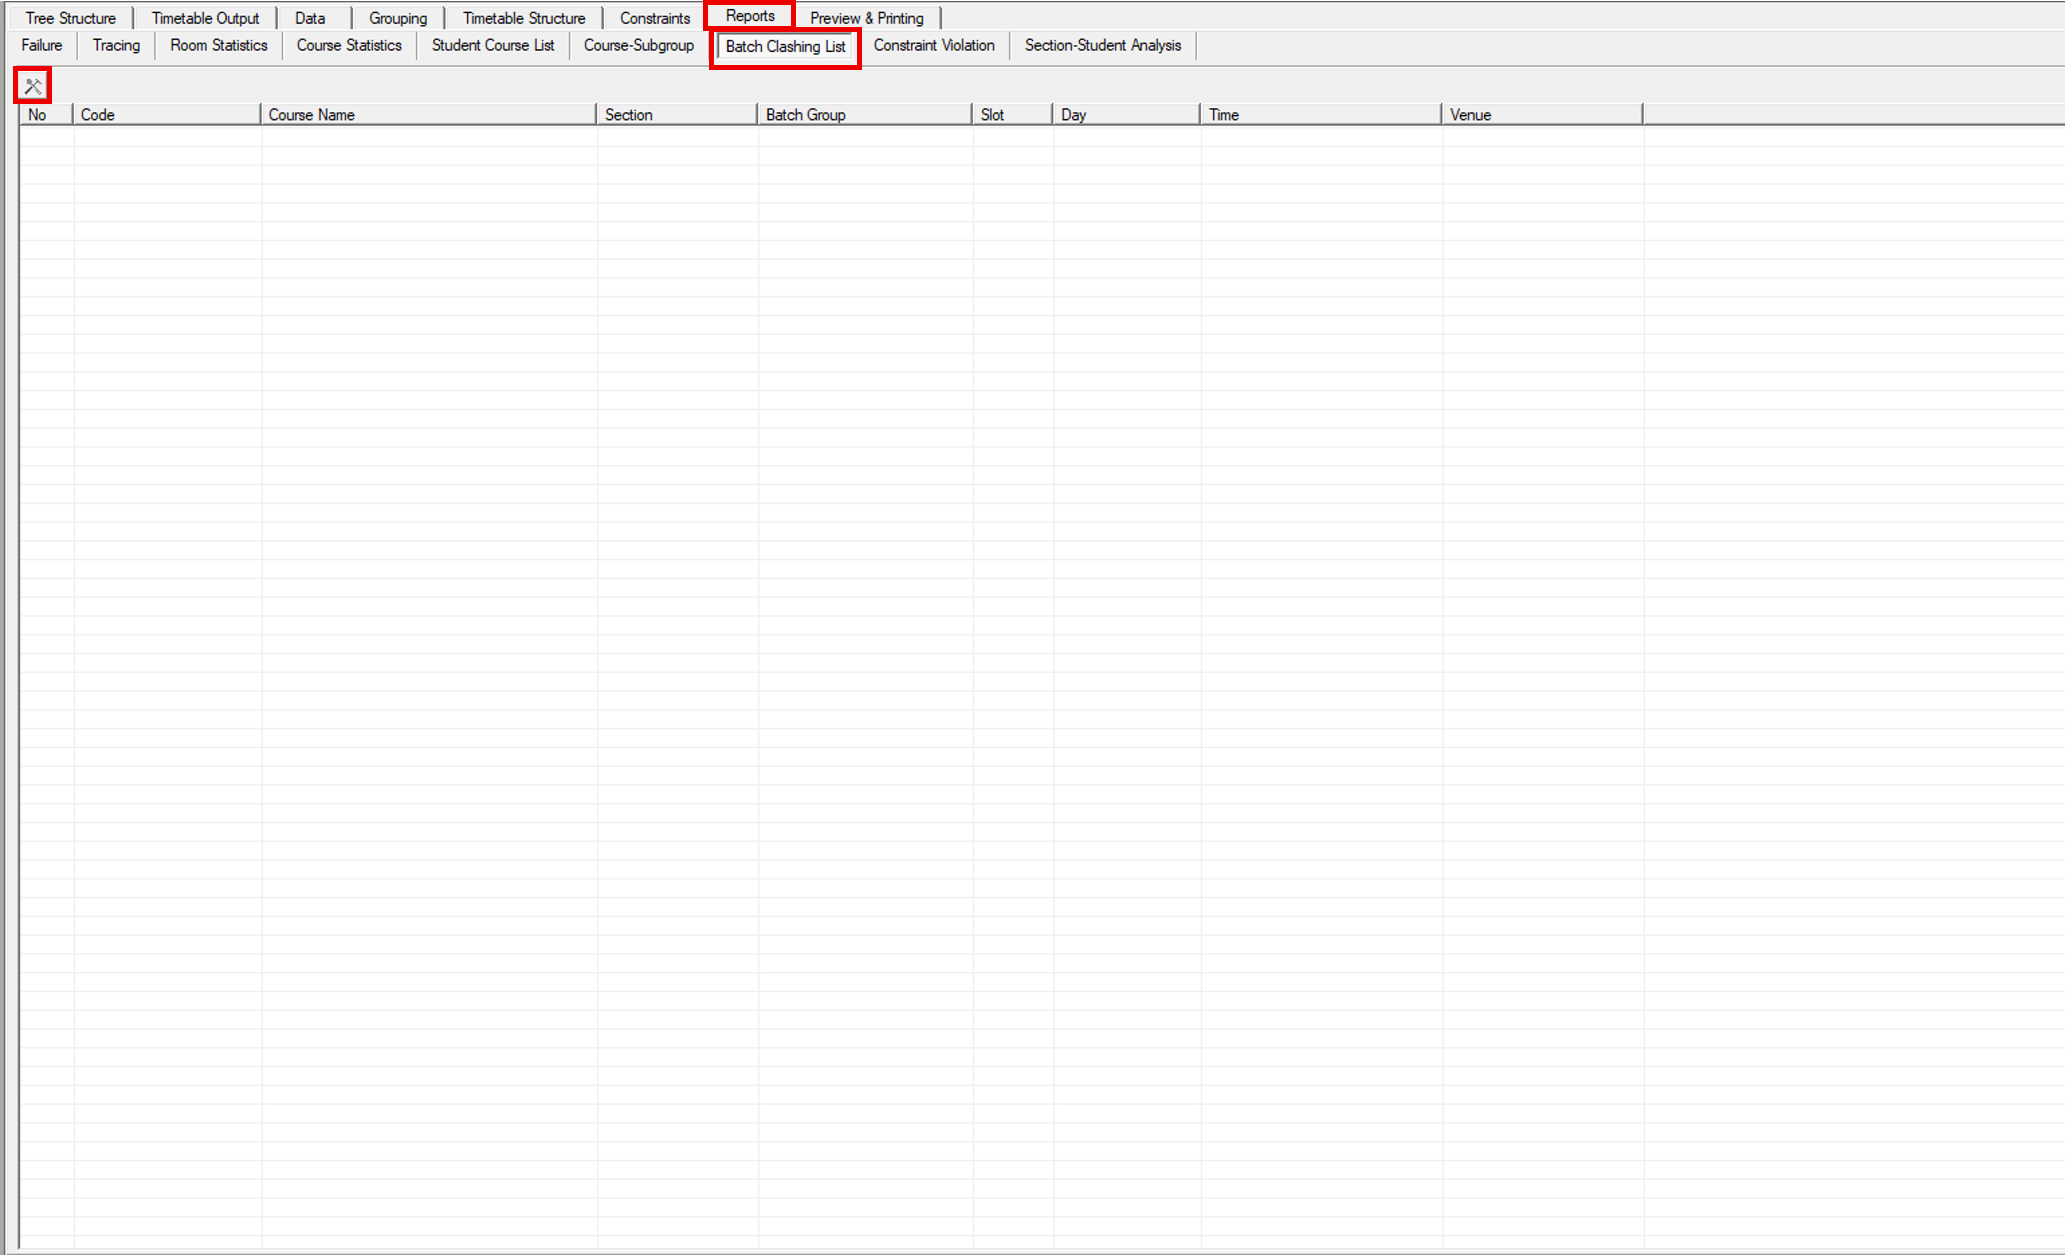
Open the Reports tab and select the Batch Clashing List sub-tab. This report finds batches that have been given two classes at the same time. The list starts empty; click the detect icon on the toolbar to run the check.
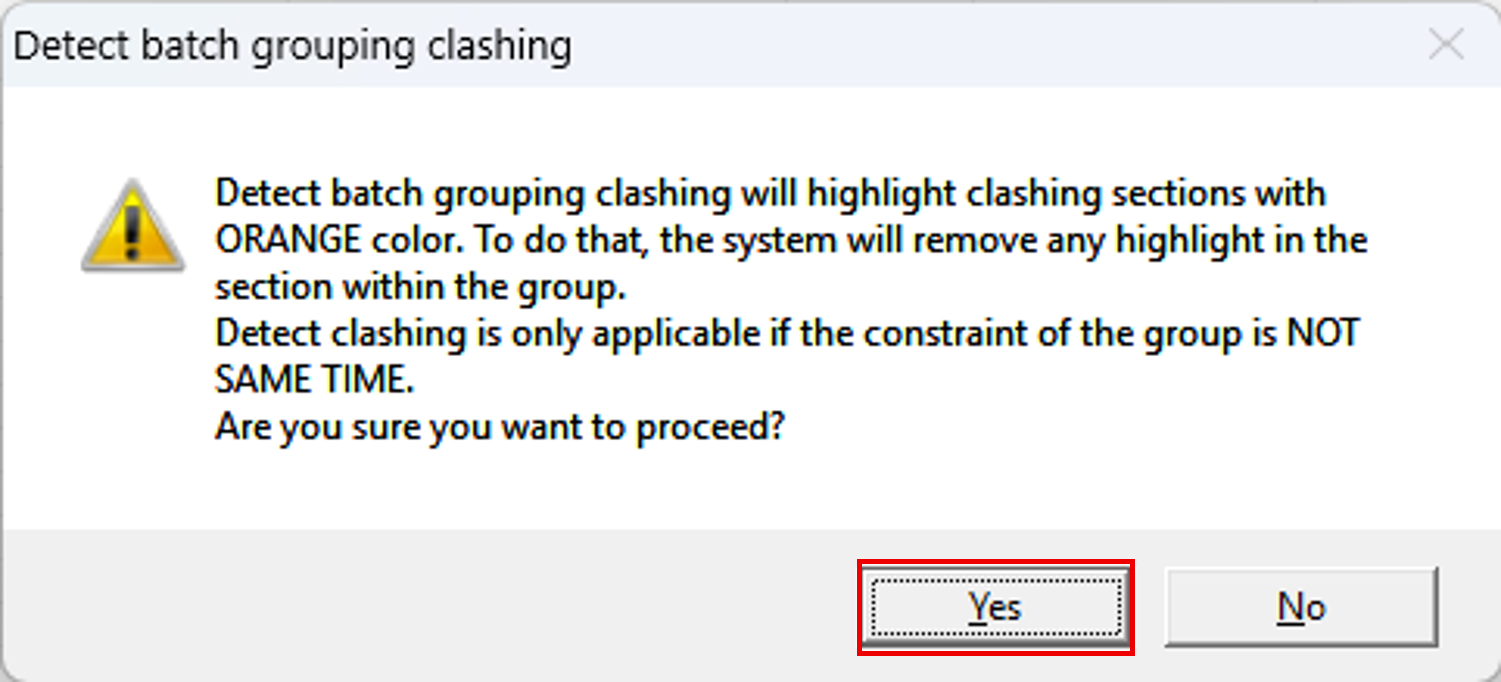
A confirmation window appears. It explains that the clashing sections will be highlighted in orange, that any existing highlight inside the group is removed first, and that the check only applies where the group constraint is not Same Time. Click Yes to run it.
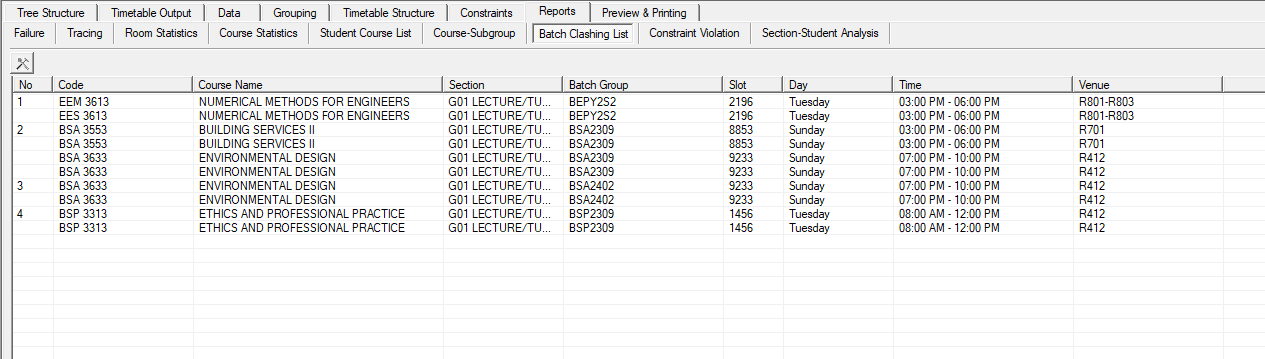
The clashes are then listed, two rows per clash, showing the Code, Course Name, Section, Batch Group, Slot, Day, Time and Venue of each. The two rows share the same slot and time, which is what makes them a clash. Move one of the two sections to another slot, then run the check again until the list is empty.
11.6 Constraint Violation
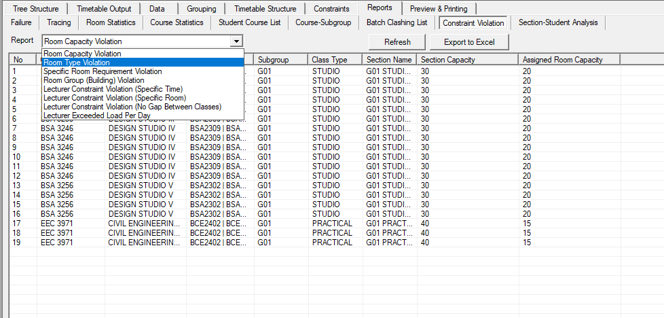
Open the Reports tab and select the Constraint Violation sub-tab. The generator places sections without breaking the hard rules, but some settings can still end up broken, for example when a section is moved by hand. This report lists them. Pick what to check from the Report drop-down.
| Report | What it lists |
|---|---|
| Room Capacity Violation | Sections placed in a room too small for the class. |
| Room Type Violation | Sections placed in a room of the wrong type. |
| Specific Room Requirement Violation | Sections not placed in the specific room they were assigned to. |
| Room Group (Building) Violation | Sections placed outside their required room group or building. |
| Lecturer Constraint Violation (Specific Time) | Classes placed outside the lecturer's available times. |
| Lecturer Constraint Violation (Specific Room) | Classes placed outside the rooms set for the lecturer. |
| Lecturer Constraint Violation (No Gap Between Classes) | Lecturers left with a gap where their classes were set to run back to back. |
| Lecturer Exceeded Load Per Day | Lecturers teaching more hours in a day than their limit allows. |
Table 11.1: Constraint Violation Reports
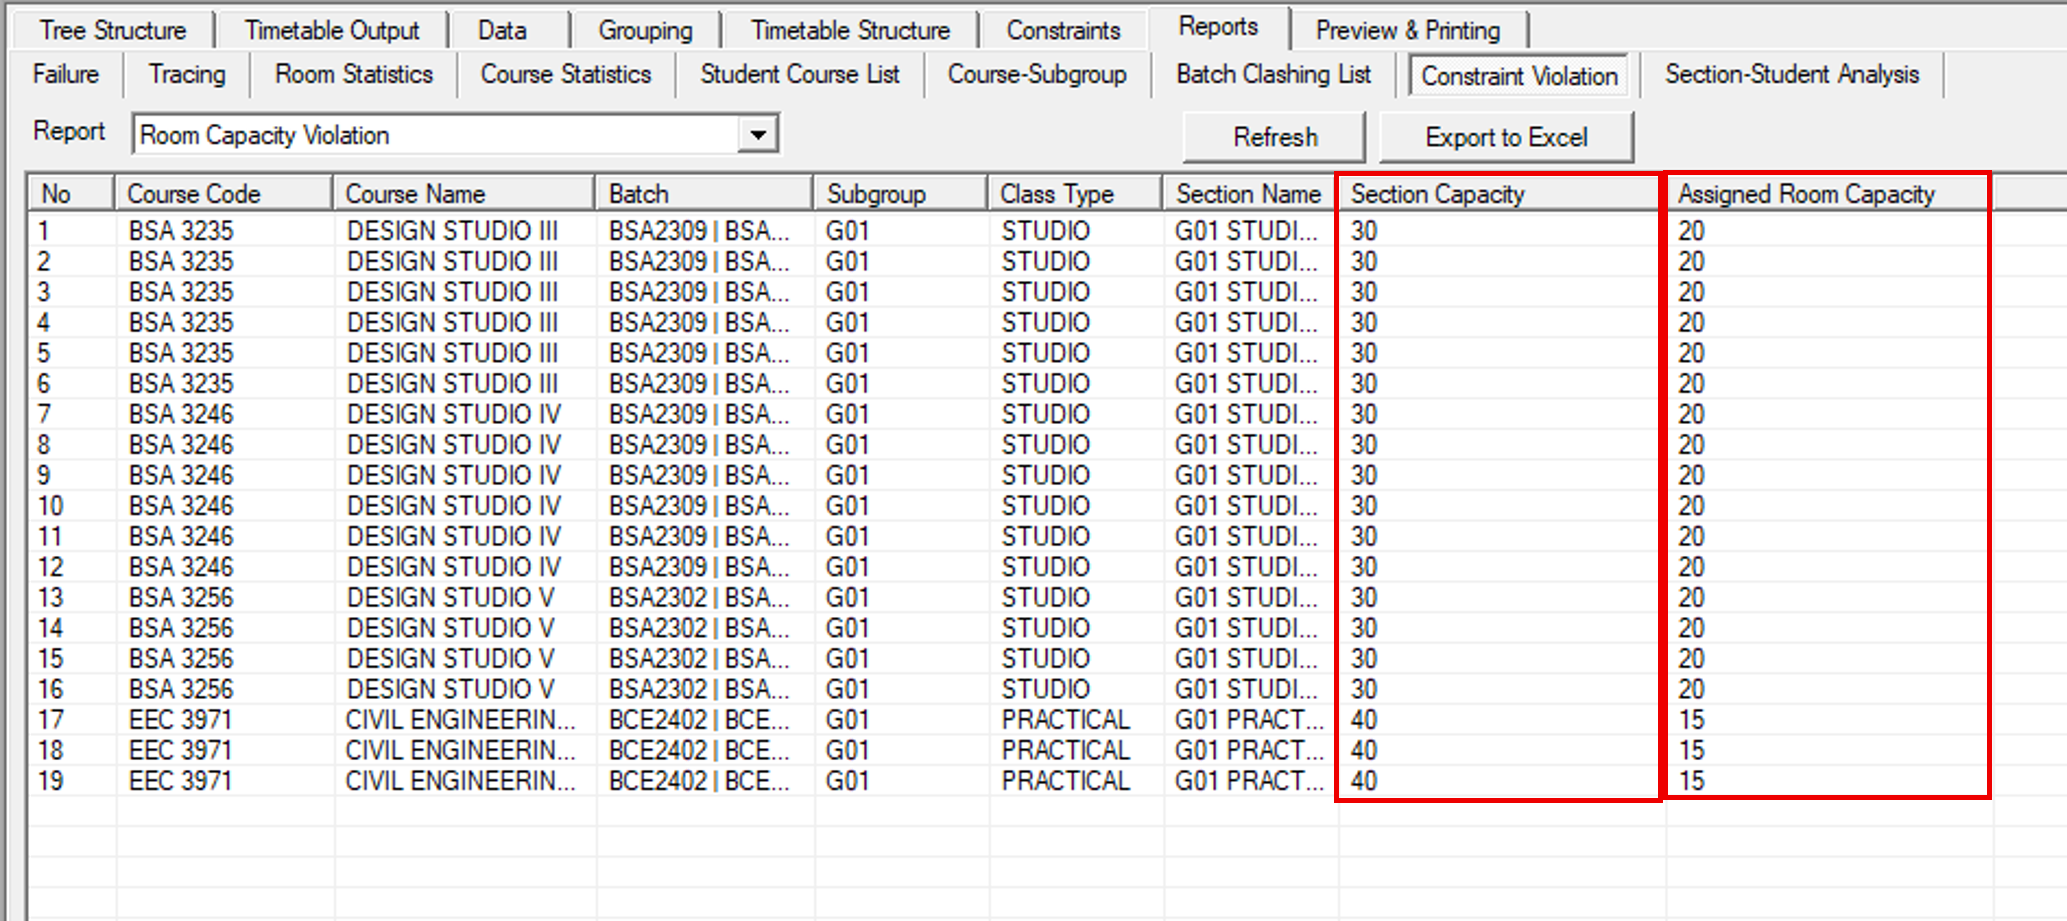
Click Refresh to run the selected report. In the example, Room Capacity Violation lists sections whose Section Capacity is larger than the Assigned Room Capacity: a section of 30 students placed in a room that holds 20, and a section of 40 placed in a room that holds 15. Move those sections to a bigger room, or correct the capacity, and run the report again.
Export to Excel saves the current report as a spreadsheet if you need to share it or work through it outside the system.