Interface Overview
When you first log in, the main interface opens with several key areas. Understanding each component will help you navigate TPlus Class efficiently and work through the timetabling process with confidence.
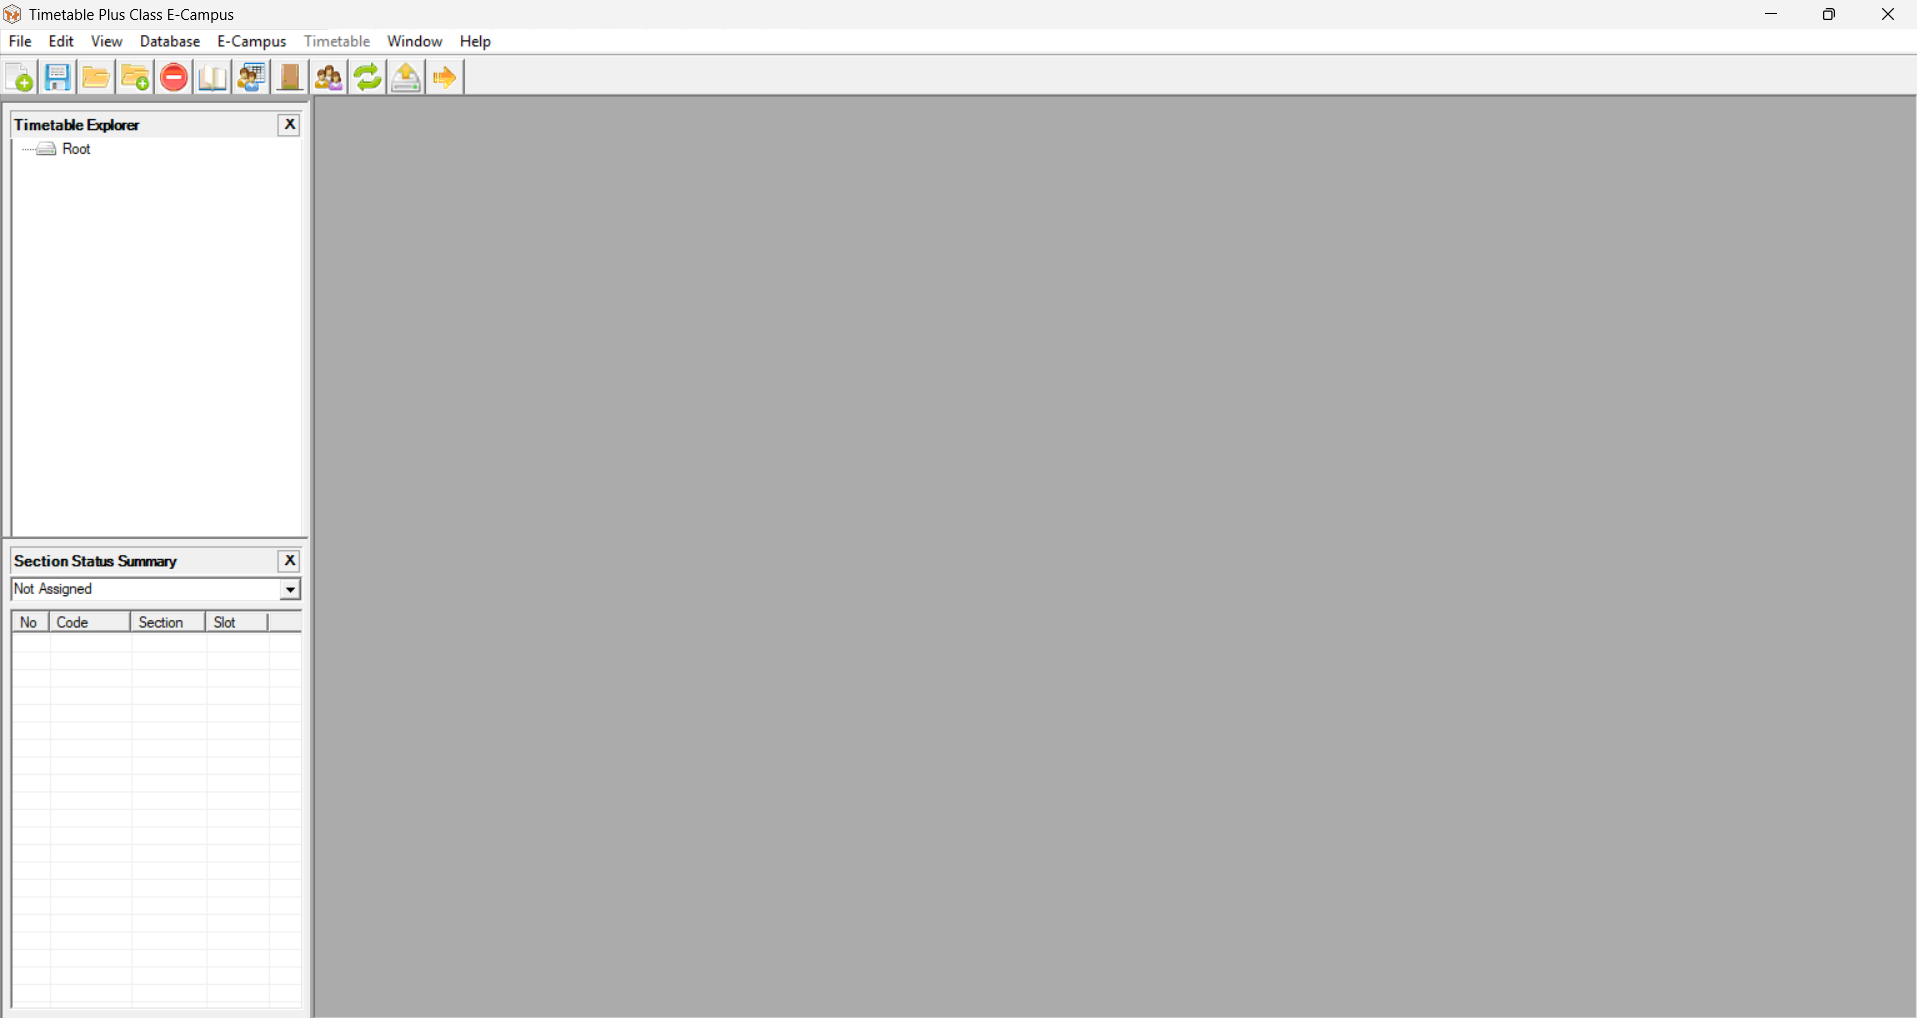
3.1 Menu Bar
The menu bar is the primary way to access all system functions. Each menu groups related actions, as shown in the figures below.

3.1.1 File Menu
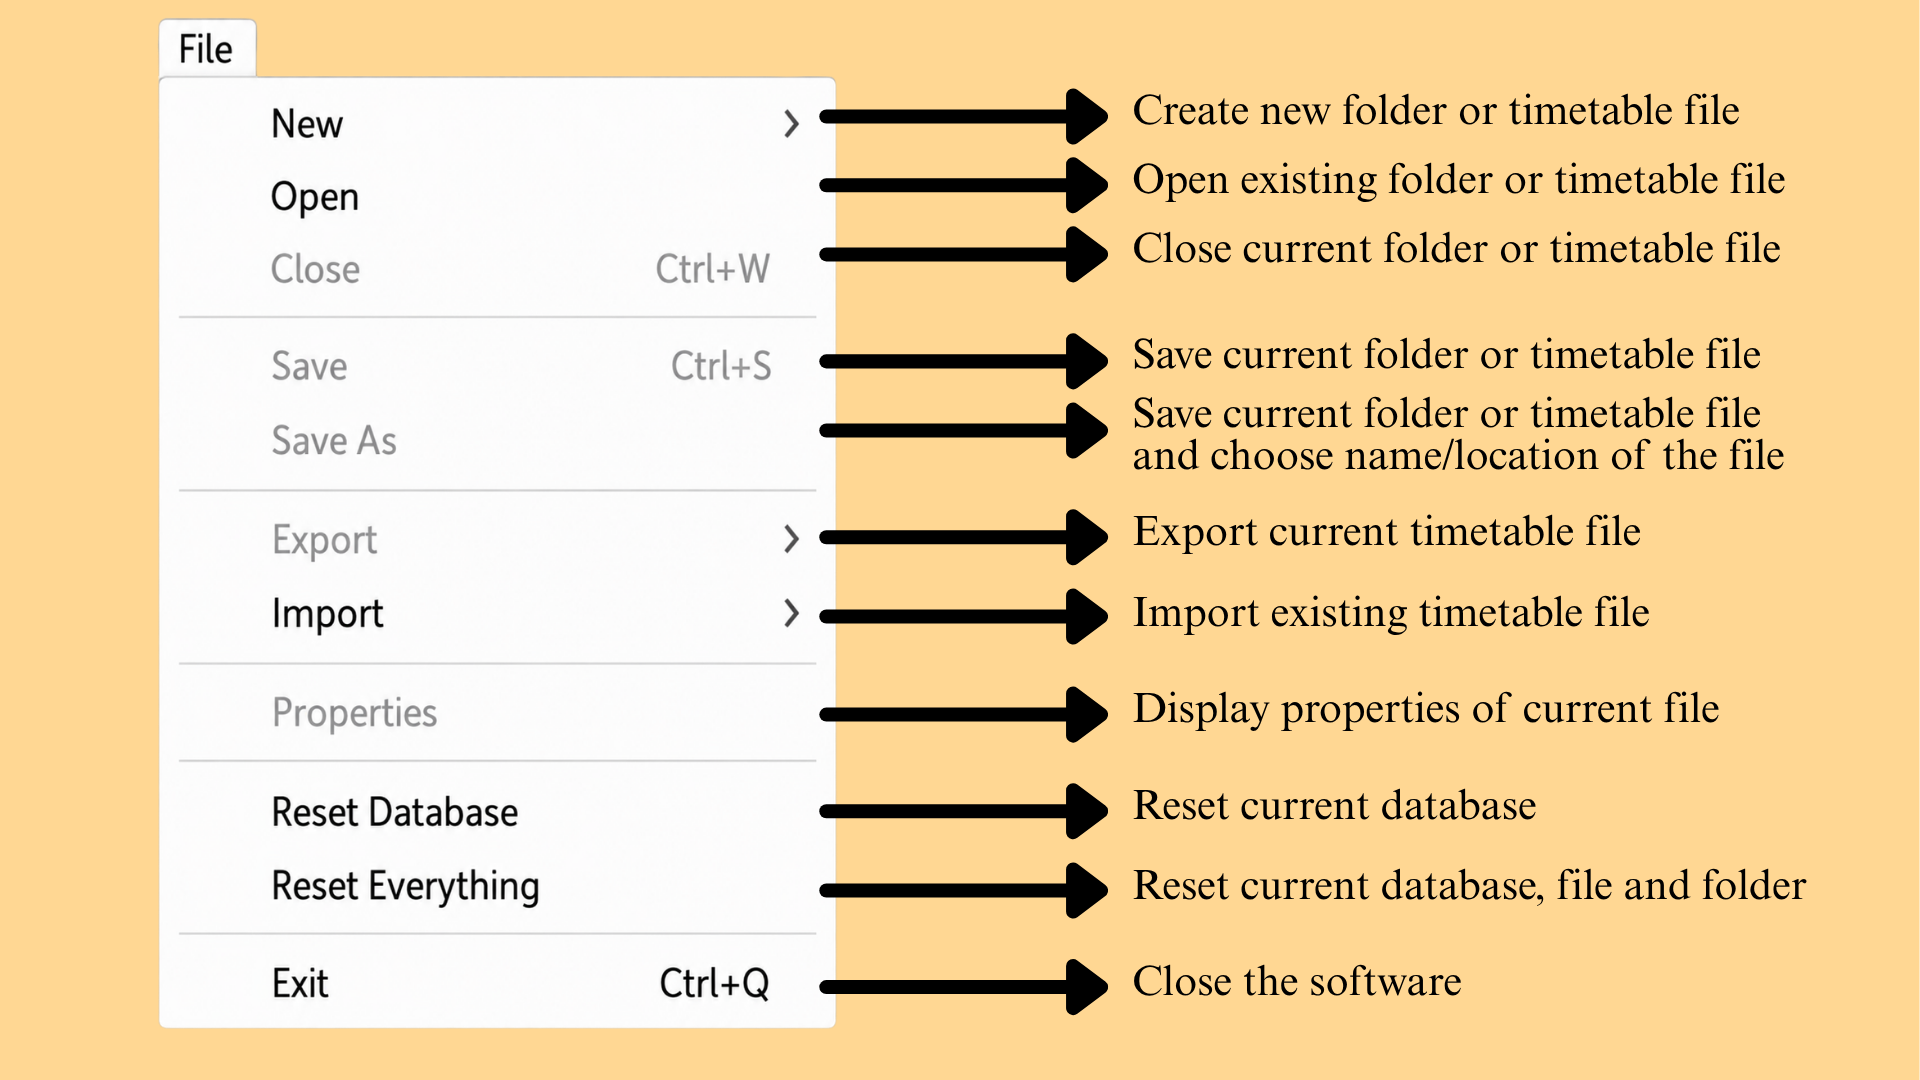
| Menu Item | Description |
|---|---|
| New | Create new folder or timetable file. |
| Open | Open existing folder or timetable file. |
| Close (Ctrl+W) | Close current folder or timetable file. |
| Save (Ctrl+S) | Save current folder or timetable file. |
| Save As | Save current folder or timetable file and choose the name and location of the file. |
| Export | Export current timetable file. |
| Import | Import existing timetable file. |
| Properties | Display properties of current file. |
| Reset Database | Reset current database. |
| Reset Everything | Reset current database, file and folder. |
| Exit (Ctrl+Q) | Close the software. |
Table 3.1.1.1: File Menu Options
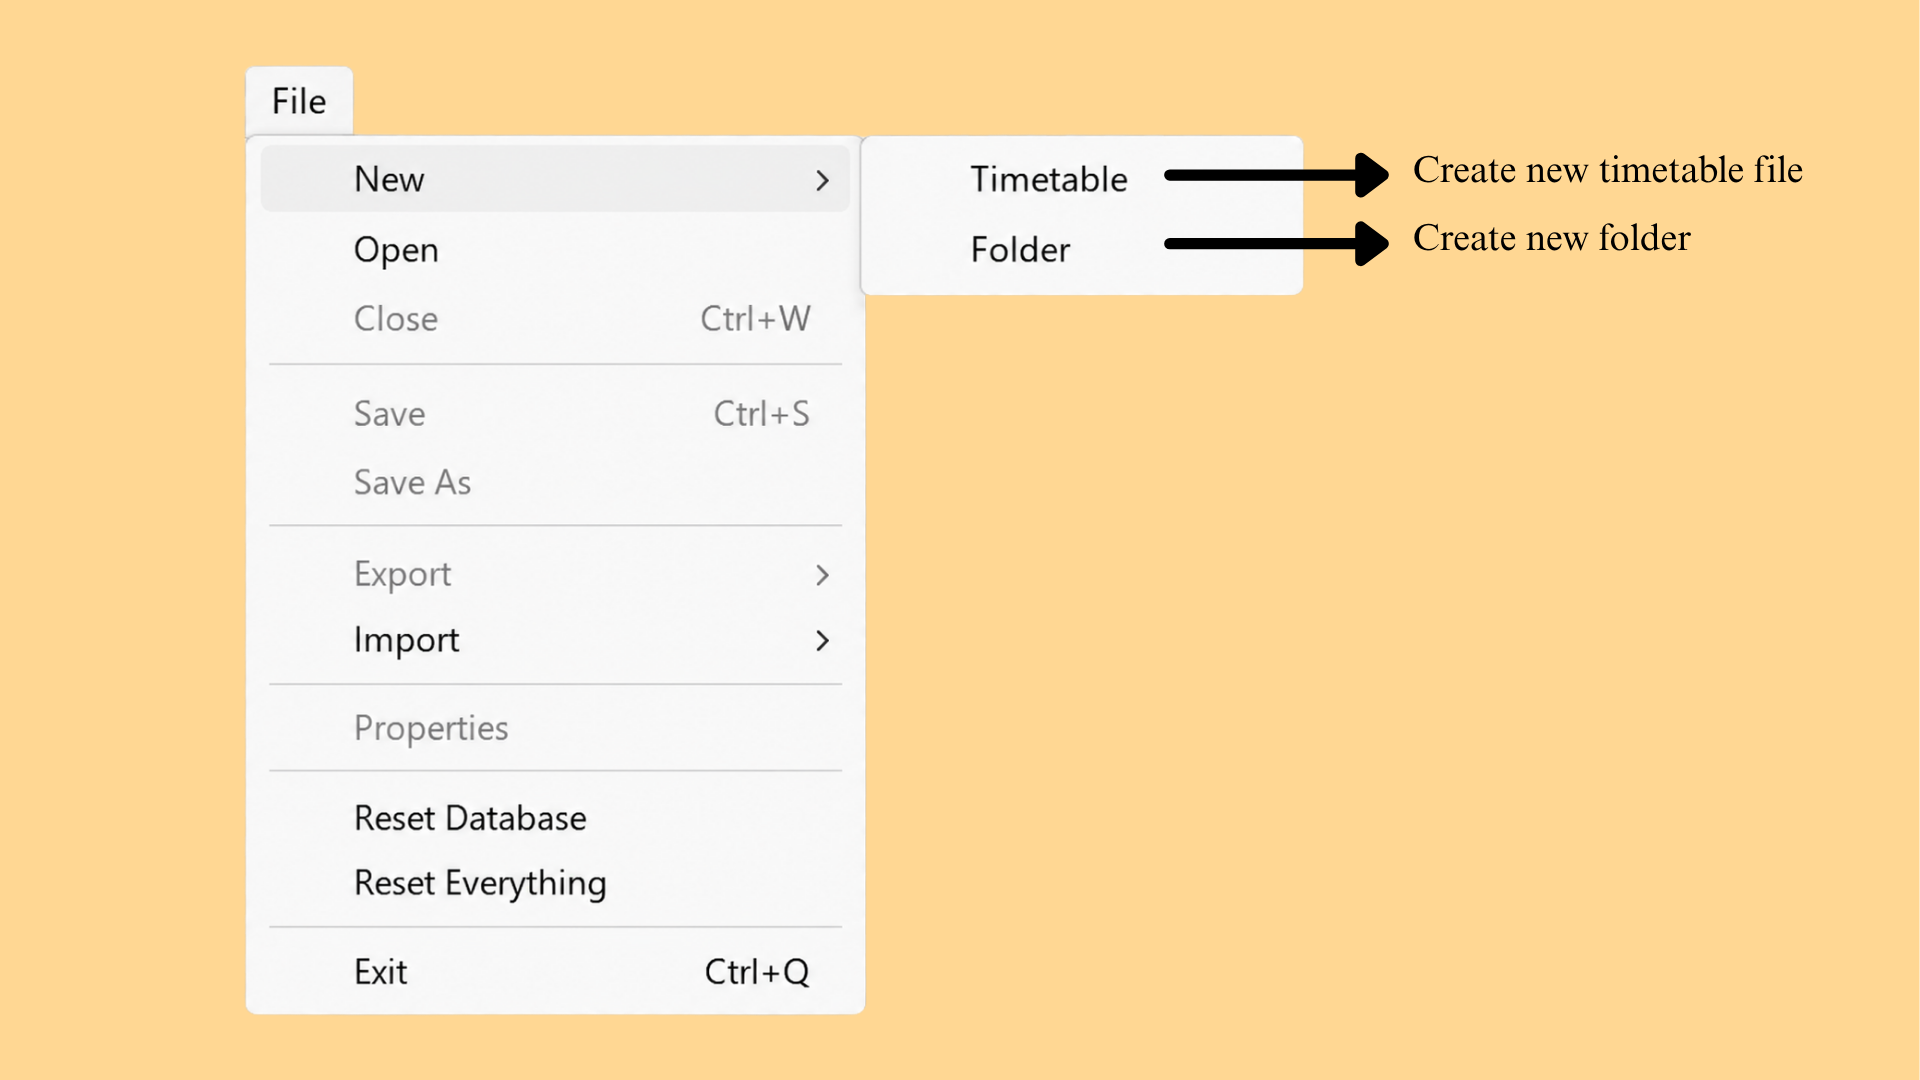
| Menu Item | Description |
|---|---|
| Timetable | Create new timetable file. |
| Folder | Create new folder. |
Table 3.1.1.2: File Menu - New
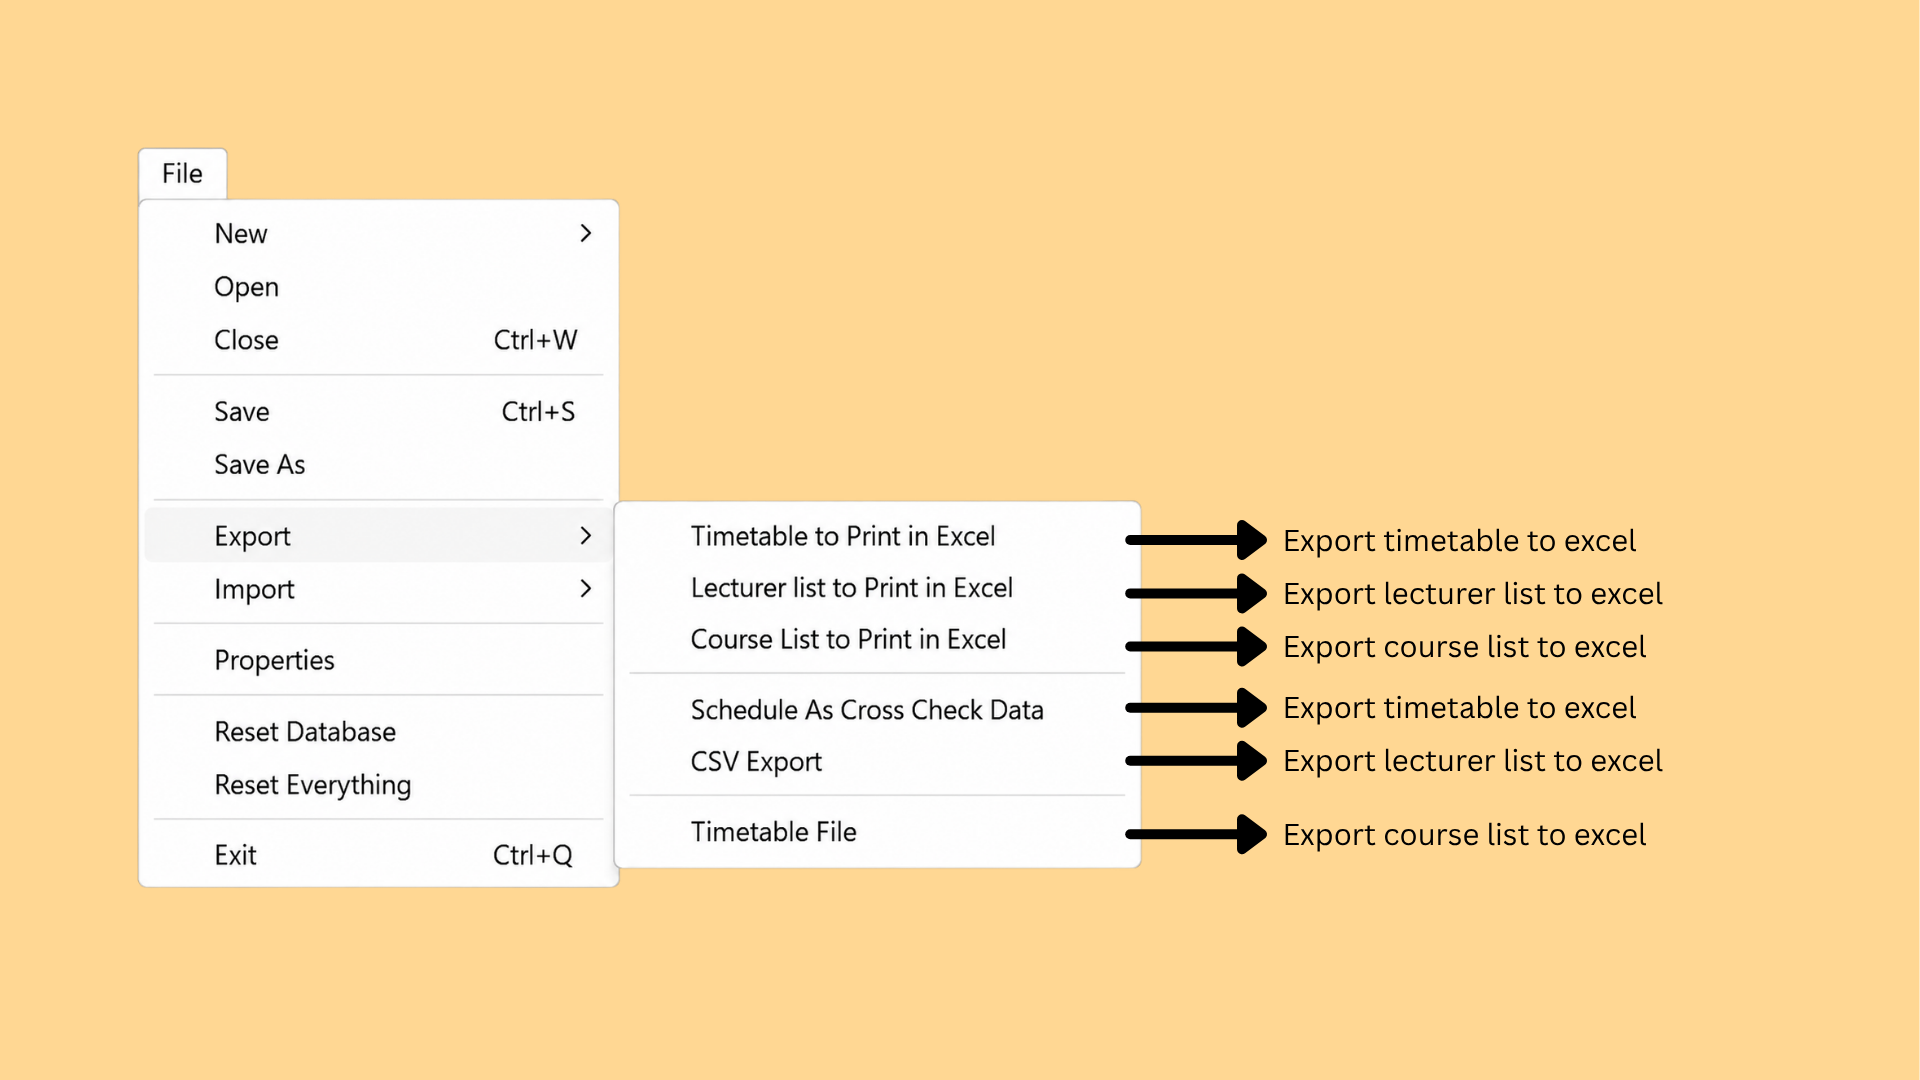
| Menu Item | Description |
|---|---|
| Timetable to Print in Excel | Export timetable to Excel. |
| Lecturer list to Print in Excel | Export lecturer list to Excel. |
| Course List to Print in Excel | Export course list to Excel. |
| Schedule As Cross Check Data | Export the schedule as cross-check data. |
| CSV Export | Export the data to a CSV file. |
| Timetable File | Export the timetable file. |
Table 3.1.1.3: File Menu - Export
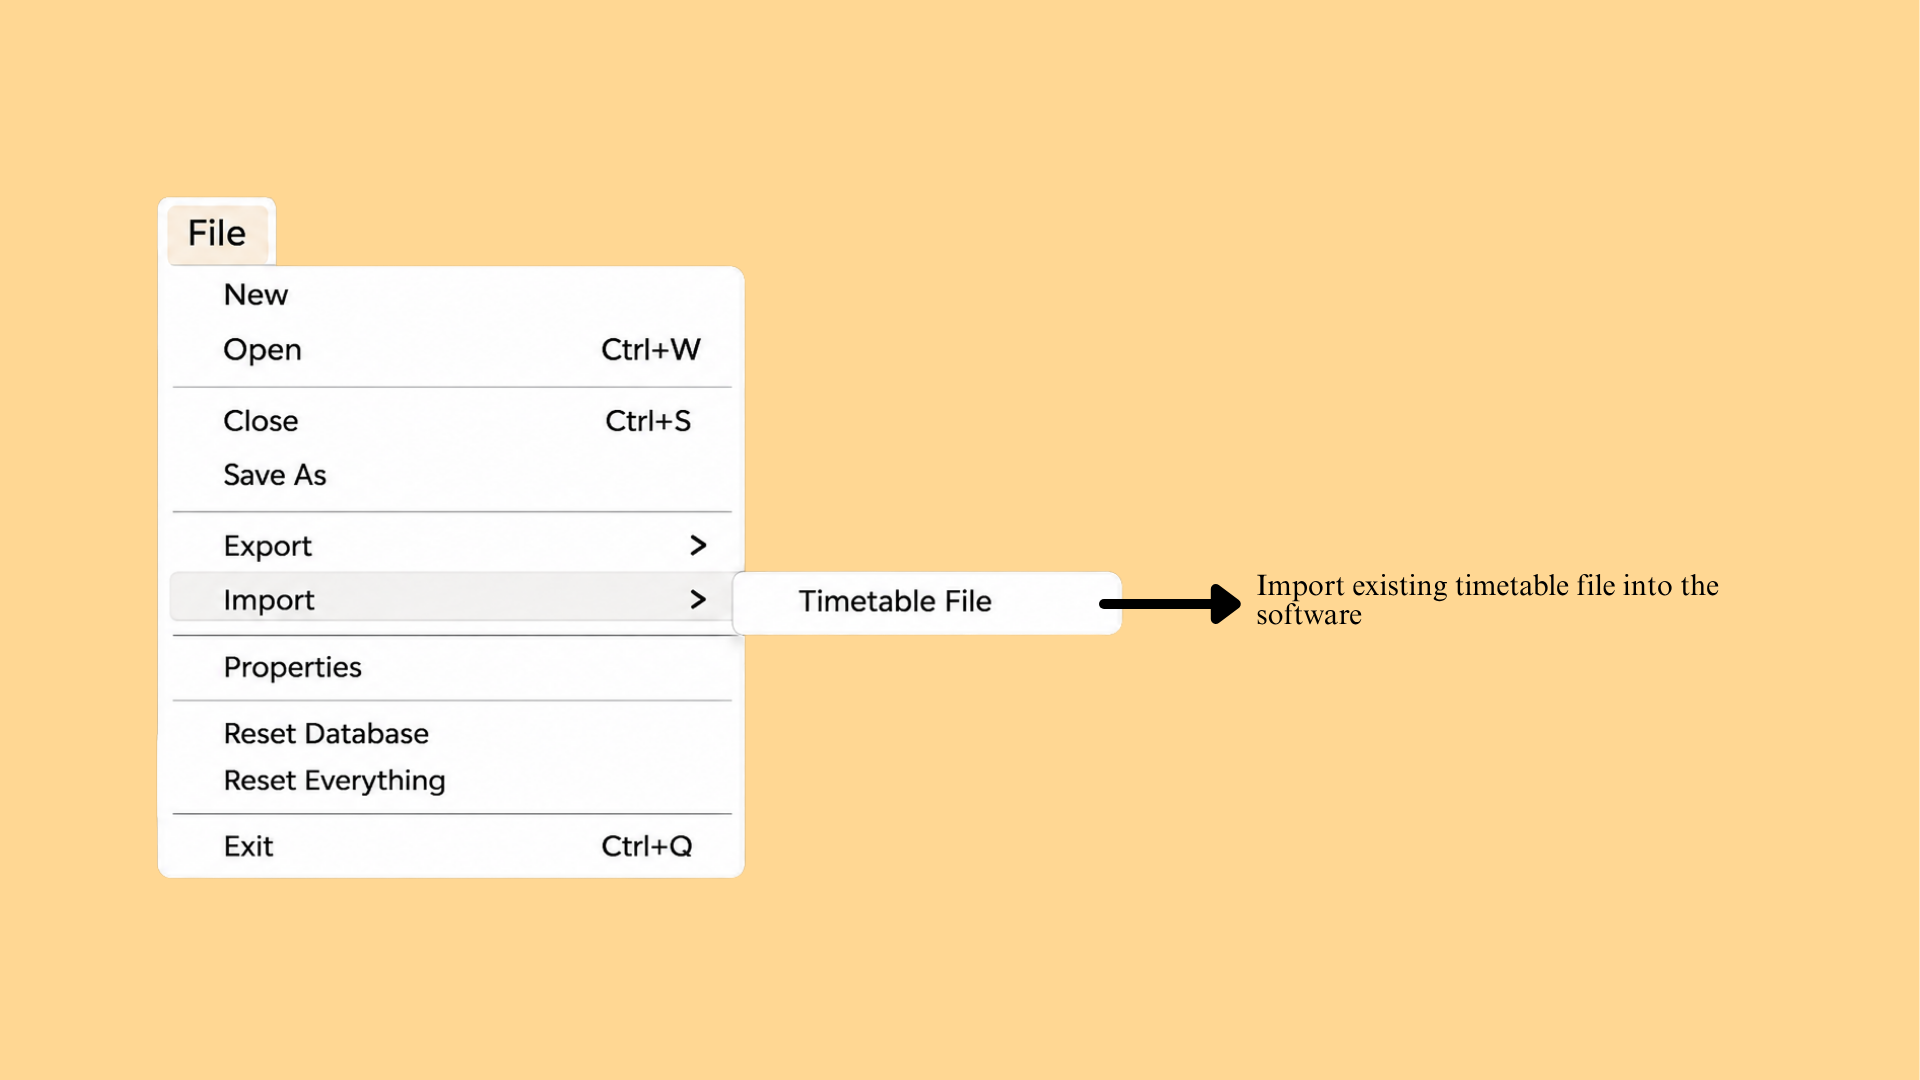
| Menu Item | Description |
|---|---|
| Timetable File | Import existing timetable file into the software. |
Table 3.1.1.4: File Menu - Import
3.1.2 Edit Menu
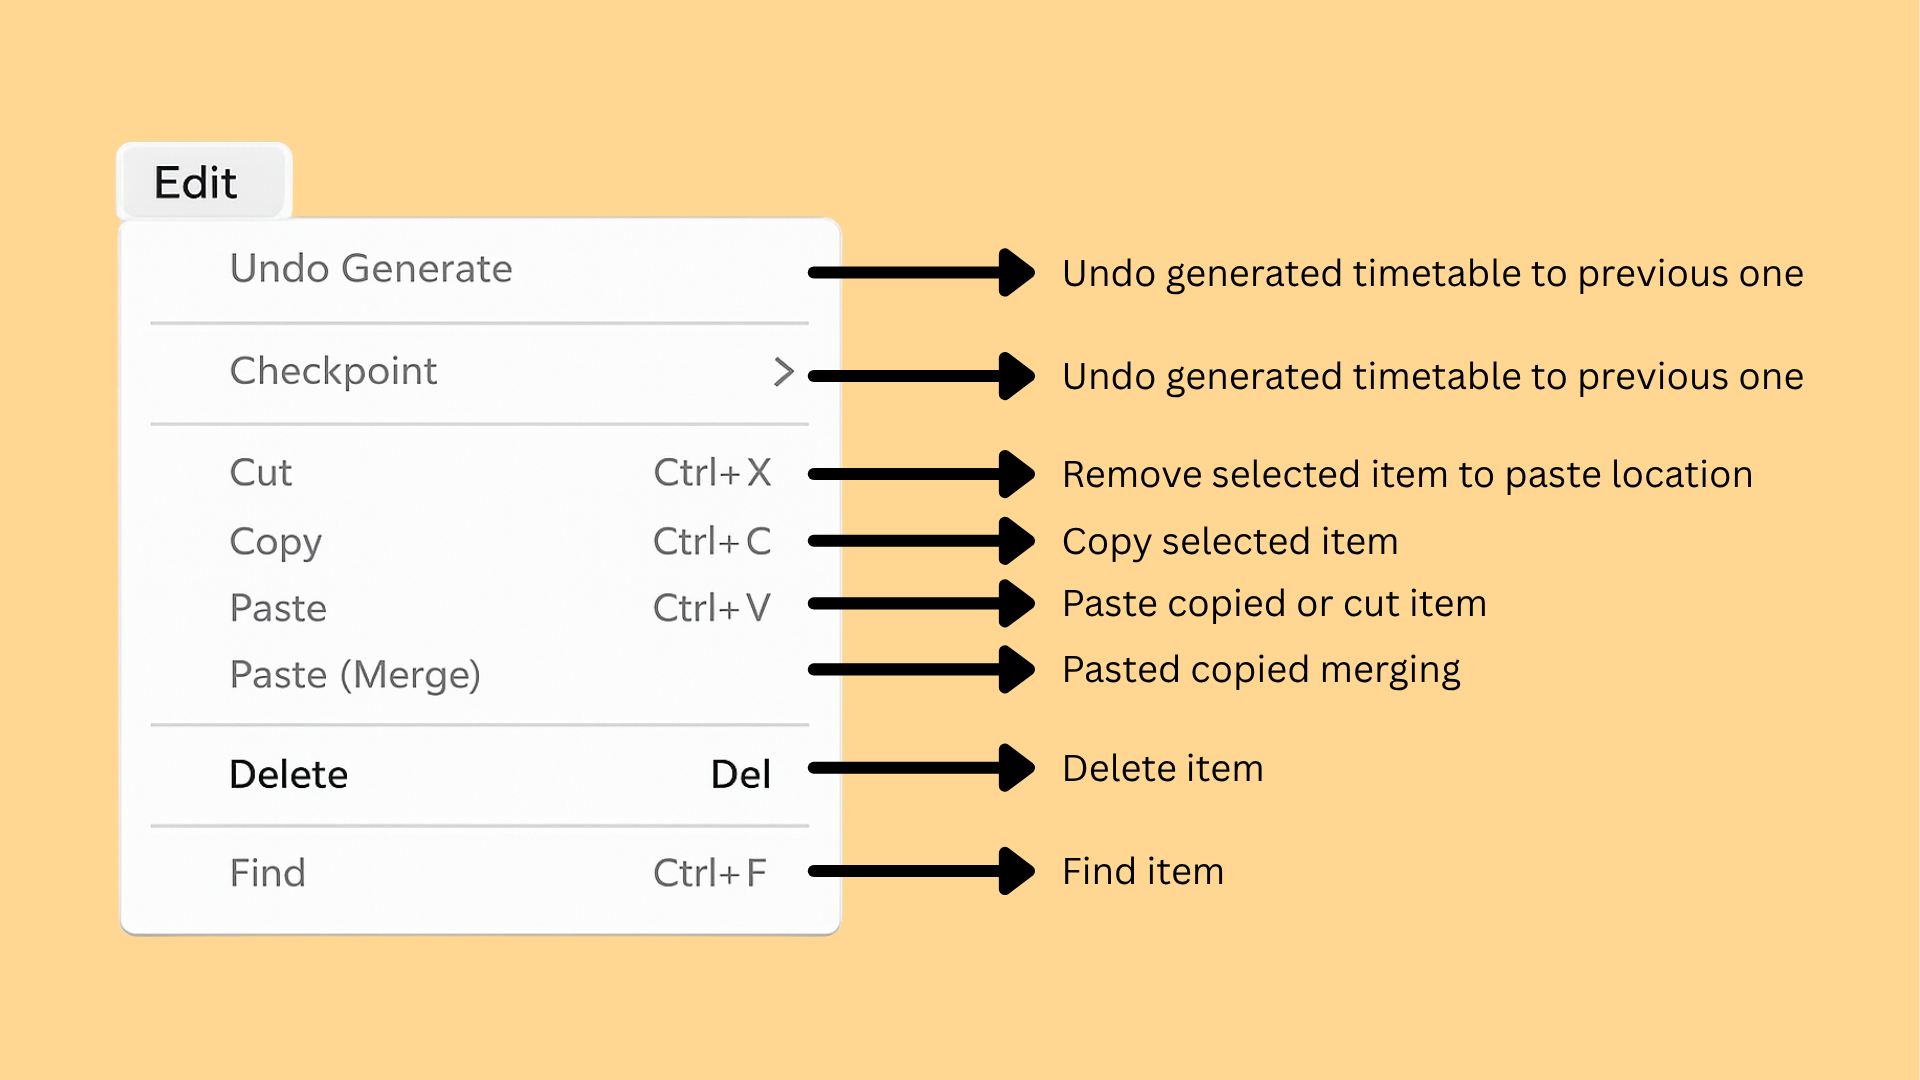
| Menu Item | Description |
|---|---|
| Undo Generate | Undo generated timetable to previous one. |
| Checkpoint | Opens the checkpoint submenu, shown in Figure 3.1.2.2. |
| Cut (Ctrl+X) | Remove selected item to paste location. |
| Copy (Ctrl+C) | Copy selected item. |
| Paste (Ctrl+V) | Paste copied or cut item. |
| Paste (Merge) | Paste the copied item, merging it into the destination. |
| Delete (Del) | Delete item. |
| Find (Ctrl+F) | Find item. |
Table 3.1.2.1: Edit Menu Options
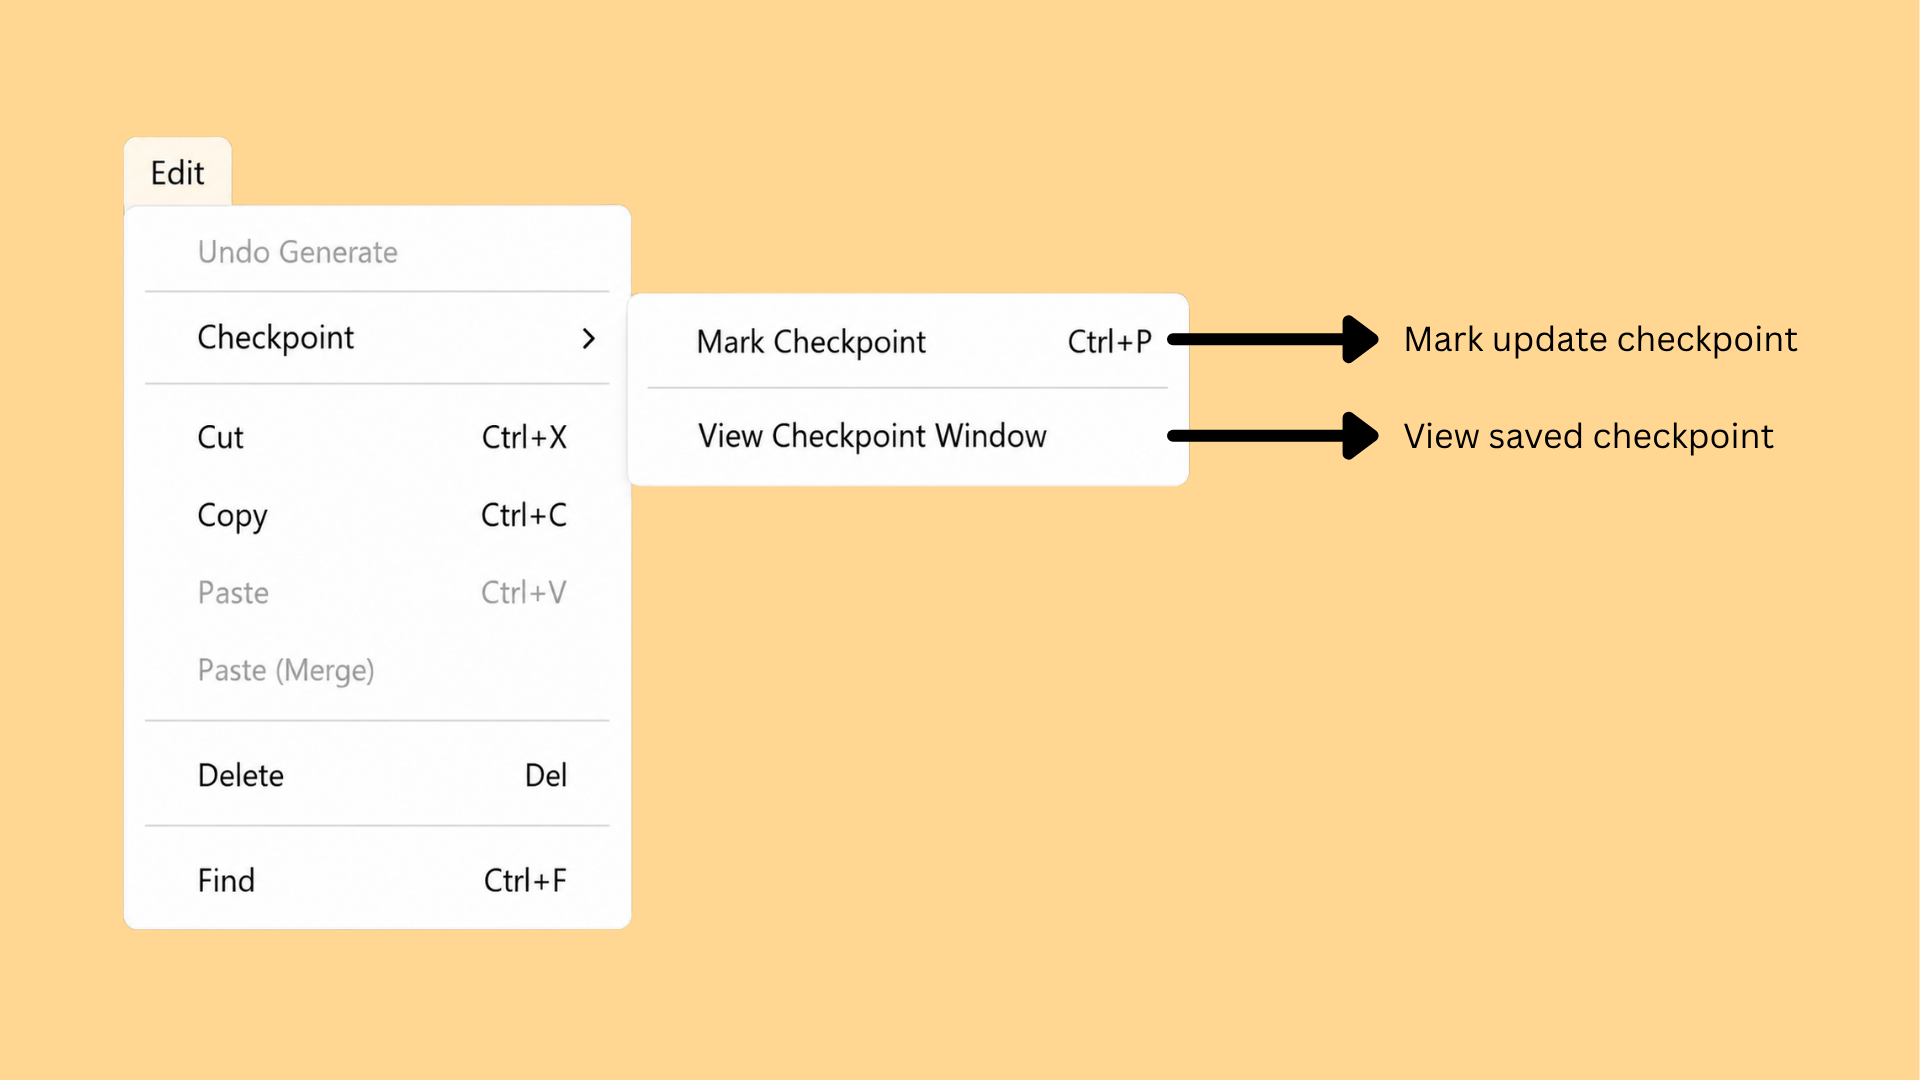
| Menu Item | Description |
|---|---|
| Mark Checkpoint (Ctrl+P) | Mark update checkpoint. |
| View Checkpoint Window | View saved checkpoint. |
Table 3.1.2.2: Edit Menu - Checkpoint
3.1.3 View Menu
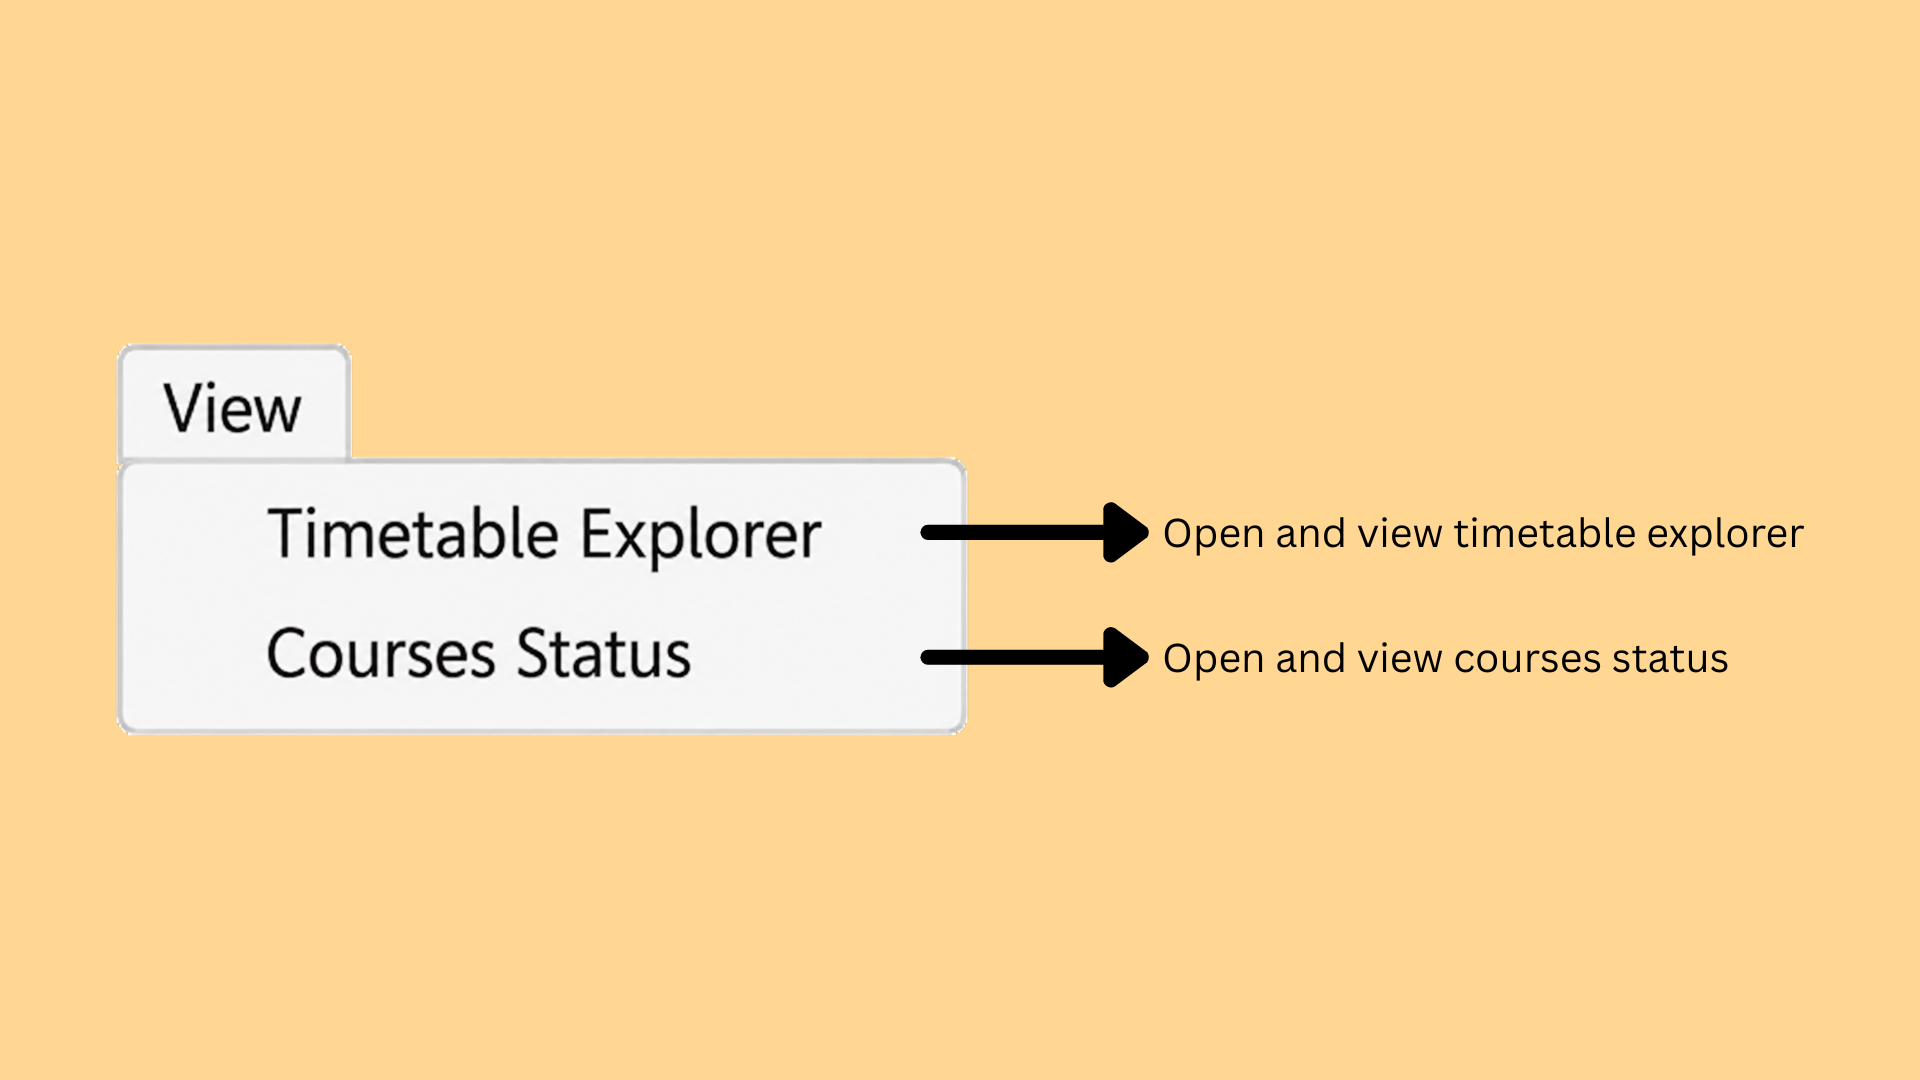
| Menu Item | Description |
|---|---|
| Timetable Explorer | Open and view timetable explorer. |
| Courses Status | Open and view courses status. |
Table 3.1.3.1: View Menu Options
3.1.4 Database Menu
The Database Menu groups the tools used for Database Management - importing, editing, and organising the data that your timetable is built from.
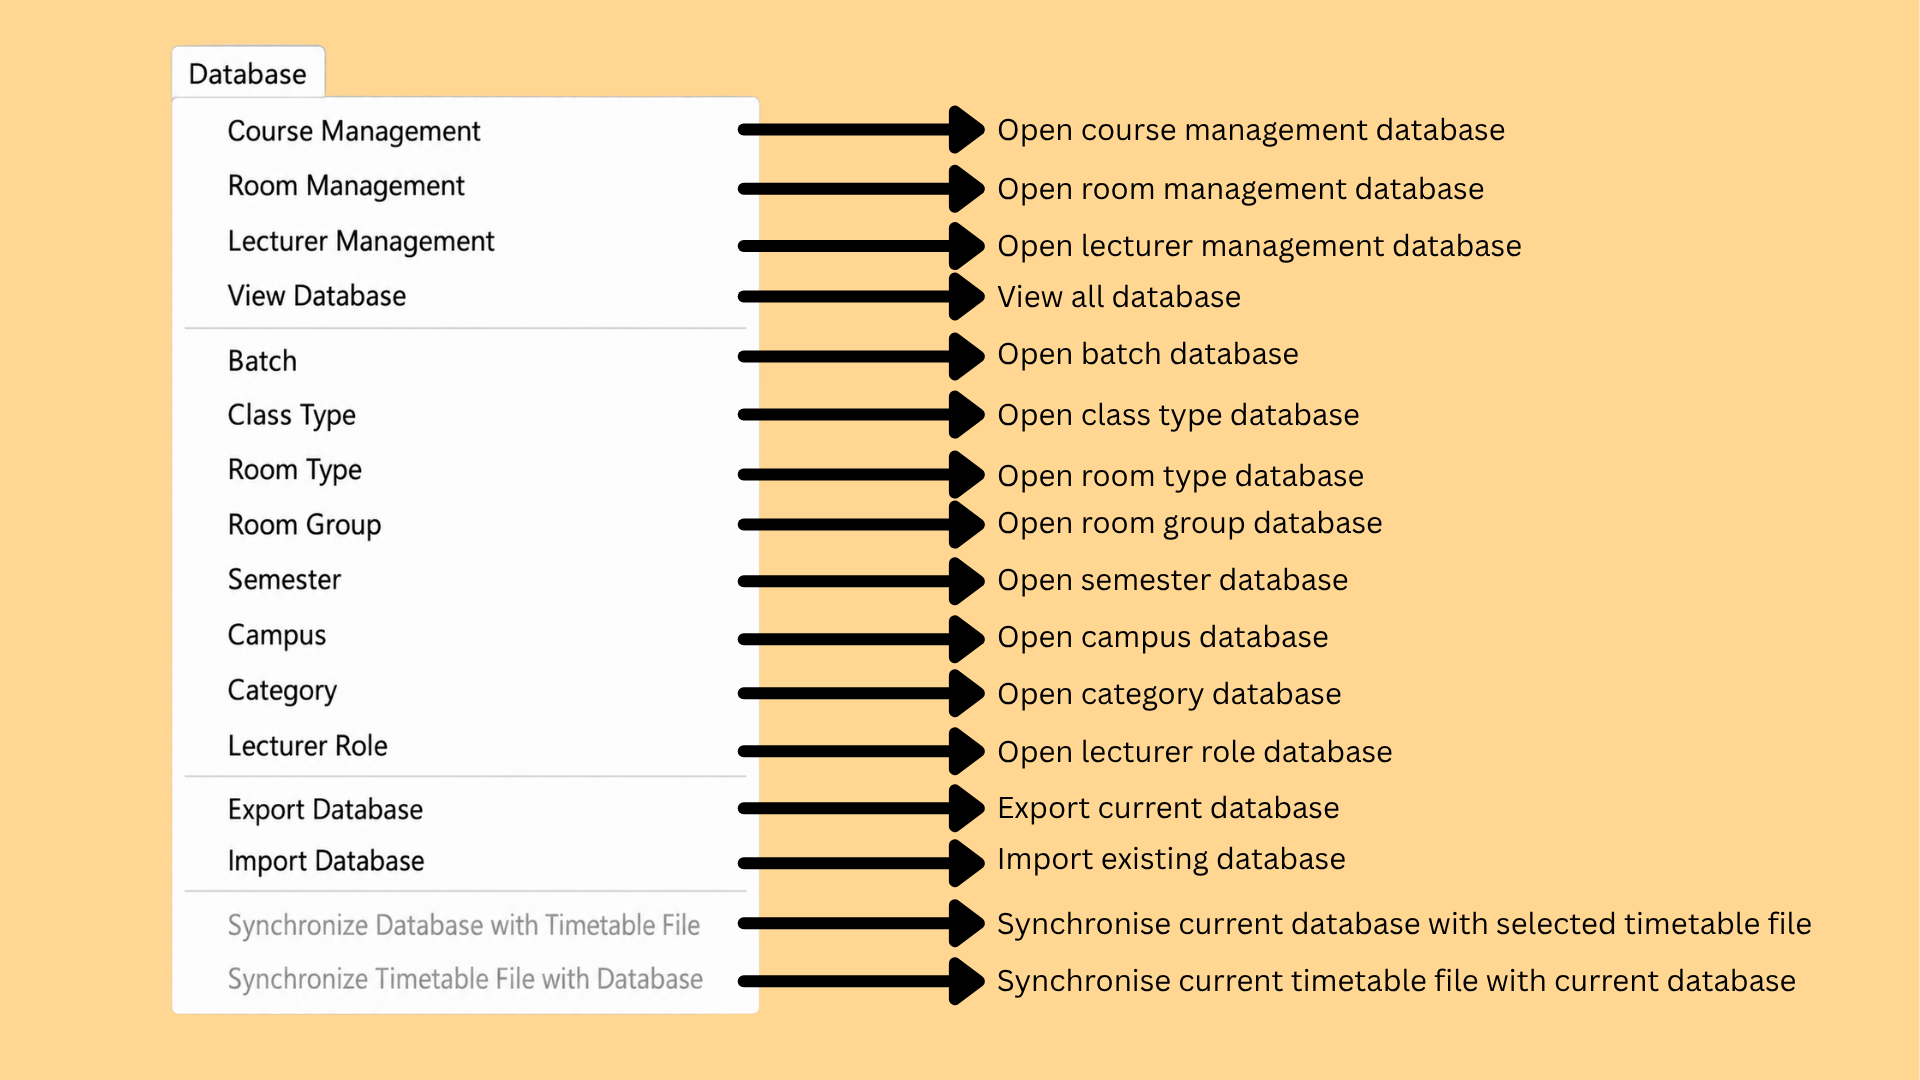
| Menu Item | Description |
|---|---|
| Course Management | Open course management database. |
| Room Management | Open room management database. |
| Lecturer Management | Open lecturer management database. |
| View Database | View all database. |
| Batch | Open batch database. |
| Class Type | Open class type database. |
| Room Type | Open room type database. |
| Room Group | Open room group database. |
| Semester | Open semester database. |
| Campus | Open campus database. |
| Category | Open category database. |
| Lecturer Role | Open lecturer role database. |
| Export Database | Export current database. |
| Import Database | Import existing database. |
| Synchronize Database with Timetable File | Synchronise current database with the selected timetable file. |
| Synchronize Timetable File with Database | Synchronise current timetable file with the current database. |
Table 3.1.4.1: Database Menu Options
3.1.5 E-Campus Menu
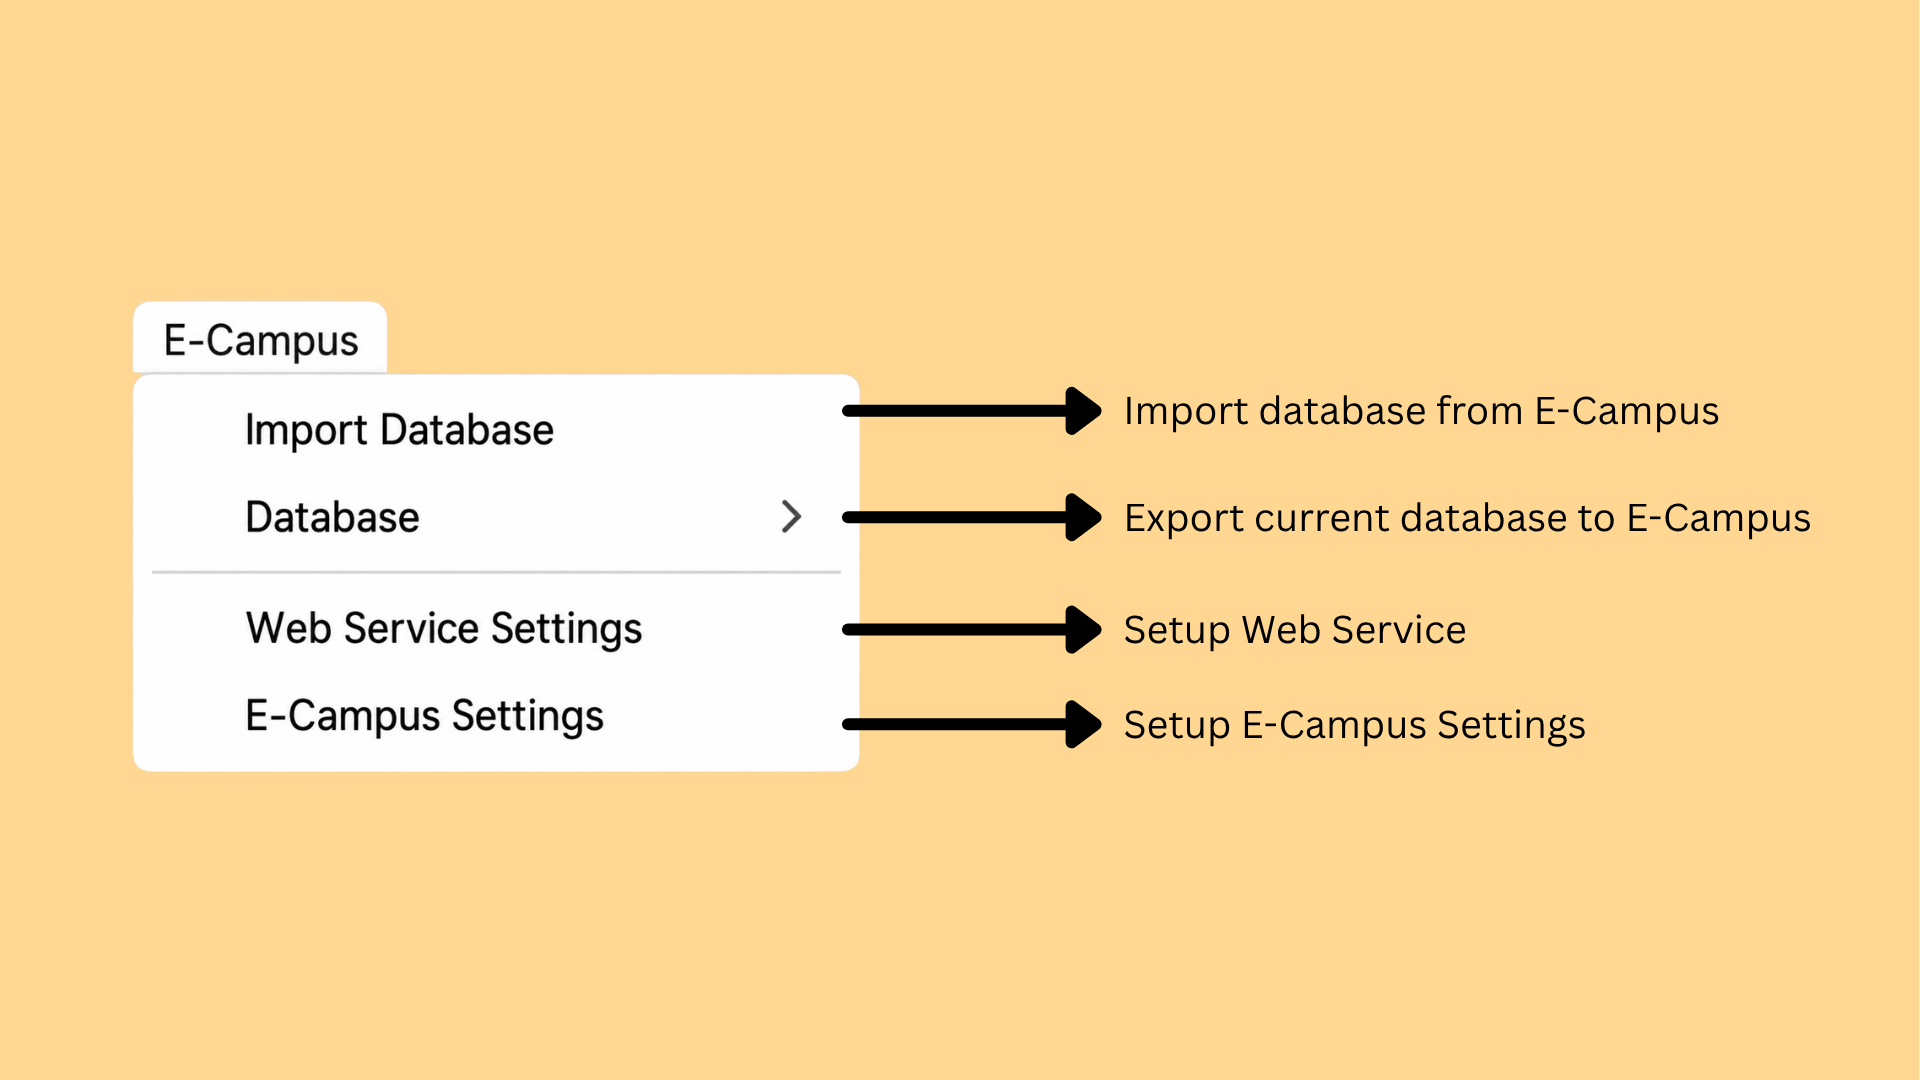
| Menu Item | Description |
|---|---|
| Import Database | Import database from E-Campus. |
| Database | Export current database to E-Campus. |
| Web Service Settings | Set up the Web Service. |
| E-Campus Settings | Set up the E-Campus settings. |
Table 3.1.5.1: E-Campus Menu Options
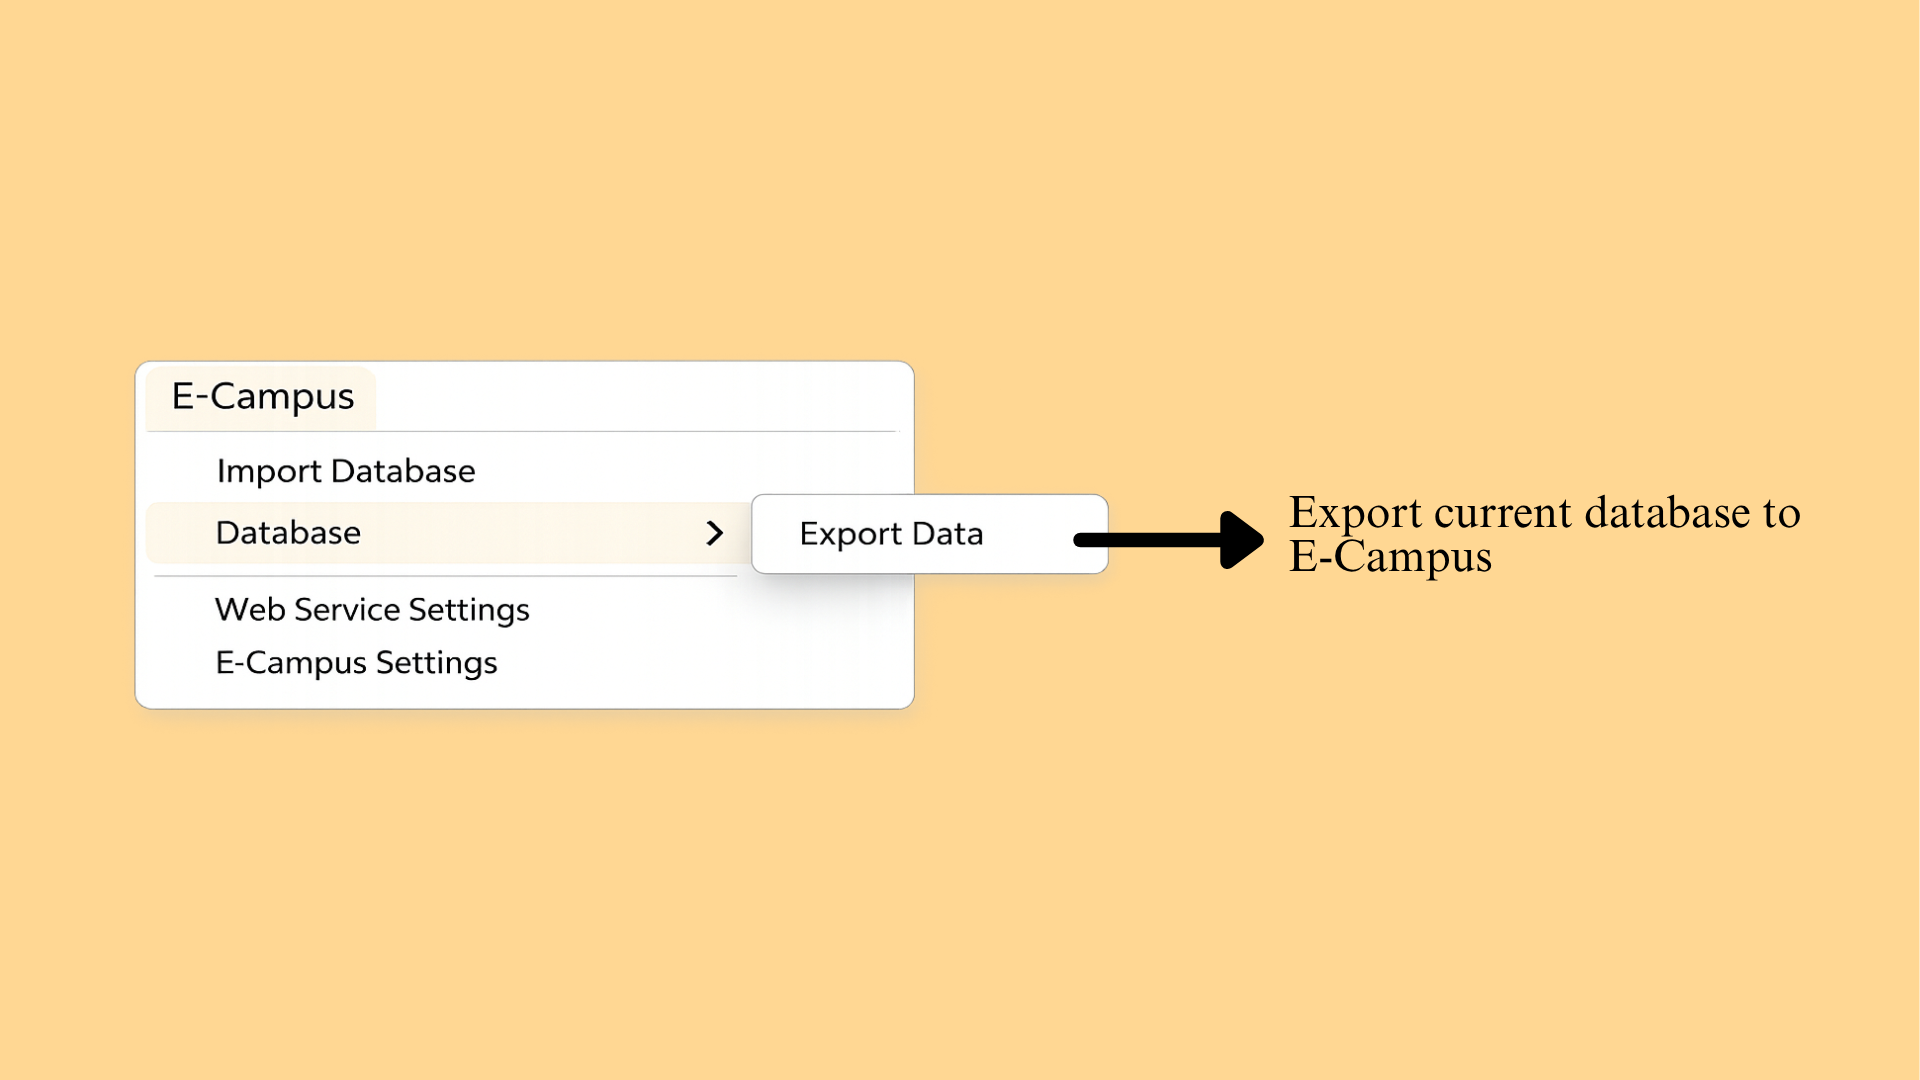
| Menu Item | Description |
|---|---|
| Export Data | Export current database to E-Campus. |
Table 3.1.5.2: E-Campus Menu - Database
3.1.6 Timetable Menu
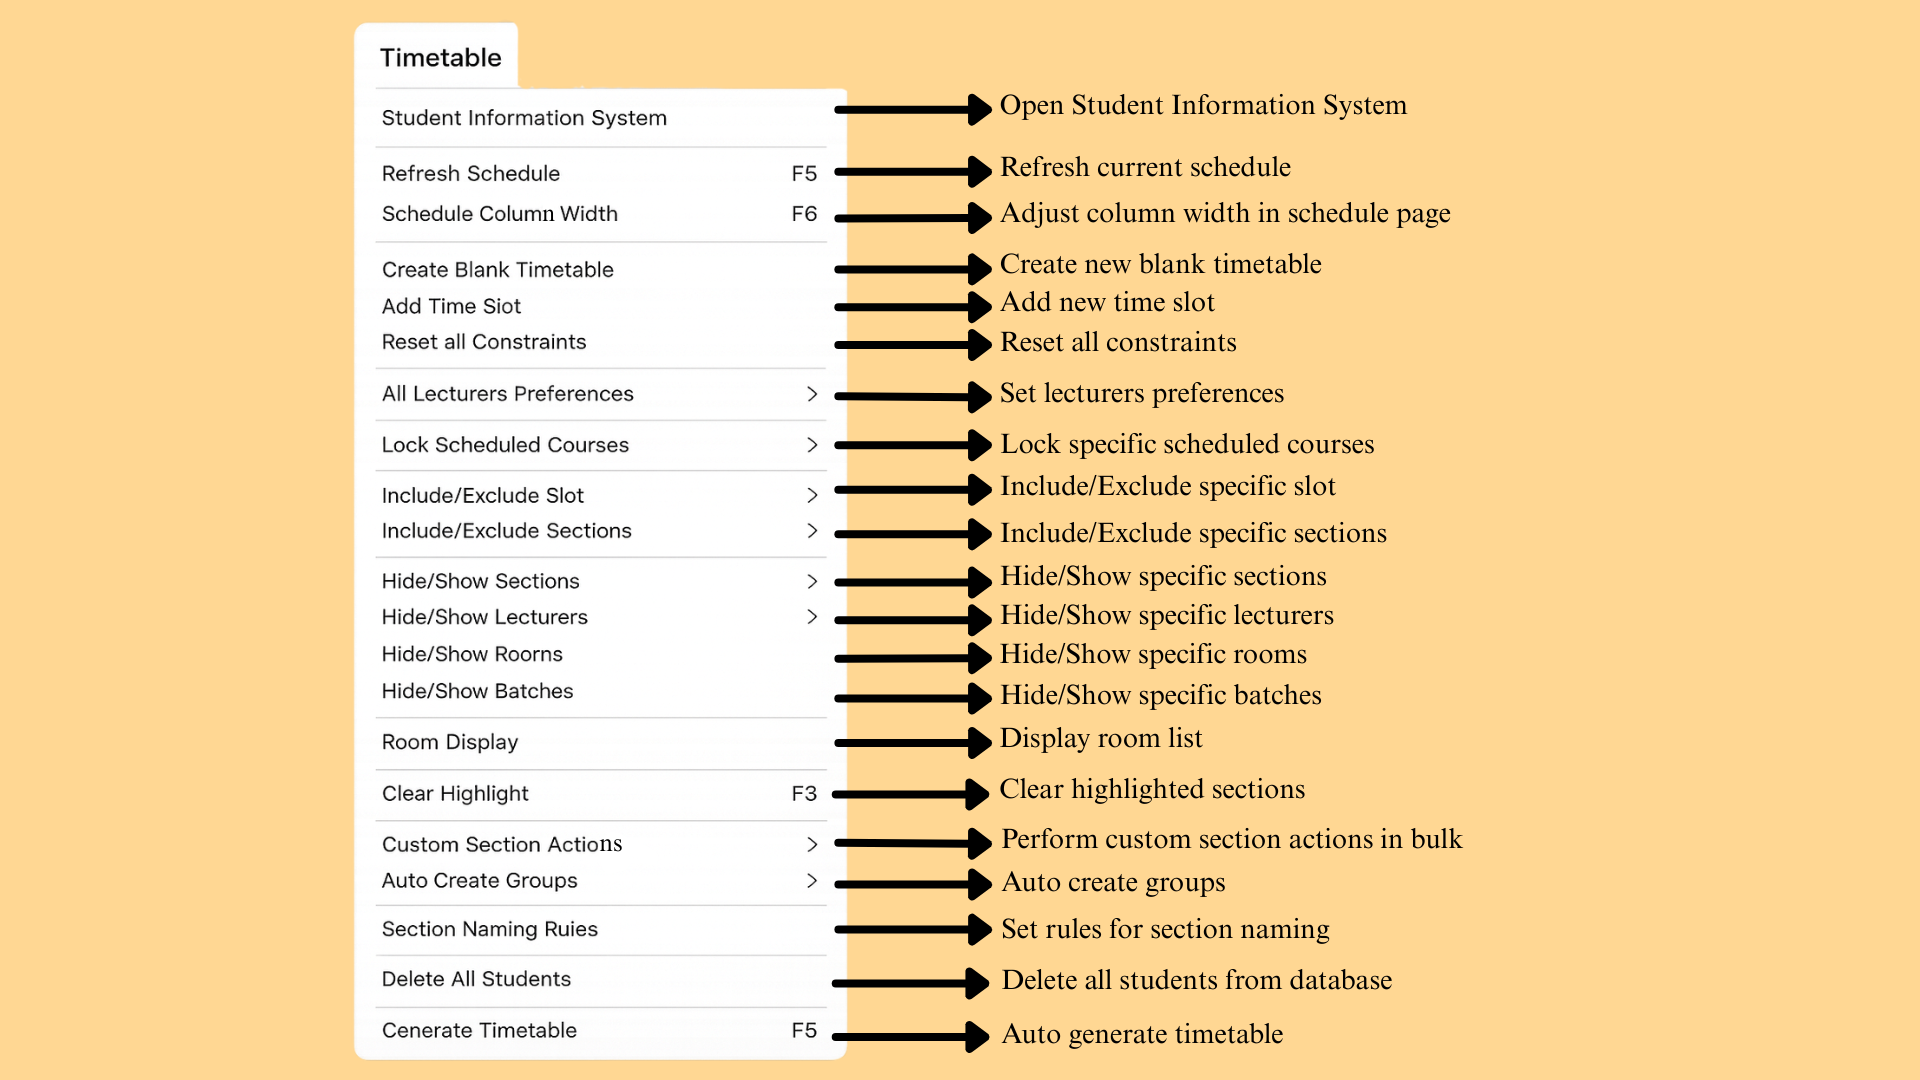
| Menu Item | Description |
|---|---|
| Student Information System | Open the Student Information System. |
| Refresh Schedule (F5) | Refresh current schedule. |
| Schedule Column Width (F6) | Adjust column width in the schedule page. |
| Create Blank Timetable | Create new blank timetable. |
| Add Time Slot | Add new time slot. |
| Reset all Constraints | Reset all constraints. |
| All Lecturers Preferences | Set lecturers preferences. |
| Lock Scheduled Courses | Lock specific scheduled courses. |
| Include/Exclude Slot | Include or exclude a specific slot. |
| Include/Exclude Sections | Include or exclude specific sections. |
| Hide/Show Sections | Hide or show specific sections. |
| Hide/Show Lecturers | Hide or show specific lecturers. |
| Hide/Show Rooms | Hide or show specific rooms. |
| Hide/Show Batches | Hide or show specific batches. |
| Room Display | Display the room list. |
| Clear Highlight (F3) | Clear highlighted sections. |
| Custom Section Actions | Perform custom section actions in bulk. |
| Auto Create Groups | Auto create groups. |
| Section Naming Rules | Set rules for section naming. |
| Delete All Students | Delete all students from the database. |
| Generate Timetable (F5) | Auto generate the timetable. |
Table 3.1.6.1: Timetable Menu Options
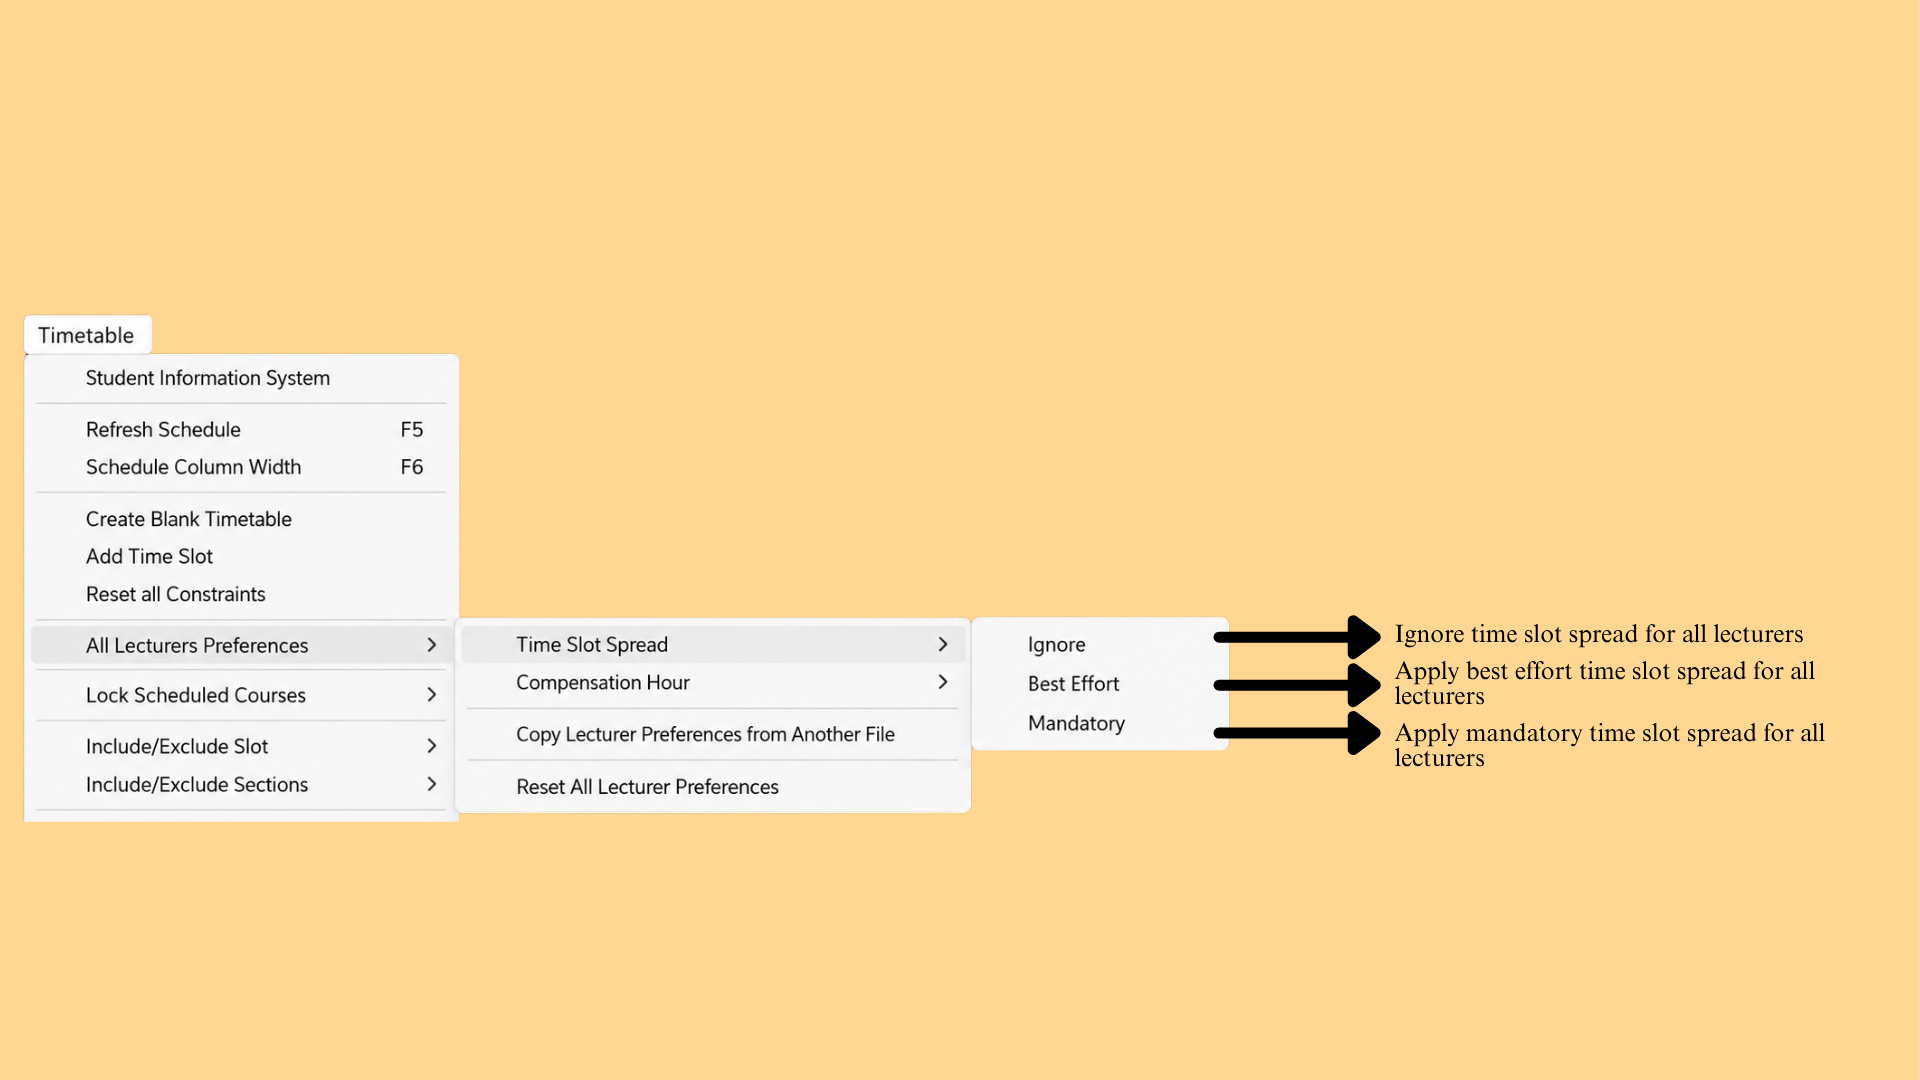
| Menu Item | Description |
|---|---|
| Ignore | Ignore time slot spread for all lecturers. |
| Best Effort | Apply best effort time slot spread for all lecturers. |
| Mandatory | Apply mandatory time slot spread for all lecturers. |
Table 3.1.6.2: Time Slot Spread Options
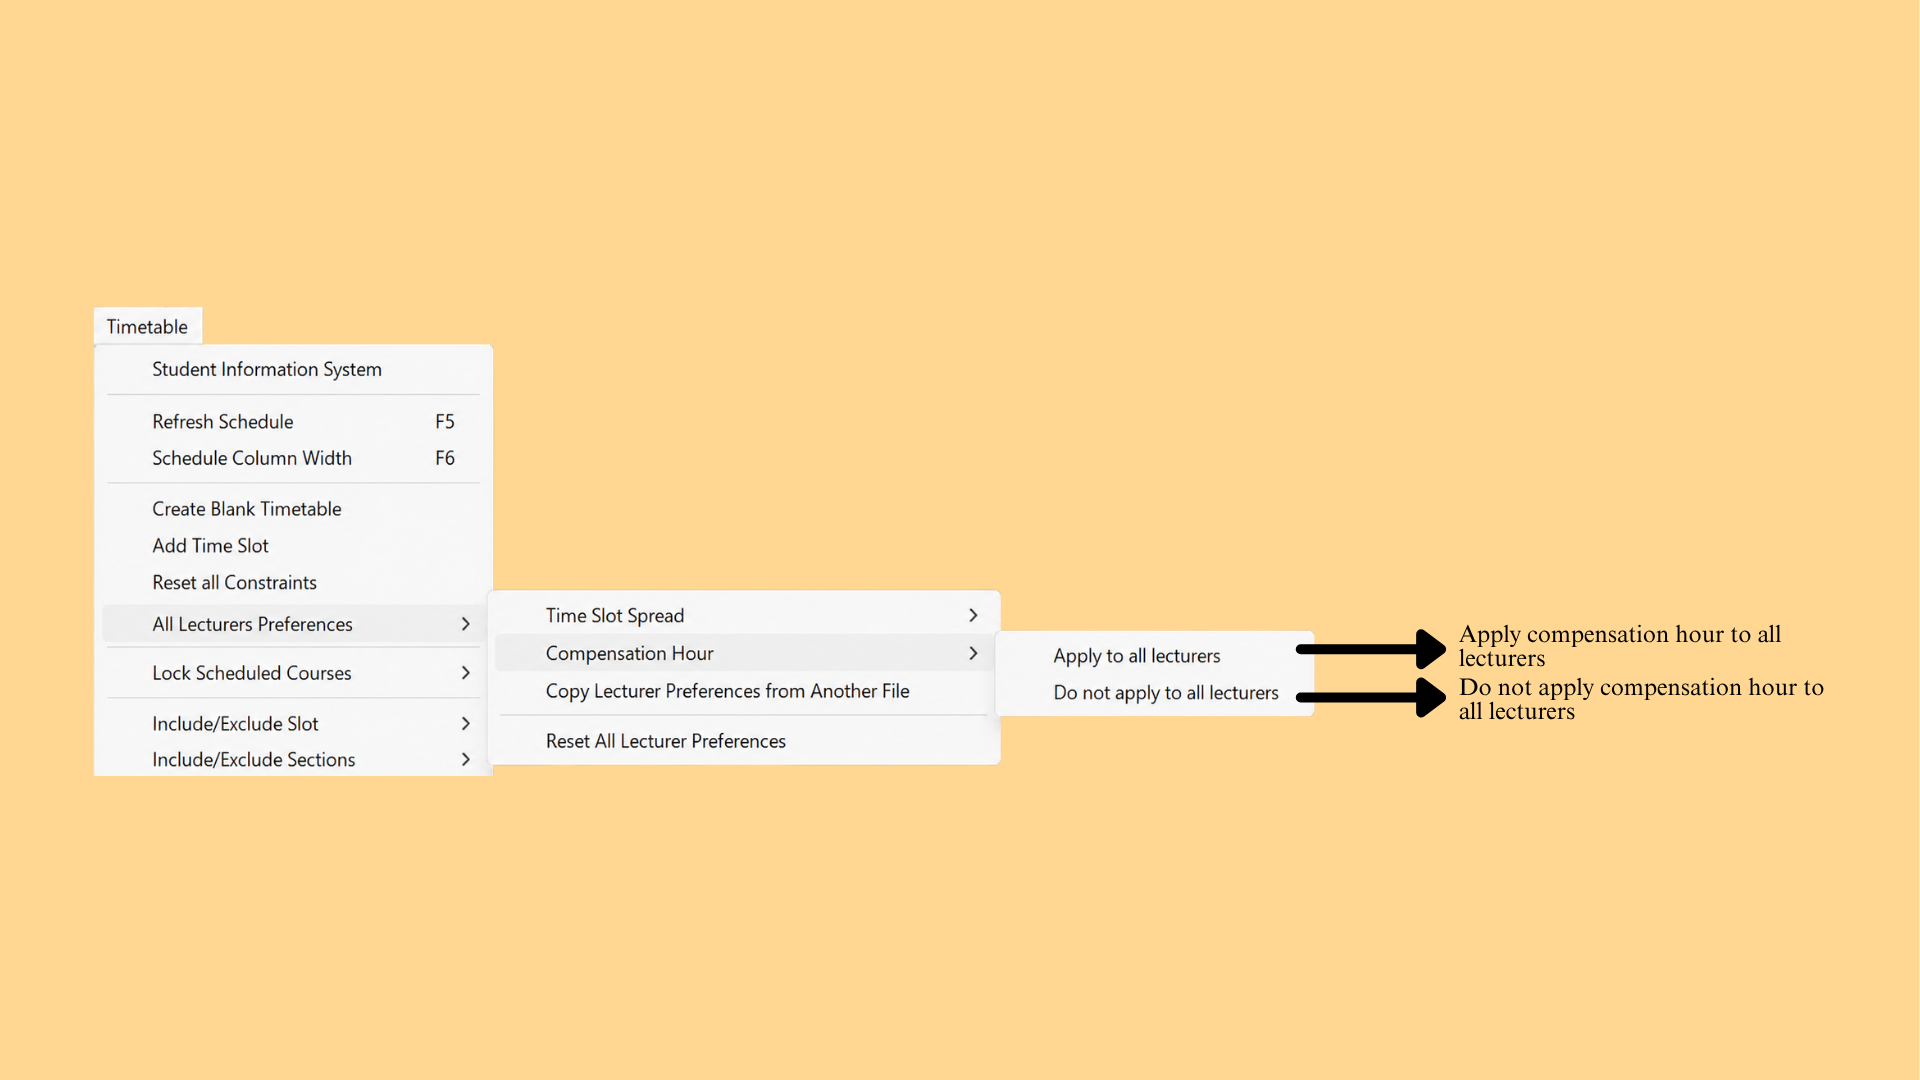
| Menu Item | Description |
|---|---|
| Apply to all lecturers | Apply compensation hour to all lecturers. |
| Do not apply to all lecturers | Do not apply compensation hour to all lecturers. |
Table 3.1.6.3: Compensation Hour Options
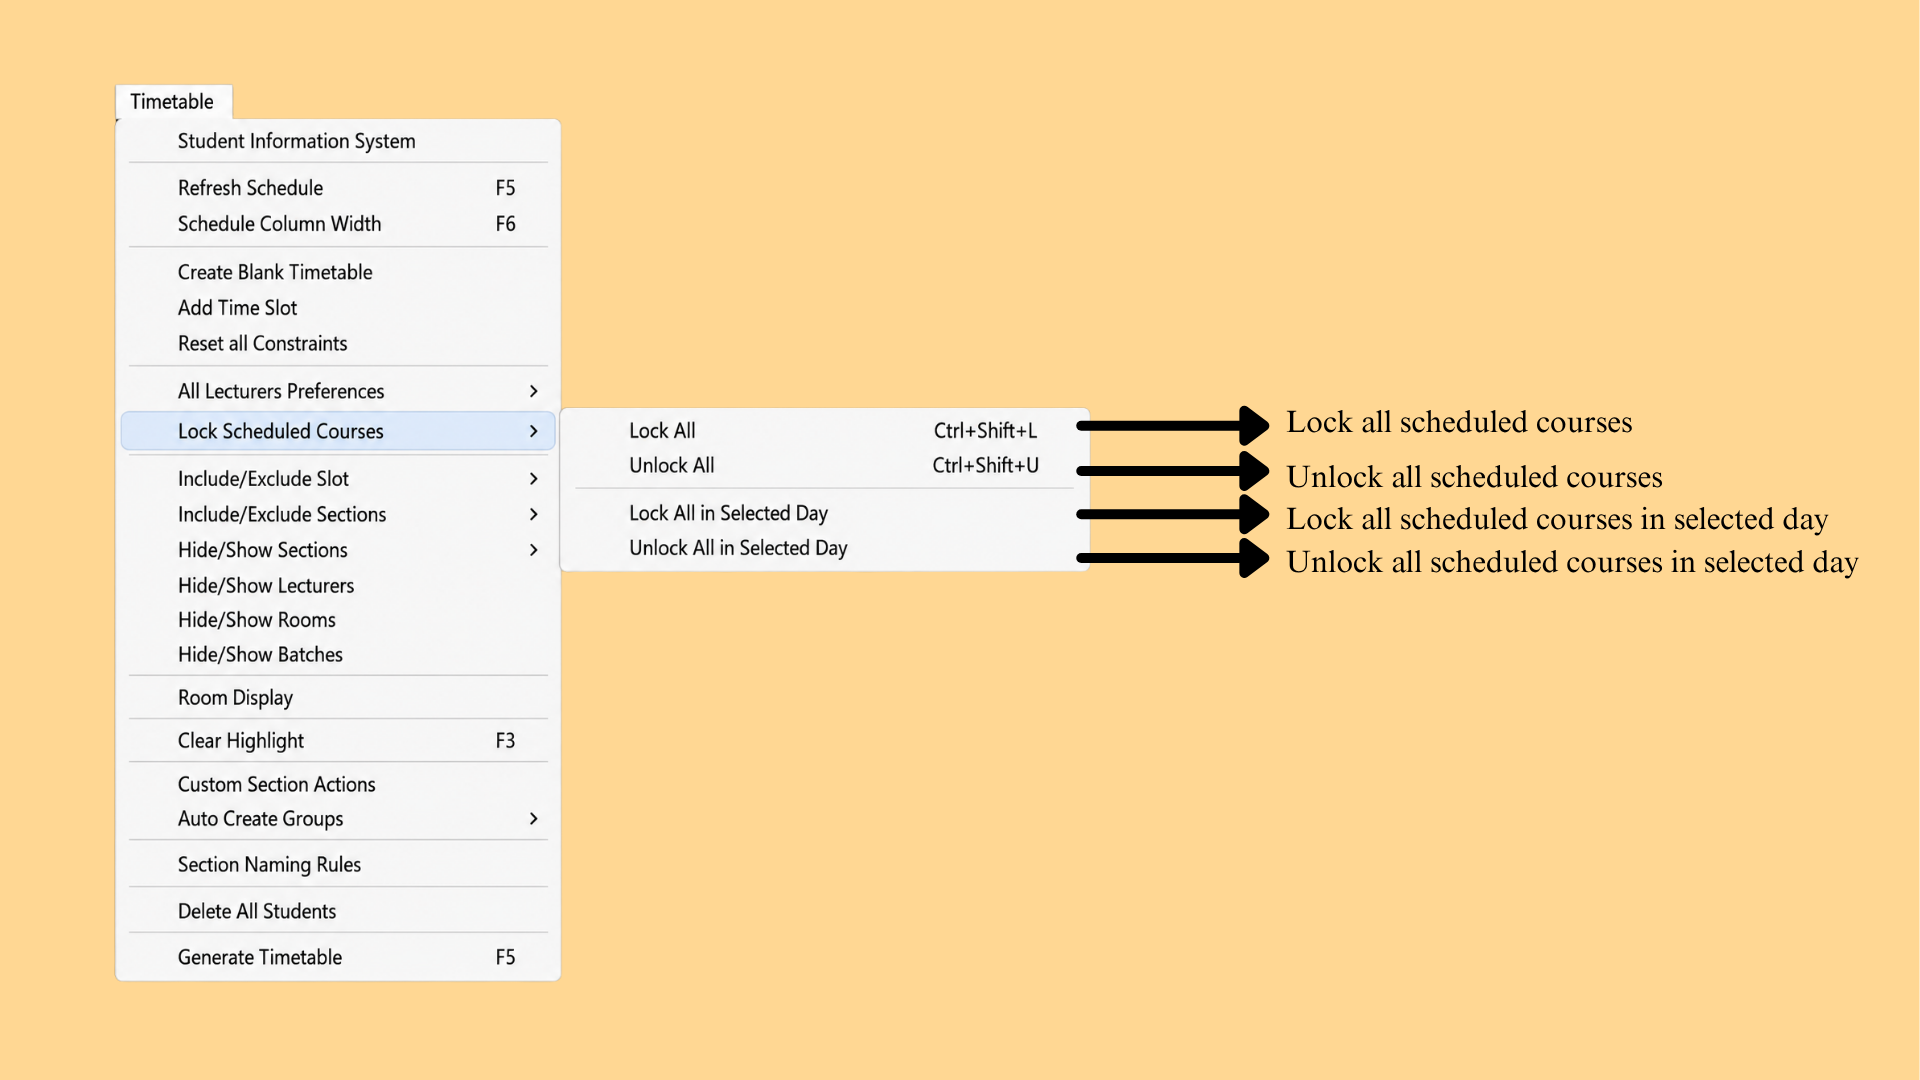
| Menu Item | Description |
|---|---|
| Lock All (Ctrl+Shift+L) | Lock all scheduled courses. |
| Unlock All (Ctrl+Shift+U) | Unlock all scheduled courses. |
| Lock All in Selected Day | Lock all scheduled courses in the selected day. |
| Unlock All in Selected Day | Unlock all scheduled courses in the selected day. |
Table 3.1.6.4: Lock Scheduled Courses Options
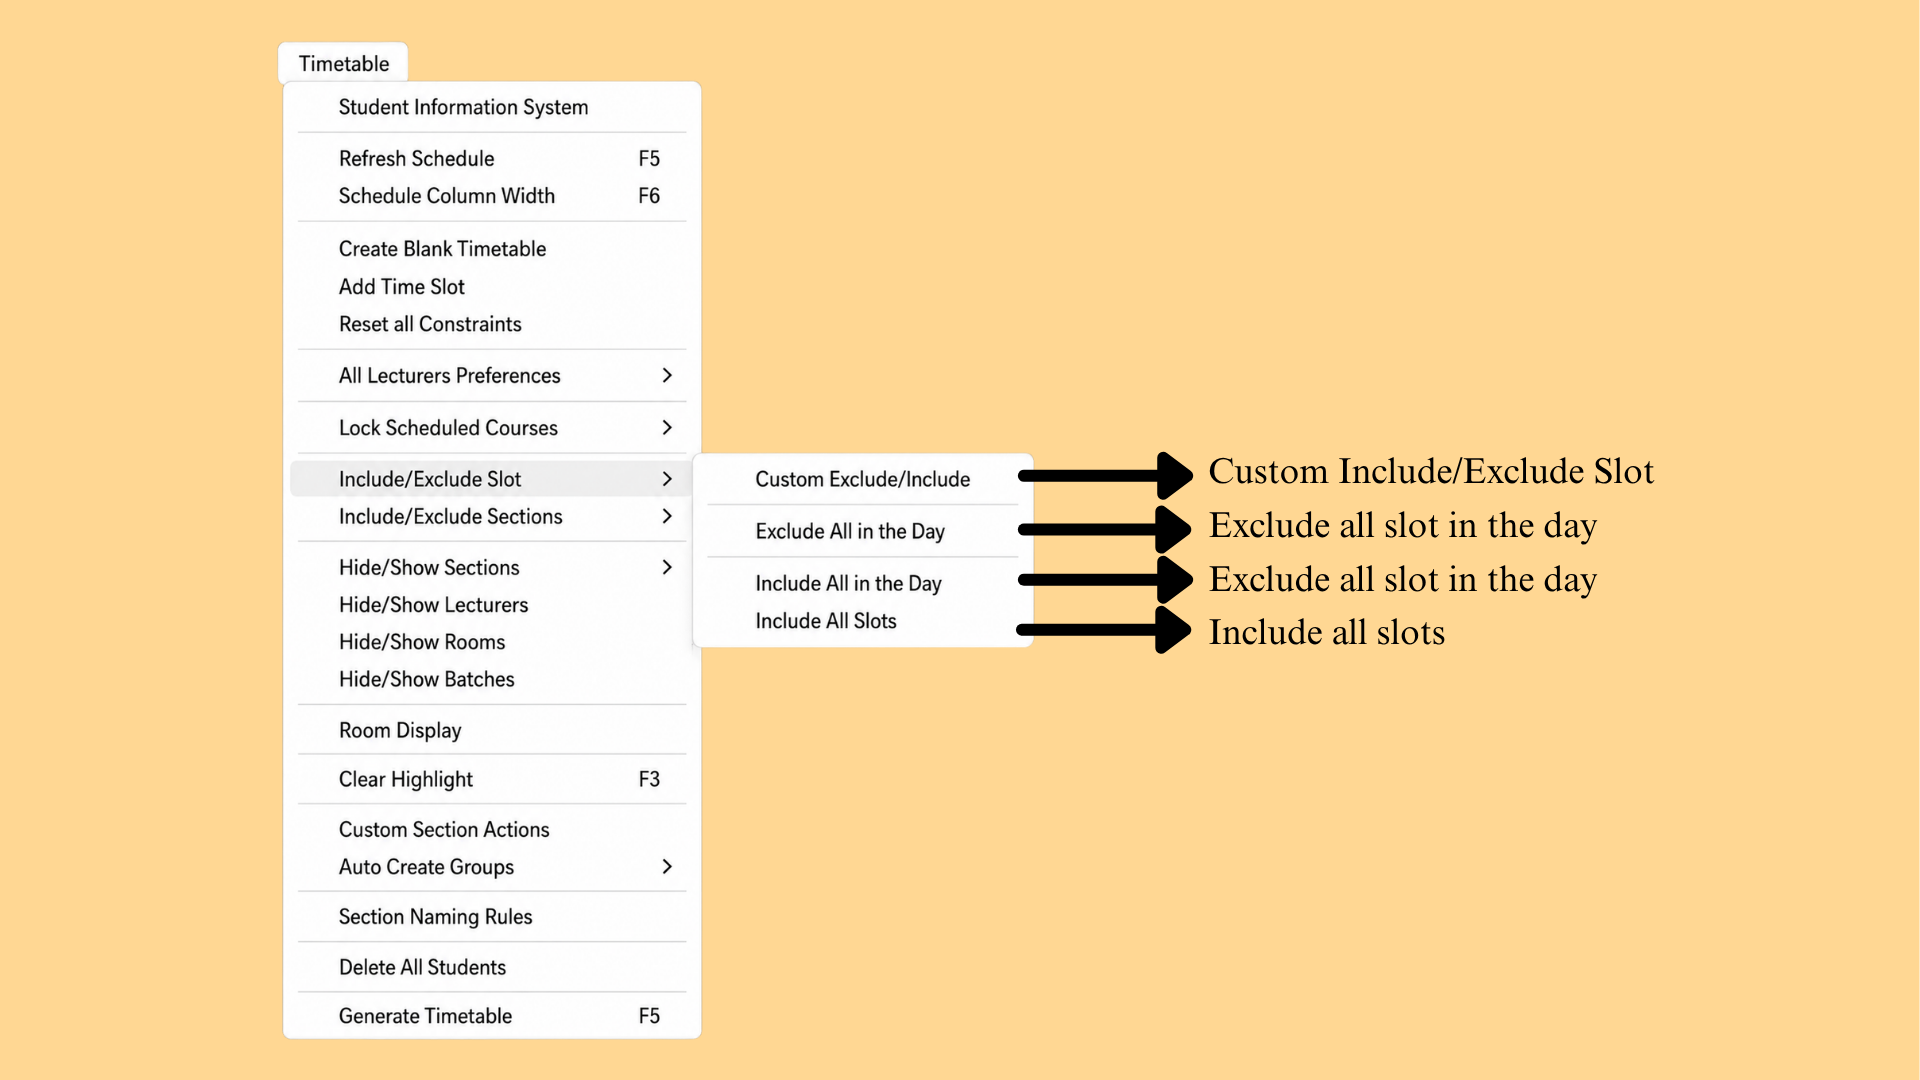
| Menu Item | Description |
|---|---|
| Custom Exclude/Include | Custom include or exclude of a slot. |
| Exclude All in the Day | Exclude all slots in the day. |
| Include All in the Day | Include all slots in the day. |
| Include All Slots | Include all slots. |
Table 3.1.6.5: Include/Exclude Slot Options
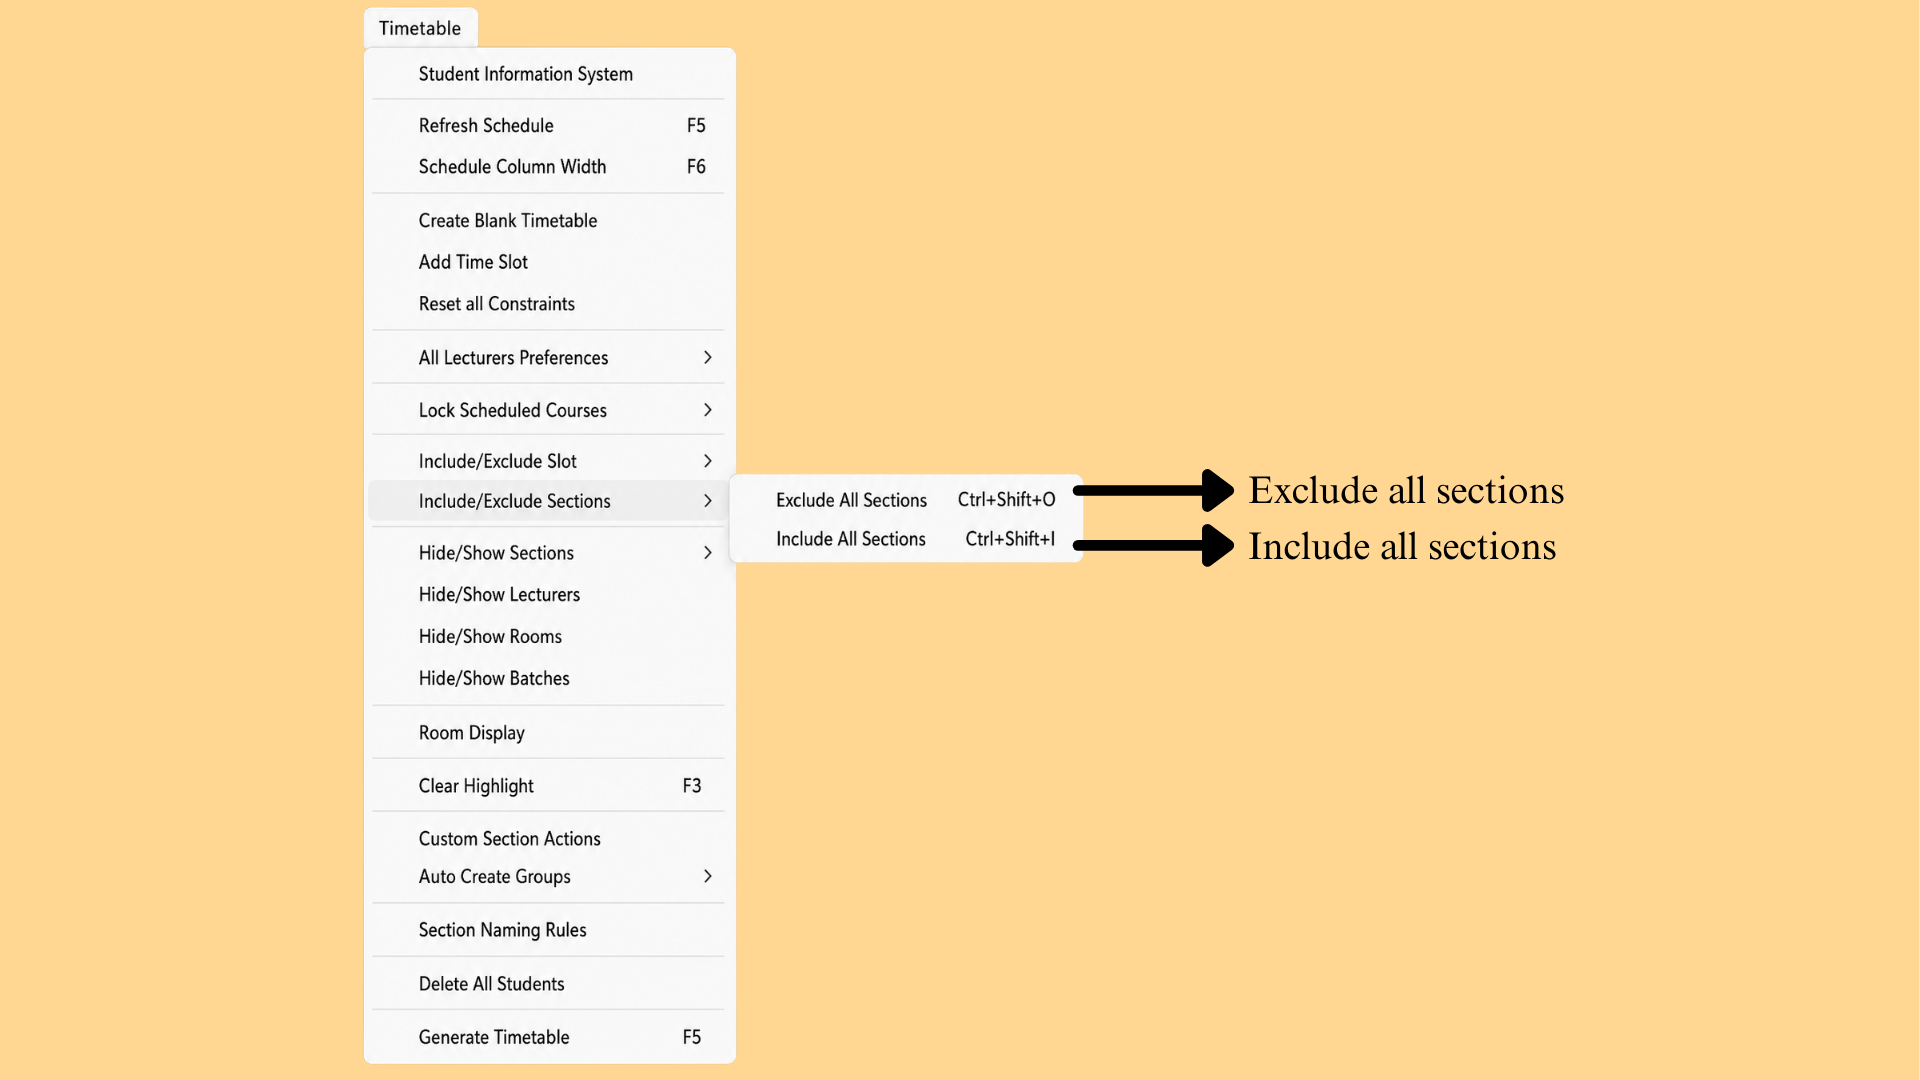
| Menu Item | Description |
|---|---|
| Exclude All Sections (Ctrl+Shift+O) | Exclude all sections. |
| Include All Sections (Ctrl+Shift+I) | Include all sections. |
Table 3.1.6.6: Include/Exclude Sections Options
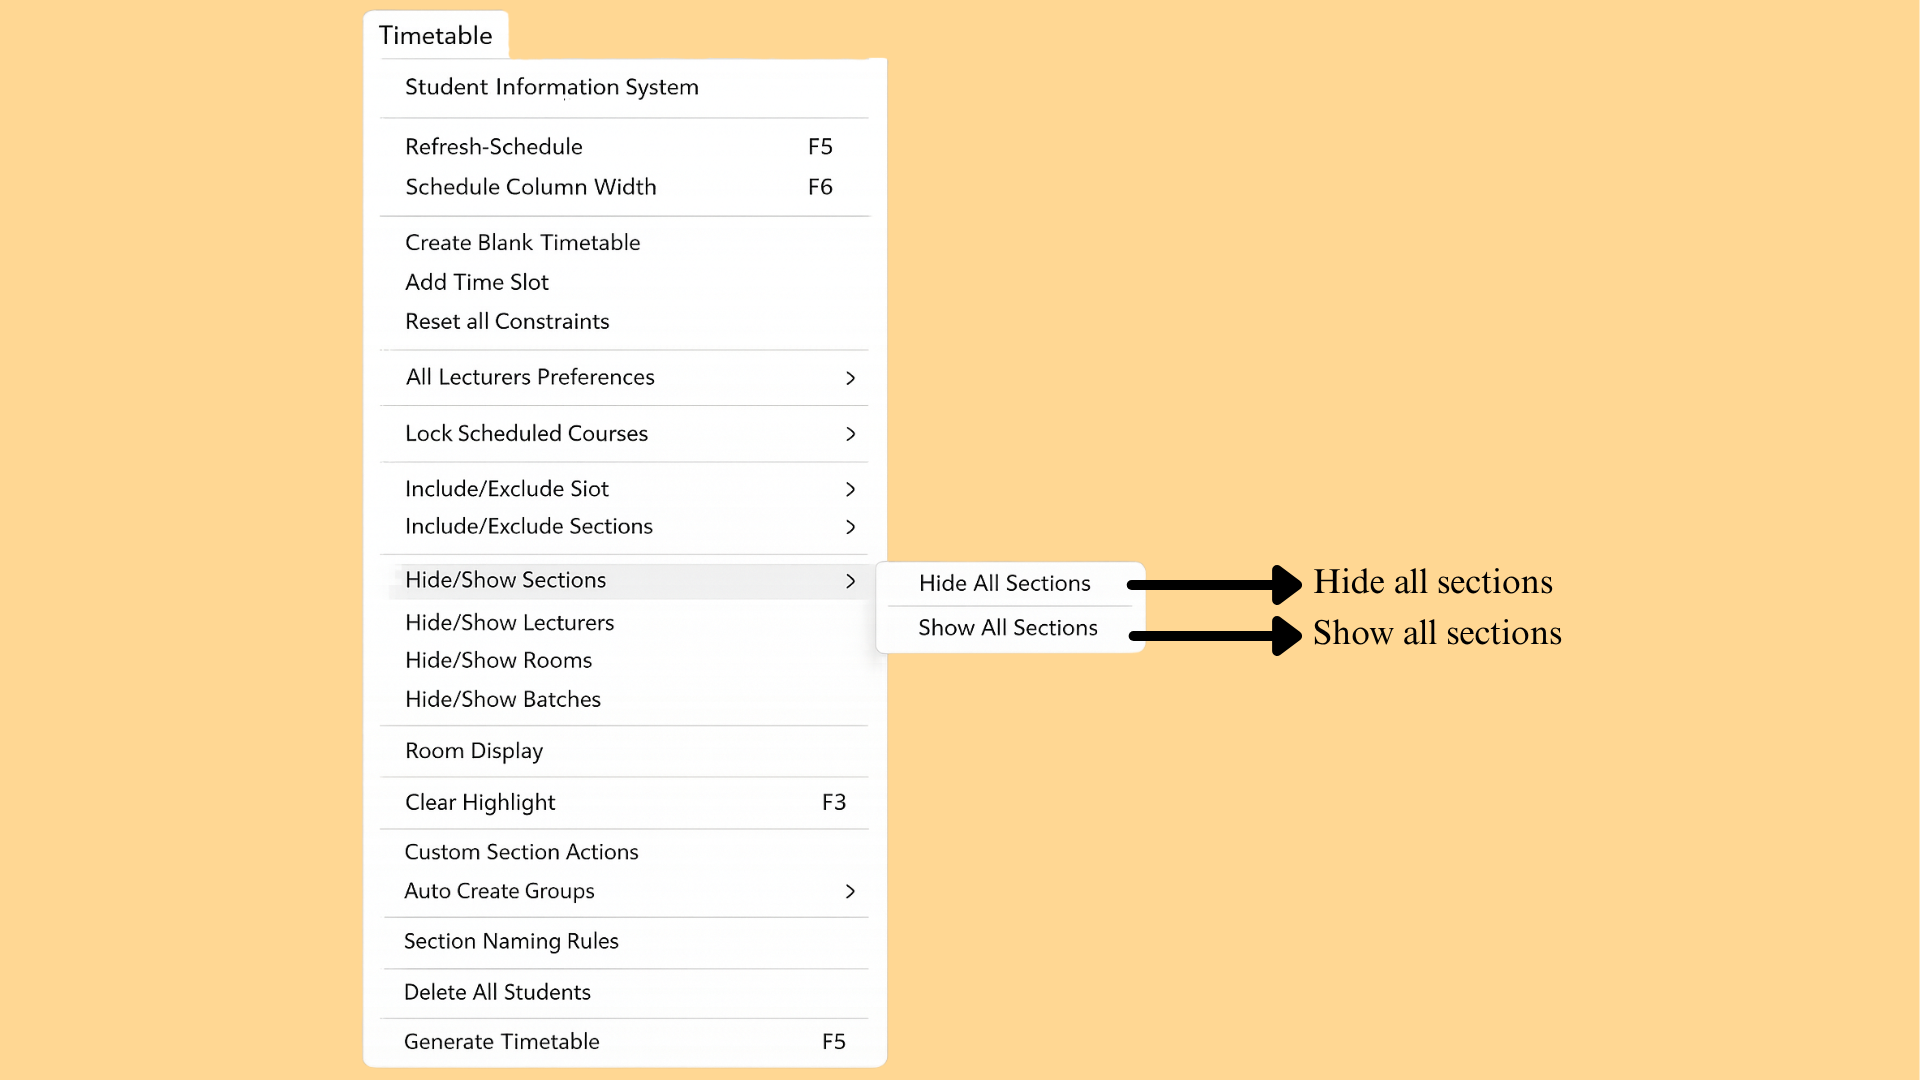
| Menu Item | Description |
|---|---|
| Hide All Sections | Hide all sections. |
| Show All Sections | Show all sections. |
Table 3.1.6.7: Hide/Show Sections Options
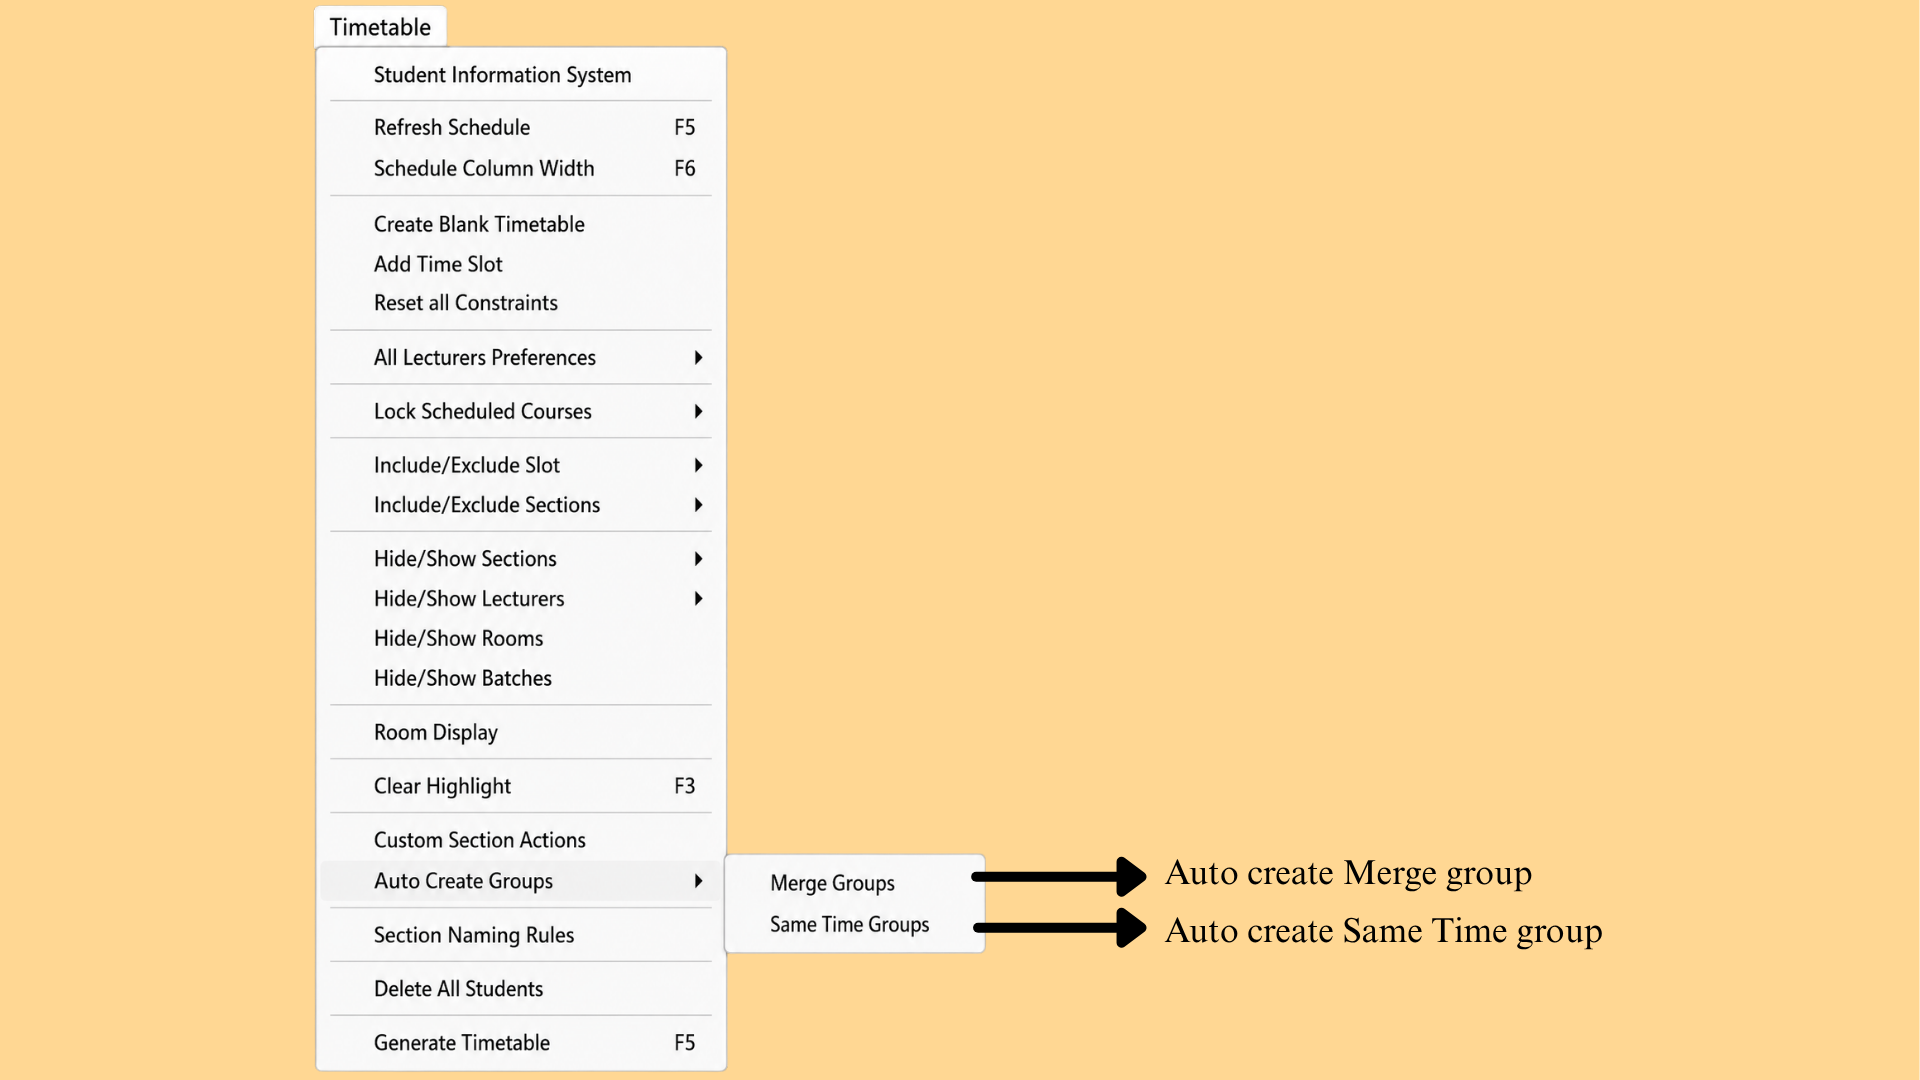
| Menu Item | Description |
|---|---|
| Merge Groups | Auto create merge groups. |
| Same Time Groups | Auto create same time groups. |
Table 3.1.6.8: Auto Create Groups Options
3.1.7 Window Menu
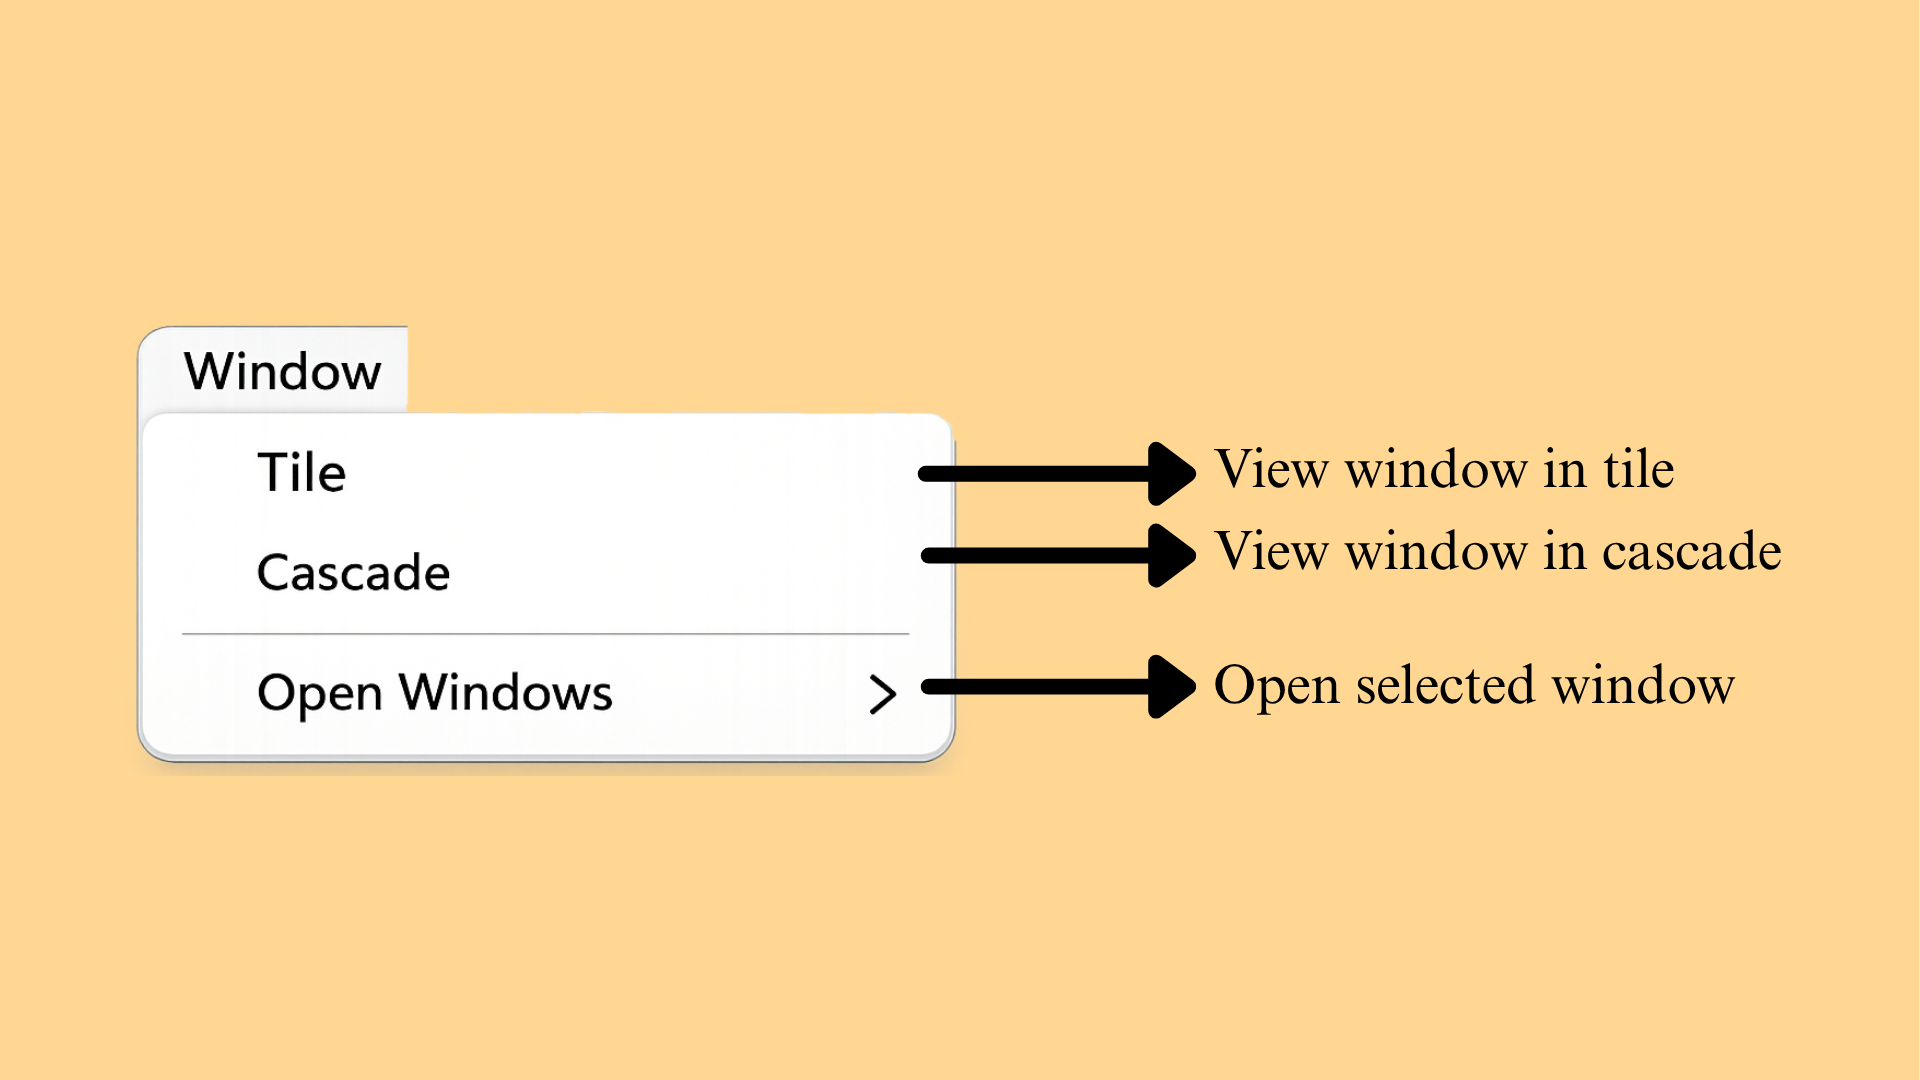
| Menu Item | Description |
|---|---|
| Tile | View windows in a tiled layout. |
| Cascade | View windows in a cascaded layout. |
| Open Windows | Open the selected window. |
Table 3.1.7.1: Window Menu Options
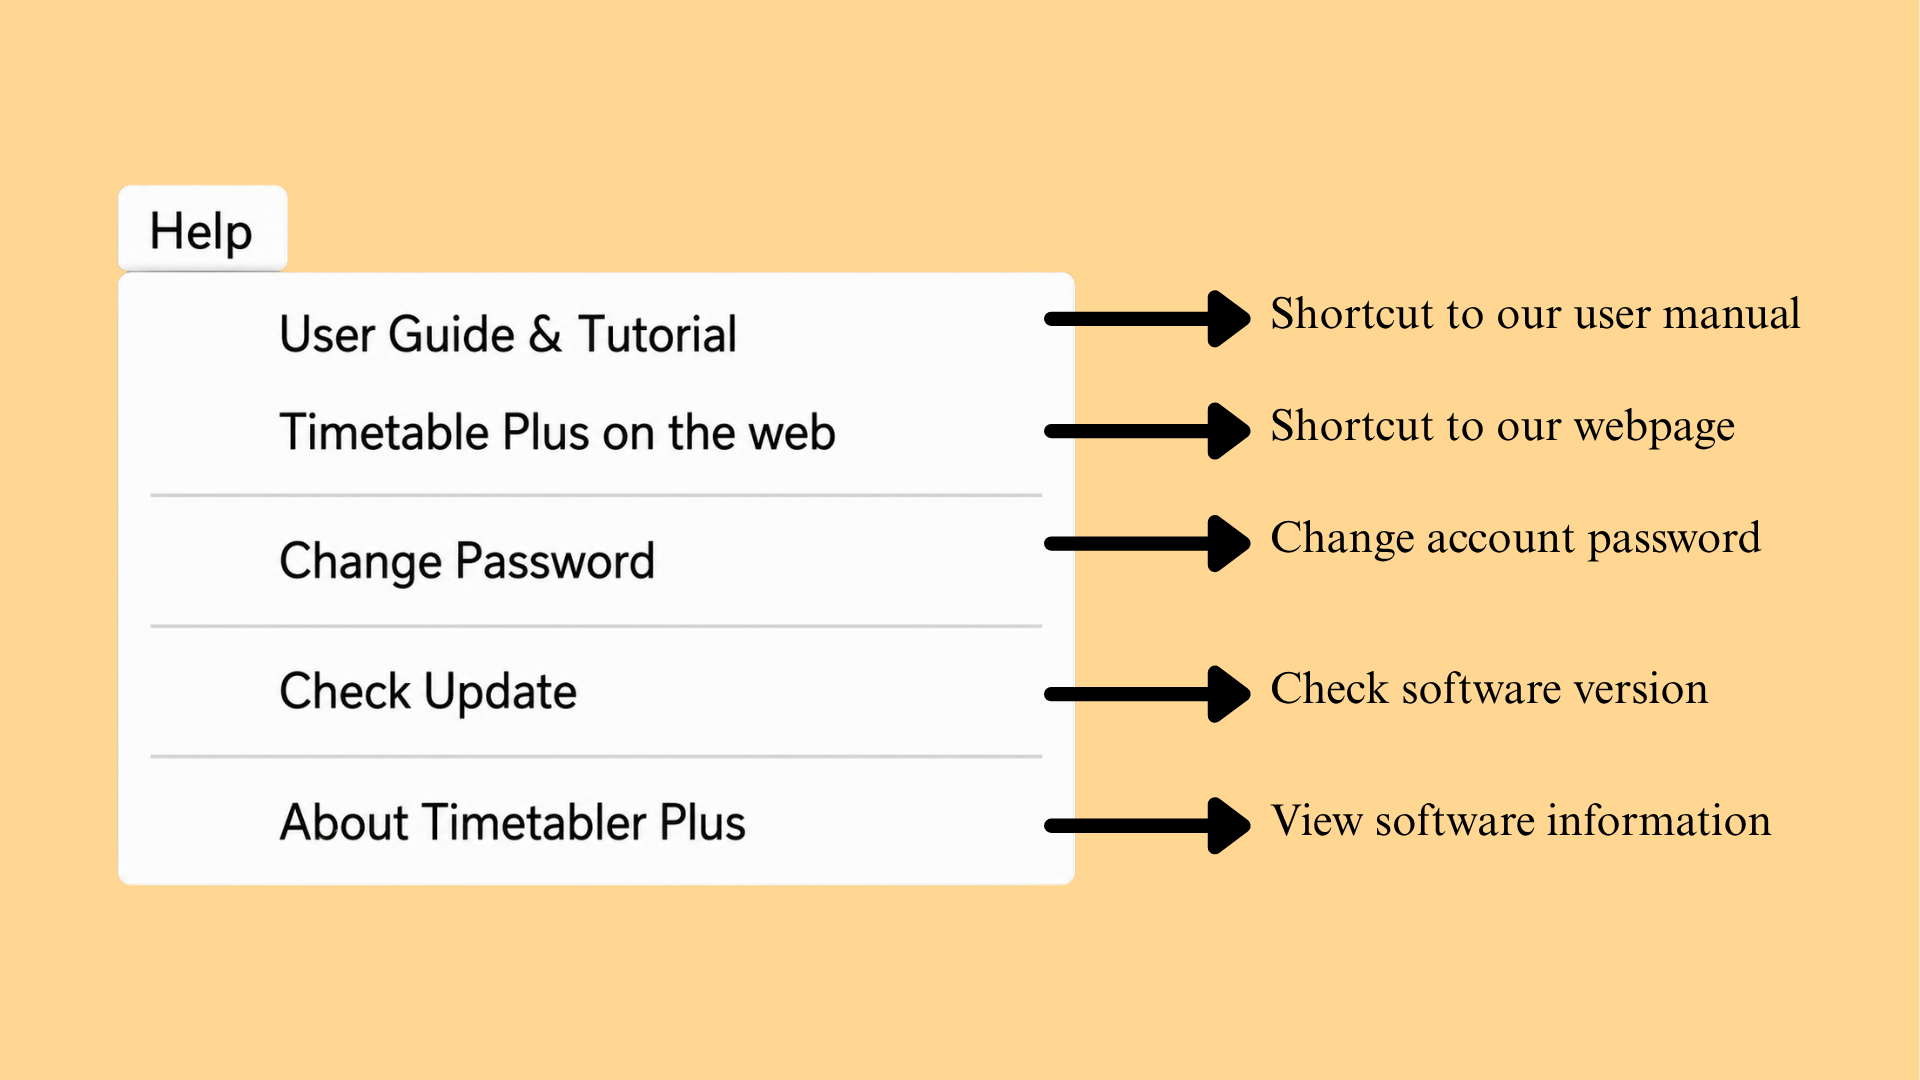
3.1.8 Help Menu
3.1.9 E-Campus Settings (To Import Database)
To import database using E-Campus, first you need to know about E-Campus Settings.
Go to the Database Menu and select E-Campus. You will see a drop-down menu under E-Campus. Click on E-Campus Settings.
1. Connection
First you need to connect your TPlus Class with your E-Campus Student Information System. The E-Campus Settings window contains two sections: Settings on the left and Connection on the right. Follow the steps below to set up the connection.
Step 1: In the Connection section on the right, fill in the Web Service Settings fields. To know how to fill in the empty slots, refer to Table 3.1.9.2 below.
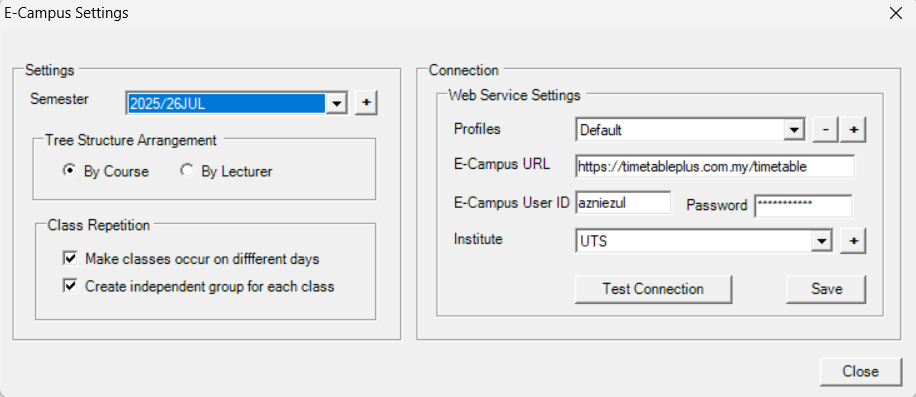
| Field | Description |
|---|---|
| SIS URL | Always fixed to the website where it contains the online database. Default is https://www.timetableplus.com/timetable. |
| SIS User ID | User ID used in online database. Example: Admin99 |
| Password | Password used in online database. |
| Institute | Your institute. You may click the drop-down menu to choose your institute. If there is none, you can click the add sign to add your institute. |
Table 3.1.9.2: Fill In Information in Connection
Step 2: In the Settings section on the left, select the preferred semester of the data that will be imported from E-Campus in the Semester drop-down list.
Step 3: Once all the slots have been filled in, click the Test Connection button.
Step 4: A pop-up message will appear, stating that the connection has been successful. Click OK to close the message.
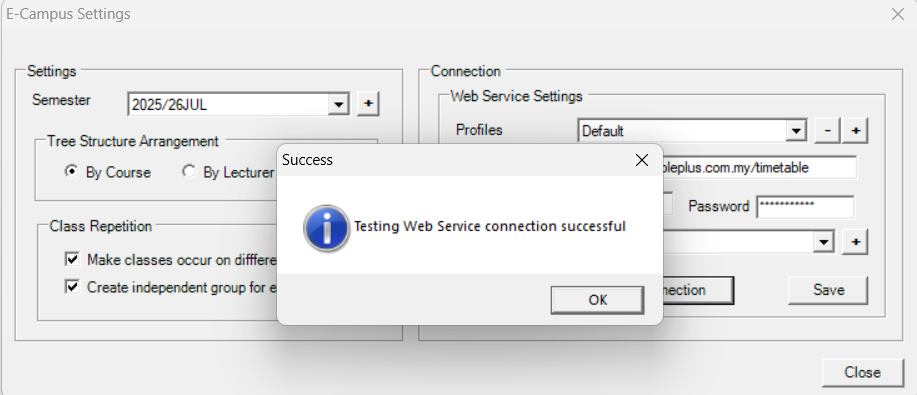
Step 5: Once everything has been filled and connected, click Save, then click Close to exit the E-Campus Settings window.
2. Import Database
After you have saved the configuration of the E-Campus connection, you may import the database from E-Campus. Go to the Database menu, select E-Campus, then click Import Database as shown in Figure 3.1.9.1. The Import Data from Student Information System window will pop-up, where you choose the data you want to import.
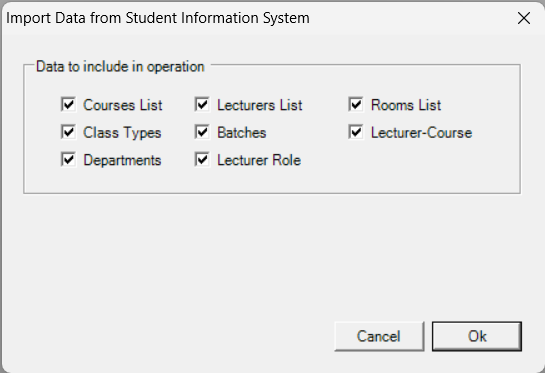
Under Data to include in operation, tick the data you want to import. Tick every box to import the entire database, or tick only the records you need. Each option is described in Table 3.1.9.4 below.
| Data | Description |
|---|---|
| Courses List | The list of courses recorded in E-Campus. |
| Lecturers List | The list of lecturers recorded in E-Campus. |
| Rooms List | The list of rooms recorded in E-Campus. |
| Class Types | The class types defined in E-Campus, used to categorise each class. |
| Batches | The student batches recorded in E-Campus. |
| Lecturer-Course | The assignment of each lecturer to the courses they teach. |
| Departments | The departments recorded in E-Campus. |
| Lecturer Role | The role assigned to each lecturer. |
Table 3.1.9.4: Data to Include in Operation
Once you have chosen the data, click Ok to begin the import, or Cancel to close the window without importing. The full import procedure is described in Chapter 5.2.5 Import Database From E-Campus.
3.2 Toolbar
The toolbar provides shortcut buttons for the most common actions, such as creating a new project or saving your work, without going through the menu. You will use it most at the start of each session and throughout your work when saving progress.

Creates a new timetable file.
Saves the current timetable file in the system.
Creates a new folder.

Deletes the selected timetable file or folder.

Refreshes and updates the timetable display.
Exports the result as a CSV file.

Automatically generates the schedule.
The remaining toolbar buttons open a window when clicked. Each button is shown below together with the window it opens.

Opens an existing timetable folder.
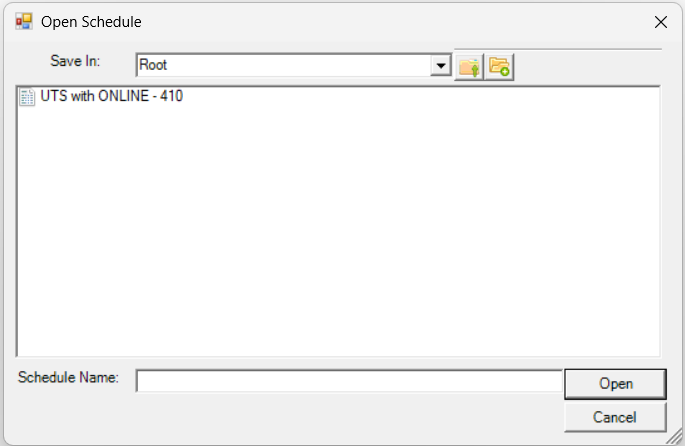
After clicking Open Timetable, the schedule selection screen appears, allowing you to choose the timetable to open.

Opens Course Management to view the course list, course details, and lecturers.
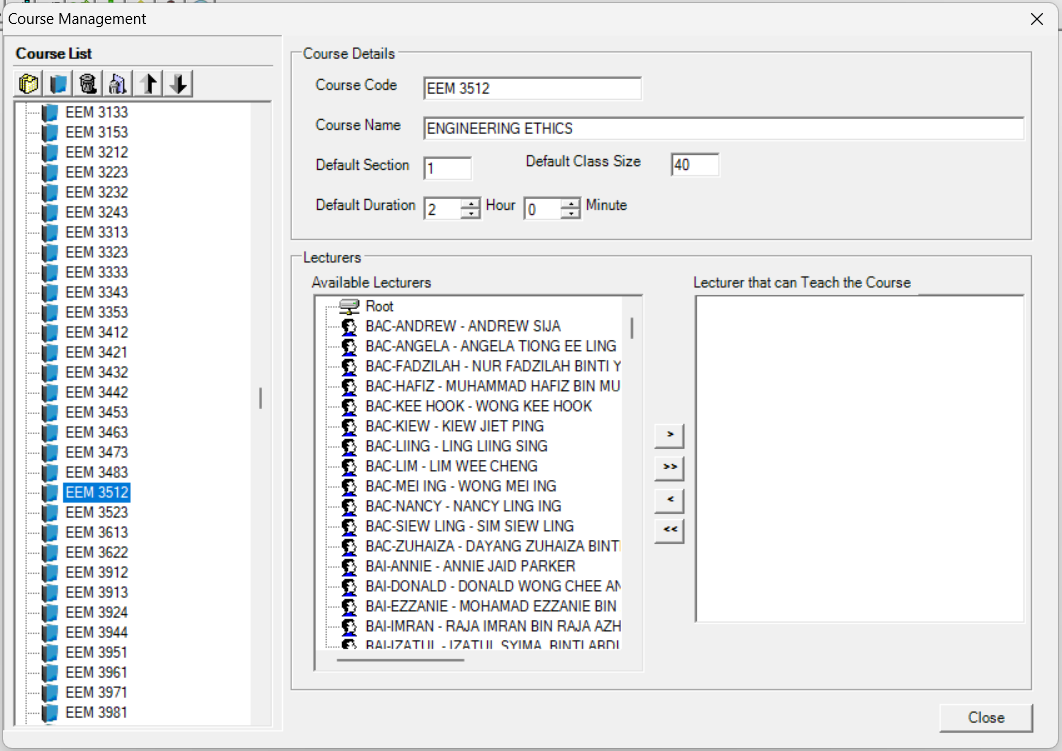
After clicking Courses Management, the Course Management window opens, showing the course list, course details, and lecturers.
Opens Lecturer Management to view the lecturer list, lecturer details, and teaching courses.
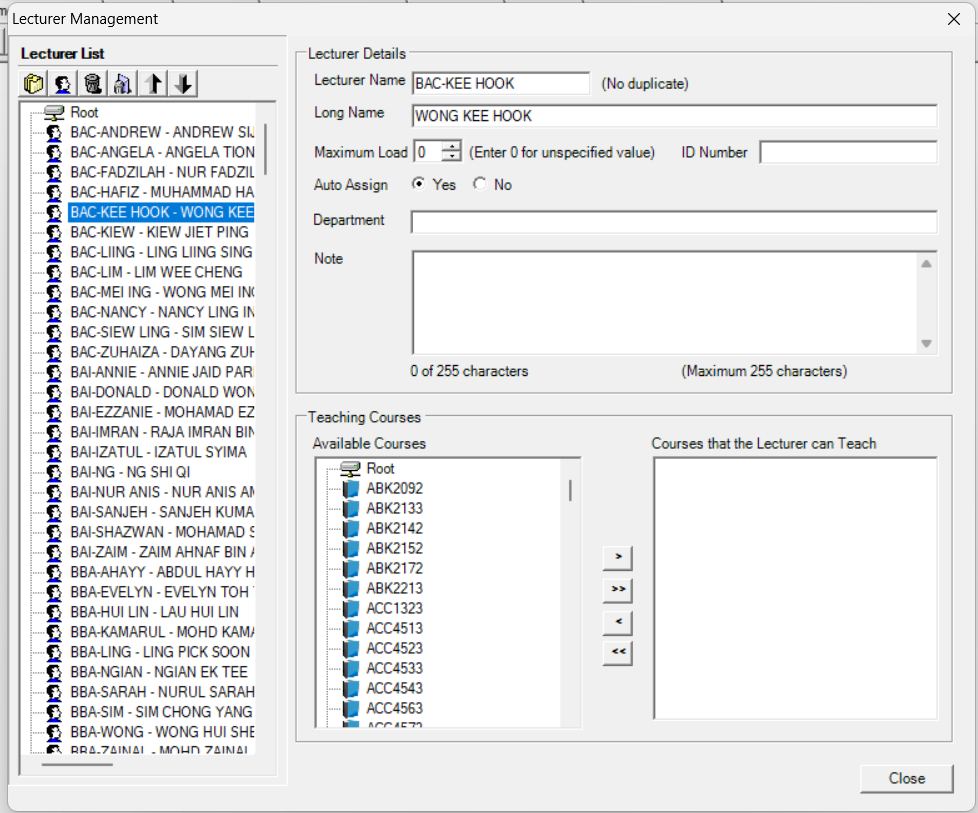
After clicking Lecturers Management, the Lecturer Management window opens, showing the lecturer list, lecturer details, and teaching courses.

Opens Room Management to view the room list and room details.
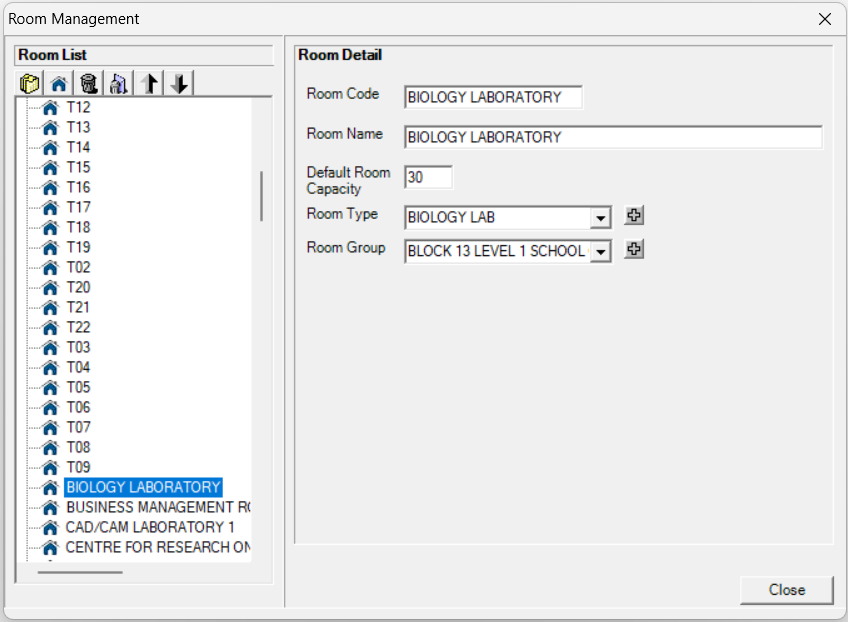
After clicking Rooms Management, the Room Management window opens, showing the room list and room details.

Opens Student Batch Management to view the batch list and batch details.
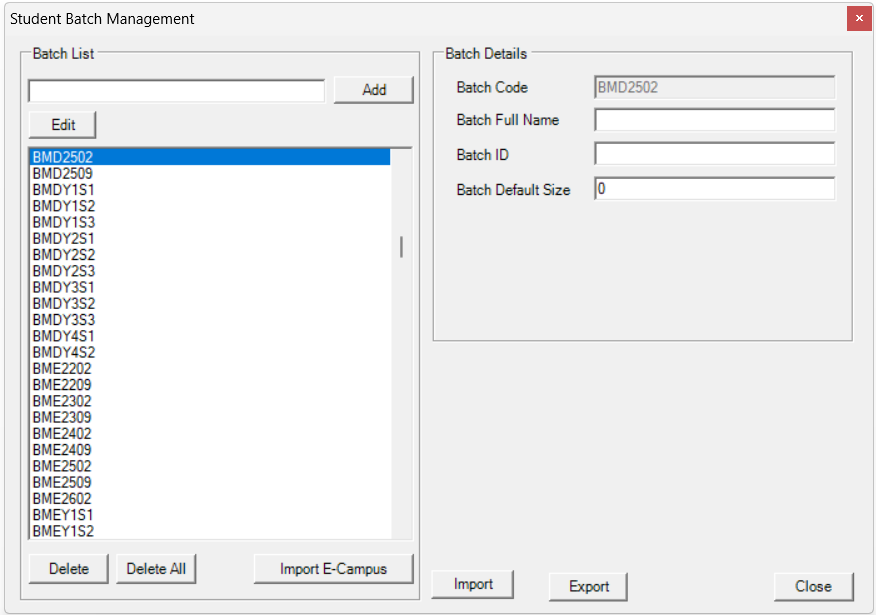
After clicking Batch Management, the Student Batch Management window opens, showing the batch list and batch details.
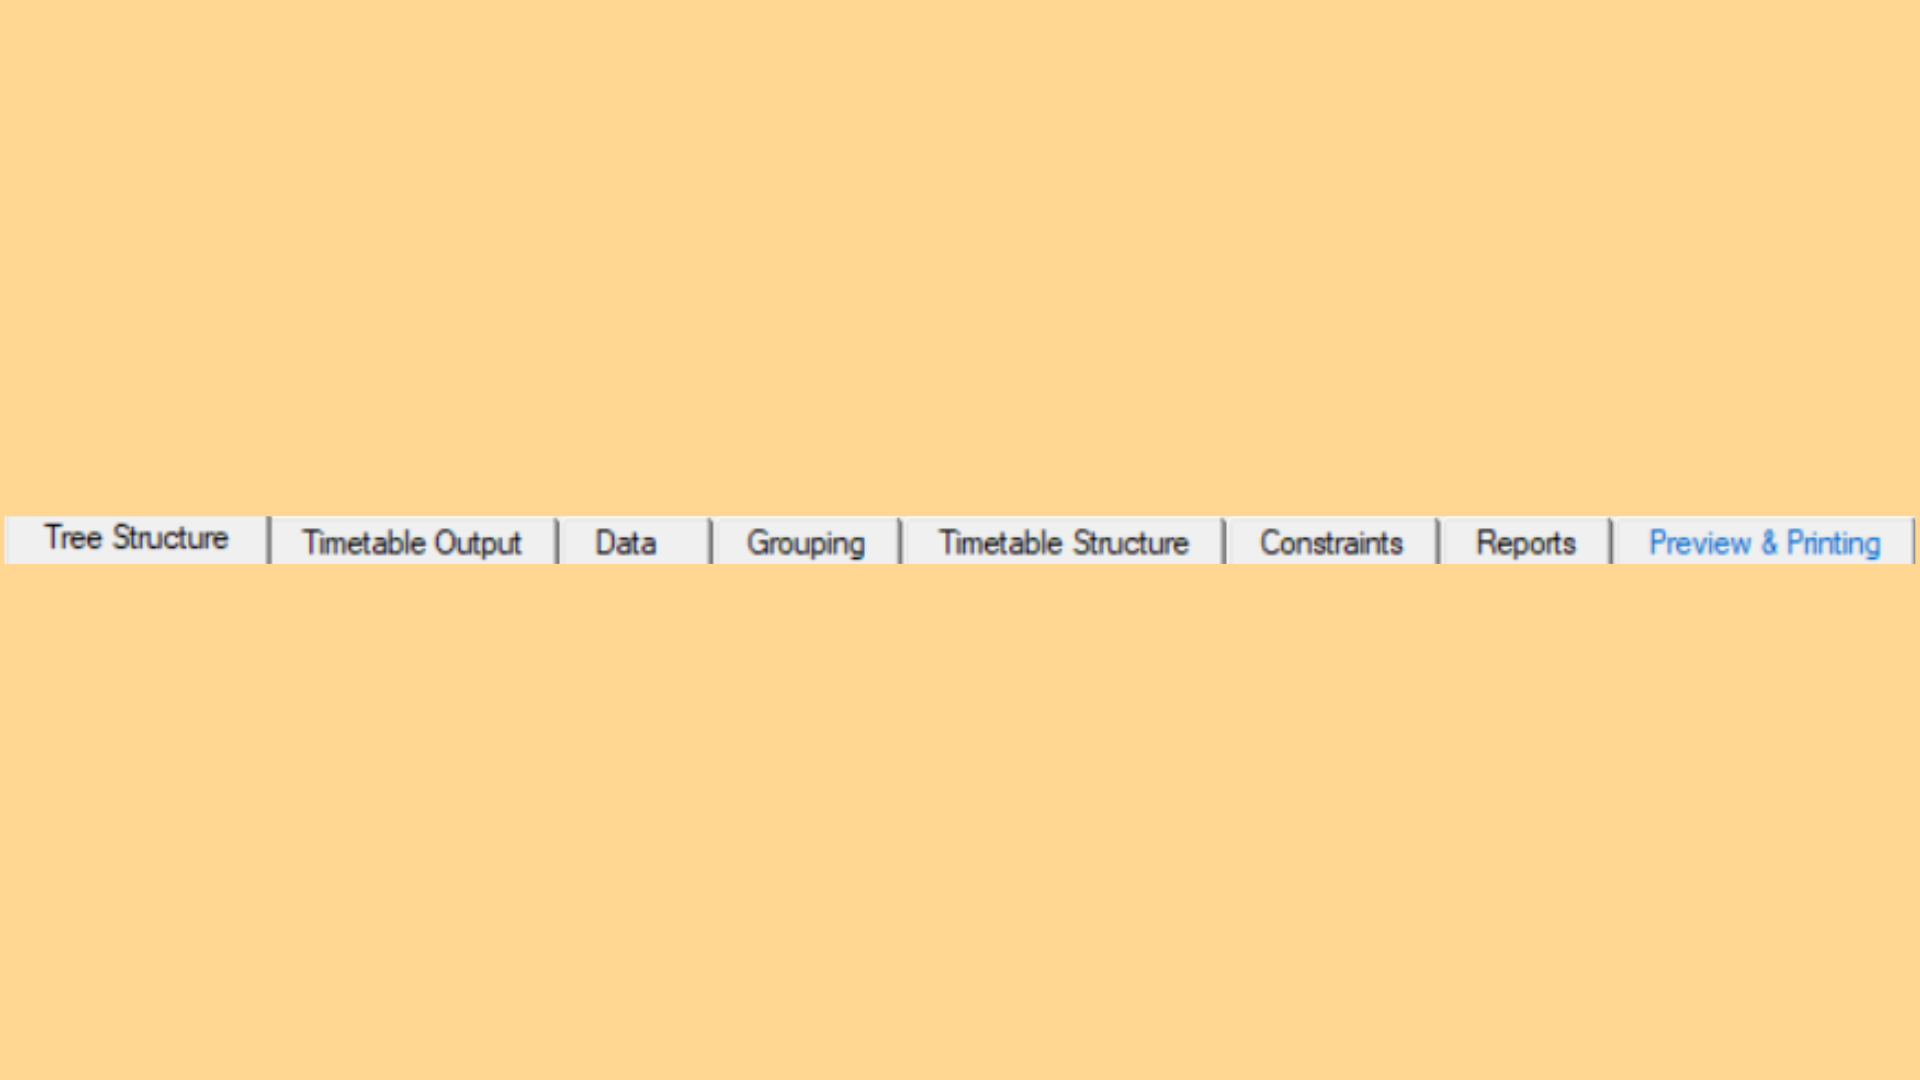
3.3 Main Module Tabs
The tabs divide the workspace into the main stages of the timetabling process. Work through them in order from left to right; each tab is covered in the chapters that follow. You will switch tabs as you move from data preparation through to generation and finalisation.
3.4 Timetable Explorer Panel
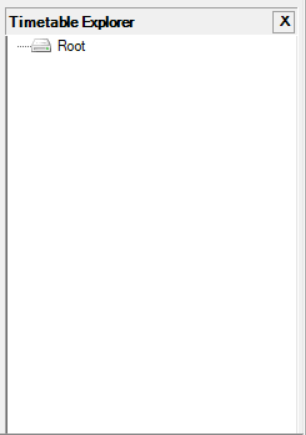
The Timetable Explorer is located on the left side of the screen. It displays all saved timetable projects under the Root directory in a Tree Structure. Use it to navigate between different parts of your project. You will refer to it when working with multiple timetable groups within the same project.
Right-Click Management Options
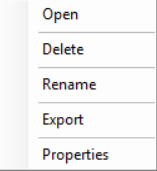
Right-clicking on a project in the Timetable Explorer opens a context menu with the following options:
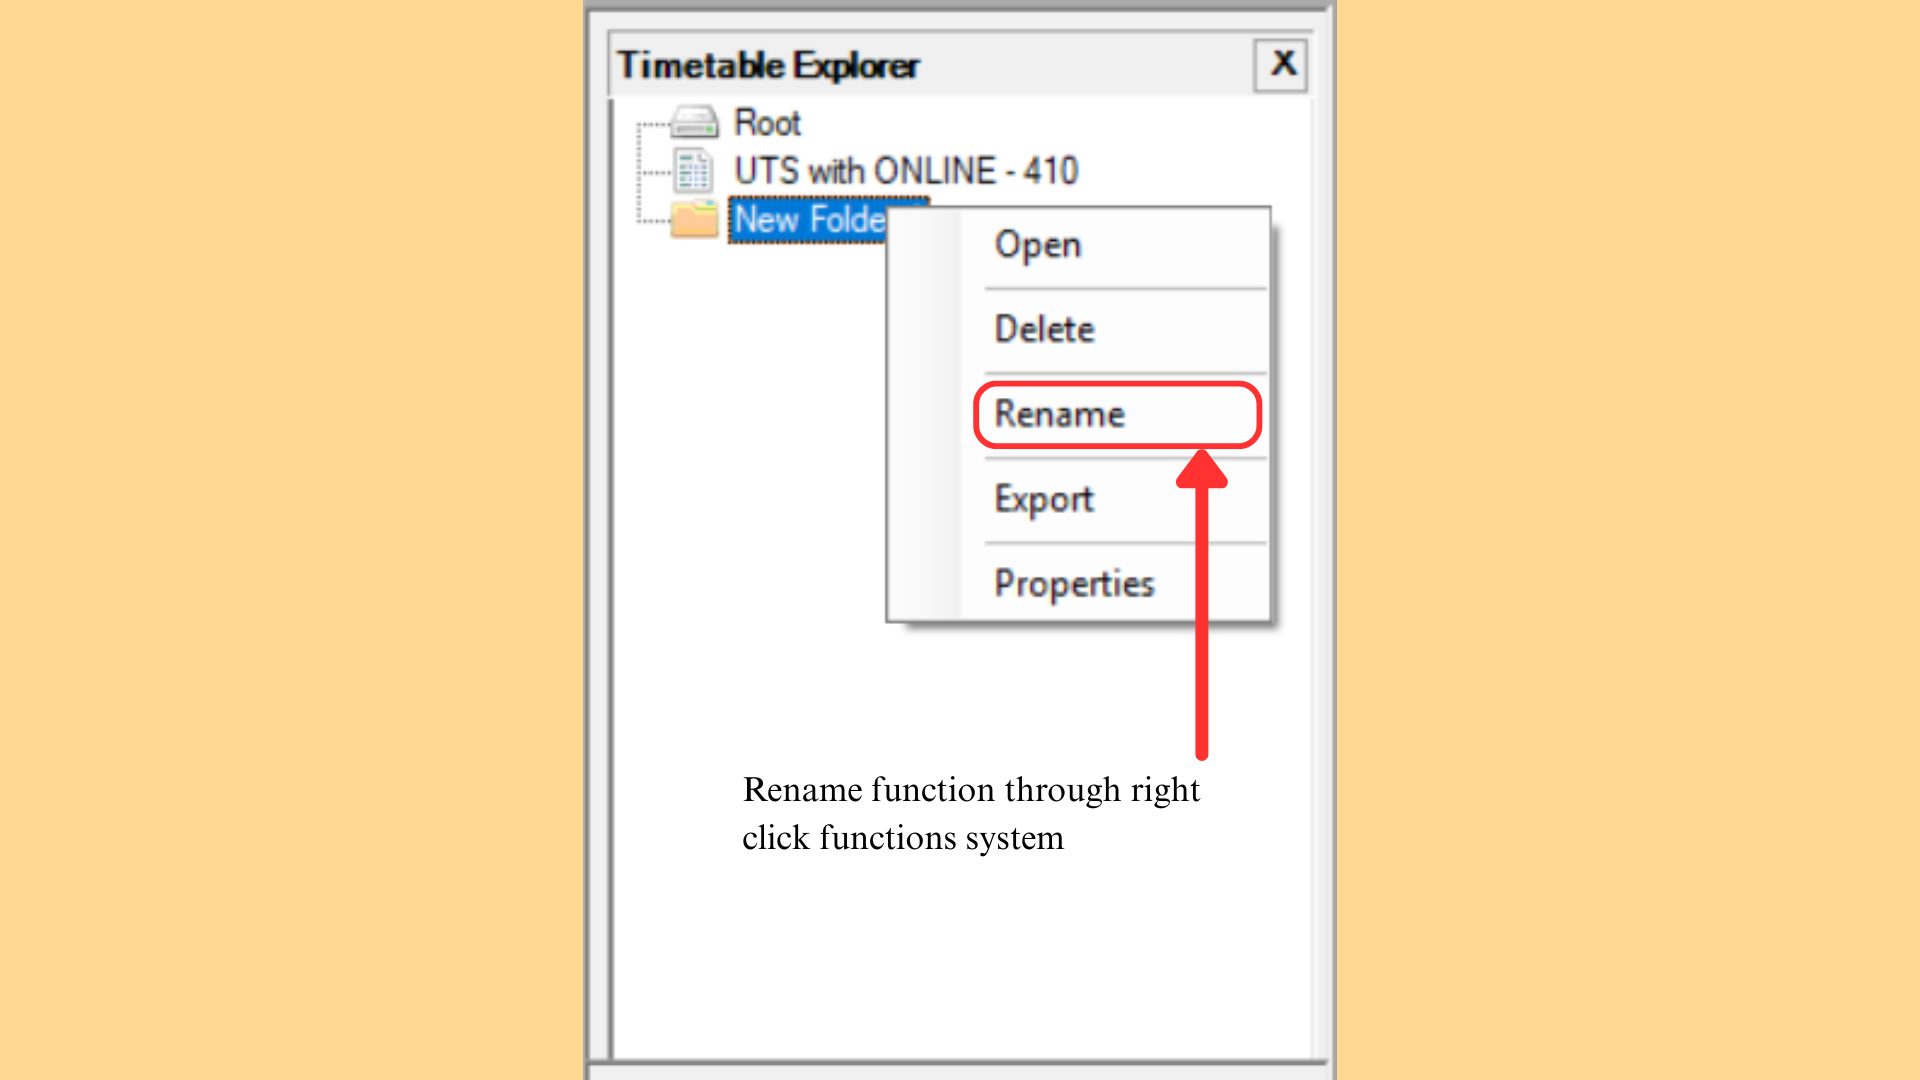
| Function | Description |
|---|---|
| Open | Opens the selected timetable project. |
| Delete | Removes the selected project from the system. |
| Rename | Changes the name of the selected project. |
| Export | Exports the project as a file for backup or transfer. |
| Properties | Displays project details such as file ID, file name, date created, and last saved. |
Table 3.4.2: Timetable Explorer Right-Click Functions
Project Properties
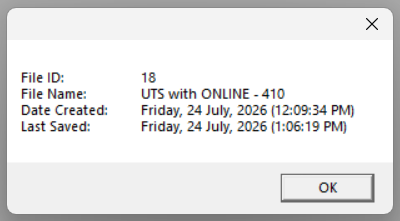
Selecting Properties from the right-click menu opens a window that displays the following information about the selected project:
| Field | Description |
|---|---|
| File ID | The unique identifier assigned to the project by the system. |
| File Name | The name given to the project when it was created. |
| Date Created | The date and time the project was first saved. |
| Last Saved | The date and time the project was last modified and saved. |
Table 3.4.3: Project Properties Fields
Exporting a Timetable Project
To export a timetable project outside the system, go to File → Export → Timetable File. The exported file uses the .TDat extension. This is useful for creating a backup copy of your project or transferring it to another machine.
3.5 Data and Status Panels
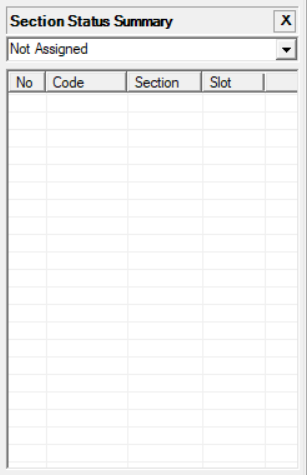
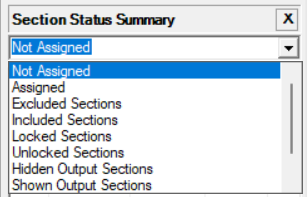
Located below the Timetable Explorer, these panels give you an at-a-glance view of your data and scheduling progress. The Section Status Summary panel lists courses that have not yet been assigned to a time slot. Use it to track scheduling progress at a glance; you will check it regularly during the timetable generation stage to confirm all courses have been placed.
3.6 Timetable Workspace
The timetable workspace is the main working area on the right side of the screen, where the timetable is displayed as a grid of days and time slots. This is where you review, adjust, and fine-tune class placements once the schedule has been generated. You will spend most of your time here during the generation and finalisation stages.
Detailed procedures for each stage are explained in the workflow chapters that follow.
3.7 Starting a New Project
Each academic session requires its own timetable project to keep data organised and separate from other periods.
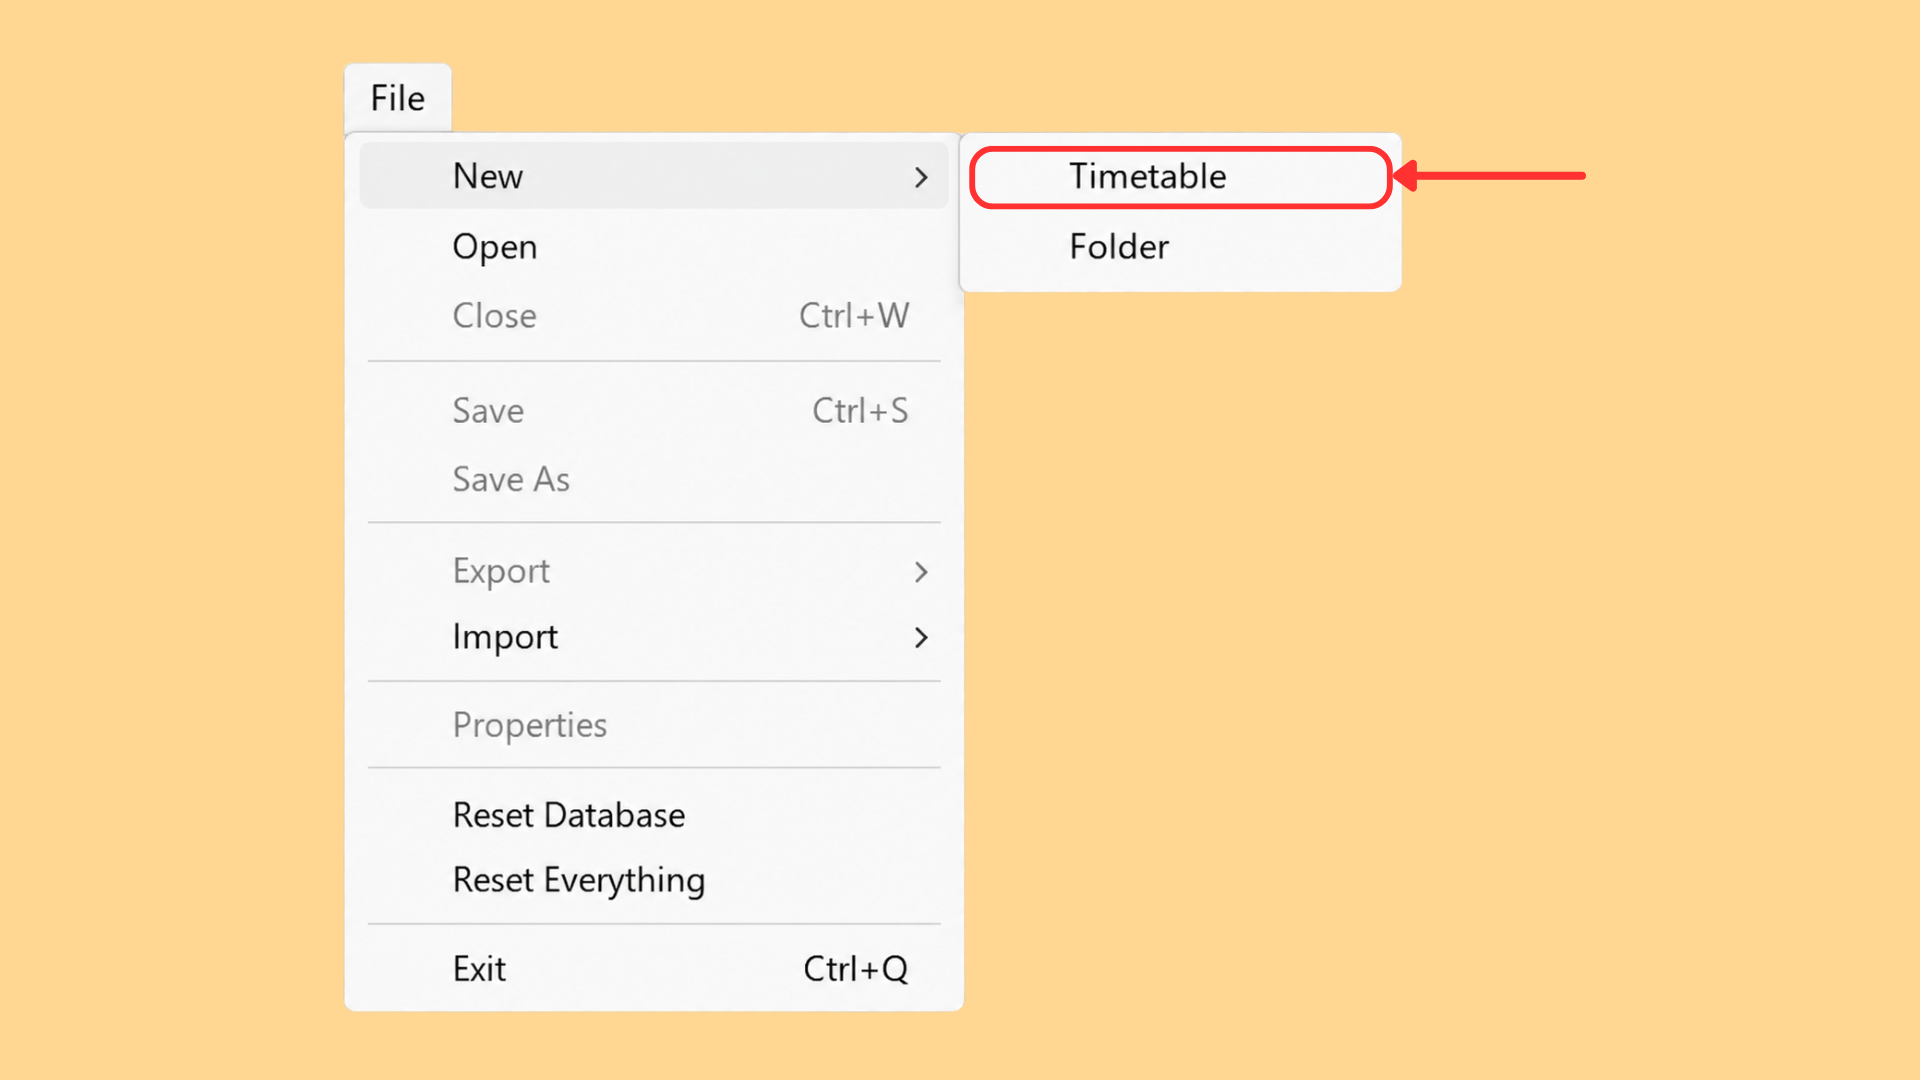
Step 1: From the menu bar, click File and select New → Timetable.
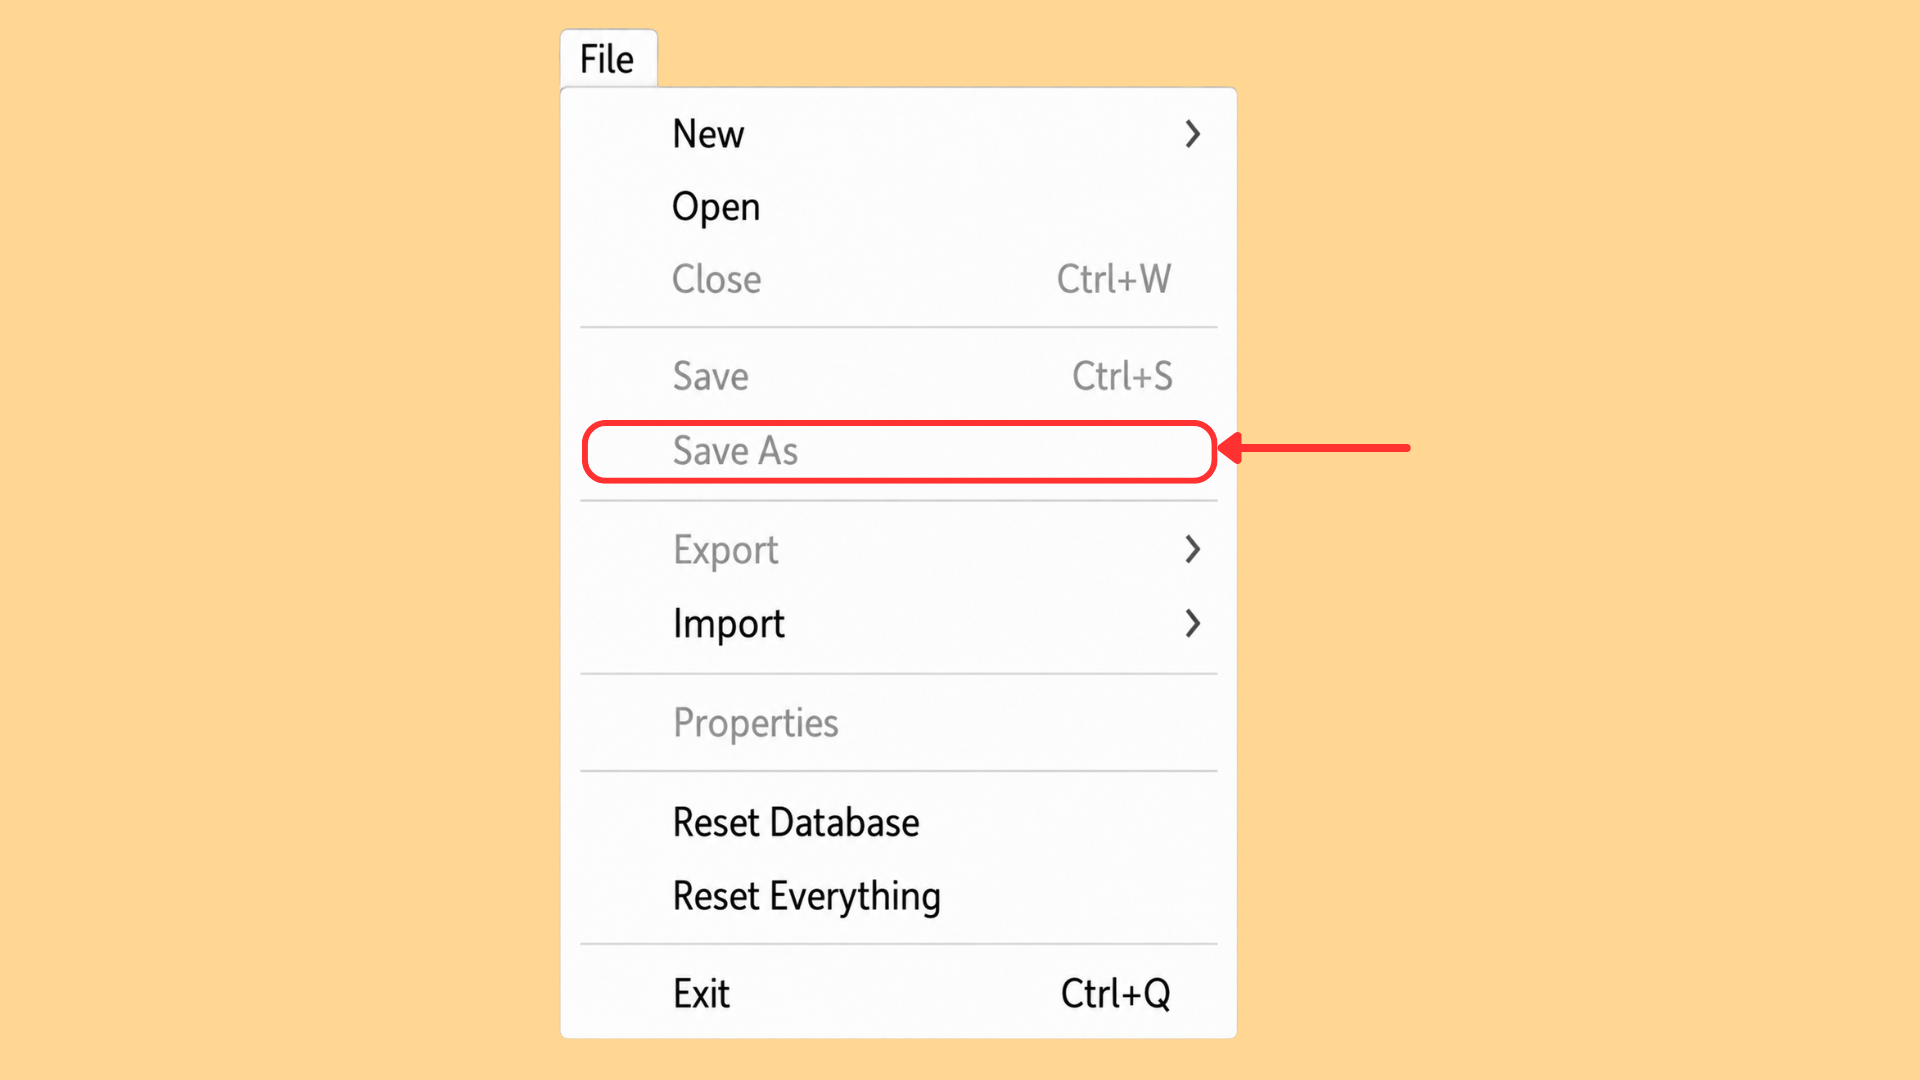
Step 2: Click Save to open the Save Schedule As window.
Step 3: Choose the save location. By default, the system opens to the Root directory. Use Up 1 Level to navigate to a parent folder if needed.
Step 4: Enter the Schedule Name (for example: Class_Sem1_2026).
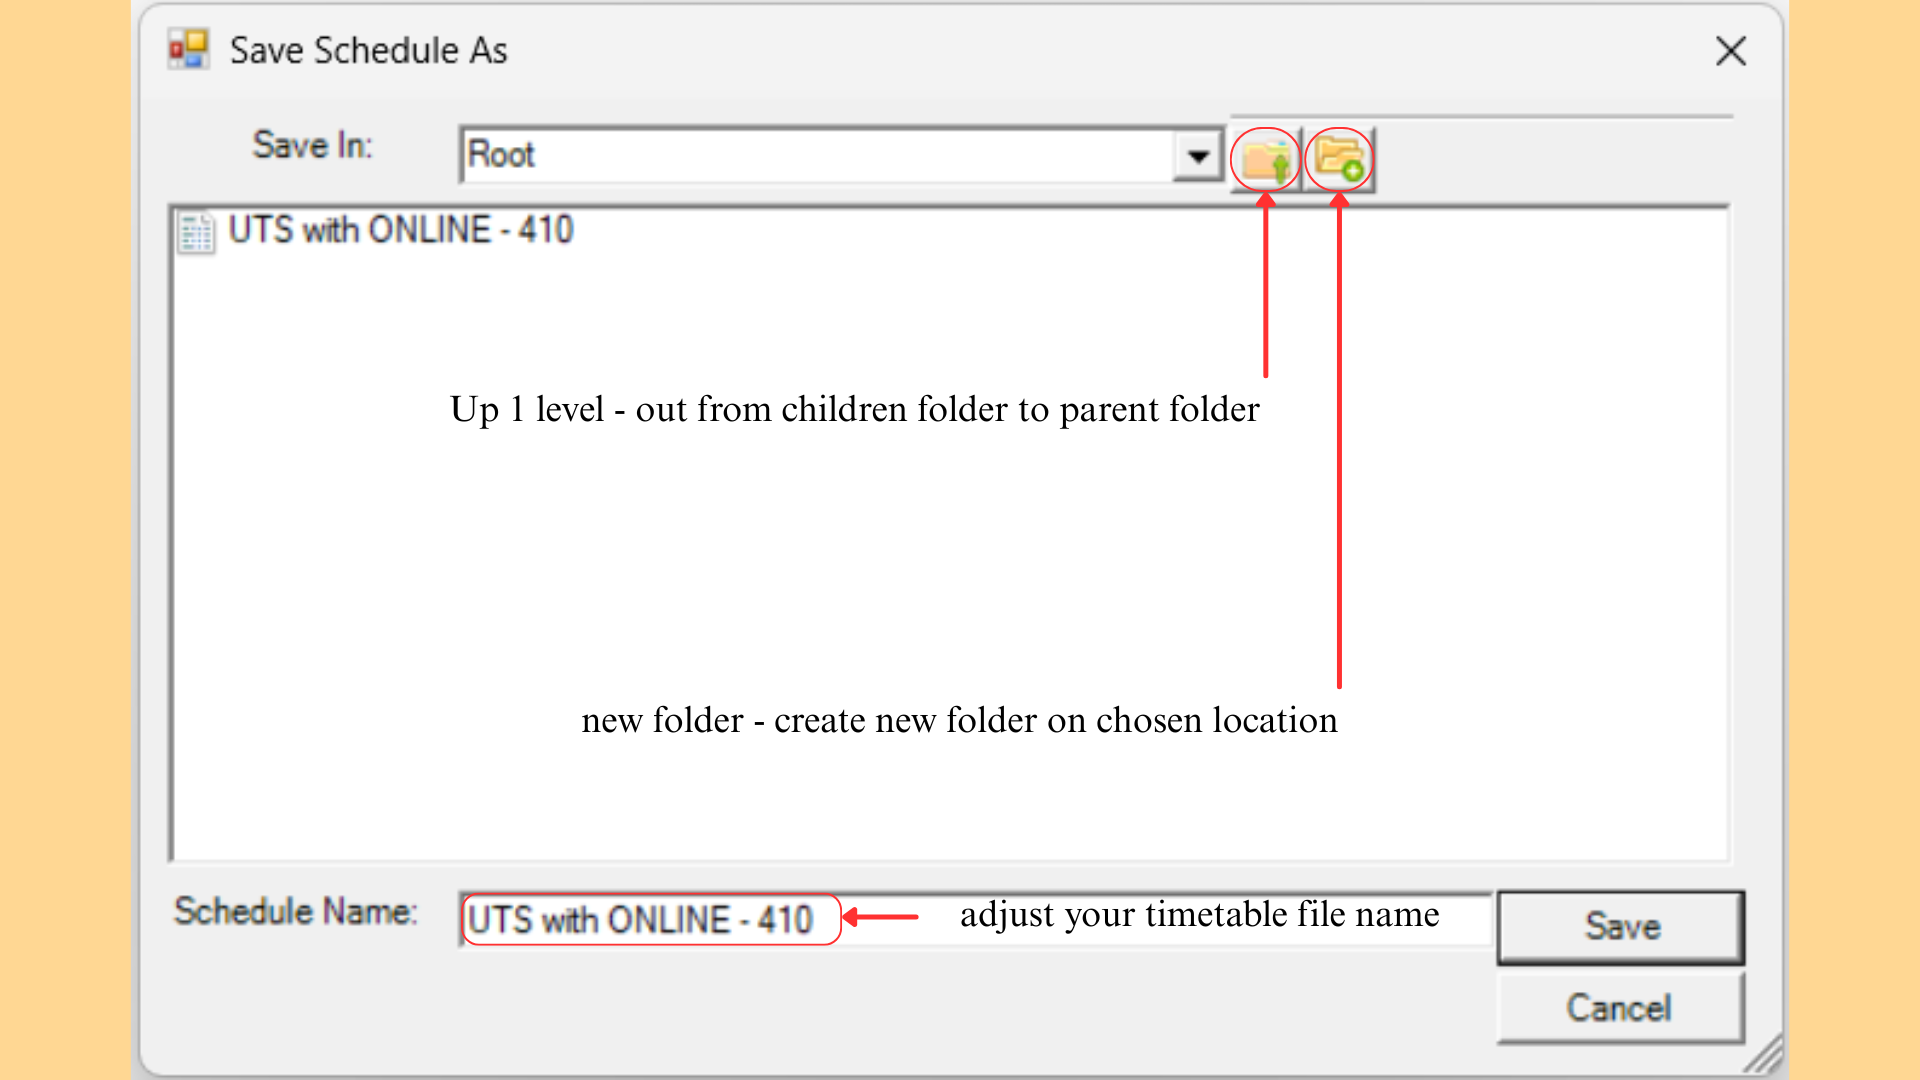
Step 5: Click Save.
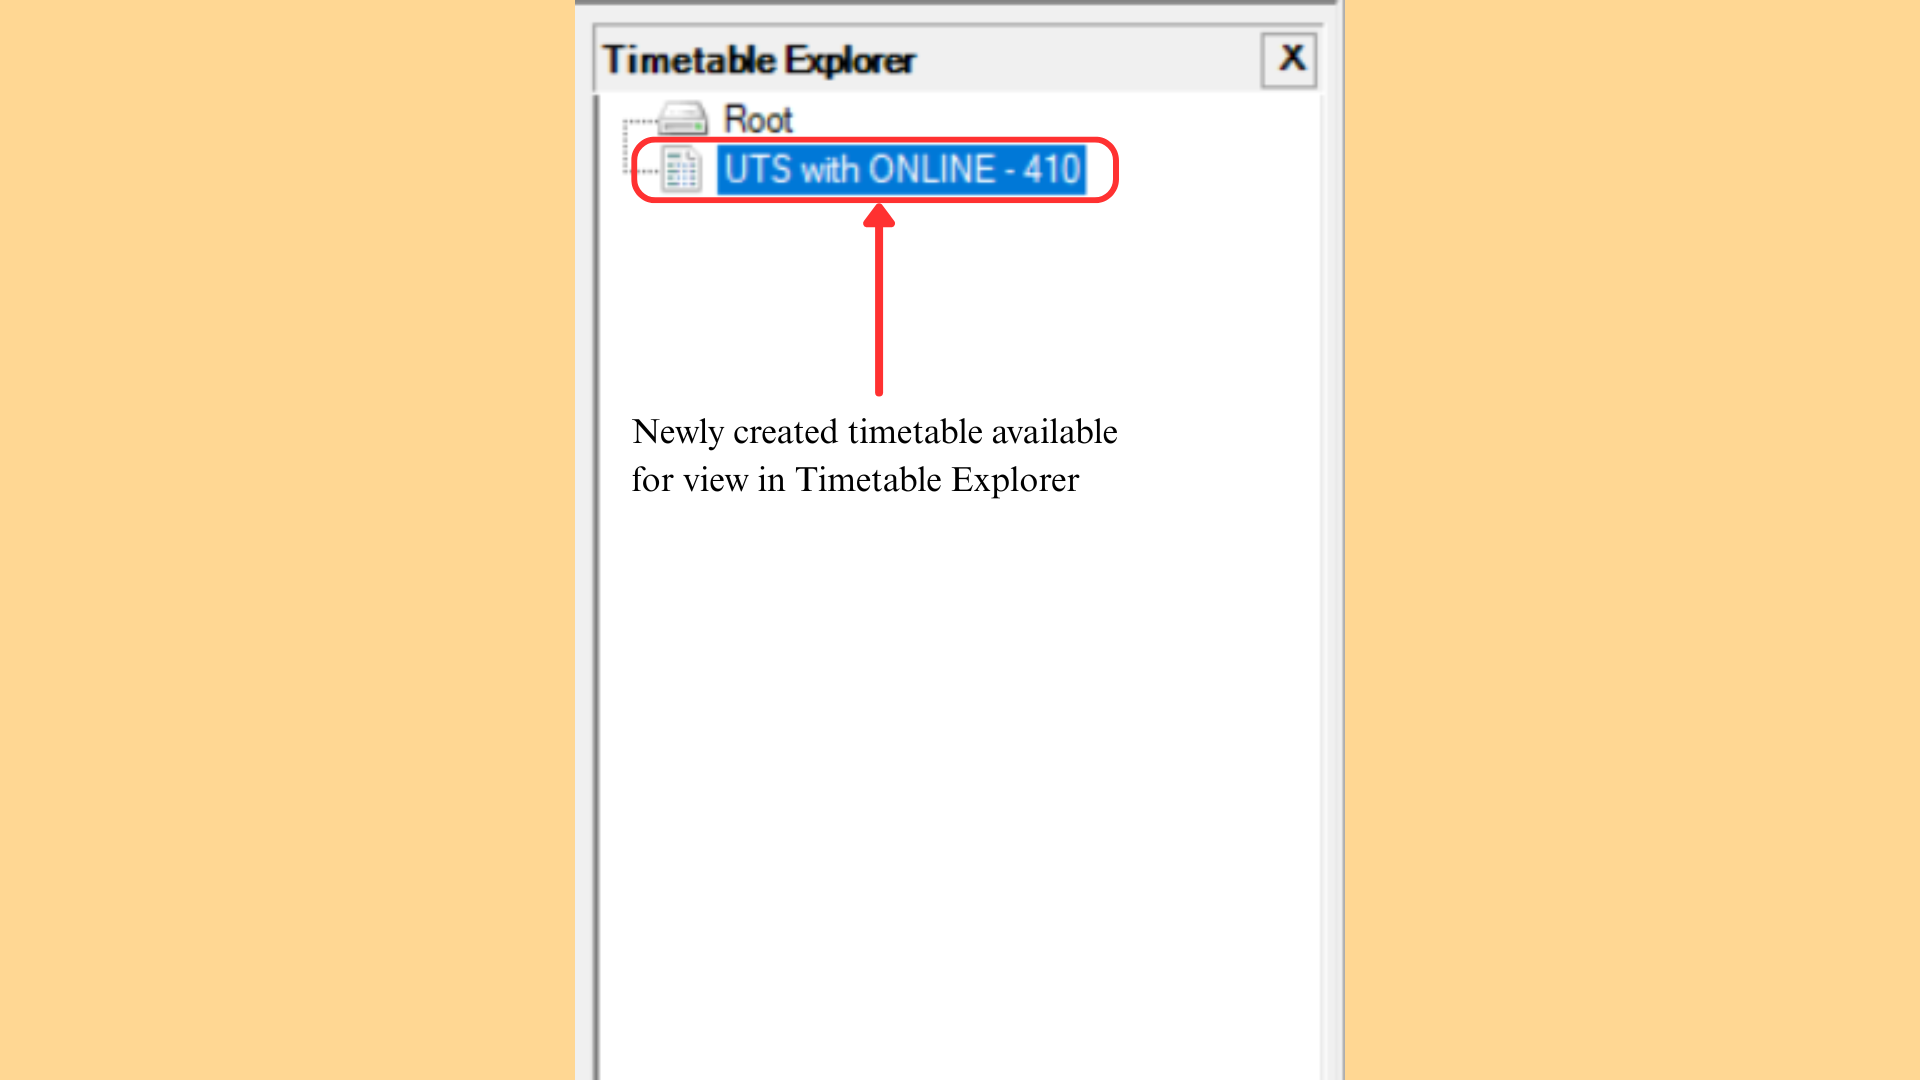
Step 6: Once saved, the new project will appear in the Timetable Explorer panel on the left side.
3.7.1 Organising Projects Using Folders
You can create folders within the save window to organise your projects by semester, year, or department.
New Folder: Click this icon to create a new folder within the current directory.
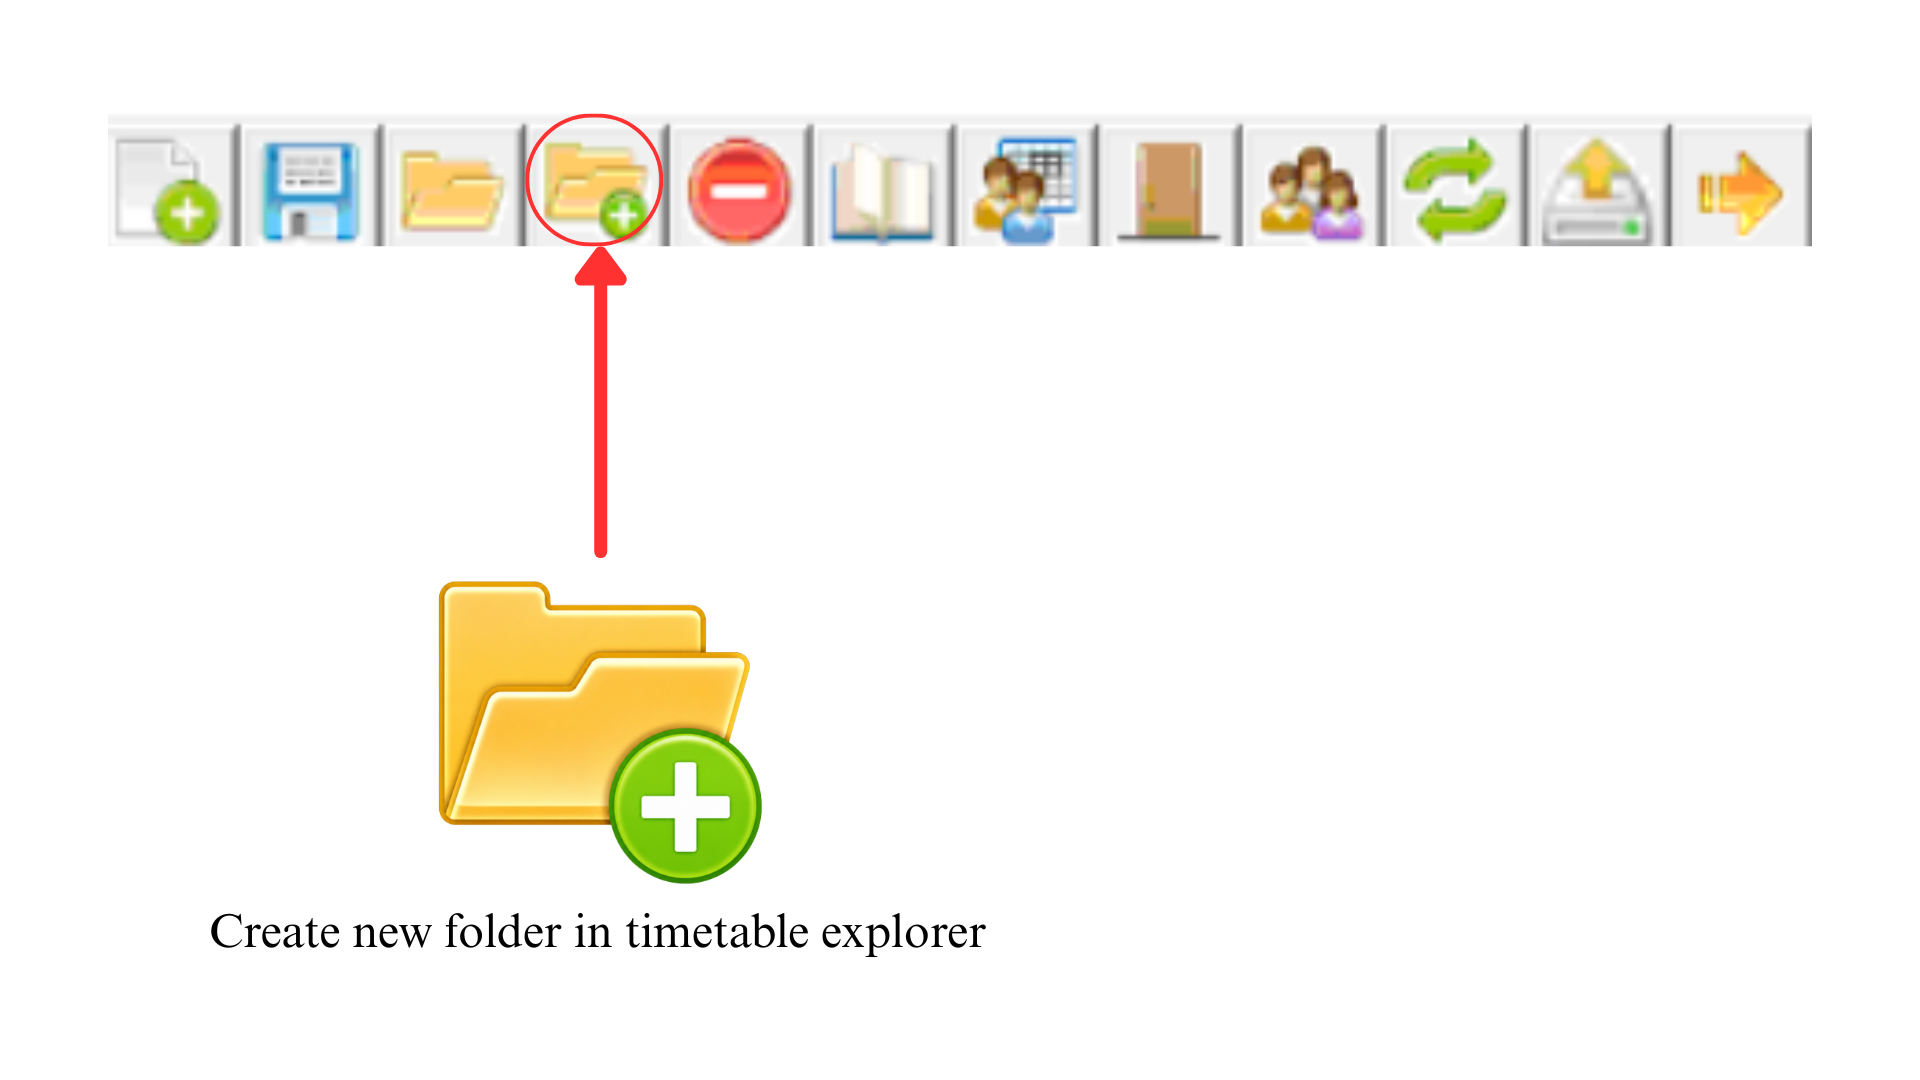
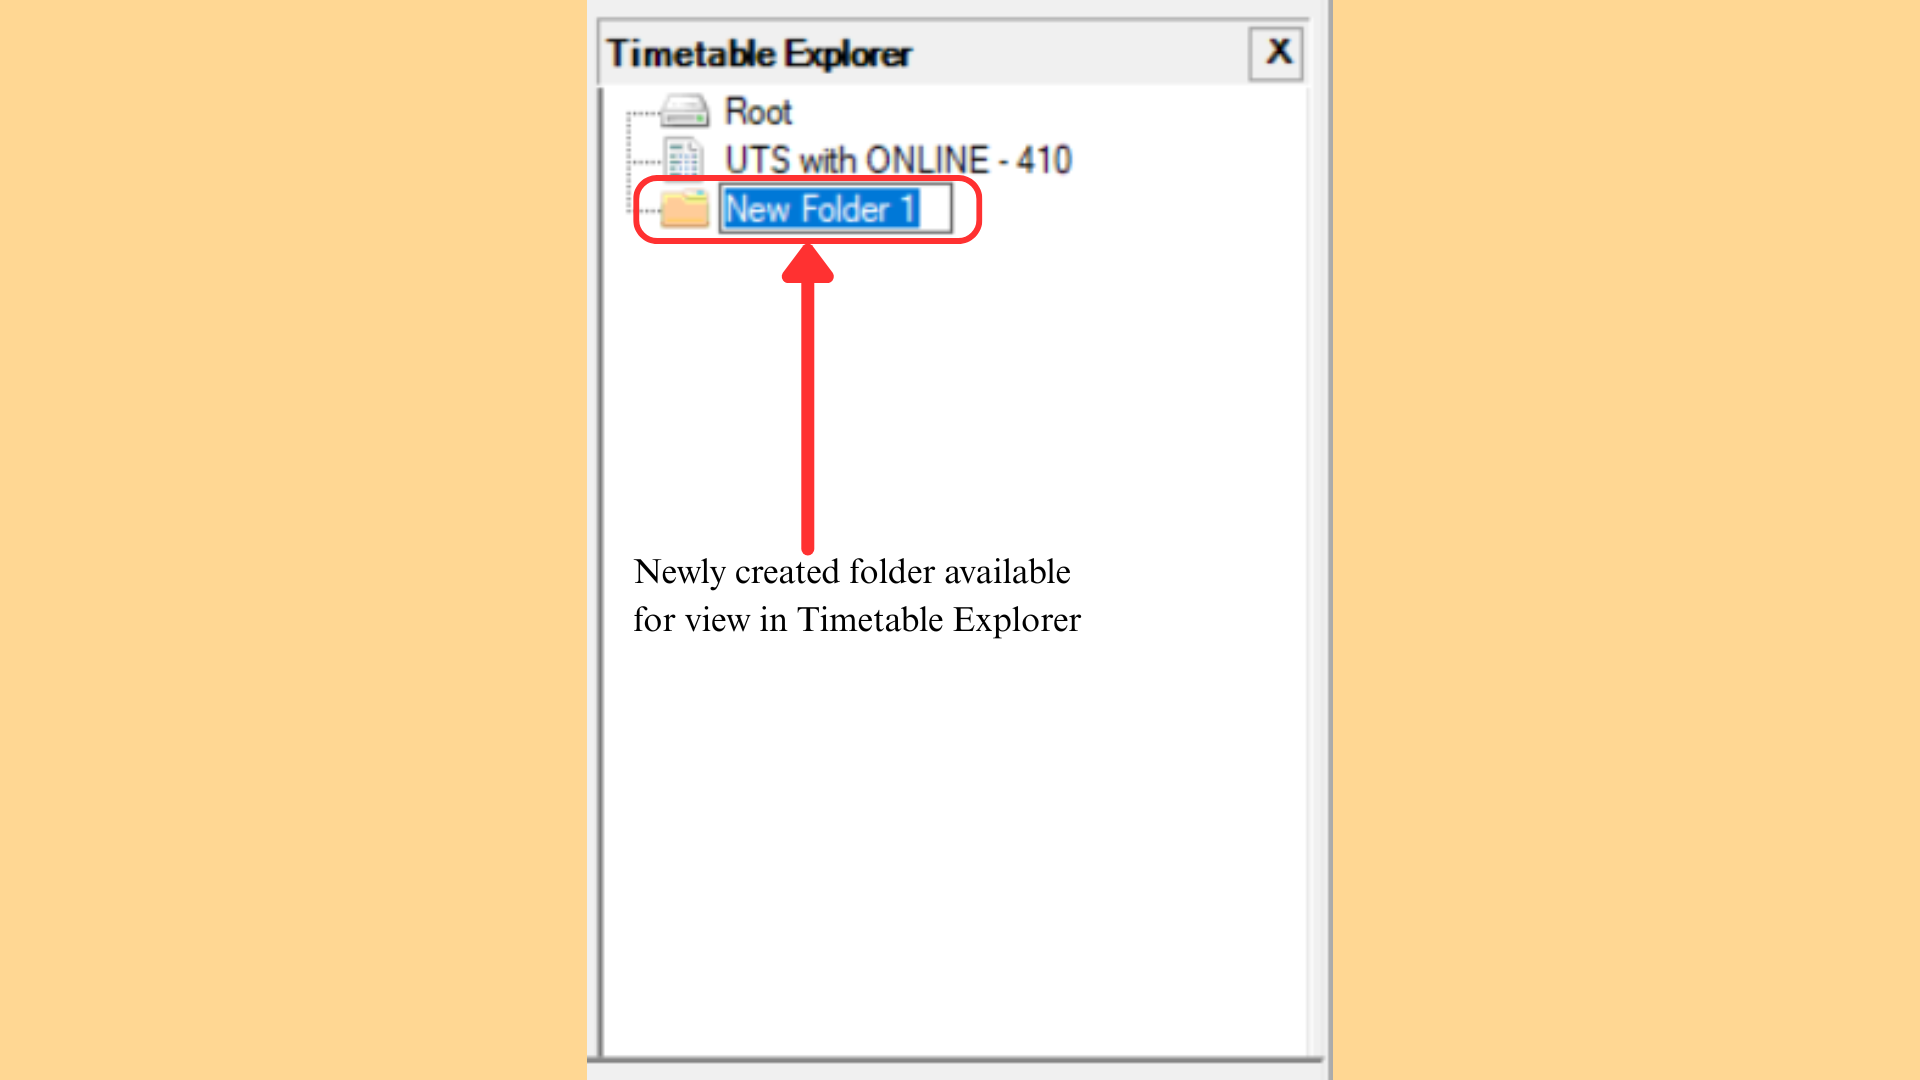
Create a New Folder: After clicking the icon, a new folder will appear in the Timetable Explorer panel.
Rename the Folder: Rename the folder to reflect the academic session or year (for example: Class2026).
Move the Project File: Select the project file and drag it into the newly created folder to organise the project structure. The connection changes from connecting to Root to connecting to New Folder 1, which indicates the file is now acting as a child of the parent folder New Folder 1. This can also be confirmed by the + and − signs, which show and hide the files under the parent folder.
Final Folder Structure: Once moved, the project file will appear under the selected folder in the Timetable Explorer panel.
3.8 Pre Database Management Checklist
Before continuing to the next chapter, confirm the following items are completed.
- You understand the main interface layout (menu bar, toolbar, module tabs, panels, and workspace)
- You can create and save a new timetable project
- You understand the Timetable Explorer and its Tree Structure
- If importing from E-Campus, the connection has been tested successfully
- You are ready to proceed to database management
Next, continue to Database Management to build and manage the database your timetable is generated from.