Output
Print and export your finalized exam timetable.
9.1 Overview
After completing all the steps in the previous chapters (generating schedule, assigning invigilators, positions, and seating arrangement), you can now generate the final output. The output can be printed or exported in various formats.
TPlus Exam provides multiple output options to suit your needs:
- Print Formats — Configure the print layout and format settings before printing.
- Print Preview — Preview and print reports by slot, course, invigilators, students, and course-student list.
- Export File — Export the timetable data as a TDAT file or directly to TPlus Campus.
9.2 Print Formats
To access Print Formats, navigate to the General Options tab. The Print Formats section allows you to configure the language, title & header, and footer settings for your printed output.
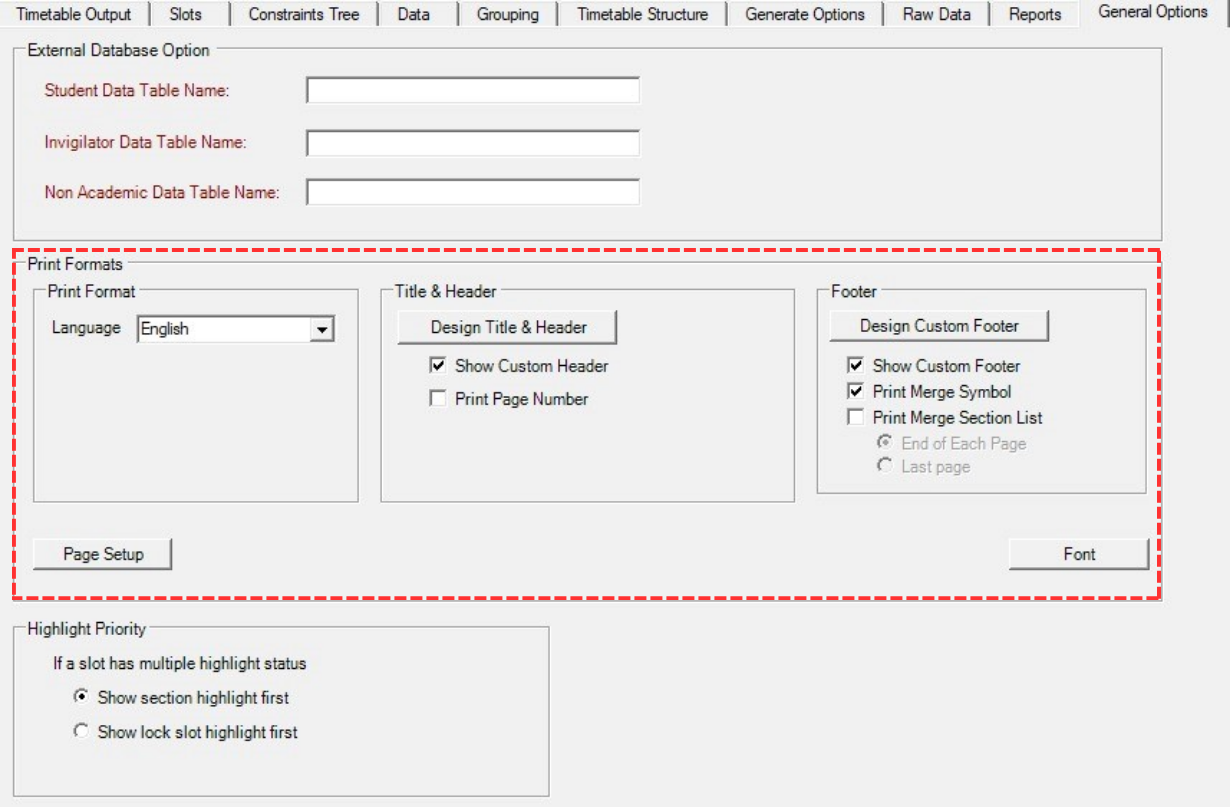
Print Format
The Print Format option allows you to choose the language for your printed reports. Select your preferred language from the dropdown list to ensure the output is displayed in the correct language.

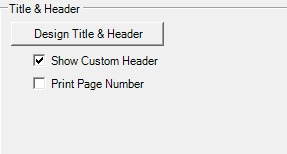
Title & Header
You may include a Title & Header at the top of your printed content. To enable it, tick the Show Custom Header checkbox. If you want to customize the header design, click the Design Title & Header button.
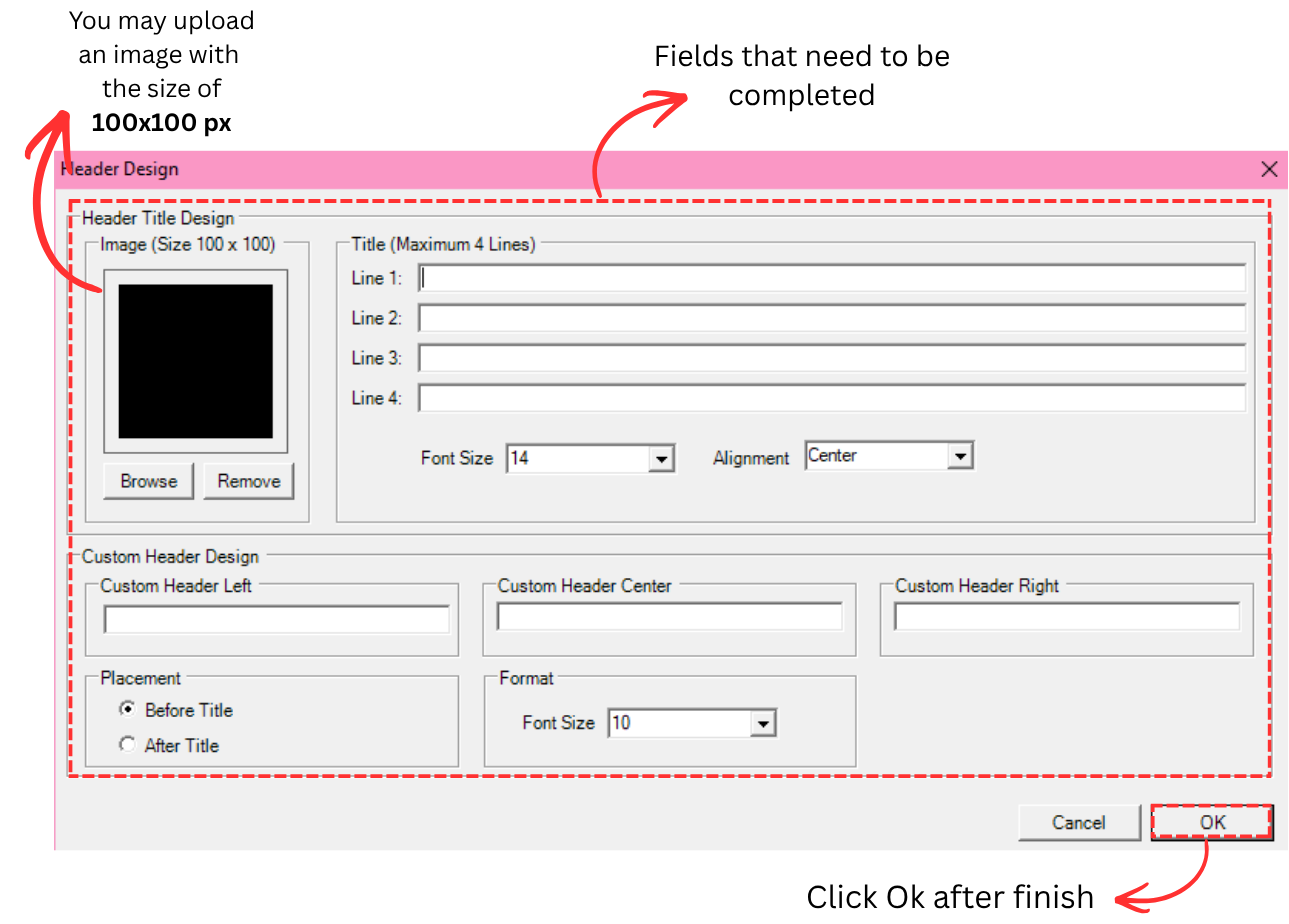
Clicking Design Title & Header opens the Header Design window where you can configure:
- Image — Upload an institution logo or image (recommended size: 100x100 px). Use the Browse button to select an image or Remove to clear it.
- Title (Maximum 4 Lines) — Enter up to 4 lines of title text (e.g., university name, exam session, semester).
- Font Size & Alignment — Set the font size and alignment (Left, Center, Right) for the title text.
- Custom Header Design — Add custom text for the left, center, and right sections of the header.
- Placement — Choose whether the custom header appears Before Title or After Title.
Click OK to save the header design.
Footer
The Footer is located at the bottom of your printed content page. You may tick your preferred options:
- Show Custom Footer — Enable to display a custom footer on printed pages.
- Print Merge Symbol — Include merge symbols in the printed output.
- Print Merge Section List — Print the merge section list at the End of Each Page or on the Last Page.
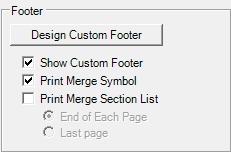
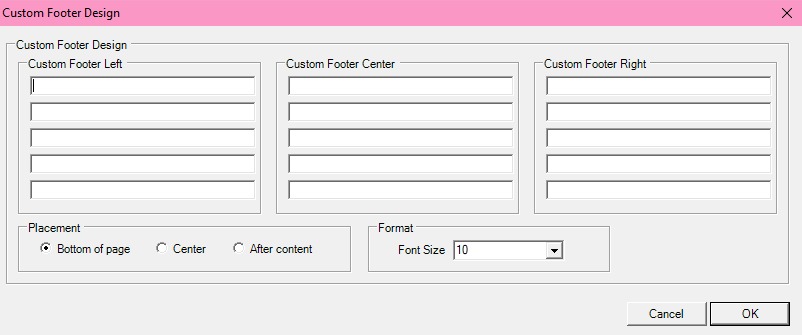
If you want to write custom text on the footer, click Design Custom Footer to open the footer design window. You can enter text for the left, center, and right sections of the footer and configure the font size.
9.3 Print Preview
The Print Preview feature allows you to view the output before printing. You can preview and print different types of reports depending on your needs.
9.3.1 Slot
To print preview at slot, you may design the print list first.
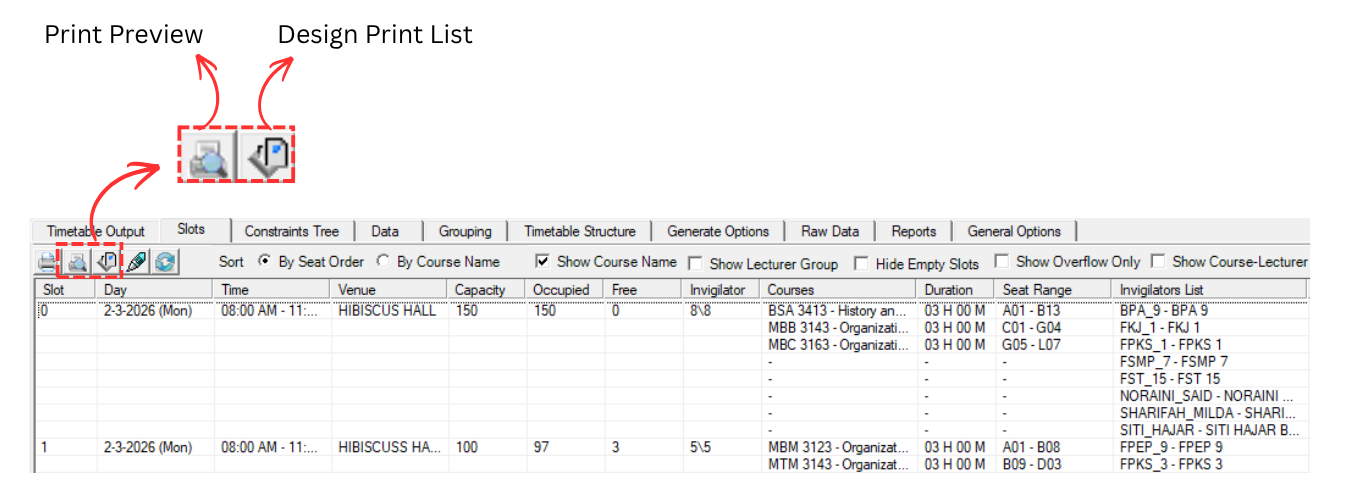
Design Print List
To design print list, click on Design Print List icon
![]() .
.
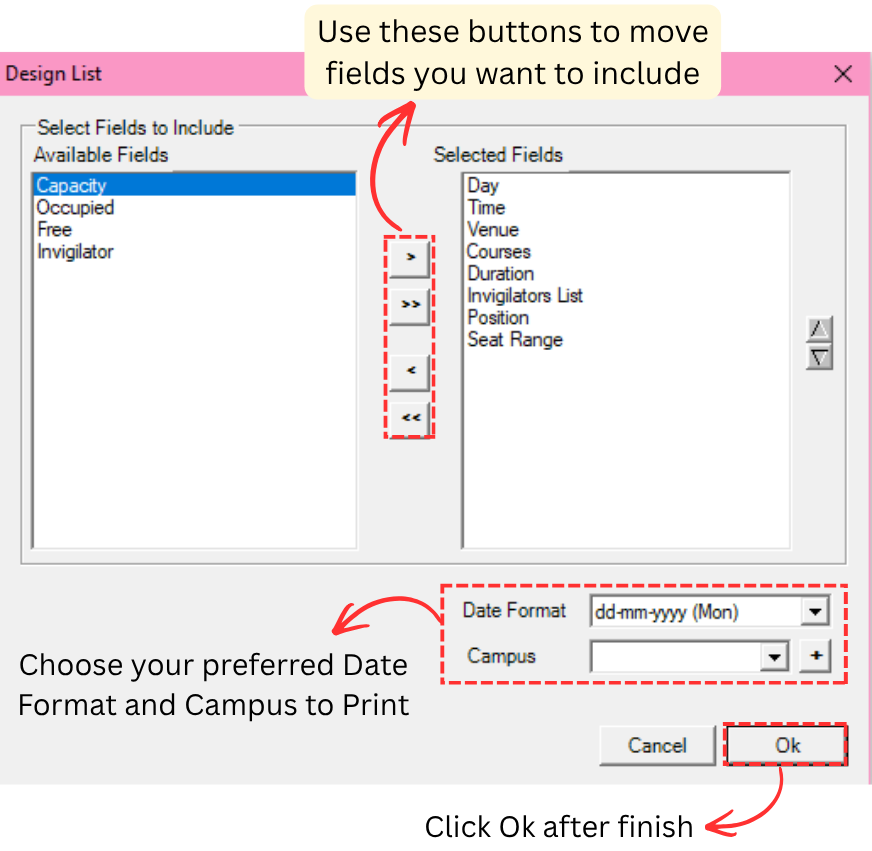
The Design List window allows you to select which fields to include in your printed output. Use the arrow buttons to move fields between the Available Fields and Selected Fields lists. You can also choose your preferred Date Format and select a Campus to print.
Click OK after finishing the configuration.
Print Preview
To Print Preview, click on Print Preview icon
![]() .
The Print Options window will appear where you can choose from the following options:
.
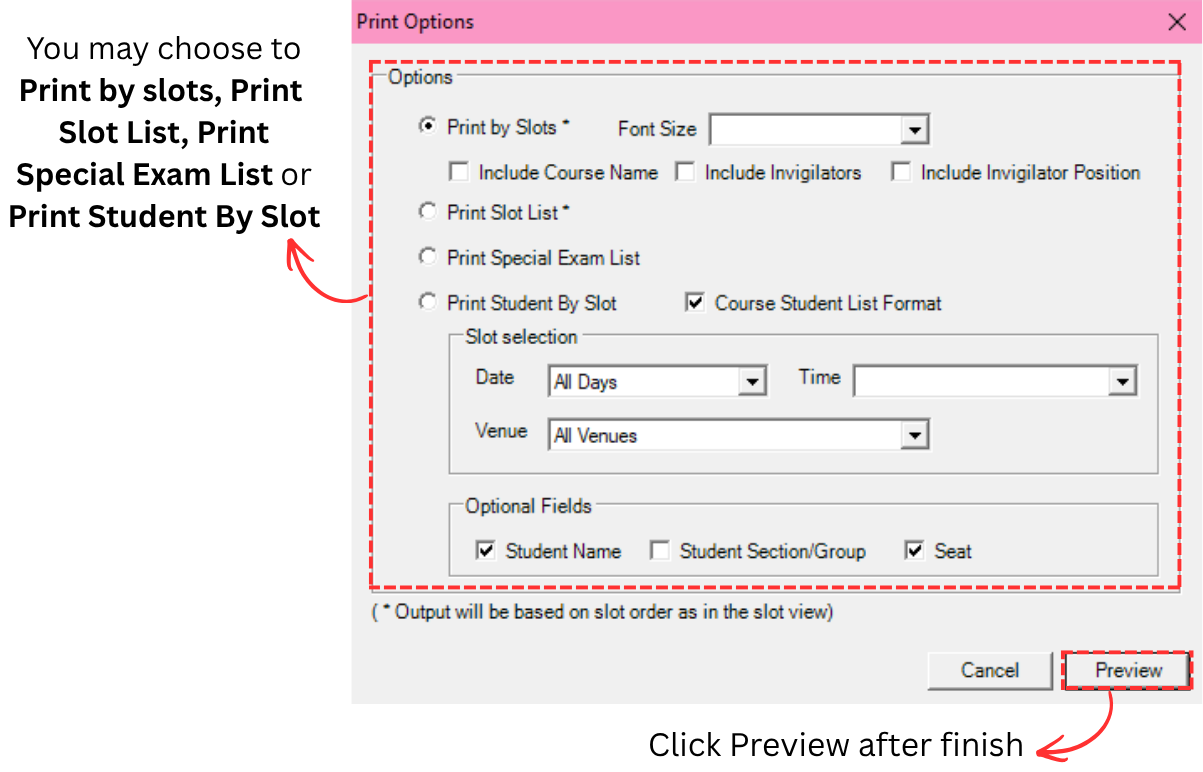
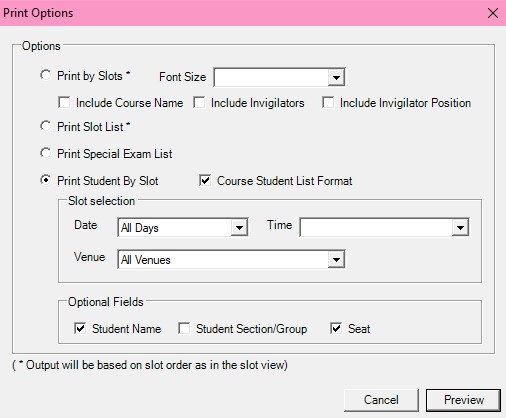
The Print Options window will appear where you can choose from the following options:
- Print by Slots — Print the timetable organized by slots. You may also set the Font Size and choose to include Course Name, Invigilators, or Invigilator Position.
- Print Slot List — Print a list view of all slots.
- Print Special Exam List — Print the list of special exams.
- Print Student By Slot — Print students grouped by slot. You can enable Course Student List Format and configure the Slot Selection (Date, Time, Venue) and Optional Fields (Student Name, Student Section/Group, Seat).
Click Preview after finishing the configuration to view the output.
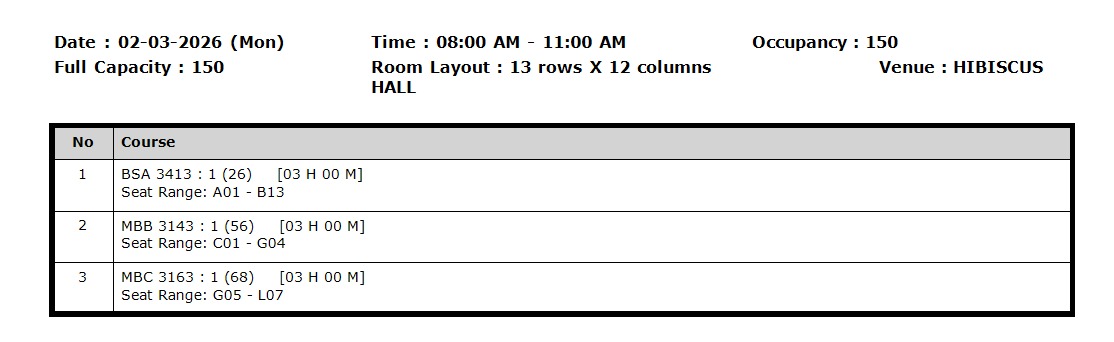
After clicking Preview, the print preview window will display the output. You can review the content before printing.
9.3.2 Course, Invigilators, Students & Course-Student List
For Course List, Invigilators List and Students List, you can simply click on Print Preview icon
![]() to preview.
to preview.
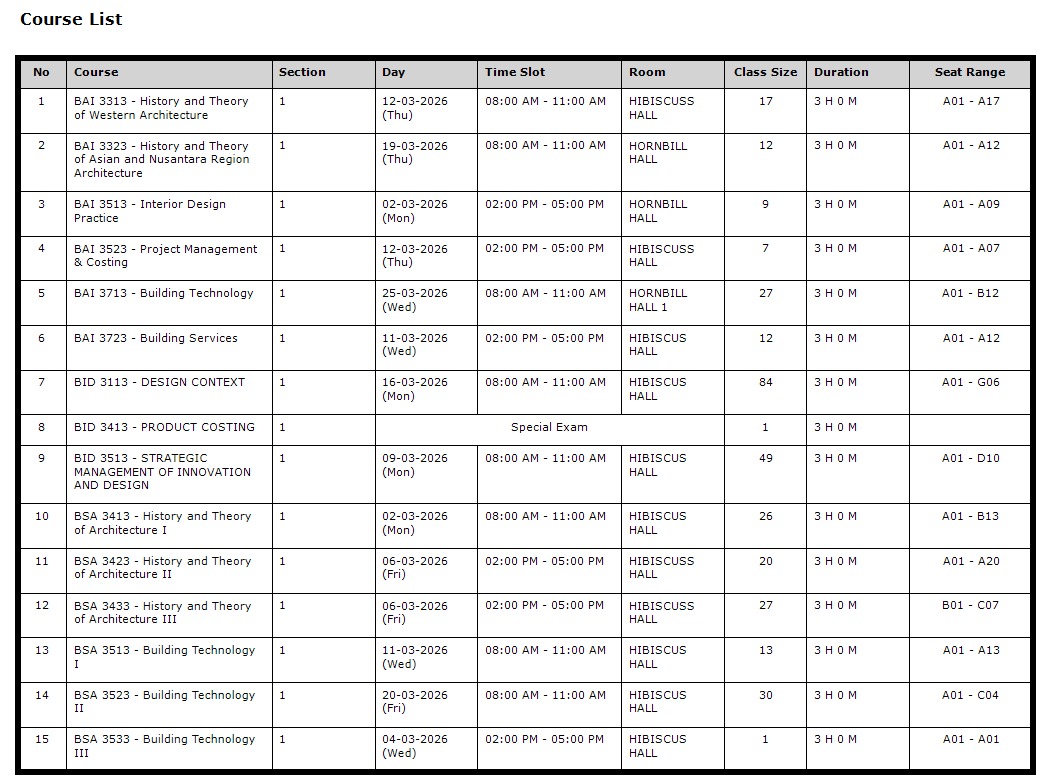
Course List
Navigate to the Courses List tab and click the Print Preview icon to preview the course list. The preview will display all courses with their exam details.
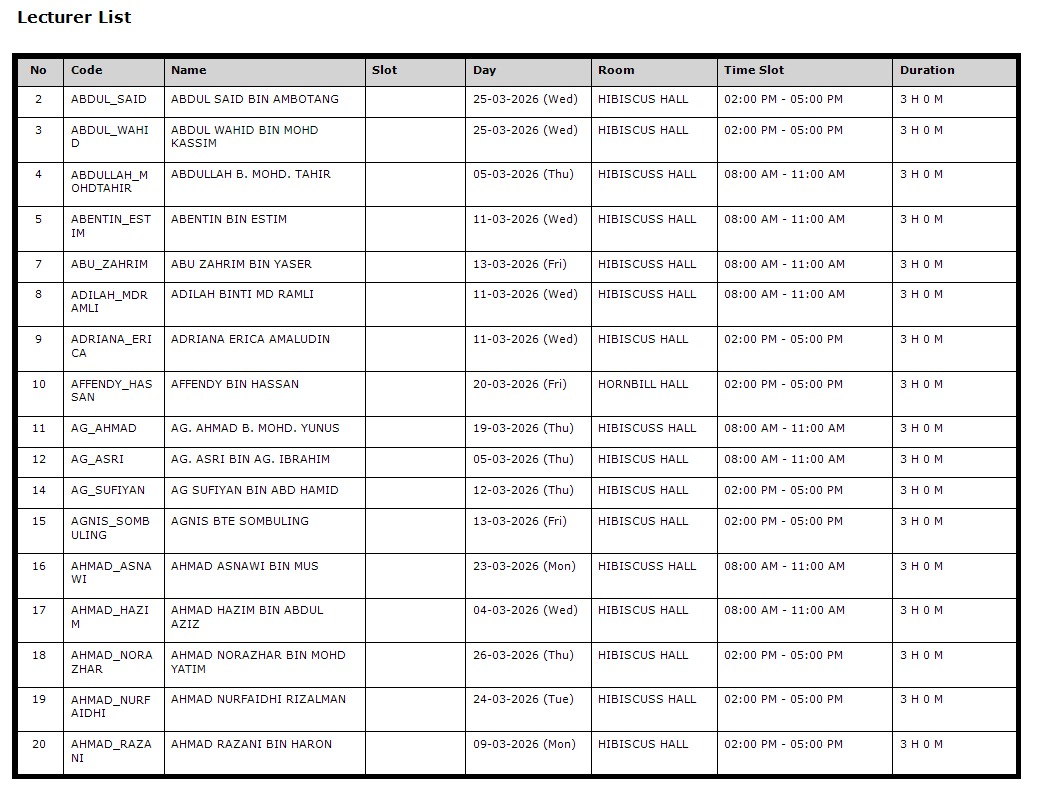
Invigilators List
Navigate to the Invigilators List tab and click the Print Preview icon to preview the invigilator list. The preview will display all invigilators with their assignment details.
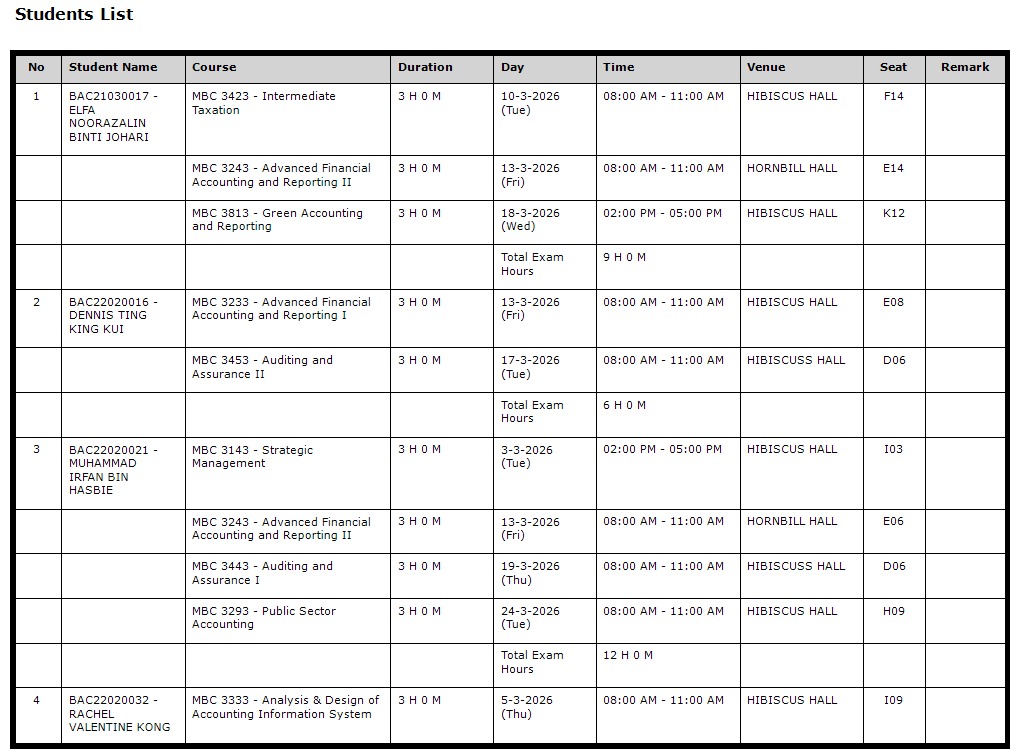
Students List
Navigate to the Students List tab and click the Print Preview icon to preview the student list. The preview will display all students with their exam schedule and seating details.
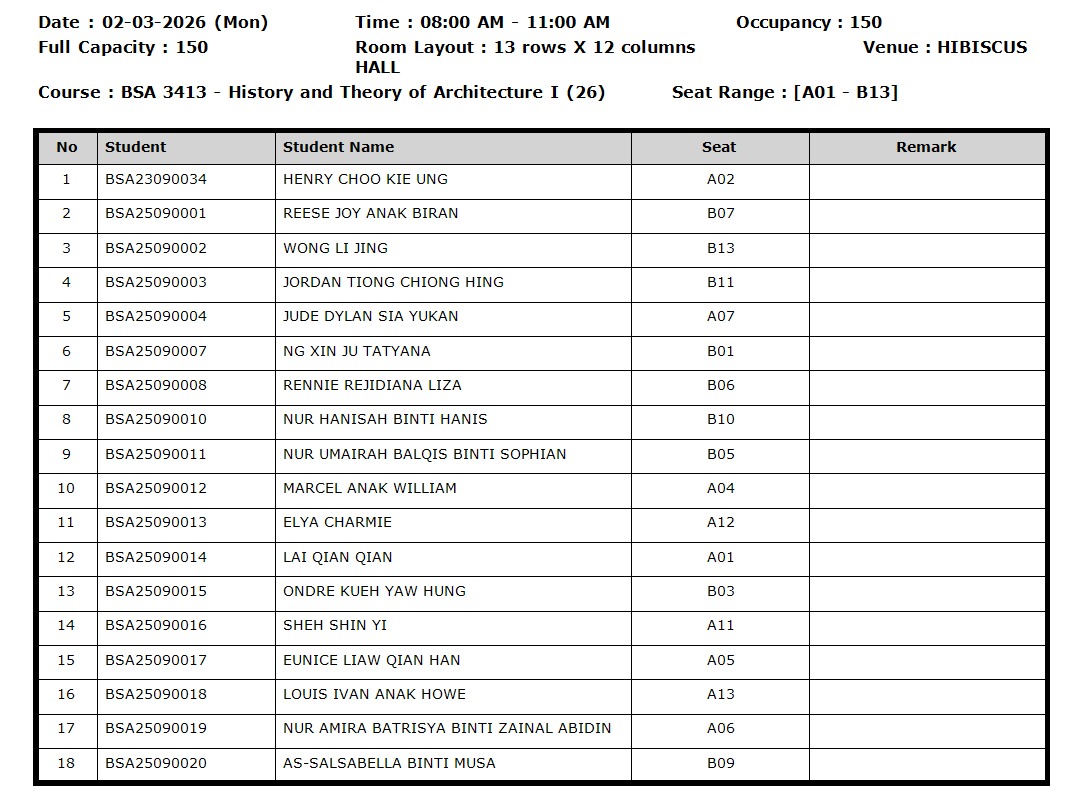
Course-Student List
To print preview at Course-Student List, you need to click on the Print button. You can also Print Slot at Course-Student List.

Clicking Print will generate the print preview for the Course-Student List.
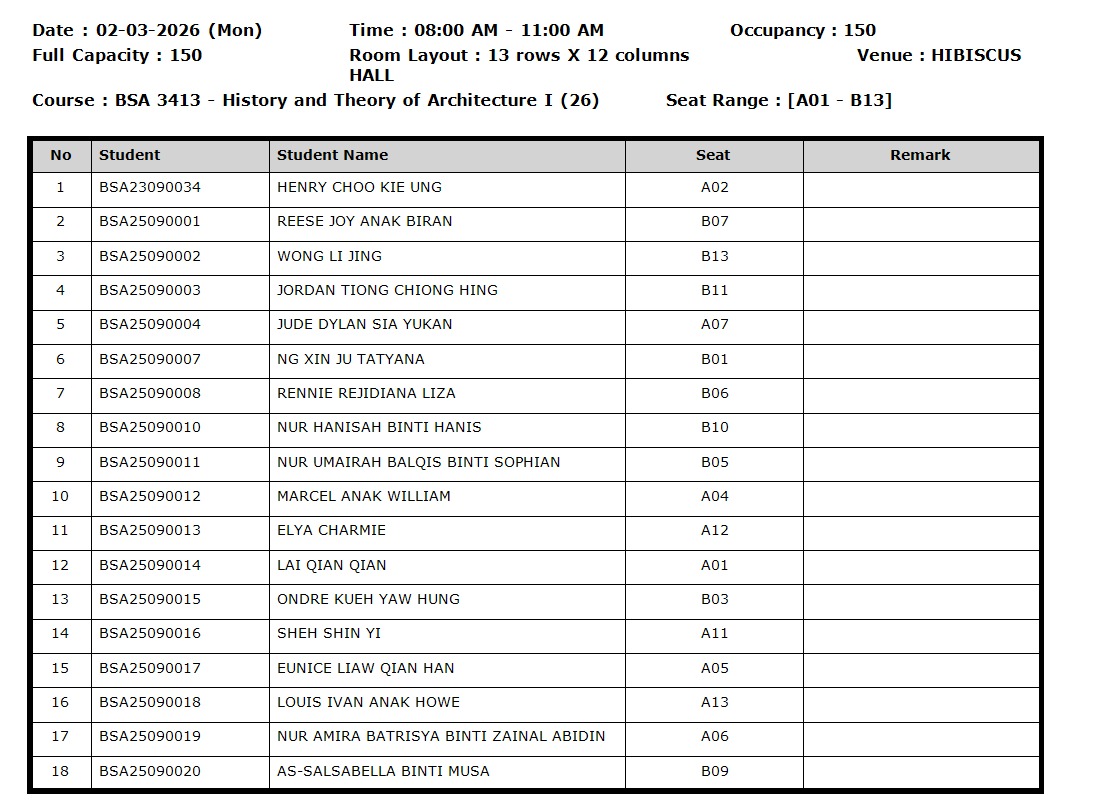
Clicking Print Slot will open the Print Options window where you can configure the slot selection and preview options. Click Preview after finishing the configuration.
After clicking Preview, the print preview window will display the slot output for the Course-Student List.
9.4 Export File
TPlus Exam allows you to export the finalized timetable data for use in other systems or for backup purposes.
9.4.1 Export as TDAT File
You can export the Timetable Plus Exam file which has the extension of .TDat and can be opened in another Timetable Plus Exam software using the Import function.
Export Timetable File
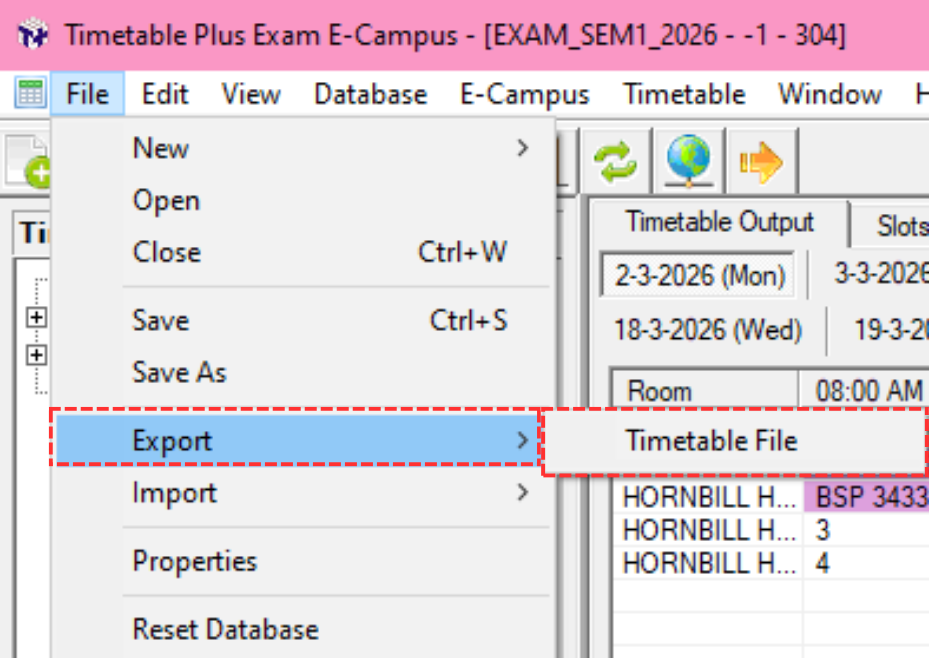
Step 1: Go to File → Export → Timetable File to export the timetable data as a .TDat file.
Step 2: A Save dialog will appear. Enter the File Name, set the Save as Type to TDat, and select the location where you want to save the file. Click Save to proceed.

Step 3: Once the export is complete, a confirmation message will appear.
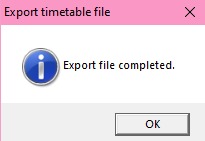
You can view the saved .TDat file at the location where you saved it.
Import Timetable File
To import a previously exported .TDat file into another Timetable Plus Exam software, follow these steps:
Step 1: Go to File → Import → Timetable File.

Step 2: An Open dialog will appear. Navigate to the location of the .TDat file, select it, and click Open.

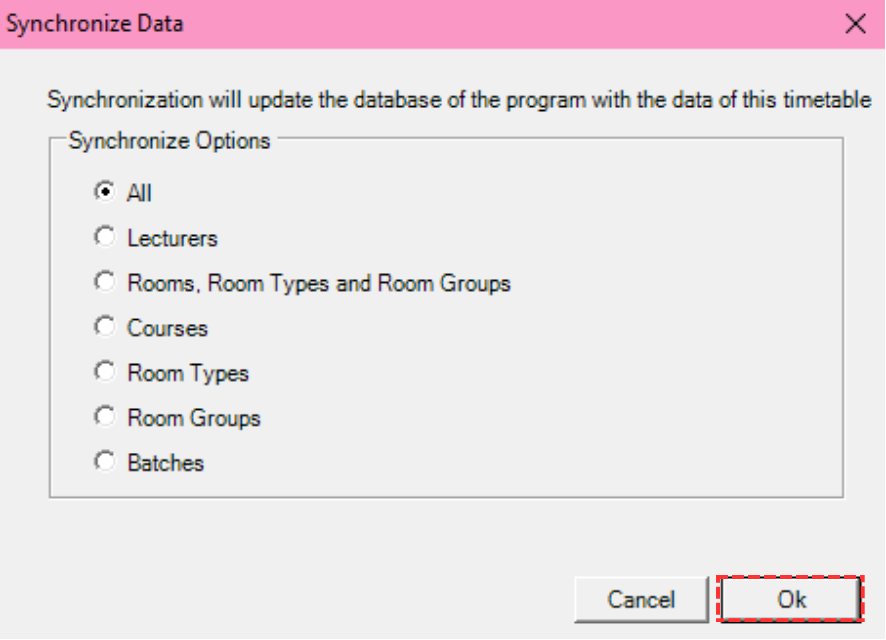
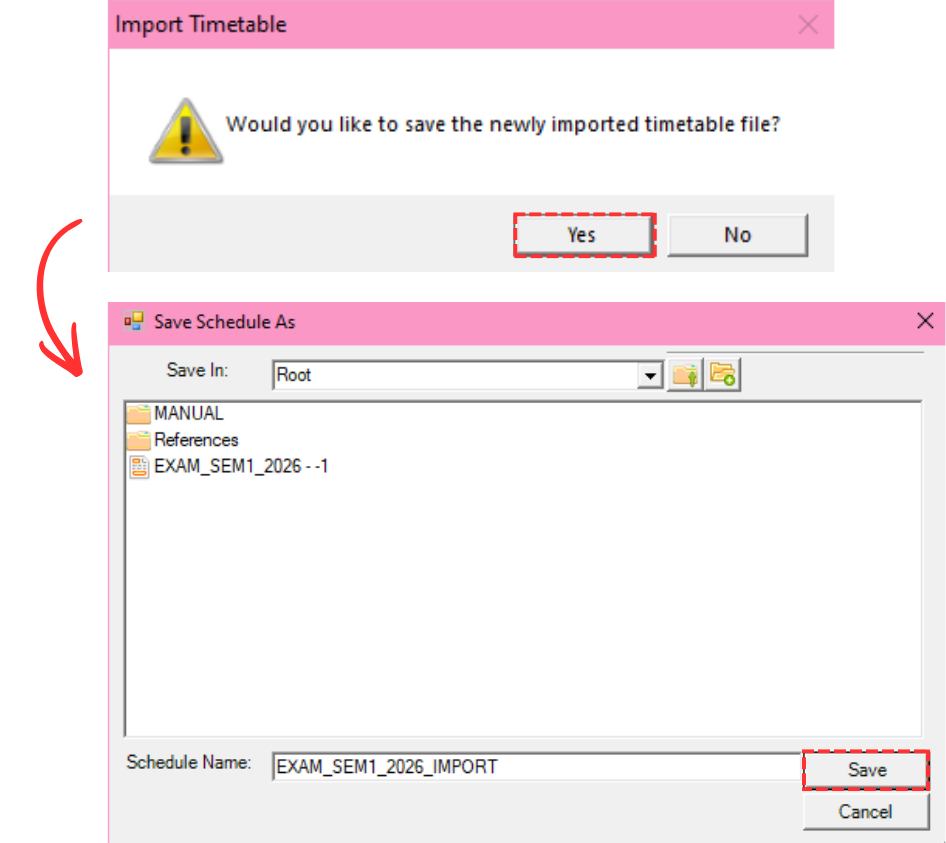
Step 3: A Synchronize dialog will appear. Click Synchronize All to synchronize all the imported data.
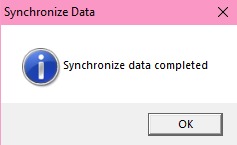
Step 4: Once the synchronization is complete, a confirmation message will appear.
Step 5: Save the imported timetable file by going to File → Save or pressing Ctrl+S.
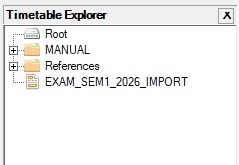
Step 6: The imported timetable file can now be seen in the Timetable Explorer.
9.4.2 Export to TPlus Campus
To export to TPlus Campus, first you need to connect to E-Campus. Refer to E-Campus Settings (Chapter 2 — Installation & Setup) for instructions on how to connect.
To export to TPlus Campus, there are 3 simple steps to do so.
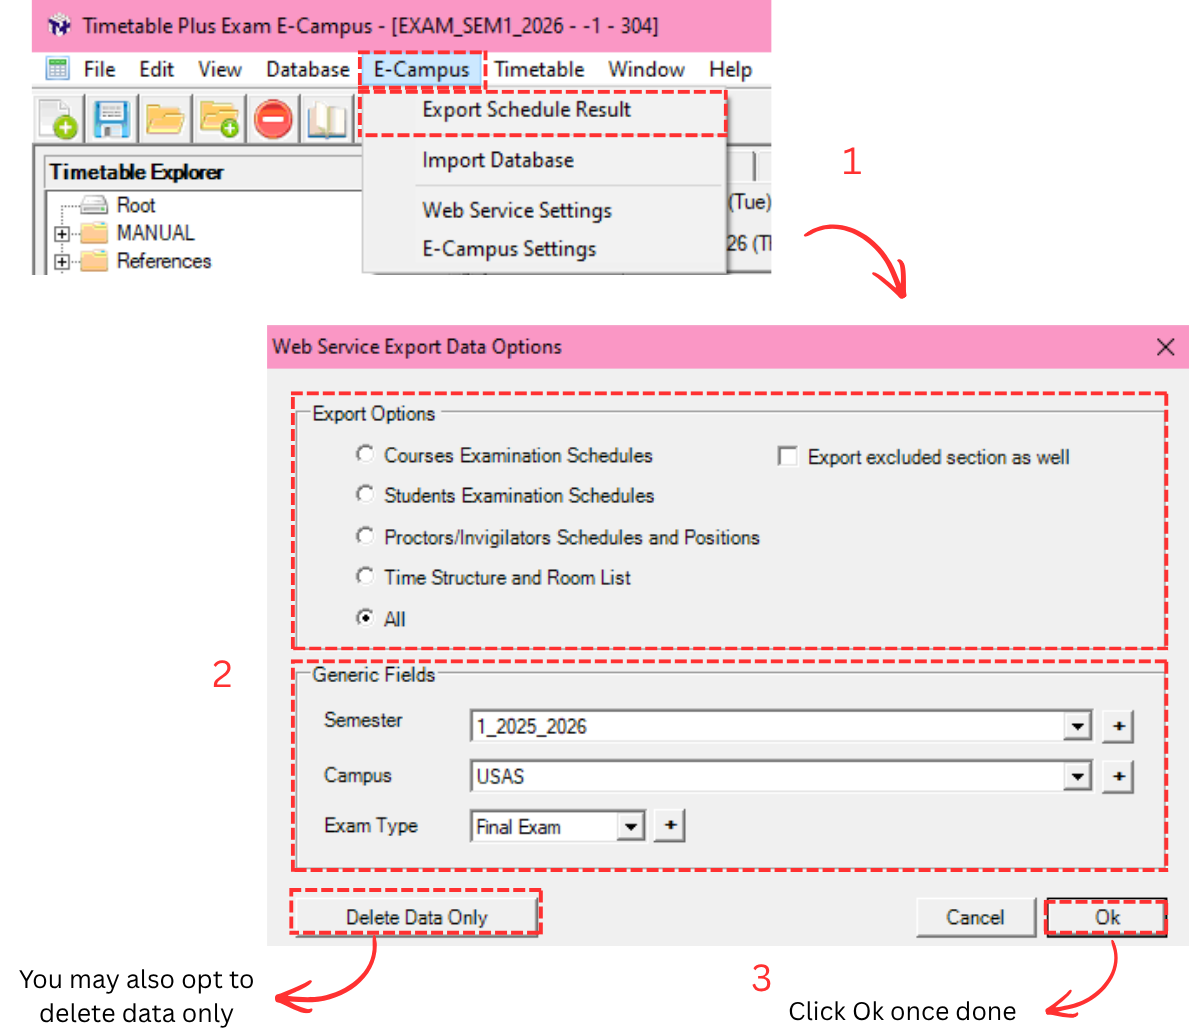
Step 1: Once connected, click on E-Campus and select Export Schedule Result.
Step 2: Choose your preferred options:
- Export Options — Select the data you want to export (Courses Examination Schedules, Students Examination Schedules, Proctors/Invigilators Schedules and Positions, Time Structure and Room List, or All). You may also tick Export excluded section as well.
- Generic Fields — Choose your preferred Semester, Exam Type, and Campus to export into TPlus Campus.
- Delete Data Only — You may also opt to delete data only if needed.
Step 3: Click OK to export.
After clicking OK, the system will begin processing the export.

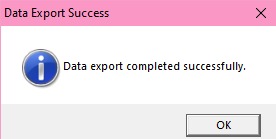
Once the export is complete, a success confirmation message will appear.
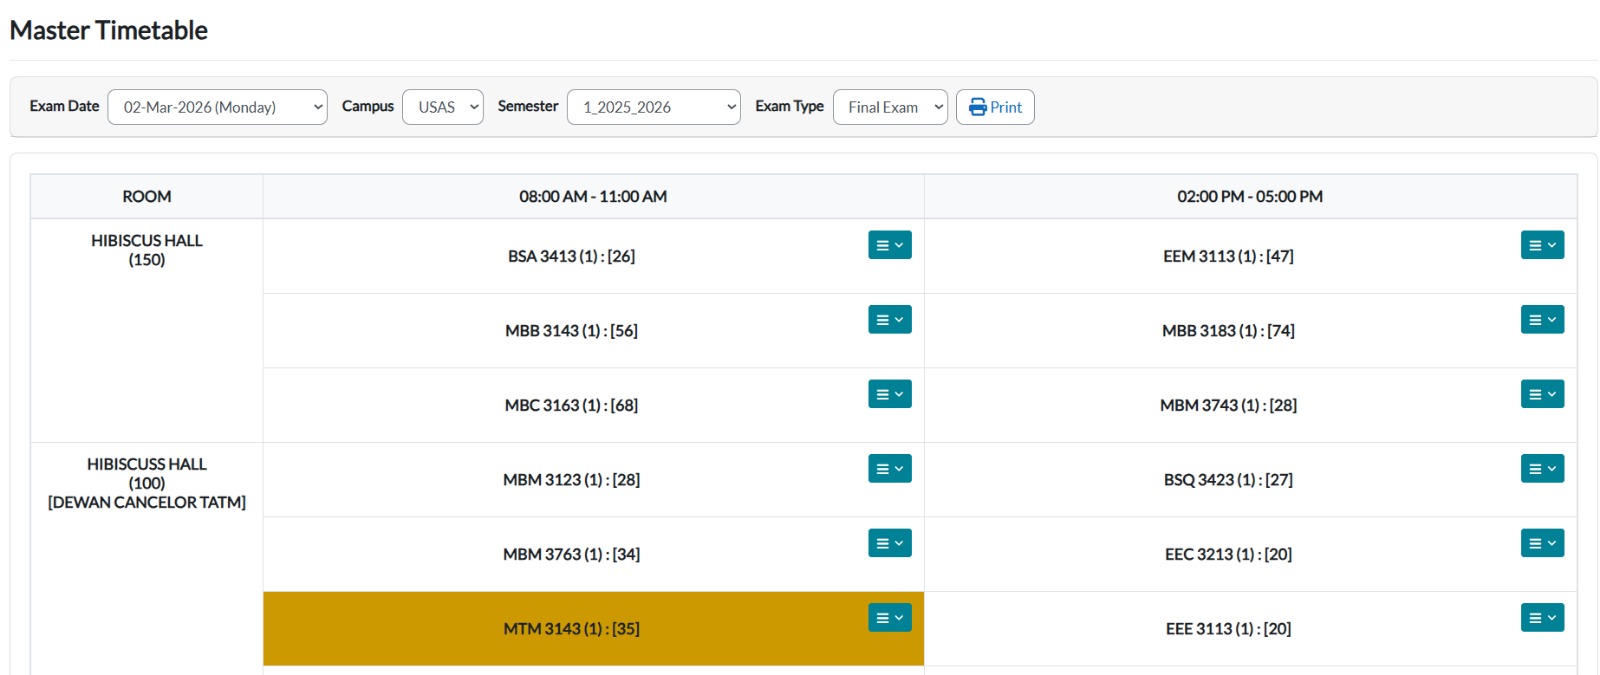
To view the timetable on TPlus Campus, go to TPlus Campus and select Examination under Examination Timetable.
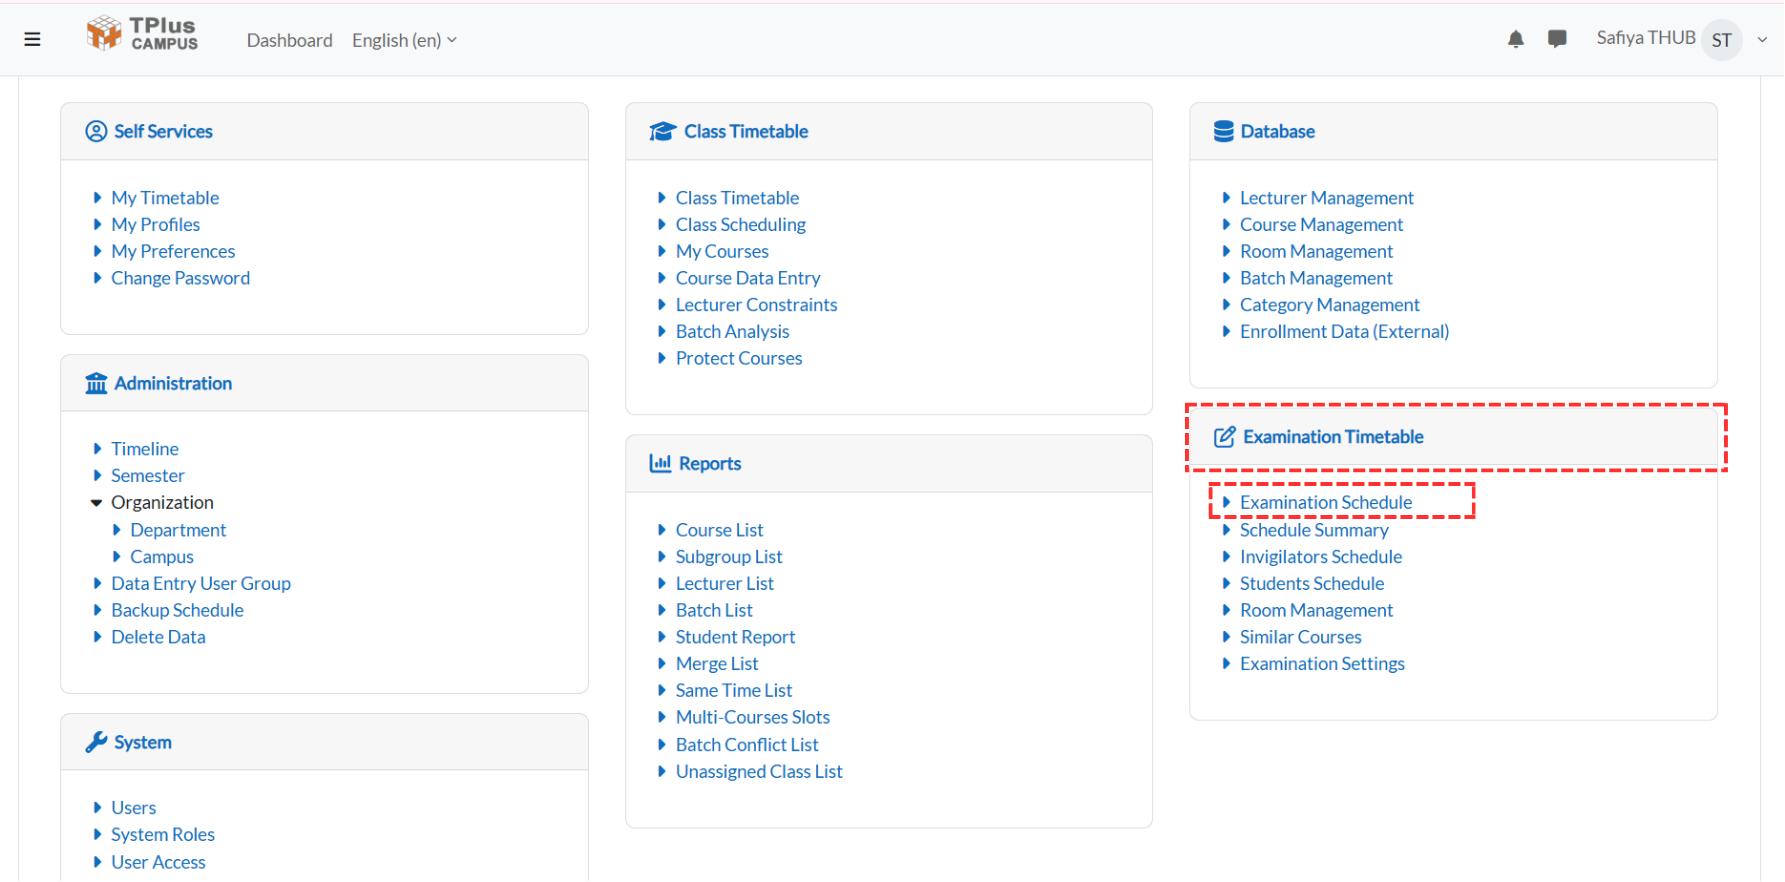
When you click on the examination schedule, the Master Timetable view will appear, displaying the complete examination timetable that has been exported from TPlus Exam.