Configure Timetable
Set up the timetable structure including time settings, room assignments, and time slot adjustments before processing data.
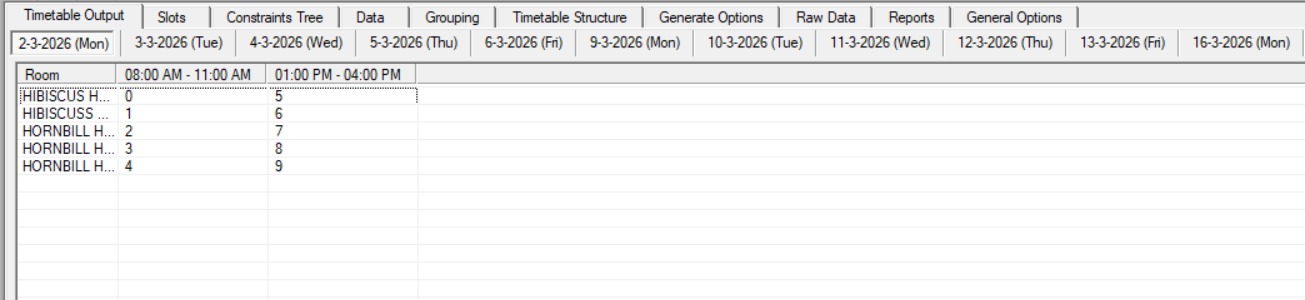
4.1 Timetable Output
Before configuring the timetable structure, here is a preview of the Timetable Output — this is the end result you will achieve after completing the setup in this chapter. It shows a grid view of all rooms mapped across time slots and days.
The image below is what the Timetable Output will look like once you have finished setting up the timetable structure.
4.2 Setting Up Timetable Structure
Before processing raw data, you need to set up the timetable structure. This includes configuring the time structure, room list, and time slot adjustments.
4.2.1 Time Structure
Time Structure is where you configure the time and day settings for the Timetable Output. It is located under the Timetable Structure tab and consists of three main areas: Time Slot, Day to Include, and General Break.
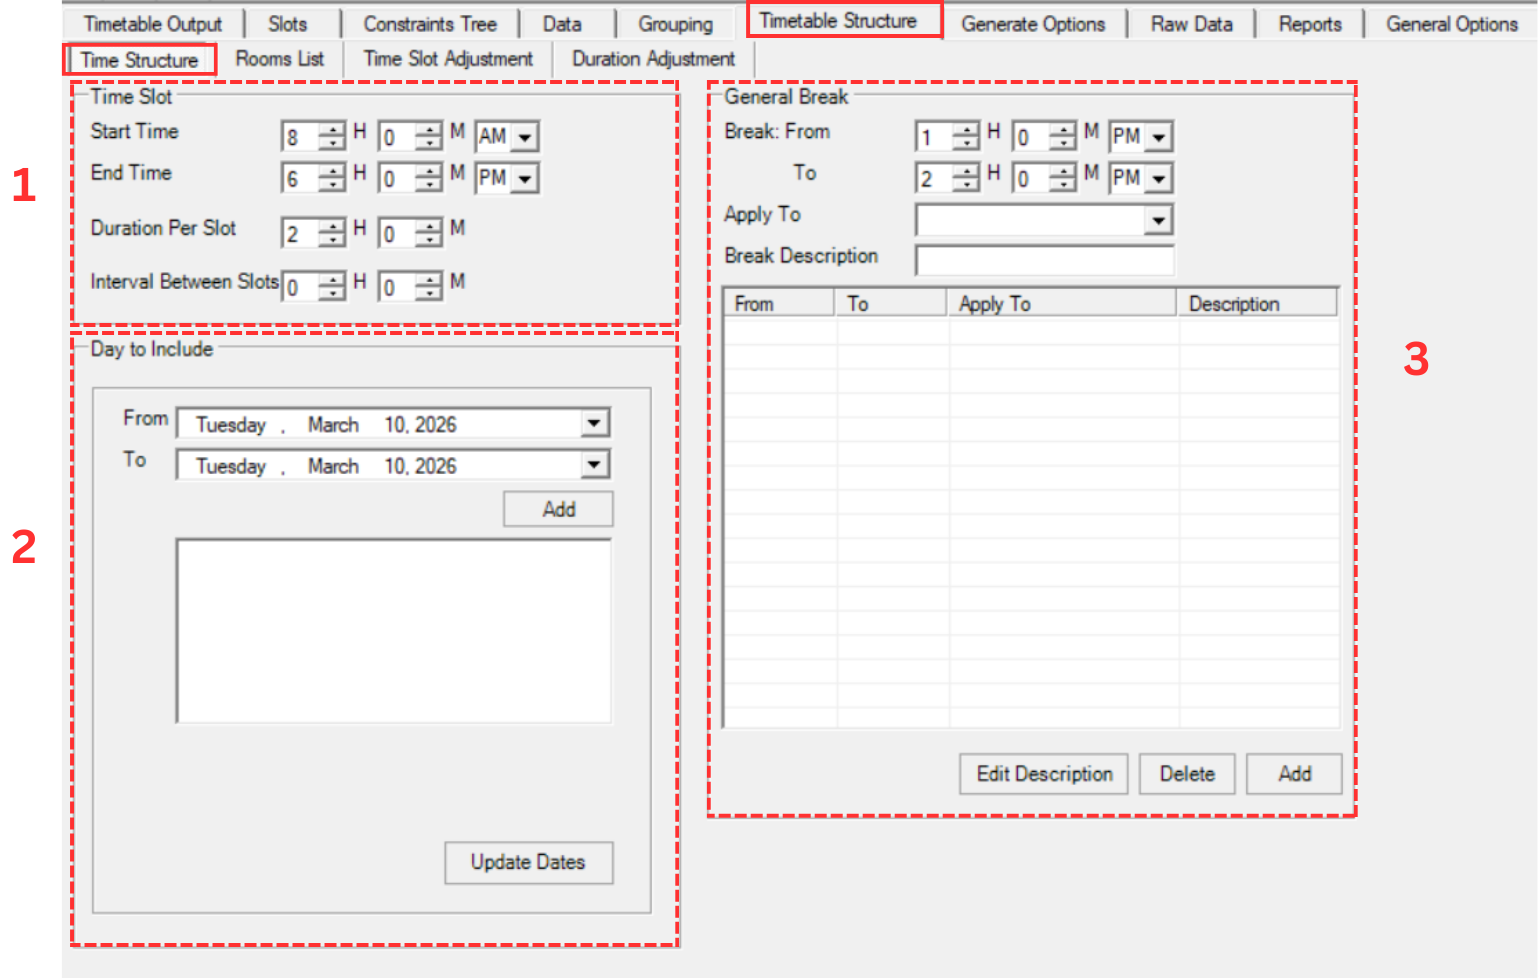
The three areas highlighted in the diagram above are:
- Time Slot — Define the start time, end time, duration per slot, and interval between slots.
- Day to Include — Select the date range and specific days to include in the timetable.
- General Break — Set an interval between exam slots and apply it to specific or all days.
1. Time Slot
The Time Slot section lets you define the daily schedule boundaries and how time is divided into slots for the exam timetable.
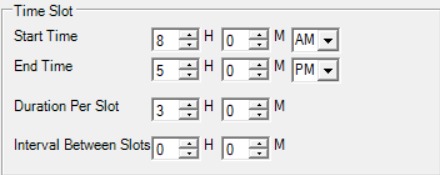
Set your preferences for the following fields:
- Start Time — The time your exam schedule begins each day. For example, 8:00 AM.
- End Time — The time your exam schedule ends each day. For example, 5:00 PM.
- Duration Per Slot — How long each exam slot lasts. Set this to the longest exam duration among all courses, with 2 sessions per day (morning and evening).
- Interval Between Slots — This field is not required and can be left empty.
2. Day to Include
The Day to Include section allows you to select which days will appear in the timetable output. You set a date range and then choose which individual days within that range to include.

Follow these steps to set the days:
- Use the From and To dropdown date pickers to select your exam period range.
- Click Add to populate the list with all days within that range.
- Click Update Dates after making any changes to apply them.
Select the days to include in your timetable output. For example, if your exam period spans 2 weeks, set the From date to the first day and the To date to the last day of that period.
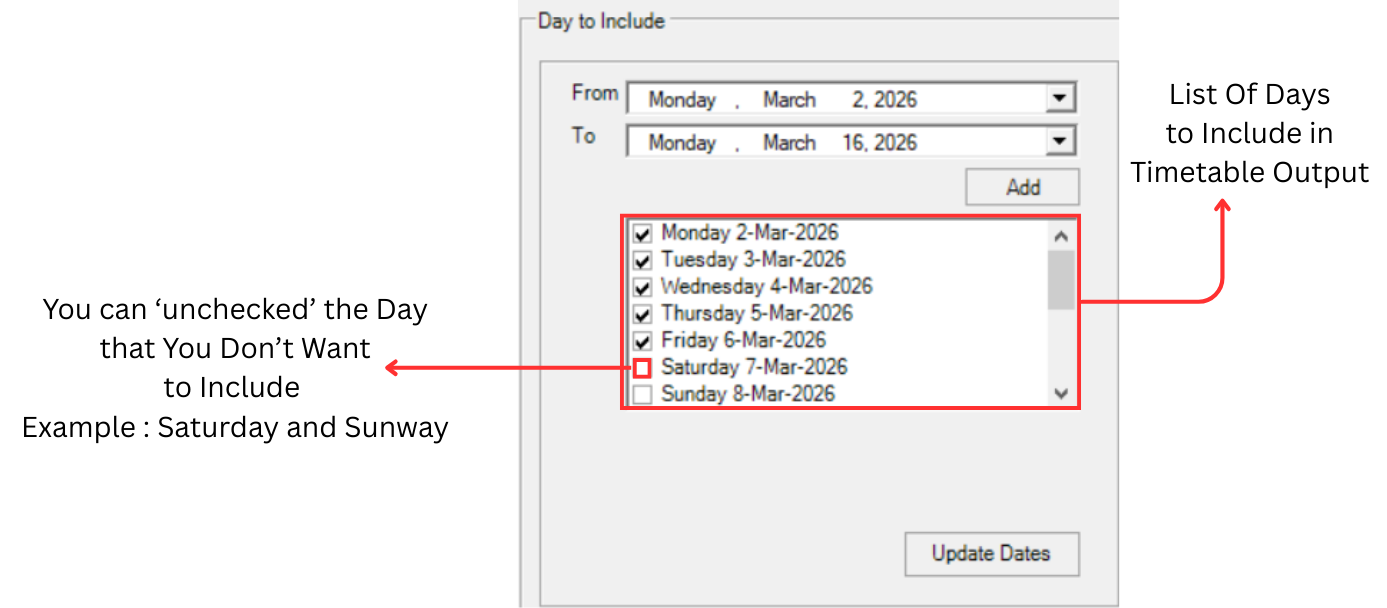
Once the date list is generated, you can uncheck any days you do not want to include in the timetable. For example, uncheck Saturday and Sunday if exams are only held on weekdays. The checked days will appear as available days in the Timetable Output.
3. General Break
The General Break section allows you to set an interval between exam slots. This provides buffer time between one slot ending and the next slot beginning. You can choose to apply a break to all days or only to specific days in the timetable. This field is not required and can be left empty.
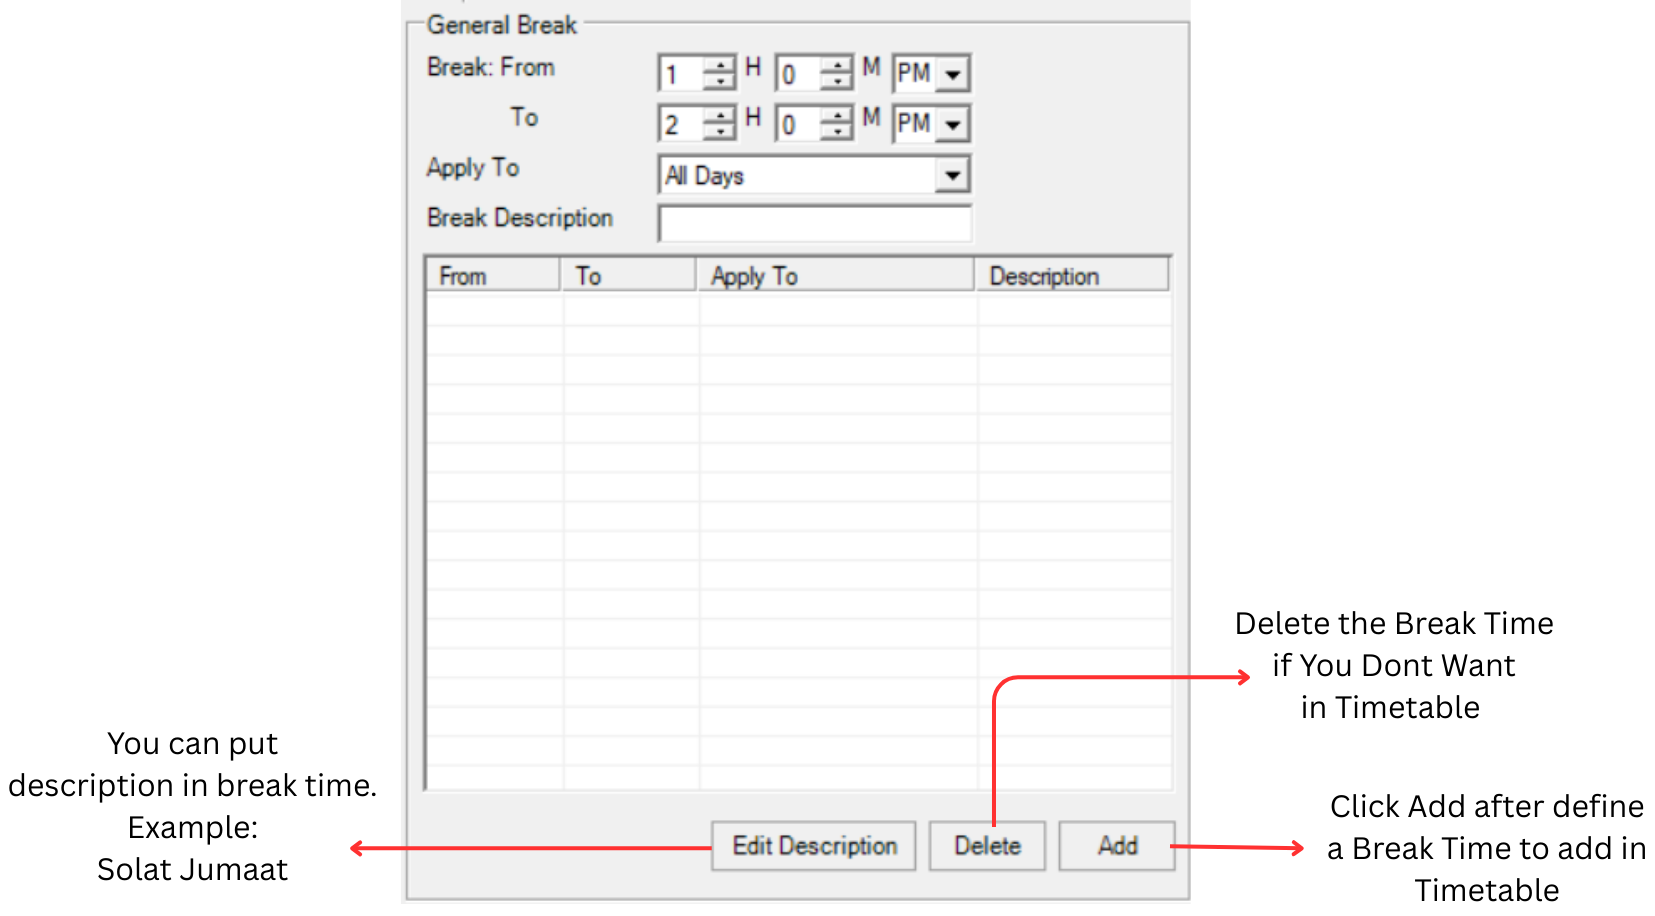
To add a break, fill in the following fields:
- Break: From / To — Set the start and end time of the break.
- Apply To — Choose whether the break applies to All Days or a specific day from the dropdown.
- Break Description — Enter a label for the break.
After filling in the fields, use the buttons at the bottom:
- Add — Adds the break to the timetable.
- Edit Description — Modifies the description of an existing break entry.
- Delete — Removes a selected break from the list.
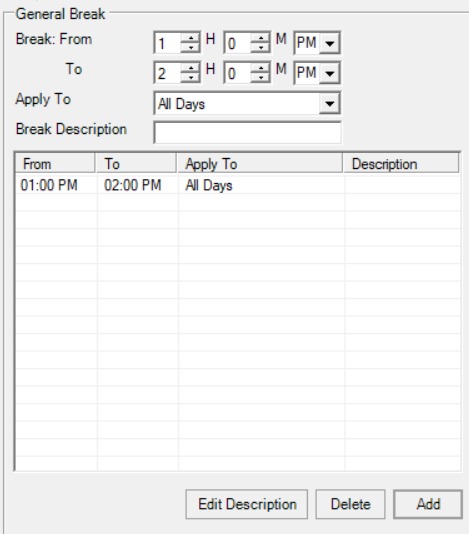
It is recommended to use the same break time across all days for consistency, unless there are special circumstances that require a different schedule on certain days.
Below is an example of a completed break entry:
Once you are done setting up the Time Structure or you make any changes, click on
 to create the Schedule Structure of Timetable Output.
4.2.2 Room List
Click Timetable Structure and click Rooms List to add Room List in Timetable Output.

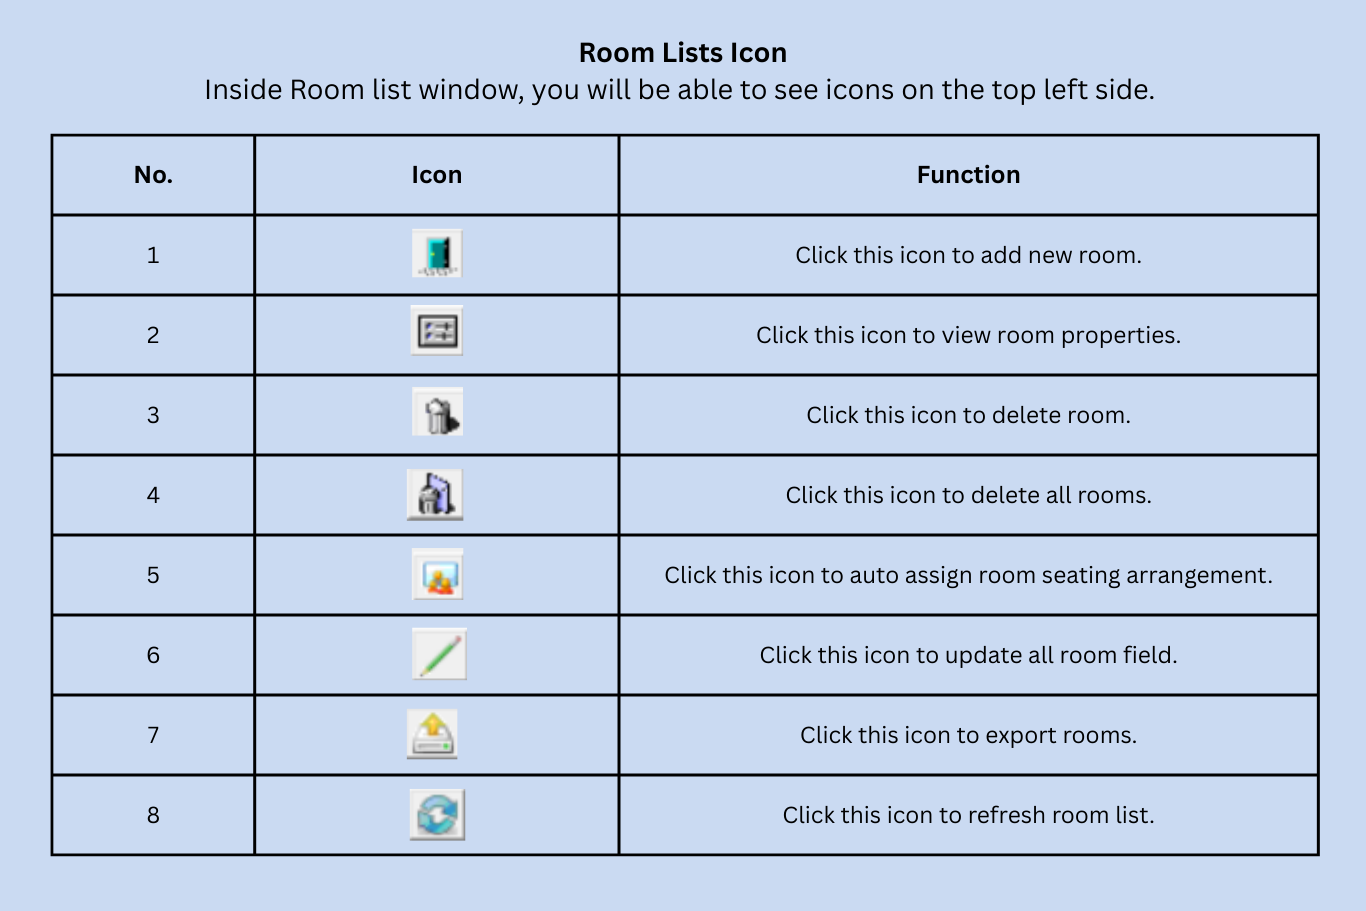
Inside the Room List window, you will be able to see icons on the top left side.
Each icon in the Room List window has a specific function:
1. Adding Room List In Timetable Output
To add Room, click on Add New Room icon
![]() .
.
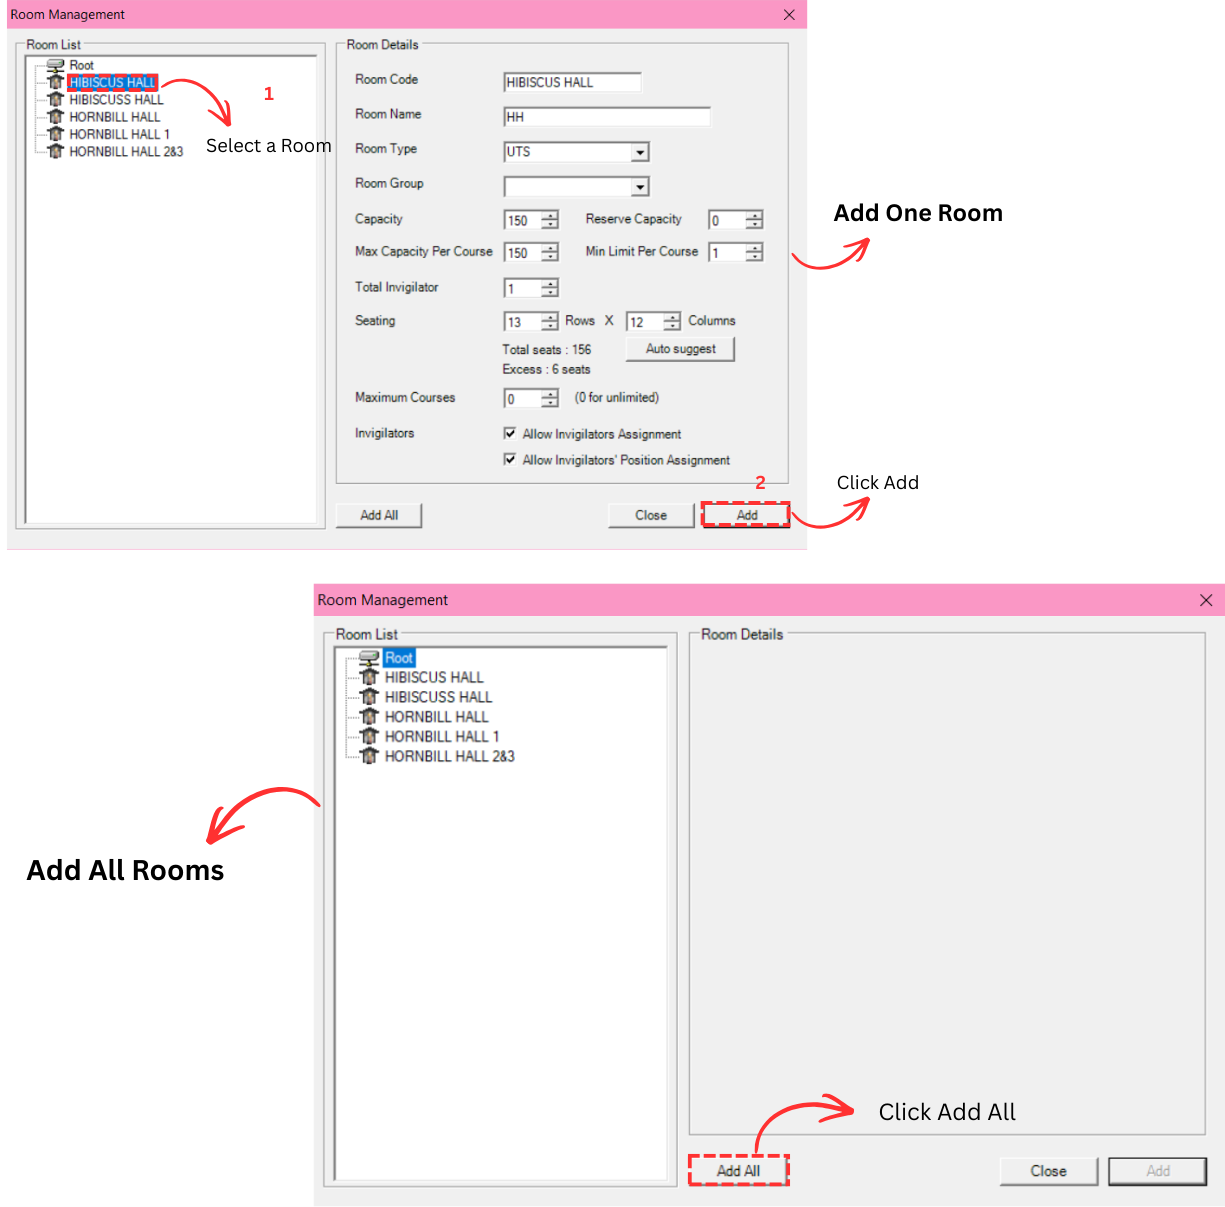
You may select a room need to be added in and click Add OR Click Add All to add all rooms in the list.
Click Close to close Room Management window once done.
2. Room Properties
To view Room properties, select a room in the list and then Click on the Room Properties
 icon.
You may also double click on selected room to view the room properties.
icon.
You may also double click on selected room to view the room properties.
A Room Properties window will appear and you will be able to see the room's details.
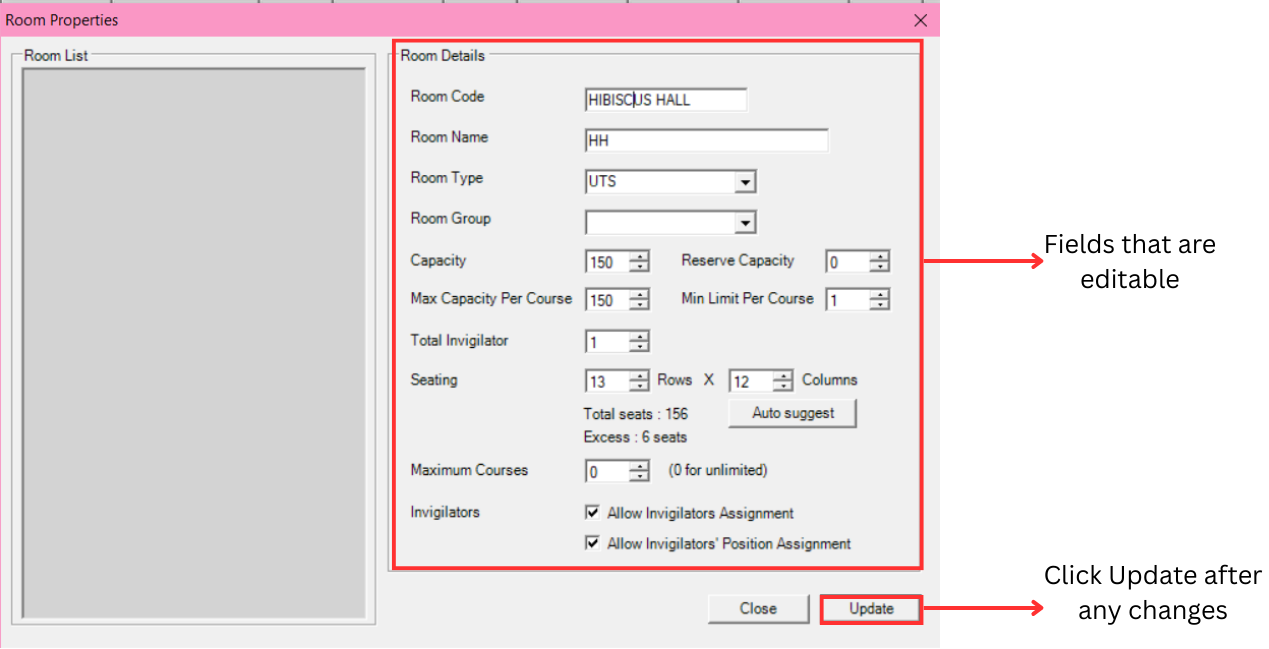
| Field | Description |
|---|---|
| Room Code | Code for the Room. Room Code is unique and cannot be duplicate. |
| Room Name | Name of the Room. IMPORTANT: Do not put 0 or leave it blank in the excel sheet. |
| Room Type | Type of exam venue. It is compulsory. Example: Hall or Lecture Hall |
| Room Group | Building, Faculty or Campus of the room. It is non-compulsory. Example: Campus KL |
| Capacity & Reserve Capacity | Capacity indicates the maximum capacity of the room. Reserve Capacity is the capacity that needs to be reserved for any unforeseen circumstances, such as unbarred students who have been previously barred from taking the exam. |
| Max Capacity Per Course & Min Limit Per Course | Max Capacity Per Course is the max students per course in the room. Min Limit Per Course is the minimum student per course in the room. |
| Total Invigilator | Total of the invigilator that will invigilate the exam in the room. |
| Seating | Seating arrangement for the student in the room. You can use auto suggest to auto allocate. |
| Maximum Courses | Maximum courses in the room for the exam to be held. |
| Invigilators | You may tick your preferences on to have invigilator and allow the invigilator to have position. |
3. Deleting Room List
There are 2 simple steps to Delete Room Only or Delete All:
Delete A Room Only
Step 1: Select the room and Click Delete Room Icon.

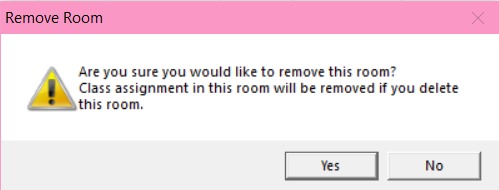
Step 2: Confirmation window will pop-up and click Yes to Delete.
Delete All
Step 1: To delete all rooms, click the delete all icon.

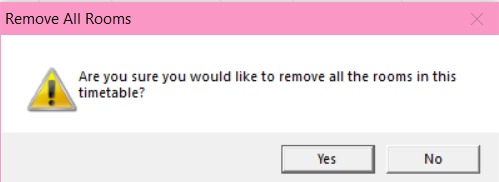
Step 2: Confirmation window will pop-up and click Yes to Delete.
4. Auto Assign Room Seating Arrangement
Click the icon
 to Auto Assign Room Seating Arrangement.
Confirmation window will pop-up.
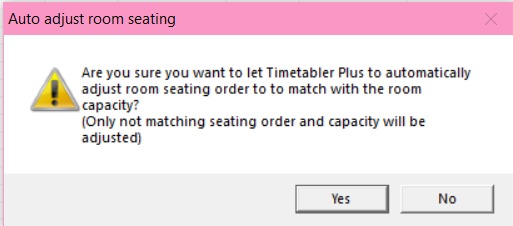
Click Yes to let Timetable Plus to automatically adjust room seating order to match with the room capacity.
5. Update All Room Field
Click the icon
 to update all room field.
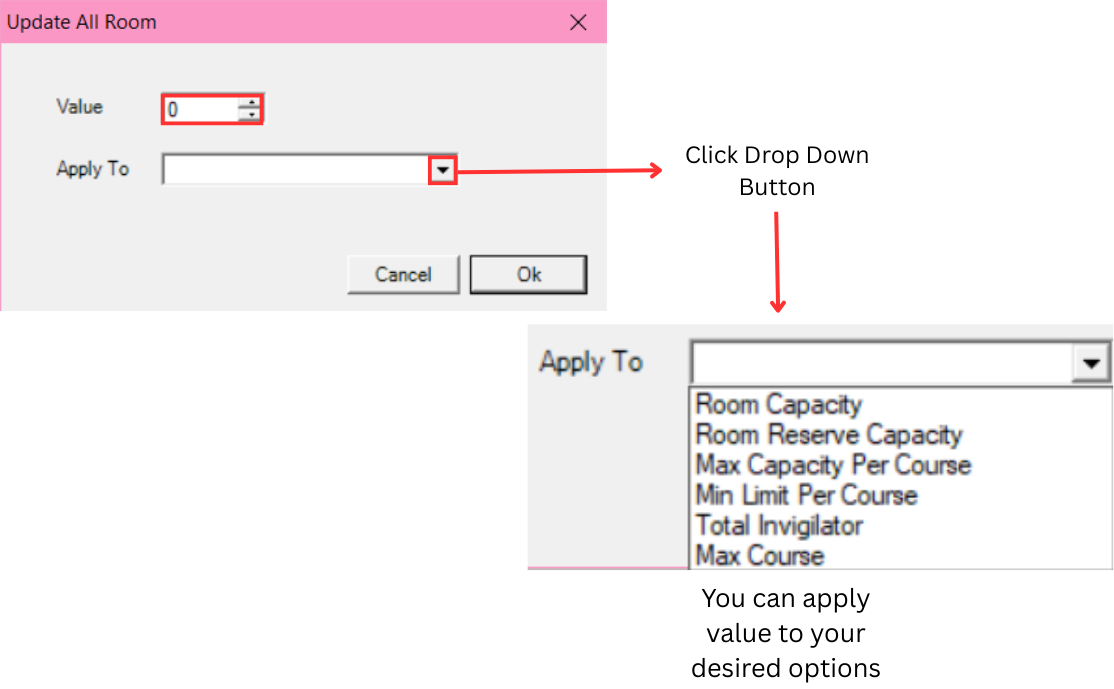
New window will pop-up and you can put a value and can apply to your desired options.
The available options in the Apply To dropdown are:
| Option | Description |
|---|---|
| Room Capacity | Sets the maximum number of students that can be seated in each room. |
| Room Reserve Capacity | Sets the number of seats to reserve in each room for unforeseen circumstances, such as unbarred students. |
| Max Capacity Per Course | Sets the maximum number of students allowed per course in a single room. |
| Min Limit Per Course | Sets the minimum number of students required for a course to be assigned to a room. |
| Total Invigilator | Sets the number of invigilators assigned to each room. |
| Max Course | Sets the maximum number of different courses that can be scheduled in a single room at the same time. |
6. Export Room
The Export Room feature allows you to export the room list and its configuration to a file. This is useful for backup purposes or for transferring room data to another timetable.
To export room, you may click on the Export Rooms icon.

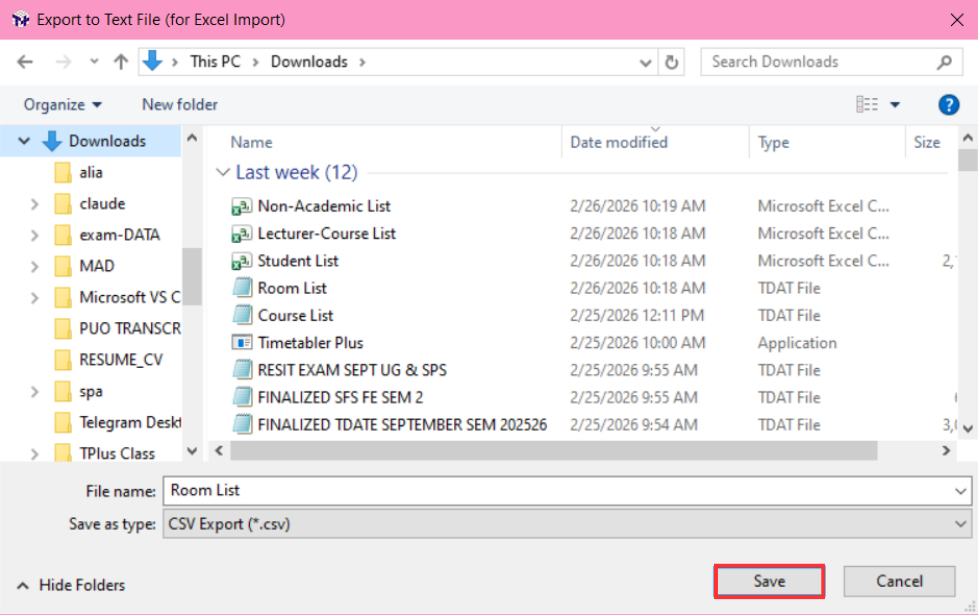
Select your desired place to save. And click Save button.
7. Refresh Room List
Click on the Refresh Room List icon
 to refresh room list. This will reload the room list to reflect any recent changes or updates made to the room data.
4.2.3 Time Slot Adjustment
Time Slot Adjustment allows you to change the start and end time of a specific exam slot on a specific day. For example, shifting Monday's 8:00 AM – 11:00 AM slot to 8:30 AM – 11:30 AM. This changes when the exam happens, but not how long it lasts.
Click Timetable Structure and then click Time Slot Adjustment to adjust time slot in timetable output.


Step by Step on how to input Time Slot Adjustment:
Step 1: Click on the particular slot (Example Monday 08:00 AM - 11:00 AM)
Step 2: Go to Adjust column and input the X Minutes to adjust (Example 30 Minutes)
Step 3: Click either
![]() or
or
![]()
(If press + then the adjusted time is 08:30 - 09:30)
Step 4: Check the box Use Time Slot Adjustment if all Batch of Students and Lecturers are going to use this time slot adjustment.
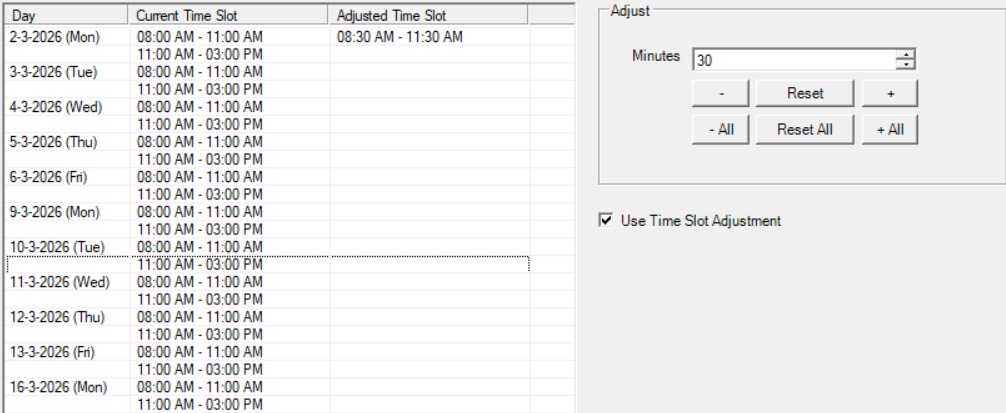
Above is the example after the time slot has been adjusted on Monday.
4.2.4 Duration Adjustment
The Duration Adjustment feature allows you to shorten the duration of a specific time slot. This is useful when certain exam sessions do not require the full slot duration. For example, if the default duration per slot is 3 hours (180 minutes) but a particular session only requires 2 hours and 30 minutes (150 minutes), you can reduce the duration for that specific slot.
Click Timetable Structure and then click Duration Adjustment to adjust the duration of a time slot.
Step by step on how to adjust the duration:
Step 1: Select the time slot that you want to adjust from the list on the left. For example, select Monday, 8:00 AM – 11:00 AM.

Step 2: Enter the number of minutes to reduce in the Minutes field on the Adjust panel. For example, enter 30 minutes.
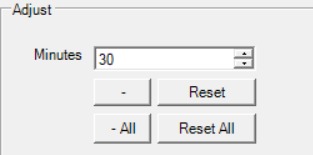
Step 3: Click the minus ( - ) button ![]() to reduce the duration. The adjusted duration will be displayed in the Adjusted Duration column.
to reduce the duration. The adjusted duration will be displayed in the Adjusted Duration column.
