3. User
Add, view, edit, and delete users in TPlus eCampus.
Users Page
The Users page allows the System Administrator to manage all user accounts in TPlus eCampus. From this page, you can add new users, view user details, edit information, and delete accounts.
Navigate to Users
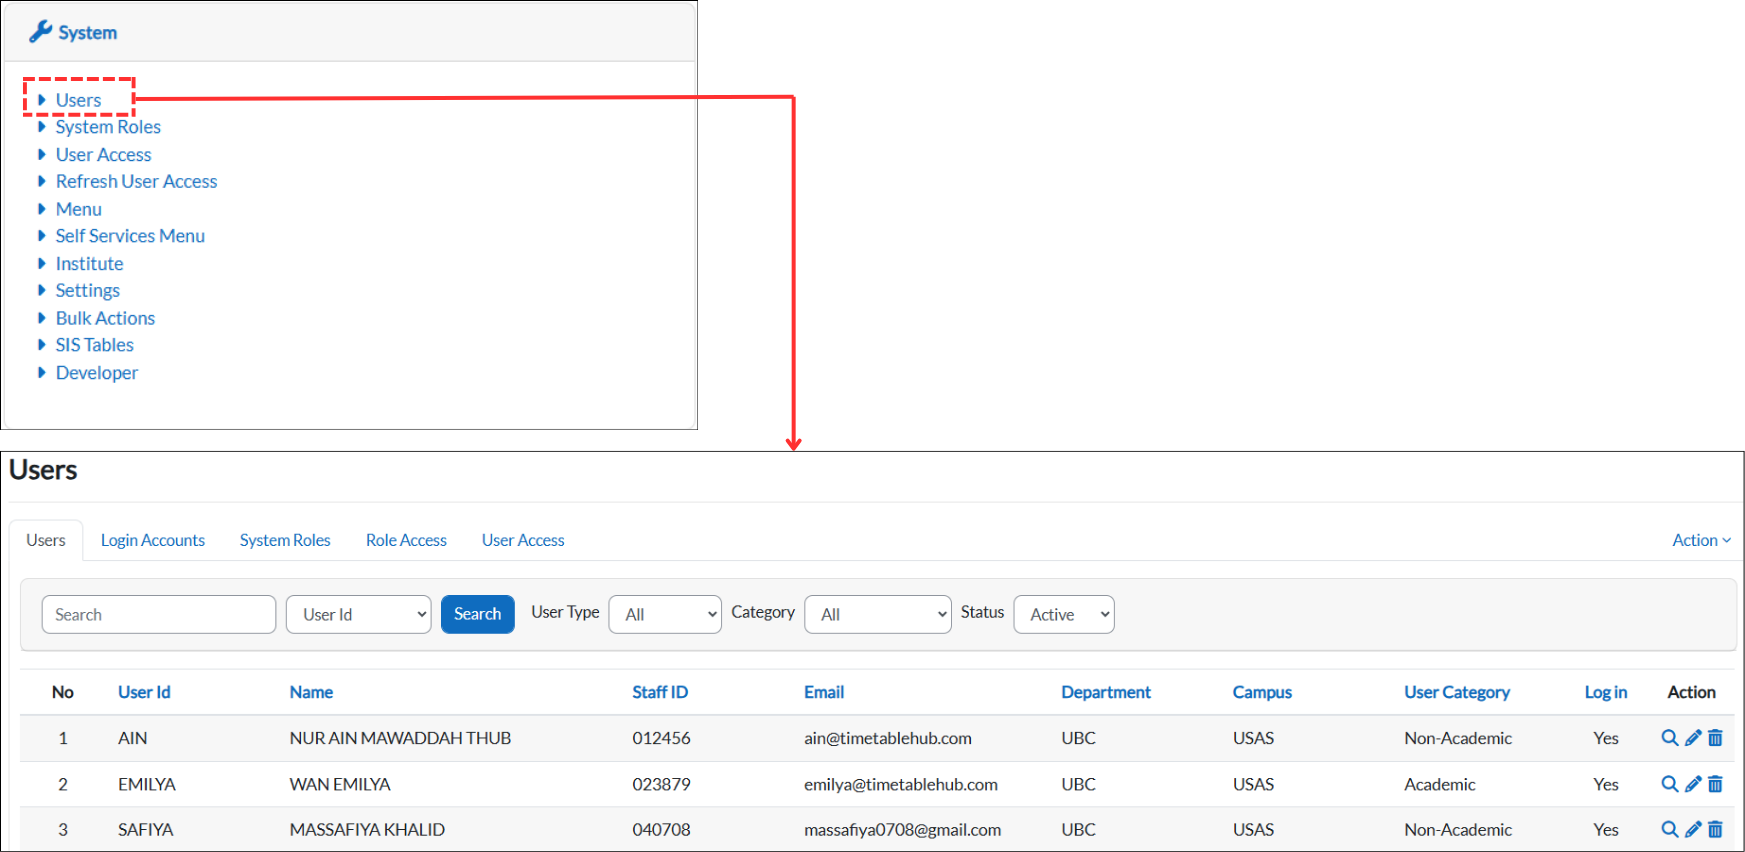
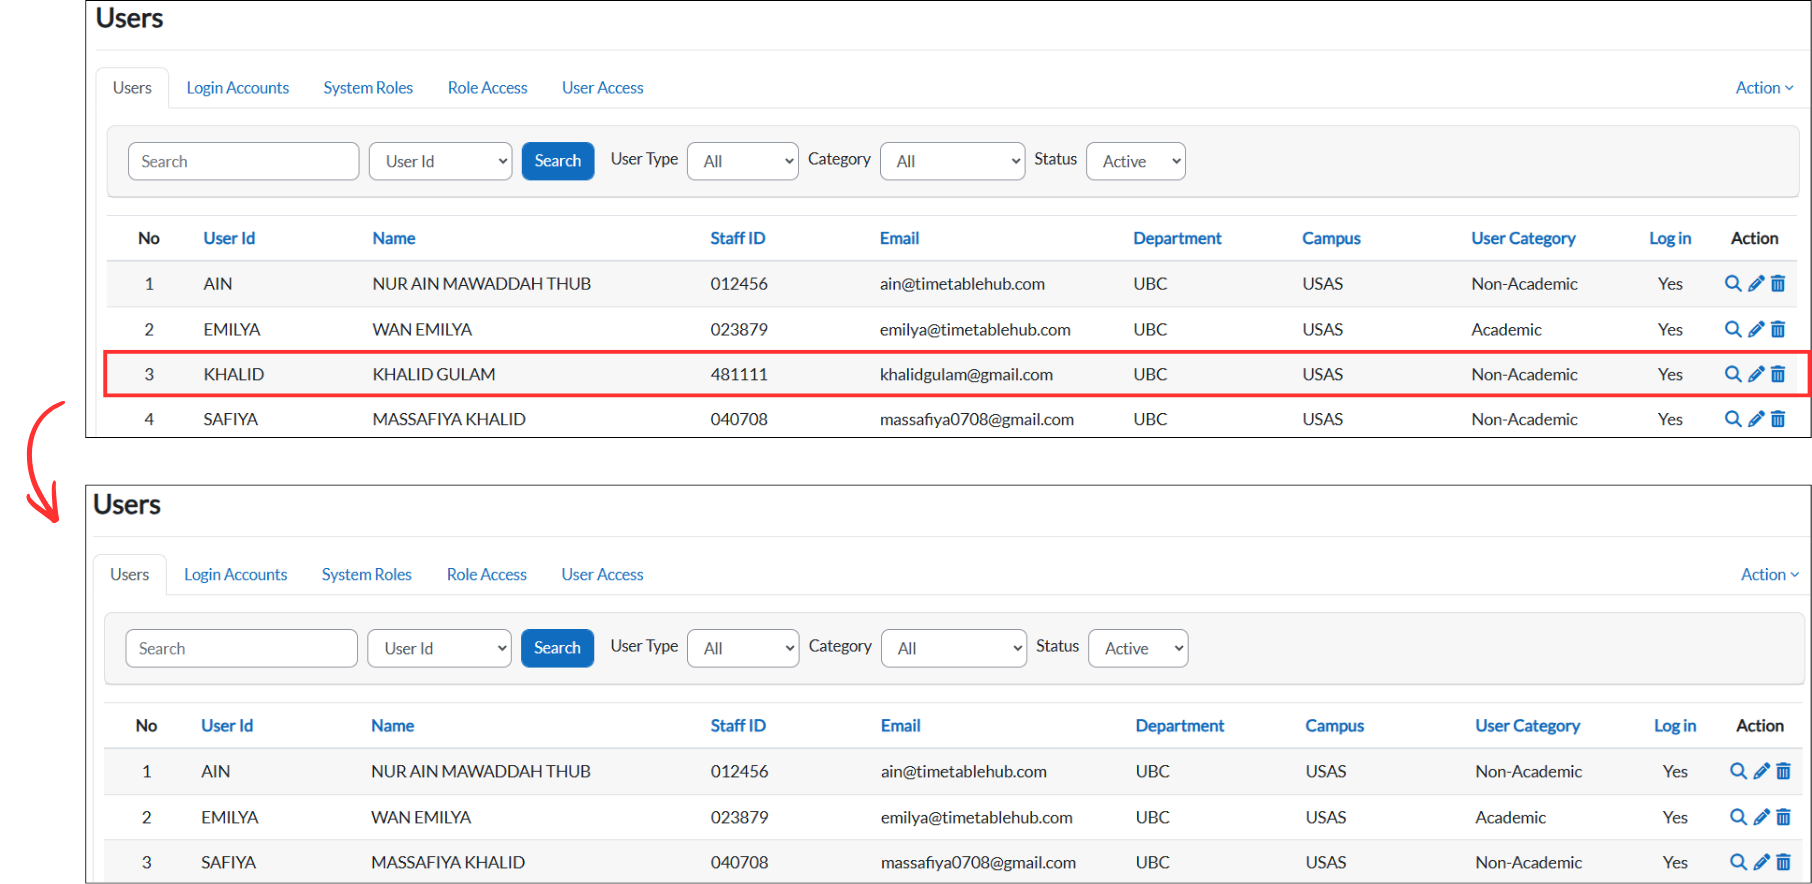
From the dashboard, go to System and click on Users. This will open the Users page displaying a list of all registered users in a table with columns: No, User Id, Name, Staff ID, Email, Department, Campus, User Category, Log in, and Action.
The Users page also has tabs at the top for quick access to related pages: Users, Login Accounts, System Roles, Role Access, and User Access.
Search Filter
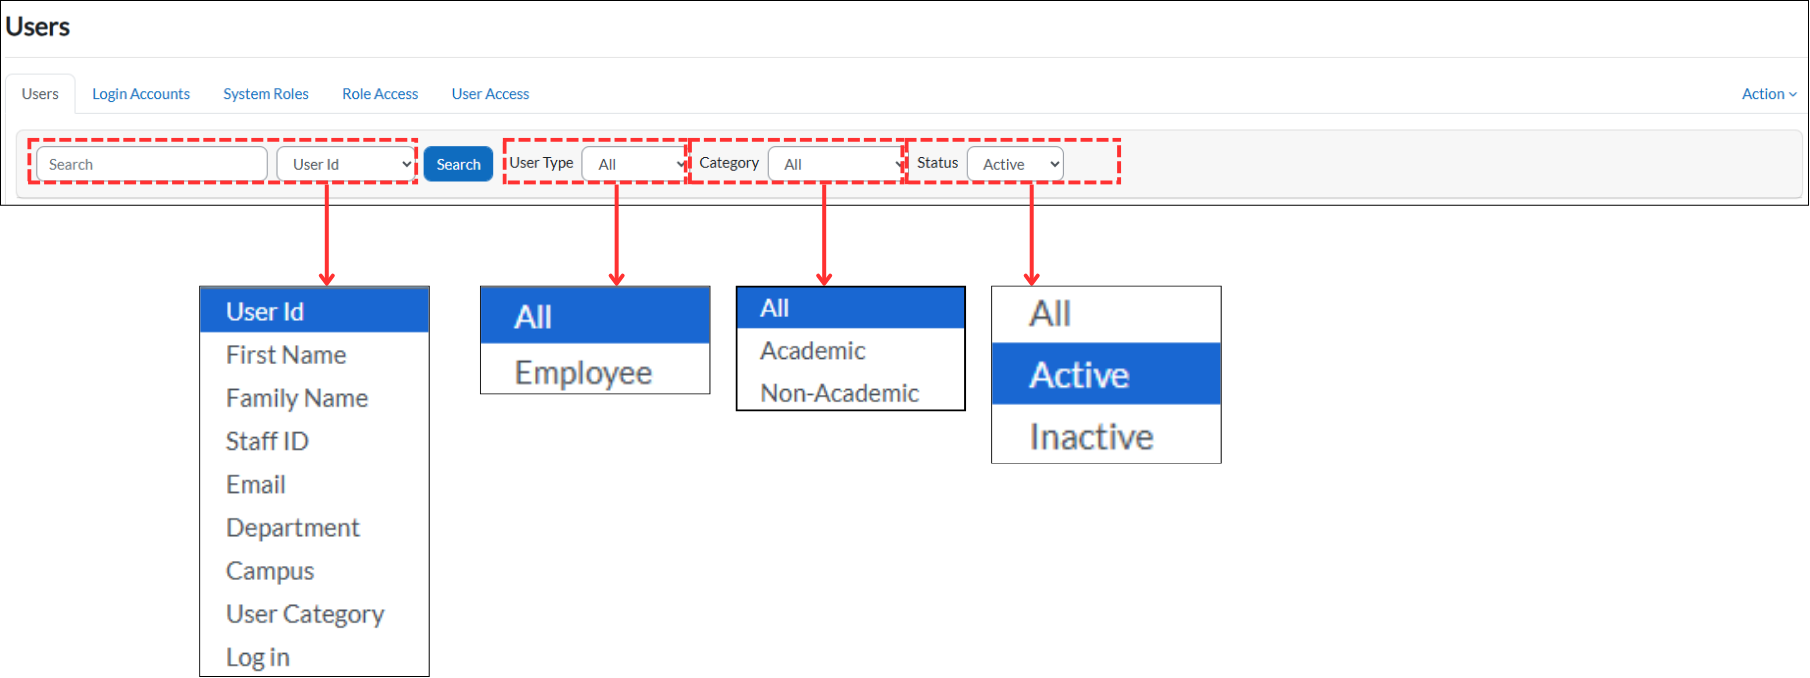
The Users page provides search and filter options to help you quickly find specific users.
- Search — Type a keyword in the search box and select the search criteria from the dropdown: User Id, First Name, Family Name, Staff ID, Email, Department, Campus, User Category, or Log in. Click the Search button to filter the list.
- User Type — Filter by user type: All or Employee.
- Category — Filter by category: All, Academic, or Non-Academic.
- Status — Filter by account status: All, Active, or Inactive.
Action Icons
Each user row in the table has action icons in the Action column. These icons allow you to manage individual users:
- View — Opens the user's profile to view their details.
- Edit — Opens the user's profile in edit mode to update their information.
- Delete — Deletes the user account after confirmation.
1.1 Add New User
To add a new user to the system, follow the steps below.
Step 1: Navigate to Users
From the dashboard, go to System and click on Users to open the Users page.
Step 2: Open Add New User
On the Users page, click the Action dropdown button at the top-right corner. Select "Add New User" from the dropdown menu.
The Action dropdown also provides other options such as Delete All Users, Disable Login for All Users, and Enable Login for All Users.

Step 3: Fill in User Details
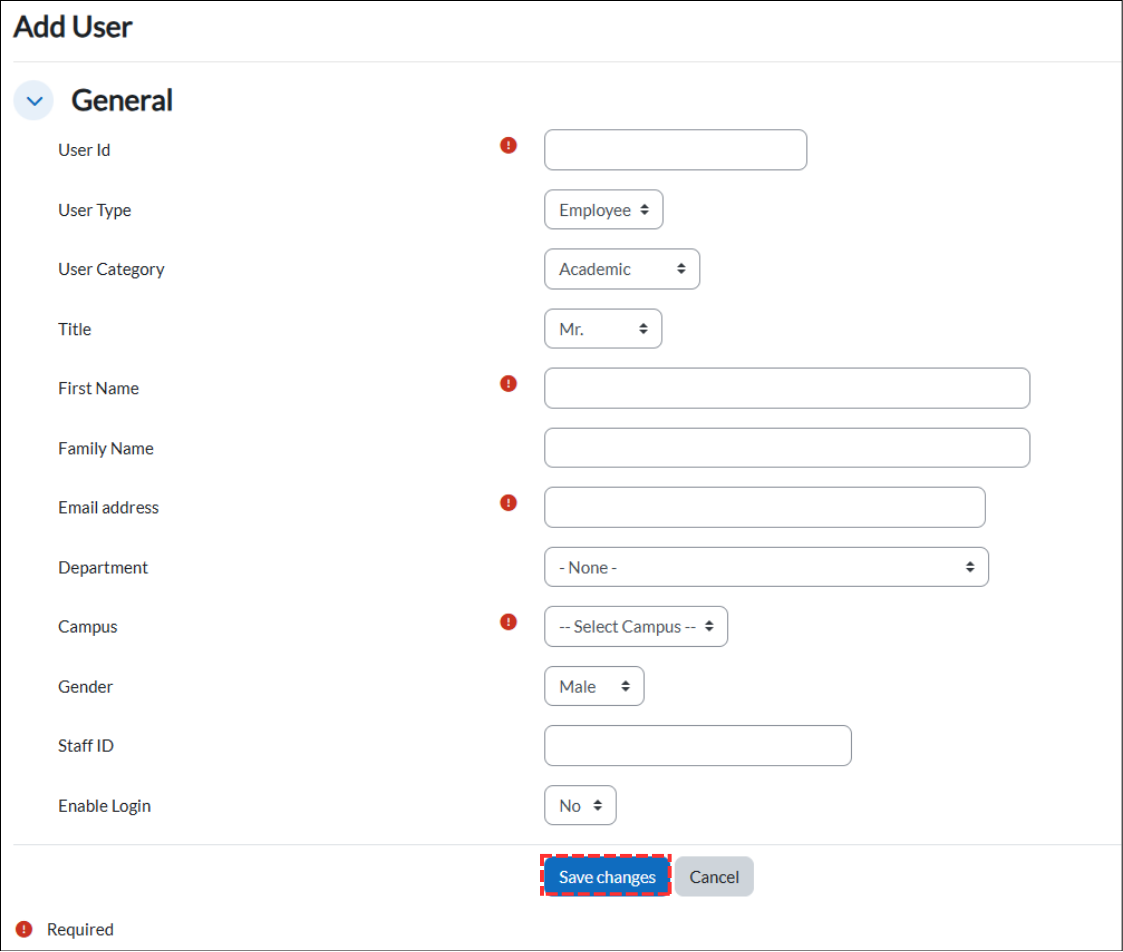
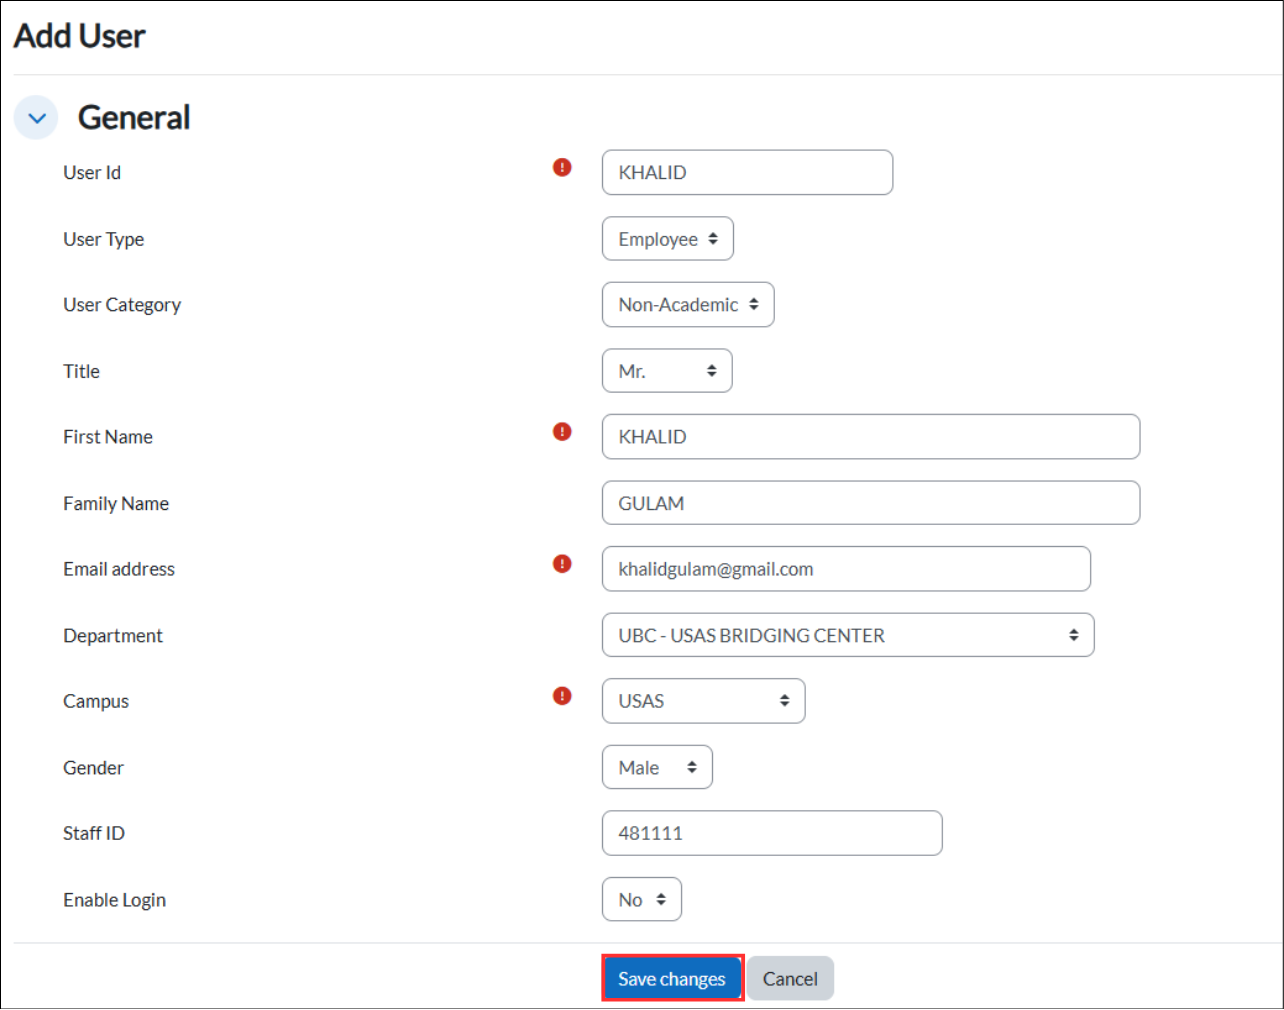
The Add User form will open with a General section. Fill in the following fields. Fields marked with are required.
- User Id * — Enter a unique identifier for the user (e.g., the user's name or staff code). This will be used as the login username.
- User Type — Select the type of user from the dropdown. The default is Employee.
- User Category — Select the user's category: Academic (teaching staff such as lecturers and professors who are involved in teaching, courses, and timetable scheduling) or Non-Academic (administrative and support staff who are not directly involved in teaching activities).
- Title — Select the user's title from the dropdown (e.g., Mr., Mrs., Ms., Dr., Prof.).
- First Name * — Enter the user's first name.
- Family Name — Enter the user's family name or surname.
- Email address * — Enter the user's email address. This will be used for password recovery and system notifications.
- Department — Select the user's department from the dropdown. Select "- None -" if not applicable.
- Campus * — Select the campus the user belongs to from the dropdown.
- Gender — Select the user's gender from the dropdown (Male or Female).
- Staff ID — Enter the user's staff identification number.
- Enable Login — Select Yes to allow the user to log in to the system, or No to keep the account inactive. The default is No.
After filling in all the required fields, click "Save changes" to create the new user account, or "Cancel" to discard.
Example
Below is an example of a completed Add User form.
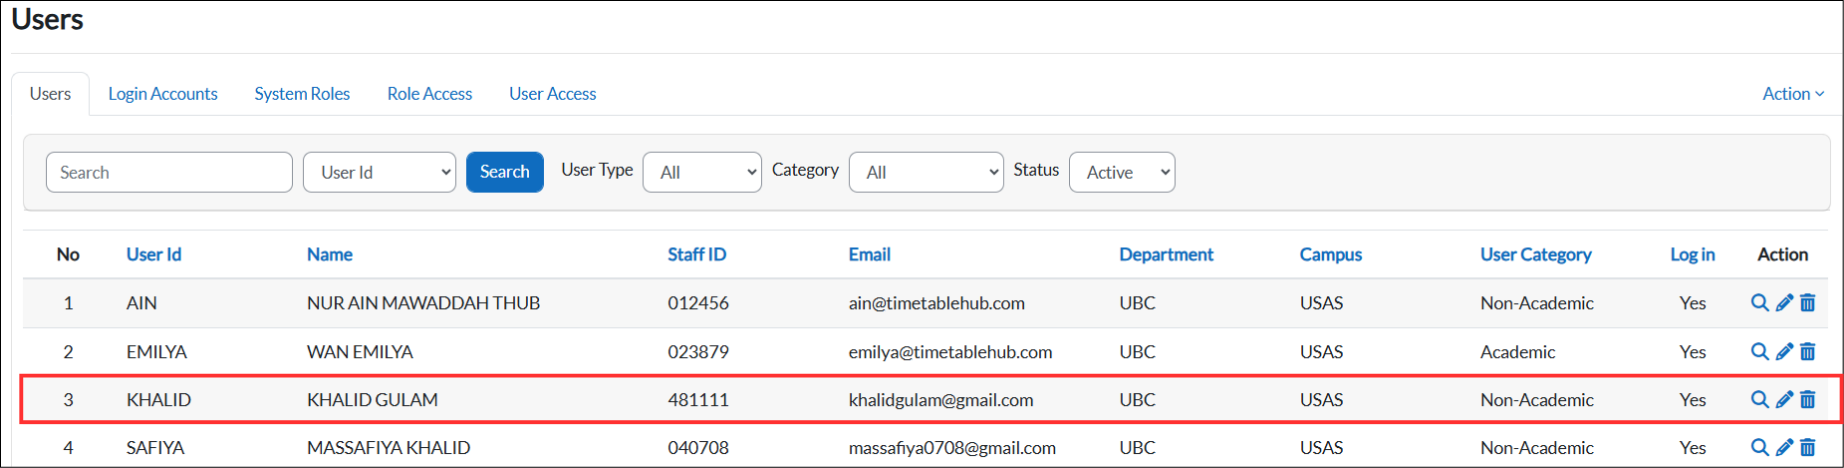
After clicking "Save changes", the new user will appear in the Users table as shown below (row 3, highlighted in red).
1.2 View, Edit, Delete
You can view, edit, or delete existing users using the action icons in the Users table.
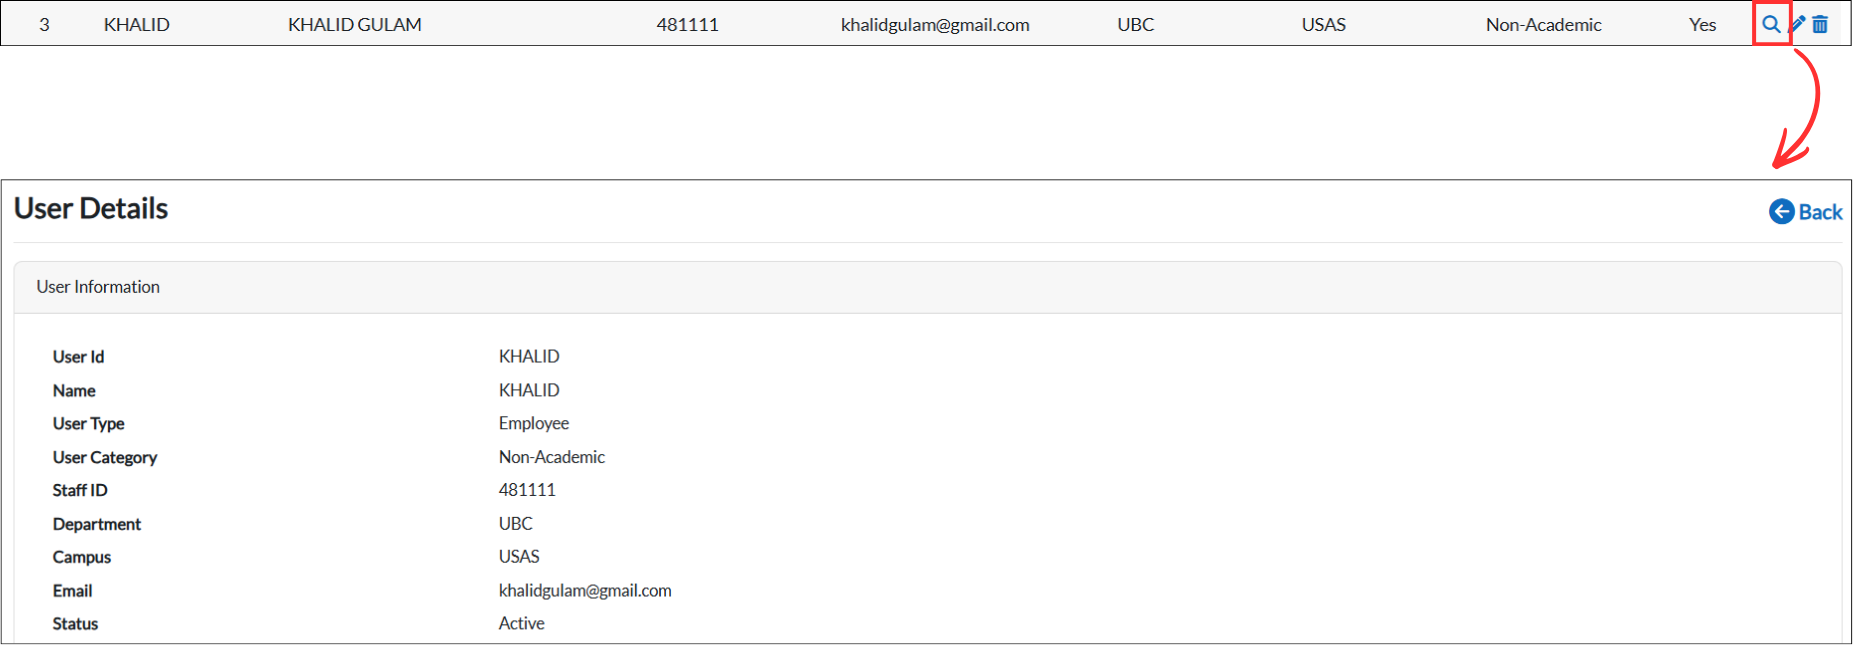
View User
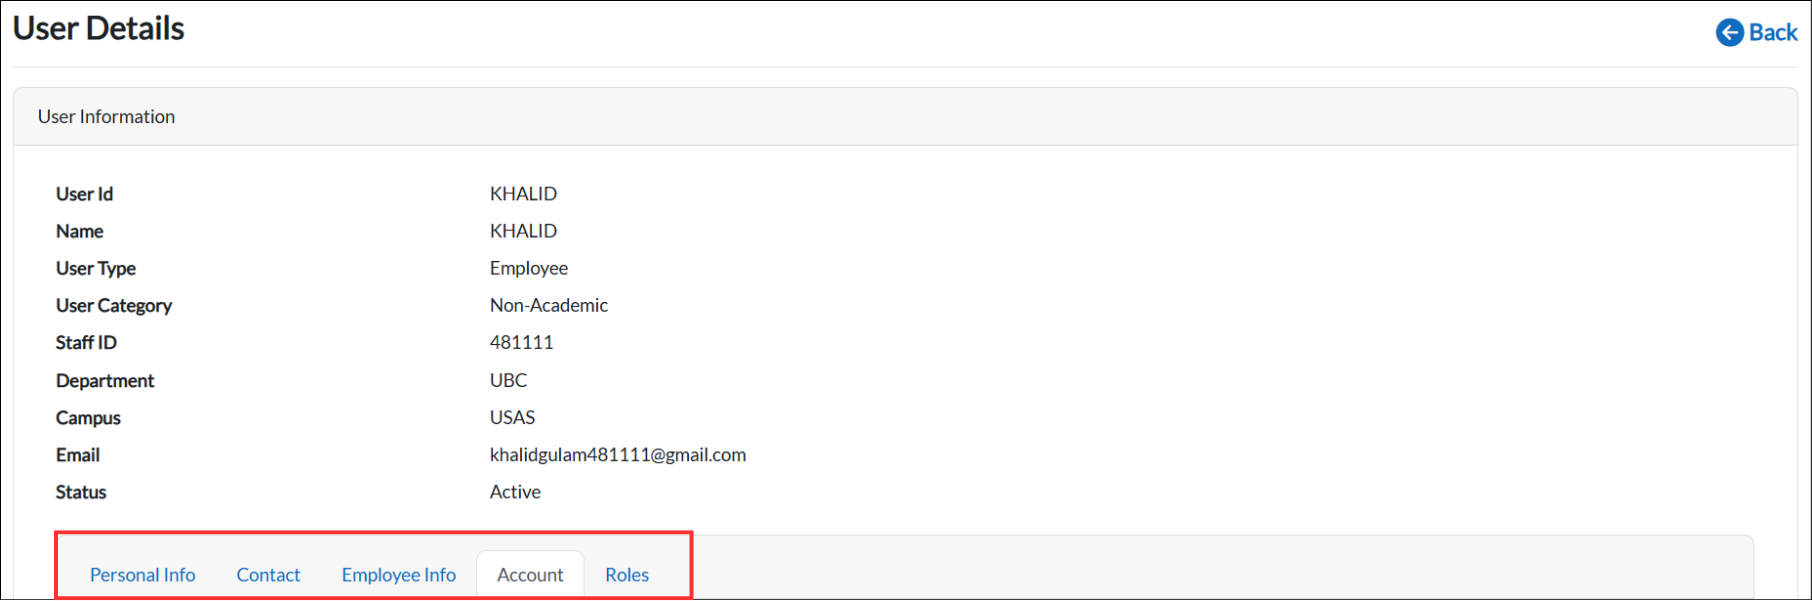
Click the magnifying glass icon on the user's row to view their details. The User Details page will open, displaying the user's information such as User Id, Name, User Type, User Category, Staff ID, Department, Campus, Email, and Status. Click the "Back" button to return to the Users table.
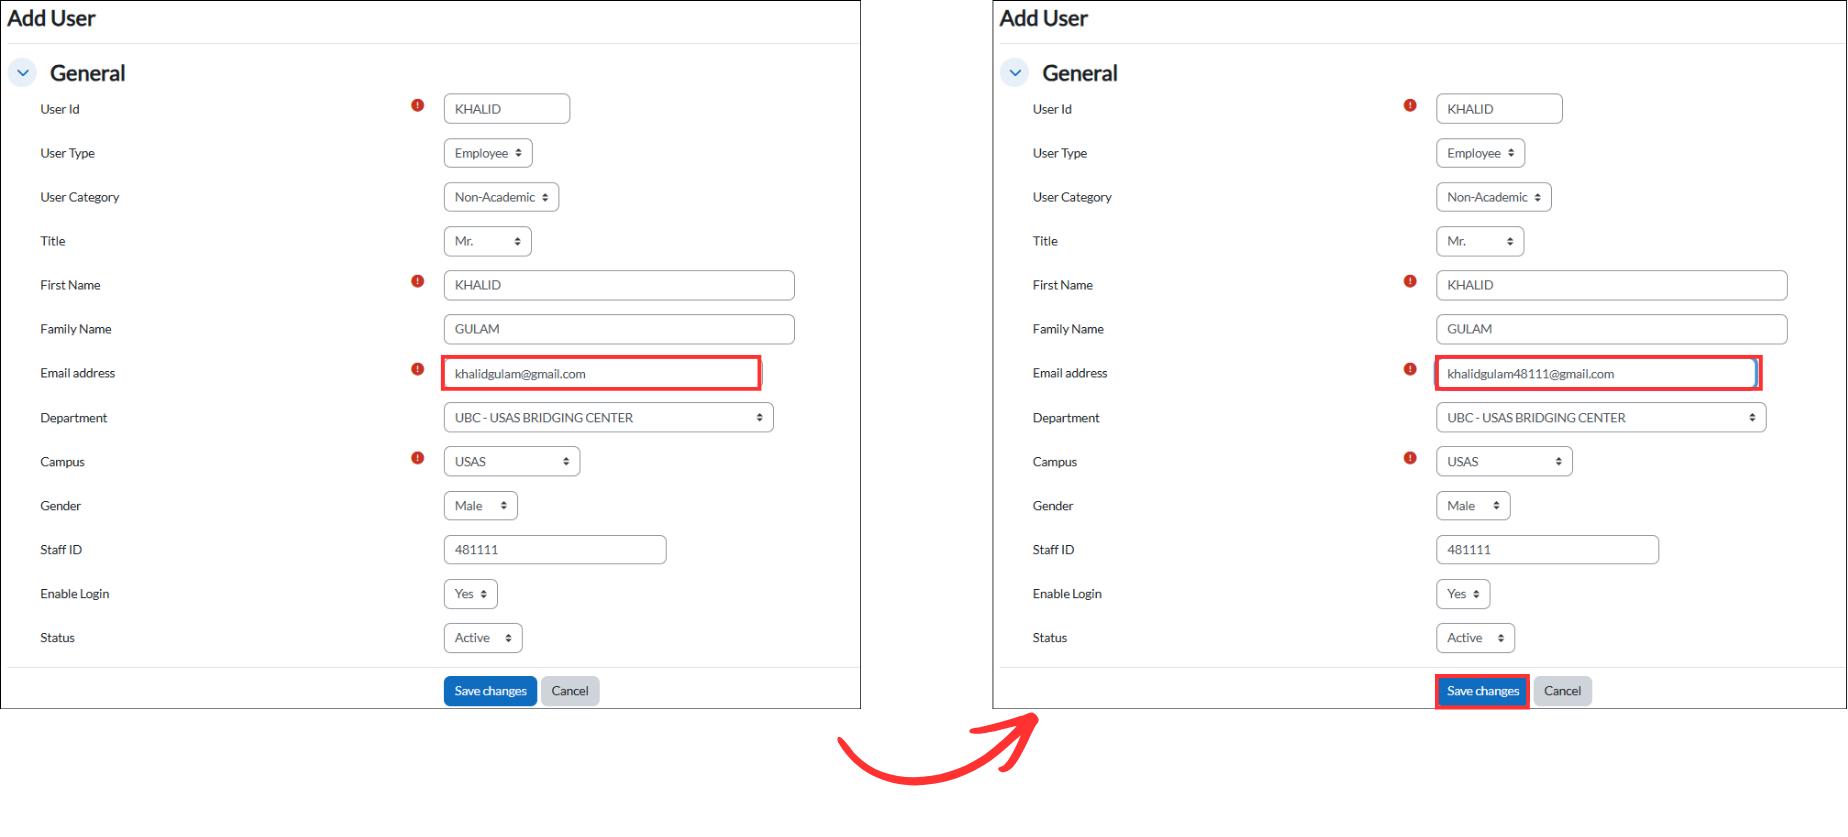
Edit User
Click the pencil icon on the user's row to open their profile in edit mode. You can update any of the user's information. After making changes, click "Save changes" to update the user's profile, or "Cancel" to discard.
In the example below, the user's email address is changed from khalidgulam@gmail.com to khalidgulam48111@gmail.com, then "Save changes" is clicked to save.
Delete User
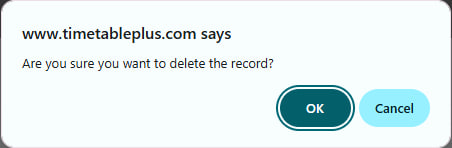
Click the trash icon on the user's row to delete the user account. A confirmation dialog will appear asking "Are you sure you want to delete the record?". Click "OK" to proceed or "Cancel" to abort.
Once confirmed, the user will be removed from the Users table.
Tab Navigation
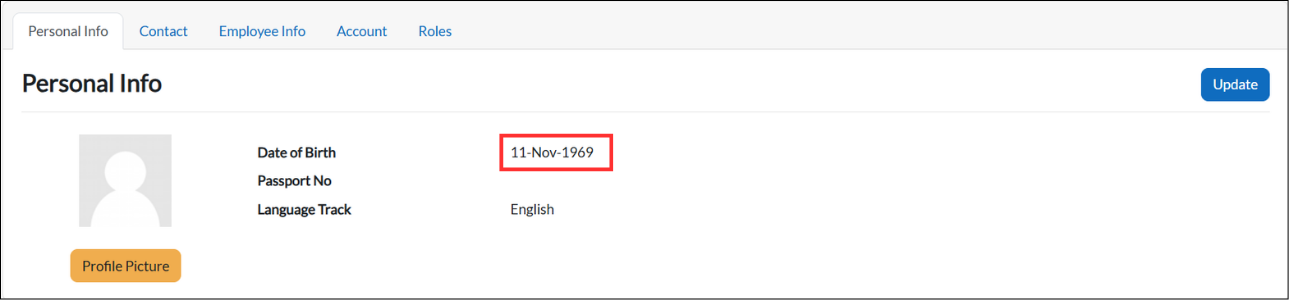
Within the User Details page, you can navigate between different tabs to view and manage additional user information. The available tabs are Personal Info, Contact, Employee Info, Account, and Roles.
Update Personal Info
In the Personal Info tab, click the "Update" button to edit the user's personal details such as Date of Birth, Nationality, Passport No, and Language Track.
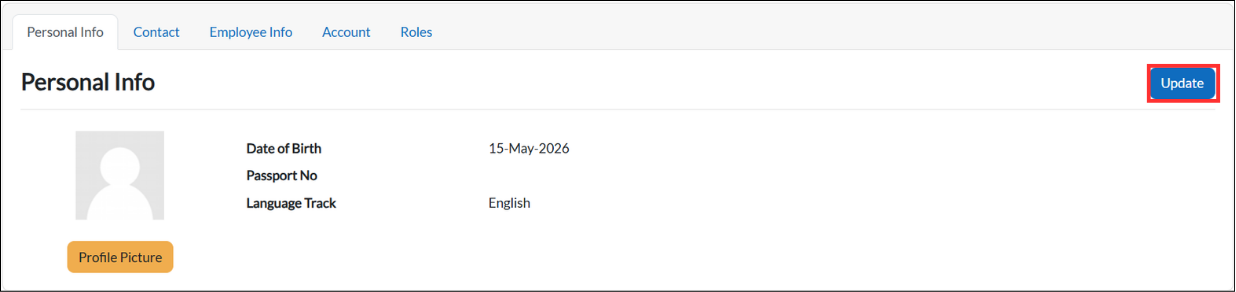
After filling in or updating the fields, click "Save changes" to save the updated personal information.
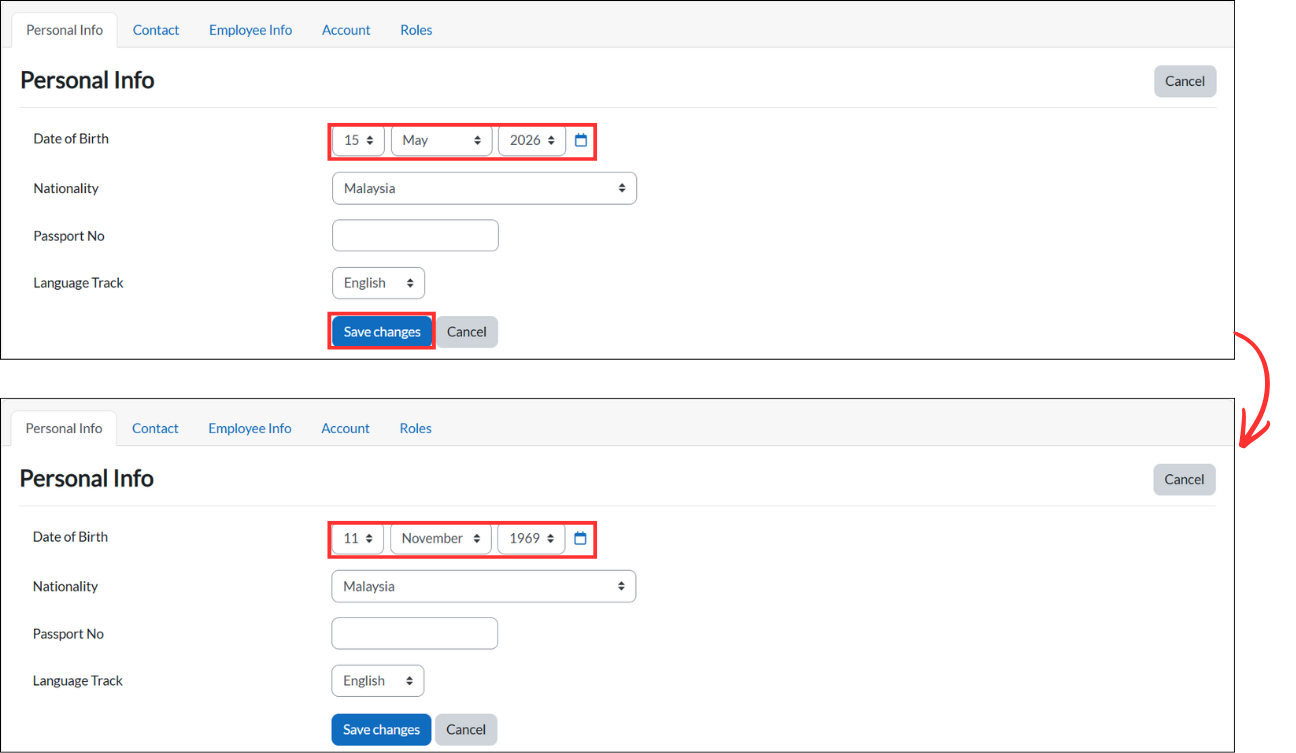
Once saved, the updated personal information will be displayed.